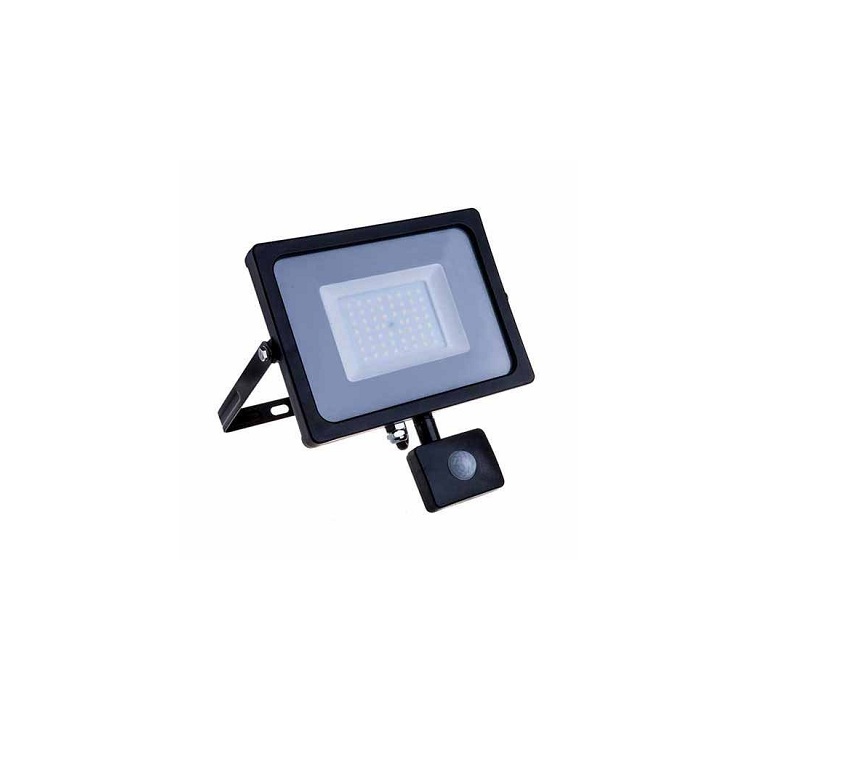
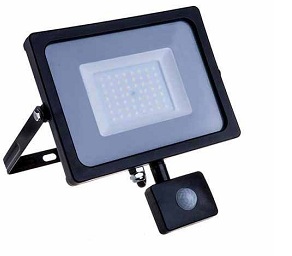
V TAC Led Floodlight Pir Sensor Installation Guide
Technical Data:
|
Power Source |
Ambient Light | Time Delay | Rated Load | Detection Distance | Detection Range | Working Temperature | Working Humidity |
Installation Height |
|
AC: 220-240 V, |
5-2000 LUX (Adjustable) | Min: 12 sec + 3 sec,
Max: 6mm + 2mm |
Max 200W (200V/AC) | 2-8 m (<24oC) | 120o | -20C to + 40oC | <93% RH |
1.8m~2.5m |
INTRODUCTION & WARRANTY
Thank you for selecting and buying V-TAC product. V-TAC will serve you the best. Please read these instructions carefully before starting the installation and keep this manual handy for future reference. If you have any another query, please contact our dealer or local vendor from whom you have purchased the product. They are trained and ready to serve you at the best. The warranty is valid for 5 years from the date of purchase. The warranty does not apply to damage caused by incorrect installation or abnormal wear and tear. The company gives no warranty against damage to any surface due to incorrect removal and installation of the product. The products are suitable for 10-12 Hours Daily operation. Usage of product for 24 Hours a day would void the warranty. This product is warranted for manufacturing defects only.
WARNING!
- Please make sure to turn off the power before starting the installation.
- Terminal block not Included. Installation must be performed by a qualified electrician
- The light source of this luminaire is not replaceable; when the light source reaches its end of life the whole luminaire shall be replaced.
- If the external flexible cable or cord of this luminaire Is damaged, it shall be exclusively replaced by the manufacturer or his service agent or a similar qualified person In order to avoid a hazard.
- Proper grounding should be ensured throughout the installation.
- Replace any cracked.

- Minimum distance from protective shield. ke lighted objects 1m.


NOTE: Avoid installing the light near air temperature zones such as air condition, central heating etc.
 This marking indicates that this product should not be disposed of with other household wastes.
 Caution, risk of electric shock.
Installation Diagram
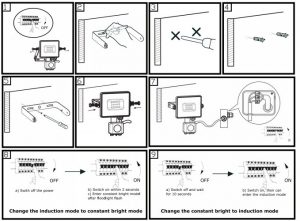
INSTALLATION INSTRUCTION
- DO NOT USE IN AREAS WITH LIMITED VENTILATION OR OUTSIDE THE RATED AMBIENT TEMPERATURE RANGE. *CONNECT WITH WATERPROOF CABLE HOUSE ONLY. *ENSURE ELECTRICITY IS SWITCH OFF BEFORE INSTALLATION.
- Please do not mount to a surface that is prone to vibrations?
- Remove the screw which is for mounting the bracket for the fixture. Remove the bracket.
- Mark the hole position for fixing bracket onto the wall. Drill onto the wall at the marked positions (screw not supplied).
- Mount the bracket back to the fixture. Adjust the floodlight to desired position and tighten the screw of fixing bracket.
- Connect your mains cable with input lead of our product through the waterproof junction box(not included).
- Switch on the power and test if the light is working properly.
- Adjust the irradiation angle according to the condition of usage.
FUNCTION
- LUX Setting: Can Identify day and night. The consumer can adjust the work ambient light. It can work during the daytime and at night when adjusted to the “sun” position (max). It can work in the ambient light less than 5LUX when it is adjusted on the “moon” position (min). As for the adjustment pattern, please refer to the testing pattern.
- SENS adjustable: For low sensitivity with 2m for detection distance set the SENS knob to (-); for High sensitivity with 8m set the knob to (+).
- Time-Delay is added continually: When it receives the second Induction signals after the first induction, it will compute time once more on the basis of the first time-delay rest. Time-Delay is adjustable. It can be set according to the consumer’s desire. The minimum-time is 12s. The maximum is 6 min.
MANUAL OVERRIDE:
- To override the automatic mode, the sensor must be switched ON in the automatic mode. Now turn the wall switch OFF and switch power ON within 2 seconds. The floodlight will flash confirming the light has been switched to constant light mode.The sensor will now hold your light ON continuously just likes a normal light.
- To switch the floodlight into automatic mode, turn your wall switch OFF, then switch ON after 10 seconds.The floodlight will flash confirming the light has been switched to automatic light mode.
TEST
Turn the SENS knob clockwise on the maximum (+). Turn the TIME knob anti-clockwise on the minimum(-). Turn the LUX knob dockwise on the maximum(sun).
- When you switch on the power, the light will be on at once, and 5-30 seconds later will be off automatically. Then if the light receives induction signal, it can work normally
- After lOsec of the first detection, the light could work again. If there is no induction signal, the load will stopped working within lOsec.
- Turn the LUX knob anti-clockwise to minimum. If it is adjusted to 5LUX the load and the sensor should not work when testing in daylight. If you cover the detection window with opaque object such as towel etc, the load will work. Under no induction signal the load will stop working within 10 seconds.
Note: When testing in daylight, please turn the LUX knob to ![]() (SUN) position, otherwise the sensor lamp will not work.
(SUN) position, otherwise the sensor lamp will not work.
- In front of the detection window please ensure there is no hinder or unrest objects effecting the detection.
TROUBLESHOOTING
- Why does the sensor not switch OFF the light automatically?
- Please check if there is a continuous signal in the detection field.
- Please check if the time delay has been set to maximum.
- Please check if the power corresponds to the instructions.
- Please check if the temperature near the sensor changes such as air condition or central heating.
- Why is the sensitivity of the sensor poor?
- Please check if there is any hinder in front of the detection window.
- Please check if the ambient temperature is too high.
- Please check if the induction signal source is in the detection field.
- Please check if the installation height corresponds as per the installation height mentioned on the instructions.
[xyz-ips snippet=”download-snippet”]