
V-TAC Solar Bulkhead Instruction Manual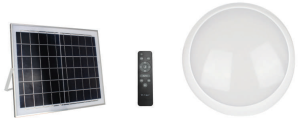
INTRODUCTION & WARRANTY
Thank you for selecting and buying V-TAC product. V-TAC will serve you the best. Please read these instructions carefully before starting the installation and keep this manual handy for future reference. If you have any another query, please contact our dealer or local vendor from whom you have purchased the product. They are trained and ready to serve you at the best. The warranty is valid for 2 years from the date of purchase. The warranty does not apply to damage caused by incorrect installation or abnormal wear and tear. The company gives no warranty against damage to any surface due to incorrect removal and installation of the product. The products are suitable for 10-12 Hours Daily operation. Usage of product for 24 Hours a day would void the warranty. This product is warranted for manufacturing defects only.
WARNING!
- Please make sure to turn off the power before starting the installation.
- Installation must be performed by a qualified person.
- The light source of this luminaire is not replaceable, when the light source reaches its end of life the whole luminaire should be replaced.
- If the external flexible cable or cord of this luminaire is damaged, it shall be exclusively replaced by the manufacturer or his service agent or a similar qualified person in order to avoid a hazard.
- Do not use solvents, petrol, etc.
Otherwise the light will be damaged.
 This marking indicates that this product should not be disposed of with other household wastes.
PARTS INCLUDED
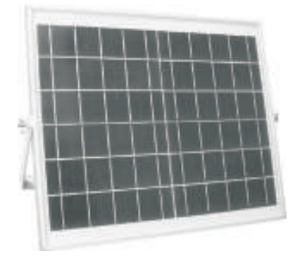
- Solar Panel

- Solar Bulkhead
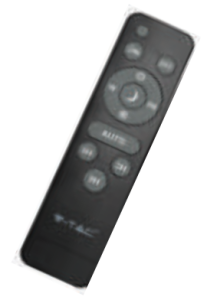
- Remote Control
- 5M Wire Length


INSTALLATION INSTRUCTIONS
STEP 1Remove the cover by twisting the diffuser anti – clockwise and set aside. Carefully remove the LED tray.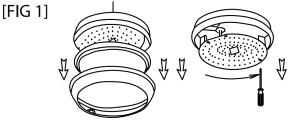
STEP 2Hold the product in place, mark & drill the holes into the wall then use expansion screws to fix the bulkhead on the wall/ceiling.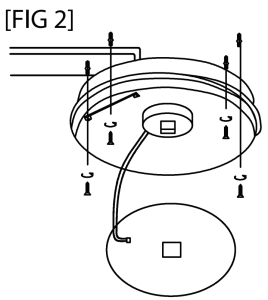
Step 3Install the LED tray on the fitting. Re-install the cover by twisting the diffuser clockwise.Ensure the fitting is properly installed.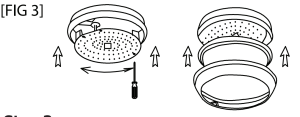
Step 4Use 2 expansion screws to fix the solar panel on the wall.Note: the battery must be fully charged before using 3-5 rainy days
STEP 5Plug the twist after the twist cap.
IN CASE OF ANY QUERY/ISSUE WITH THE PRODUCT, PLEASE REACH OUT TO US AT: FOR MORE PRODUCTS RANGE, INQUIRY PLEASE CONTACT OUR DISTRIBUTOR OR NEARESTDEALERS. V-TAC EUROPE LTD. BULGARIA, PLOVDIV 4000, BUL.L.KARAVELOW 9B
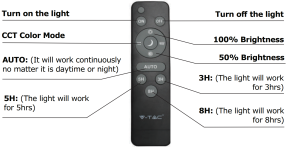
REMOTE CONTROL
INSTALLATION GUIDE:
- Before installing please remove all the parts to check if all are in good condition or not.
- The luminaire is connected to the solar panel against the sun light. Please makes sure the solar panel is adjusted in correct angle in order to receive sunlight.
- The remote control is designed with an operation distance of 8 15m.
- The solar panel Angle must be adjusted in correct direction to receive sunlight.
- Lamps cannot be installed in low-lying areas, so as not to soak.
- Plug the male and female plugs and tighten the waterproof cap and install it.
- After installation test the light using the remote control.
MAINTENANCE &WARNING
- Clean the light with a dry, lint-free cloth.
- Check the solar panel for dirt regularly. If dirt or is present remove it to guarantee flawless function of the product.
- Especially during the winter, keep the product free from snow and ice.
- Confirm installation direction is correct (solar panel should be a top).
- Confirm no objects blocking the solar panel to receive sunlight.
- Keep away from fire.
- Don’t immerse in the water
References
[xyz-ips snippet=”download-snippet”]