V-TAC VT-5125 AHD Camera Instruction Manual
INTRODUCTION
Thank you for selecting and buying V-TAC product. V-TAC will serve you the best. Please read these instructions carefully before starting the installing and keep this manual handy for future reference. If you have any another query, please contact our dealer or local vendor from whom you have purchased the product. They are trained and ready to serve you at the best.
Multi-Language Manual QR CODEPlease scan the QR code to access the manual in multiple languages.
TECHNICAL SPECIFICATIONS
|
Key Features |
VT-5125 | VT-5126 |
| Sensor |
2.0 Mega-pixel 1/2.7″ low illumination CMOS sensor |
|
|
Signal System |
AHD/CVI/TVI/CVBS @1080P | |
|
Min. Illumination |
Color:0.01Lux @(F1.2,AGC ON); 0 Lux (IRs on) |
|
| Black & White |
0.001 Lux @ (F1.2,AGC ON),0 Lux(IRs on) |
|
|
Shutter |
1/50(1/60) second~ 1/10,000 second | |
| Lens |
High-definition board lens 2.8mm @F1.8 |
|
|
Lens Mount |
M12 | |
| Day/Night |
IR-CUT |
|
|
Maximum image size |
1920*1080 | |
| Video Output |
1Vp-p Composite Output(75Ω/BNC) |
|
|
Audio I/O |
No | |
| Working Temperature |
-10℃-+55℃ |
|
|
Working Humidity |
10%-90% RH |
|
| Working Voltage |
DC12V±10% |
|
|
IR Distance |
20-30meters | |
| Power Consumption |
MAX 3W |
|
|
Case Material |
ABS | Aluminium |
| Waterproof Index | IP22 |
IP65 |
INSTALLATION DIAGRAM
NOTE: AHD Video’s transmission over coaxial cable should be less than 500 metres.TIPS When installing the camera, please don’t make the camera lens face towards strong light, mirror-type objects, or extremely light-coloured objects i.e. glasses, water surface, lamps. Front-Lighting Installation is recommended for camera placement.
DOWNLOAD THE APP
- Google Play Store -Search “XMEYE”
- IOS (Apple Store) – Search “XMEYE”
- Android phones and IOS (Iphone) can download by scanning the following QR codes.
ANDROID APP
IOS APP
REGISTER NEW ACCOUNT
- Tap on “Register” to sign up with your email address as user ID and tap on “Next” to get confirmation Code.
- The APP will send a confirmation code to your email ID. Please confirm the code to complete the registarion process. Enter new user ID and password.

After successfully logging in, click the `+’ icon on the top right corner to add device 1) automatically by the XMEYE QR Code or 2) manually by entering the device name, username (arbitrary), and the password (default password is empty). Click the device name, and choose your preferred channel.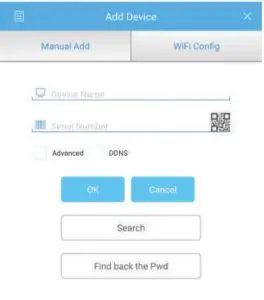
GUIDE TO MANAGING CMS ON YOUR COMPUTER
Insert the CD installer, download, and install CMS for Windows. Login (default admin + password is empty) and go to System Setting >Monitoring Point Management > Add Area. Select an area then click ‘Add Device’, then `Add Settings’. Now, you can see a preview in the software for equipment management.Note: Remote Viewing can only be activated by logging on to the cloud (http://www.xmeye.net.main) and entering the serial number.
REMOTE VIEWING THROUGH IE BROWSER
- Access www.xmeye.net on IE browser. Go to ‘Device Login’. Enter your serial number. Now you can access remote viewing with playback operation and more.
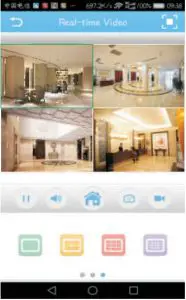
- Click `Main Stream’ or `Deputy Stream’ on the interface to see the live feed on IE browser.
REMINDERWhen remote viewing has failed, click the main menu on your left-hand side. Go to System Information > Version Information to check equipment status. If it is searching DNS, please check if your network connection is normal or not and remove the `Automatically Obtain IPAddress’ option. Manually change the IP address of LAN and match the gateway with the routing gateway.
References
[xyz-ips snippet=”download-snippet”]