![]()
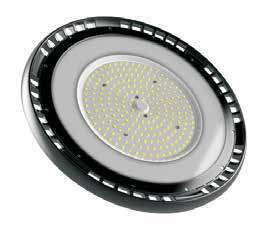
V-TAC VT-9-106 LED Highbay Series Installation Guide


TECHNICAL DATA:

WARNING!INSTALLATION DIAGRAM:
- Please make sure to turn o the power before starting the installation.
- The light source of this luminaire is not replaceable, when the light source reaches its end of life the whole luminaire should be replaced.
- Install only by certified Electrician.
![]() This marking indicates that this product should not be disposed of with other household wastes.
This marking indicates that this product should not be disposed of with other household wastes.
 Caution, risk of electric shock.

DIMENSION DIAGRAM:

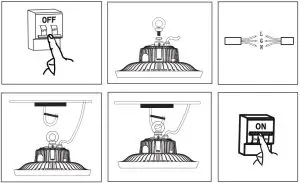
INSTALLATION DIAGRAM:
INTRODUCTION & WARRANTY
Thank you for selecting and buying V-TAC product. V-TAC will serve you the best. Please read these instructions carefully before starting the installing and keep this manual handy for future reference. If you have any another query, please contact our dealer or local vendor from whom you have purchased the product. They are trained and ready to serve you at the best.The warranty is valid for 5 years from the date of purchase. The warranty does not apply to damage caused by incorrect installation or abnormal wear and tear. The company gives no warranty against damage to any surface due to incorrect removal and installation of the product. The products are suitable for 10-12 Hours Daily operation. Usage of product for 24 Hours a day would void the warranty. This product is warranted for manufacturing defects only.
INSTALLATION INSTRUCTION
- Step 1: Turn OFF the Switch
- Step 2: Seal spring shim between bolts, then lock down
- Step 3: Connect L, G & N Wires
- Step 4: Hang the Lamp Carefully
- Step 5: Turn ON the Switch
IN CASE OF ANY QUERY/ISSUE WITH THE PRODUCT, PLEASE REACH OUT TO US AT: [email protected] FOR MORE PRODUCTS RANGE, INQUIRY PLEASE CONTACT OUR DISTRIBUTOR OR NEAREST
DEALERS. V-TAC EUROPE LTD. BULGARIA, PLOVDIV 4000, BUL.L.KARAVELOW 9B

[xyz-ips snippet=”download-snippet”]