![]()
Owner’s Guide

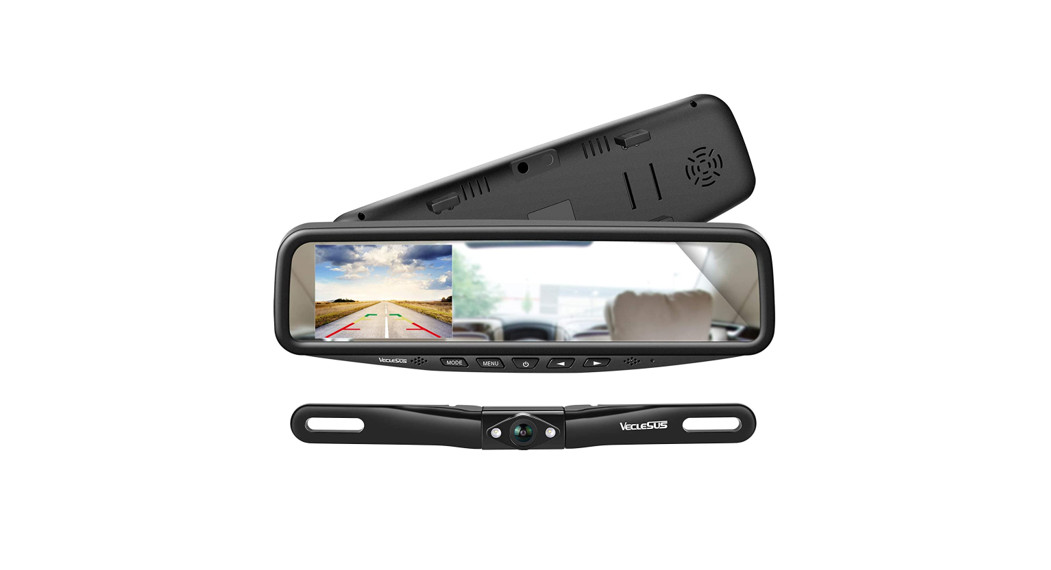
| VECLESUS VT1Car Mirror Rear View Camera System |
Wire Connection Diagram
For your safety, non-professionals are not allowed to disassemble products at will, if product failure, please consult a er-sales service [[email protected]] or send it to the local maintenance department.
- In the cold weather, a dark screen may appear when the product is started up. But when the product is powered on, it will heat up slowly, and the display will slowly return to normal as the temperature increases.It is possible to have a small number of “bright spots” on the LCD screen, which is acceptable in LCD technology.
- Do not press on the LCD monitor screen, which may cause image distor on or malfunc on, the image may become blurred, and the screen may be damaged. Gently wipe the display with a so damp cloth.
Connection Guide

Parking Guideline Selecon:Default seng is with parking guide line.Cut off the green cable, parking guide line is cancelled.
Testing
Before rou ng the video cable, please connect the monitor and put the car gear to reversing and check if it works.
Wire Routing
After testing, route the video cable as the picture below (two ways of routing are available).
Camera Installation
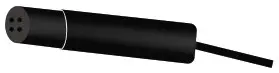
- First we need to mount the camera to the car license plate. Proceed as follows:(A) Loose the original screws on the number plate with wrench.(B) Thread camera cable through the space for the number plate light.If your car doesn’t feature this light,or a hole to thread this cable through,a discreet 7mm hole needs to be drilled to allow this cable into the rear part of the car trunk.(C) Once the cable is secure inside the car, Then tighten the screws to put the camera on the license plate, and put the license plate back to the vehicle. If necessary, use cross screwdriver to loosen the screw beside the camera head, ll up or down the ver cal angel of the lens, which may improve the view of the camera lens.

- Next, we need to connect the power cord to the reversing light.A) Connect the red wire to the reverse light (positive) and the black wire to the ground (negative or iron part ou your vehicle).B) Open the inner plas c panel and remove it from the hatch or tailgate. (The panels are usually a ached on the tailgate by clips. It may take a bit longer me to avoid clip damages. Once the panel is removed, the work will be done easily).C) Carefully peel the skin of the red and black wires, and find the reverse light power wires, fix the red wire of the video cable with the positive reverse wire, while the black wire to the iron part of the car (ground).D) Connect the mini 4 pin connector to the video cord

Mirror Installation
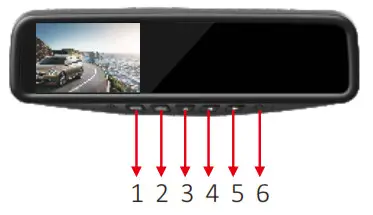
- Button Functions
1- Mode switch2- Menu Key3- Power key 4- Decrease5- Increase6- Red LED light - Mounting Mirror Monitor The back cover of the mirror monitor is designed with a spring clip, which can be directly a ached to the original rear view mirror on the car.
Package Contents
Backup camera * 14.3″ rear view mirror monitor * 1Lens wiping cloth*1Clamps and straps8M(26.2ft) extension cord *1Triple-use screwdriver * 1User manual * 1Thanks card * 1
Technical Specification
Monitor:
| Screen Size | 4.3″ | Power | <2W |
| Power Supply | DC12V±10% | Aspect Ratio | 16:9 Widescreen |
| Operating Temperature | -4°F-158°F RH95% MAX | Resolution | 480*RG B*272 |
| Storage Temperature | -22°F-176°F RH95% MAX | Signal System | Automatically |
| Video Input | Mini 4-Pin | Brightness | 250cd/m2 |
Backup camera:
| Sensor | CMOS | Water-proof | IP68 |
| Power Supply | DC12V±10% | Night Vision | YES |
| Operating Temperature | -4°F-158°F RH95% MAX | Resolution | 480TV Lines |
| Storage Temperature | -22°F-176°F RH95% MAX | TV System | PAL( ) NTSC( V ) |
| Video Out | 4-Pin dapter | Effective Pixel | 648*488 |
| S/N Ratio | >48dB | Vertical Sync Fre | 60Hz |
Trouble Shooting
| Problems | Solutions |
| Grainy image | 1. Check the wire connection – Red wire should connect to the reversing light, black wire(GND) to iron part of your car.2. Check the voltage -Connect the red wire to storage baery(12V±10%) and see if it works well. |
| Black Screen | 1. Check the monitor connector – if it is defective.2. Check the 4 pin cable is secured to the video cable, ensure the video and power cables are connected well.3. Check the camera – Connect well with reversing light and ground (iron part).4. Contact support team: s[email protected] |
Warranty
This product is covered by a 365-day warranty, during the warranty period, if the product was used under normal conditions, you will be entitled to the repair of the product and replacement of parts free of charge arising from defects in the materials and workmanship. Veclesus reserves the right to amend the warranty content without prior notice.Ver 2.020200911
www.veclesusclub.comwww.veclesus.netEmail: [email protected]

References
[xyz-ips snippet=”download-snippet”]