
Vera VistaCam 1200 User Guide
![]()
Congratulations on choosing the VistaCam 1200
You’ve taken the next step toward making your home safer and your life easier.
It’s easy to set up your camera. Here’s what you need to do.
Regulatory Information
FCC InformationThis device complies with Part 15 of the FCC Rules. Operation is subject to the following two conditions:
- This device may not cause harmful interference, and
- This device must accept any interference received, including interference that may cause undesired operation.
Note: This product has been tested and found to comply with the limits for a Class B digital device, pursuant to Part 15 of the FCC Rules. These limits are designed to provide reasonable protection against harmful interference in a residential installation. This product generates, uses, and can radiate radio frequency energy and, if not installed and used in accordance with the instructions, may cause harmful interference to radio communications. However, there is no guarantee that interference will not occur in a particular installation. If this product does cause harmful interference to radio or television reception, which can be determined by turning the equipment off and on, the user is encouraged to try tocorrect the interference by one or more of the following measures:
- Reorient or relocate the receiving antenna.
- Increase the separation between the equipment and receiver.
- Connect the equipment into an outlet on a circuit different from that to which the receiver is connected.
- Consult the dealer or an experienced radio/TV technician for help.
Please take attention that changes or modification not expressly approved by the party responsible for compliance could void the user’s authority to operate the equipment. This equipment should be installed and operated with a minimum distance 20cm between the radiator and your body.
This device complies with Industry Canada licence-exempt RSS standard(s). Operation is subject to the following two conditions:
- this device may not cause interference, and
- this device must accept any interference, including interference that may cause undesired operation of the device.
Under Industry Canada regulations, this radio transmitter may only operate using an antenna of a type and maximum (or lesser) gain approved for the transmitter by Industry Canada. To reduce potential radio interference to other users, the antenna type and its gain should be so chosen that the equivalent isotropically radiated power (e.i.r.p.) is not more than that necessary for successful communication.
If you haven’t already set up your Vera or Ezlo controller, please do that first. There are instructions on how to do so accompanying the controller.

Now let’s set up your doorbell. Once the wiring is done we’ll add it to your system.
What’s in the Box
Doorbell (x1)Faceplate (x3)
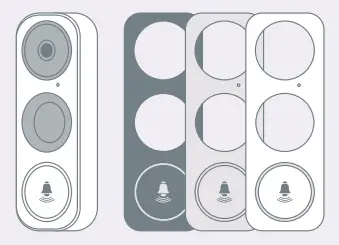
Mounting Plate (x3)Pick the one for best surveillance angle.
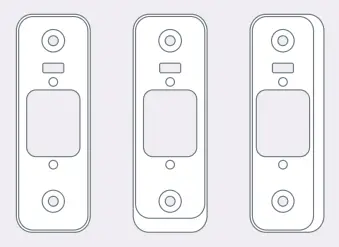
Plate Foam (x1)Stabilize the mounting plate when installing it on a rough surface.

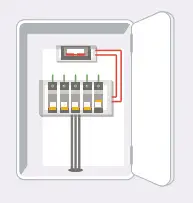
Before doing anything else, shut off the breaker that controls the doorbell’s circuit.
If you have a mechanical chime installed in your home, install the power kit and doorbell.
If you have an electronic chime installed in your home, refer to its own manual to install the power kit, and install the doorbell.
If your home does not currently have chimes, please consult a local installer or contractor for assistance.

![]() Note: The output of any newly installed wiring should be between 8-24 VAC.
Note: The output of any newly installed wiring should be between 8-24 VAC.
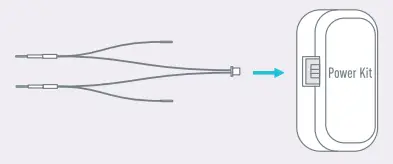
Install the power kit
- Insert one end of the wire harness into the power kit.

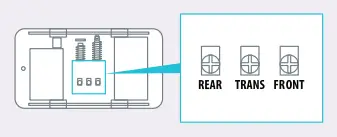
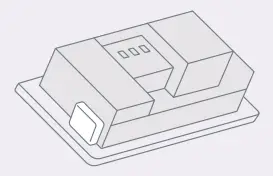
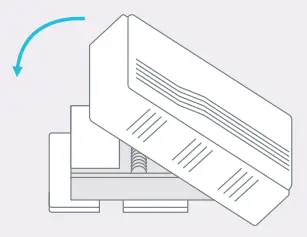
- Remove the cover from your mechanical chime.
- Remove the existing chime wires in the terminals named TRANS and FRONT.
- Connect the wire harness to the chime’s terminals named TRANS and FRONT.
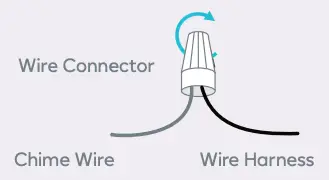
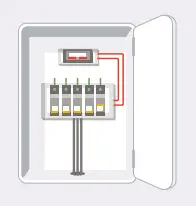
- Insert the existing chime wire and the other end of the wire harness into the wire connector and twist it tightly. Repeat this step with the other chime wire.Wiring overview
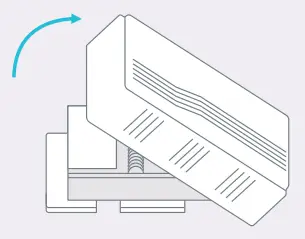
- Mount the power kit to the side of the chime.
- Put back the chime cover.
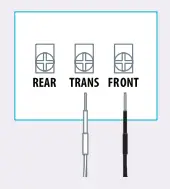
 Wiring overview
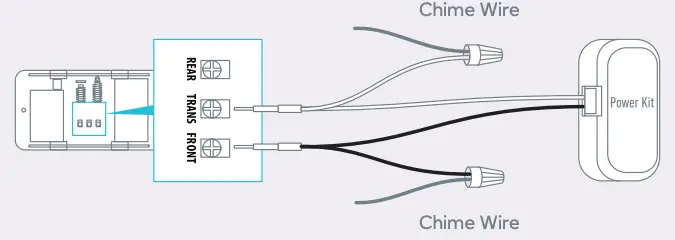
Install the doorbell
- Ensure the electricity at the breaker that controls the doorbell’s circuit is still off.
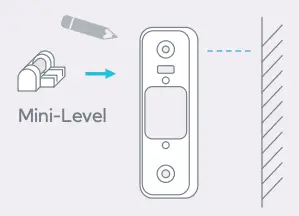
- (Optional) When the wall is uneven, paste the plate foam to the mounting plate.
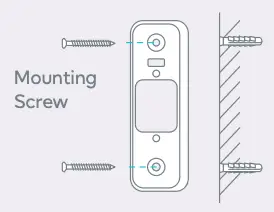
- Insert the mini-level into the mounting plate and mark the drill points when its bubble stays in the middle.
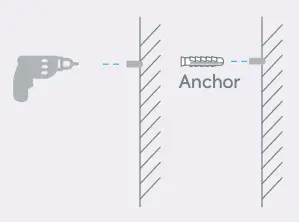
- Drill holes according to drill points and insert anchors.
- Fix the mounting plate to the wall.
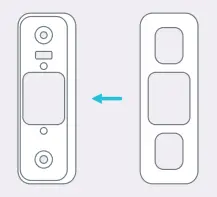
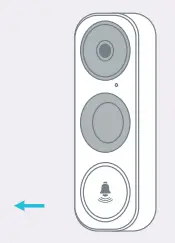
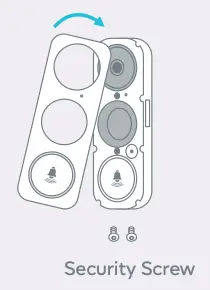
- Remove the faceplate on your doorbell from bottom to top.
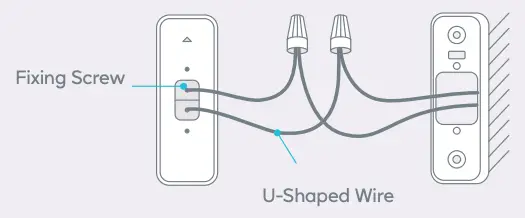
- Connect the doorbell with your existing doorbell wires.
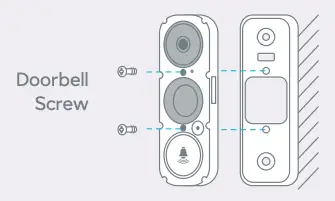
- Fix the doorbell to the mounting plate by inserting the doorbell screws.
- Restore the electricity at the breaker.
![]() Doorbell is powered on when its indicator flashes blue quickly. If you see this blue flash, proceed to the doorbell setup. If you do not see the indicator flashing blue quickly, make sure your electricity is off and check the wiring.
Doorbell is powered on when its indicator flashes blue quickly. If you see this blue flash, proceed to the doorbell setup. If you do not see the indicator flashing blue quickly, make sure your electricity is off and check the wiring.
Doorbell Setup
10. In the Vera app, navigate to the Devices screen and tap + in the top right corner.
Select doorbells and look for the VistaCam 1200.
Follow the prompts to finalize the setup.
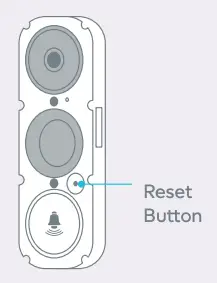
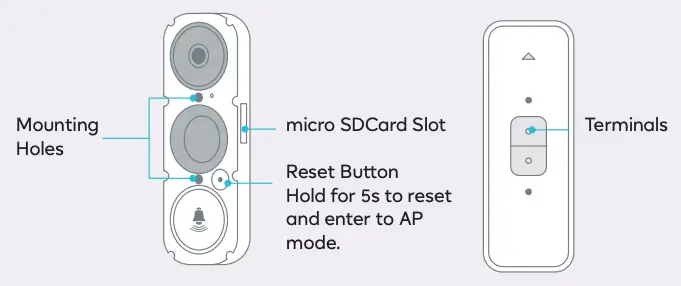
![]() If you want to change your doorbell’s Wi-Fi, press and hold the reset button for 5s and repeat the device adding process.
If you want to change your doorbell’s Wi-Fi, press and hold the reset button for 5s and repeat the device adding process.
11. Put the faceplate back and insert two security screws into the bottom of the doorbell to secure the faceplate.
Basics
LED Indicator
| Blue Light | Flashing | Doorbell is ready for Wi-Fi configuration. |
| Steady on | Doorbell is working. | |
| Red Light | Flashing Fast | Device Exception. |
| Steady on | Doorbell is powering on. |
Your doorbell is now set up!
 You can now talk to people at your door through the Vera app and ensure greater security for your home.
Need help setting up?
You can reach our Customer Care team seven days a week at 866.966.2272 between 6am and 10pm US CST/EST*or at [email protected]
You can also purchase our Vera Easy Start service and get one hour of personalized setup assistance through a phone call with one of our most experienced agents. Visit getvera.com to learn more.
*Customer Care available 6am-10pm CST during Non-Daylight Savings Hours; and 6am-10pm EST during Daylight Savings Hours
You’re now ready to enjoy smarter home control.
![]()
 report this ad
© Ezlo Innovation 2020
References
[xyz-ips snippet=”download-snippet”]