
The Camden Privacy Screen Assembly Instructions

Please read through before starting assembly.
IMPORTANT: CHECK THE INSIDE OF YOUR POSTS FOR ALL MATERIALS.
Check Box for These Contents
In the event of missing or defective parts please call our customer service department 1 800 282 9346 (Mon. to Fri. 8:00 AM to 5:00 PM EST).

- Post Caps (2) 10824
- Decorative Beam End Caps (4) 30015
- Post Trim Caps (2) 10737-1
- Horizontal Rails (2) 10228 – 2″ x 3 1/2″ x 79 3/4″ (5 x 9 x 203 cm)
- Vertical Spindles (11) 10229 – 7/8″ x 1 1/2″ x 65 3/4″ (2 x 3.8 x 3 167 cm)
- Horizontal Spindles (3) 10231 – 1 1/2″ x 1 1/2″ x 79 3/4″ (3.8 x 3.8 x 203 cm)
- Posts (2) 10232 – 4″ x 4″ x 90″ – (10 x 10 x 229 cm)
- Beams (2) 10233 -1 1/2″ x 5 1/2″ x 88 1/8″ (3.8 x 14 x 224 cm)
- 2 1/2″ (64mm)Self-Auguring Screws (24) 20009-1
- Tube of vinyl glue (1) 20000
Material You Will Need
- 4 x 4 x 6′ (10x10x183 cm) Pressure-treated wood post (cut in two – 36″(91 cm) lengths).
Tools You Will Need
- CordlessDrill
- Hammer
- TapeMeasure
- Level
- Shovel
General Information
- Read Instructions through carefully before beginning assembly.
- When assembling components, place on a non-abrasive surface (i.e. shipping box) to avoid scratching.
- We recommend an area approx 5′ x 8′ (1.5m x 2.4m) for unobstructed assembling.
- You should not need to use excessive force when assembling component.
STEP ONE
Privacy Screen Assembly
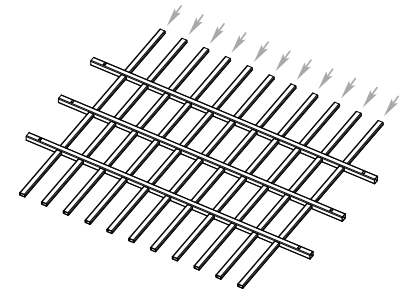
- Layout the horizontal spindles with all the routed holes in line as shown and insert the 11 vertical spindles through them.

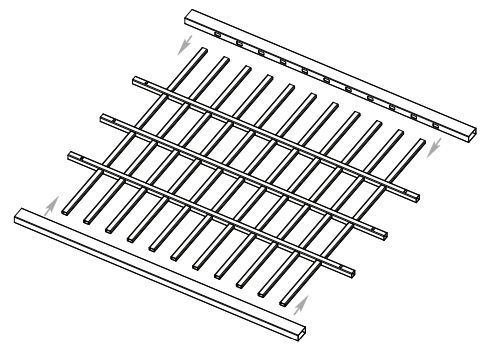
- Insert the two horizontal rails onto the vertical spindles as shown. Excessive force should not be used.
- Finish the assembly by inserting the two posts onto the rail ends as shown. Note the tabs on the horizontal spindles; once inserted, the spindles will lock into place.
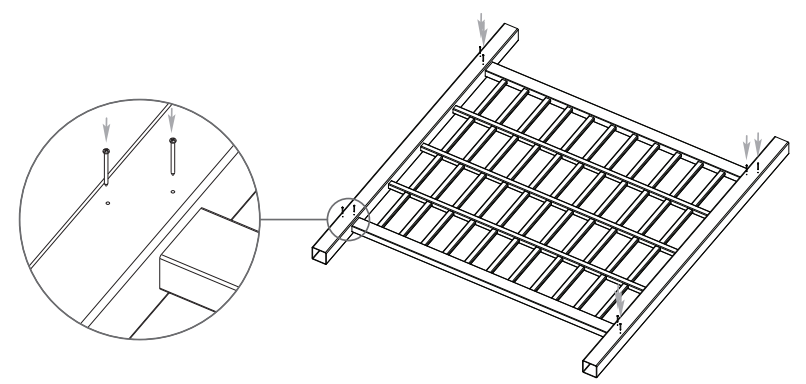
- Fasten the posts onto the horizontal rails using a total of eight screws through the pre-drilled holes on the post.

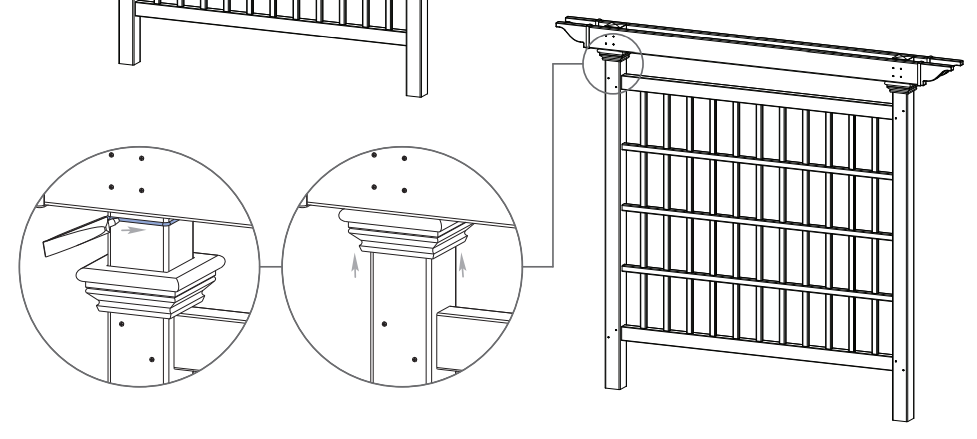
STEP TWO
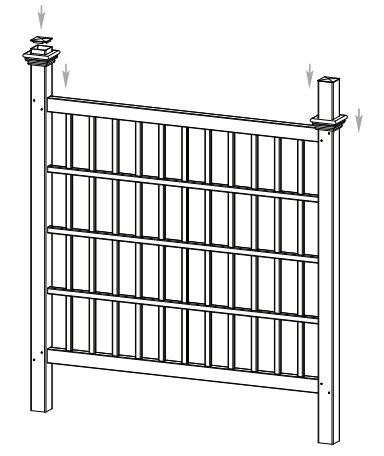
- Slide the two post trim caps down the post as shown, followed by the two post caps. The trim caps can sit on the horizontal rail for now and the post cap pressure-fits into place.
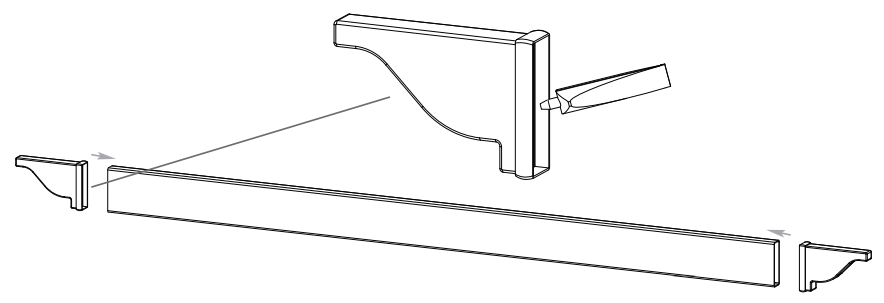
- Apply a small amount of glue to the inside of the end cap as shown and insert onto the beam. Allow 30 seconds for the glue to set and a few more minutes to cure.
- Repeat for second beam.
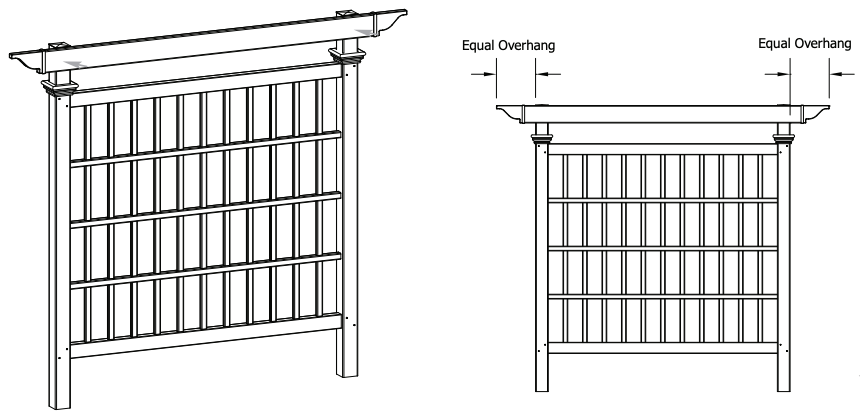
- With a helper, align one of the beam against the posts as shown. The top of the beam should be at the same level as the bottom of the post caps and the overhang should be equal on both ends.
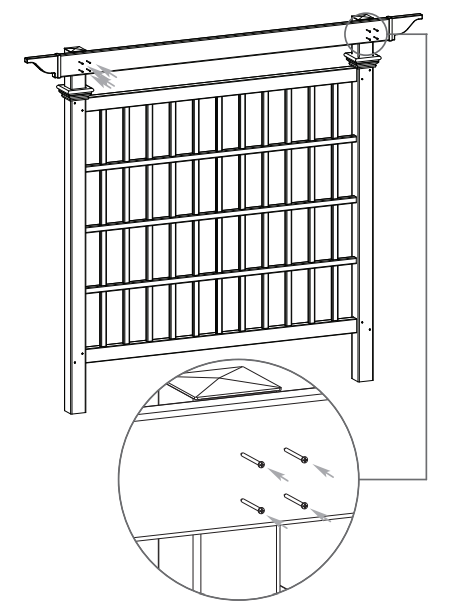
STEP THREE
- Fasten the beam onto the posts using eight screws as shown (four at each post).
- Repeat steps for the second beam.
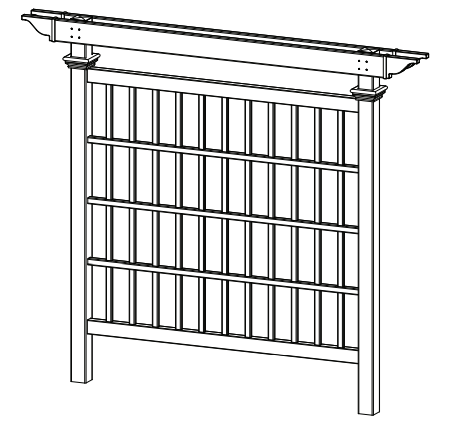
- Apply a small amount of glue around the post approximately 1 inch (2.5 cm) below the beams as shown.
- Slide the post trim caps against the beam and hold for 30 seconds until the glue sets.
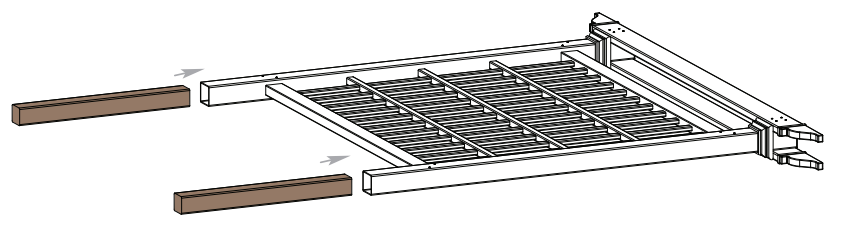
STEP FOUR
Wooden Posts Installation 1
- Insert the two 4x4x36″ (10 x10 x 91 cm) pressure treated wood posts in to the bottom of the vinyl post until it bottoms out against the horizontal rail.
- Fasten with two screws each (not included).

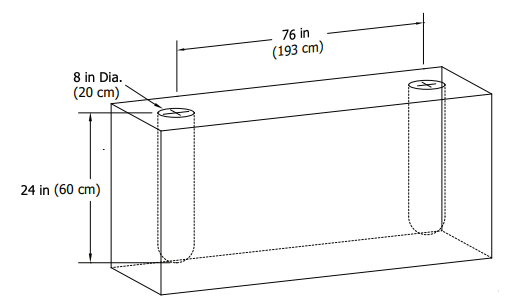
STEP FIVE
Install Privacy Screen into Ground
- Dig two, 8″(20 cm) Diameter x 24″(60 cm) Deep holes on76″(193 cm) Centers
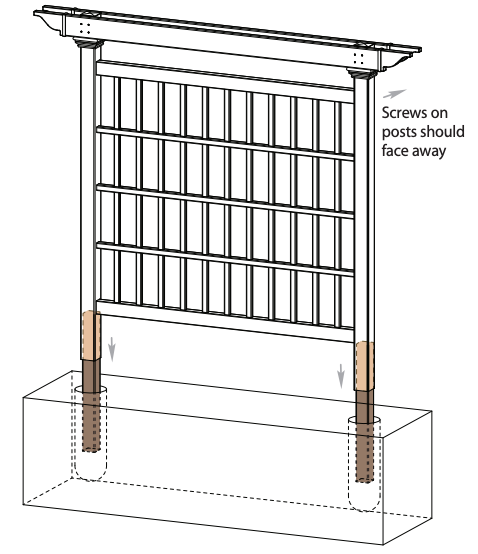
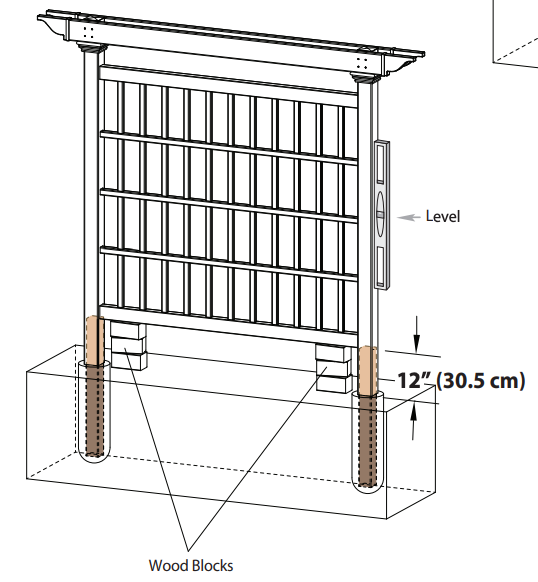
STEP FIVE
- With a helper, place the privacy screen posts into the holes and level it both vertically and horizontally.Note: for aesthetics purposes, the screws on the posts should be facing away.
- To prevent the privacy screen from “sinking”, place a few blocks of wood below the bottom horizontal rail. The bottom horizontal rail should be 12″ (30.5 cm) off the ground.
- Backfill the holes with cement and allow it to set and cure.
North America Toll Free Phone: 1 800 282 9346
References
[xyz-ips snippet=”download-snippet”]