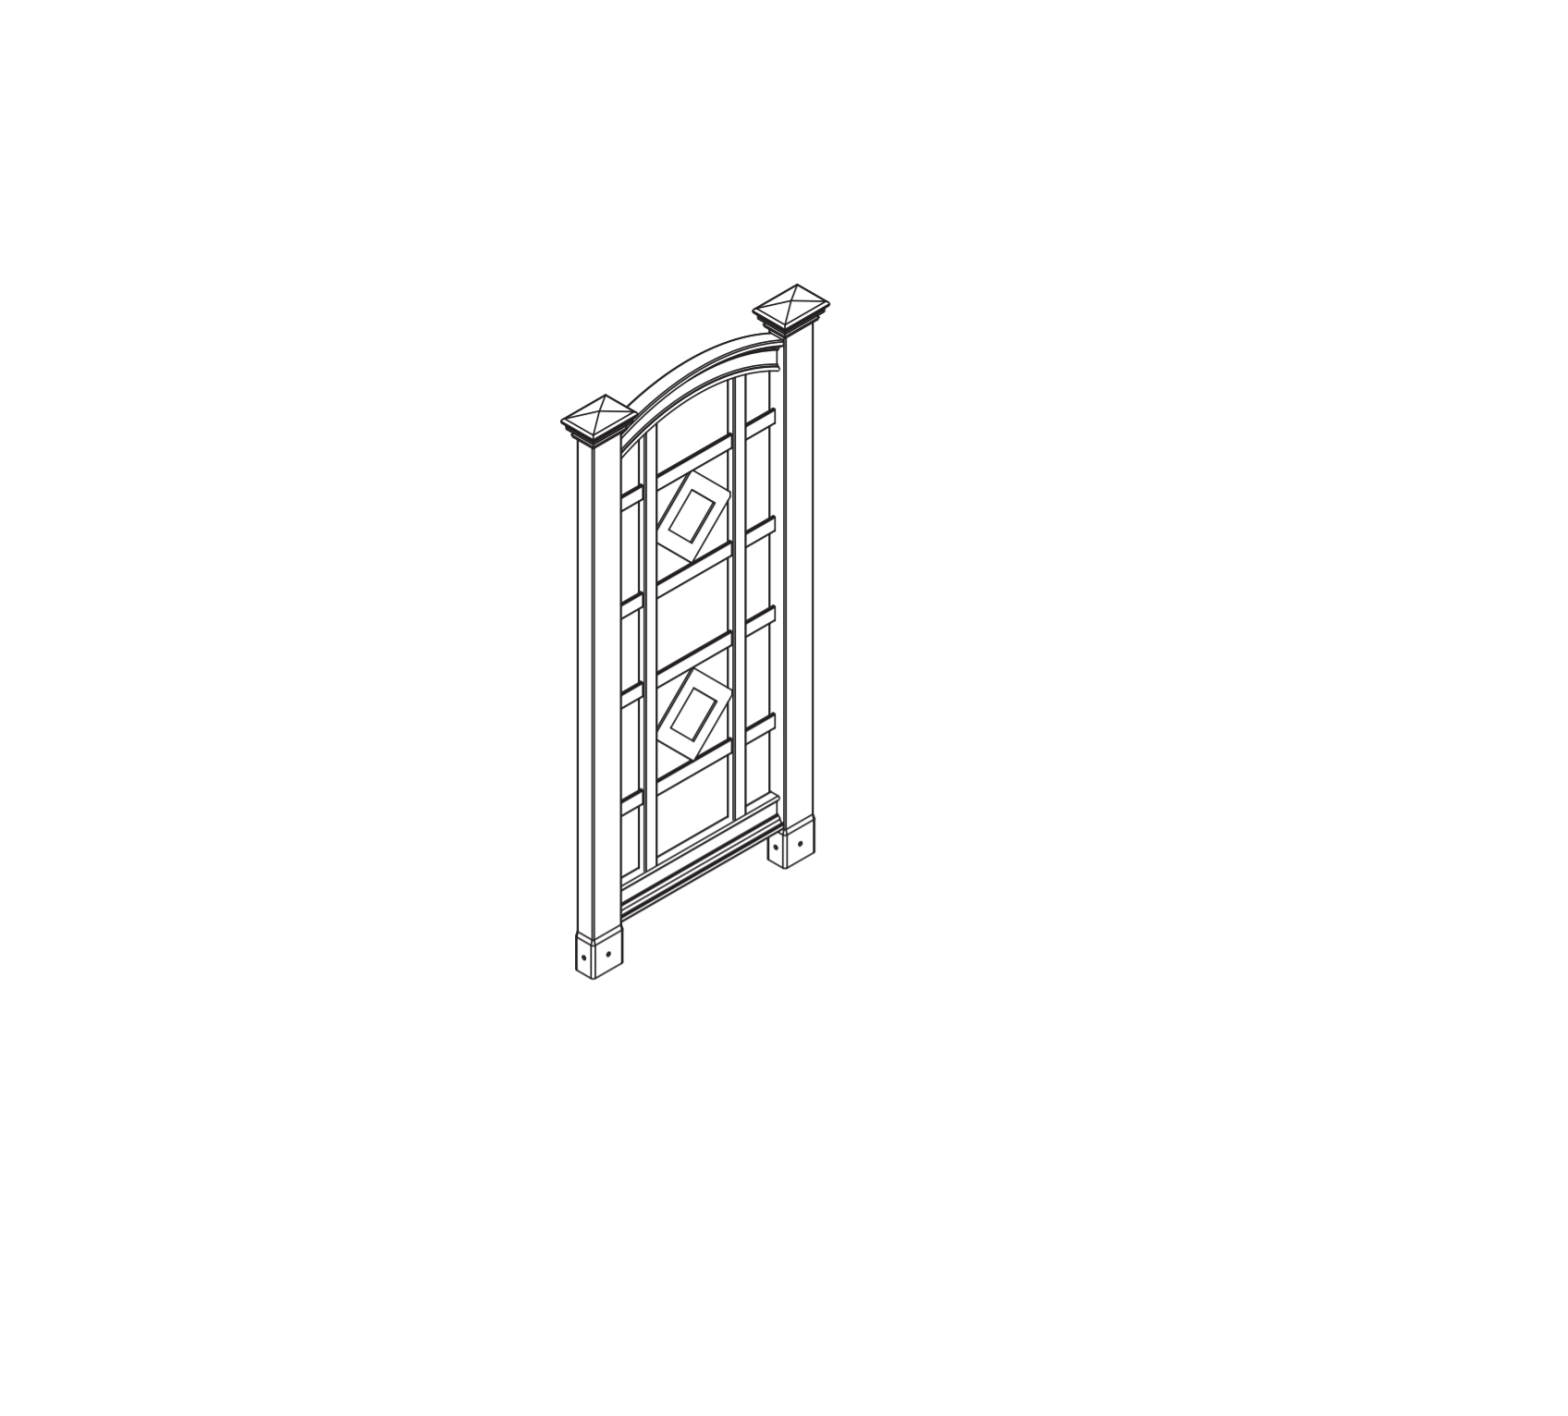
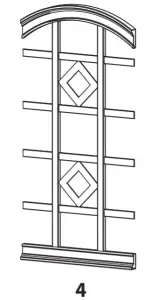
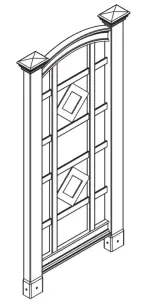
Vita VA68188 The Milan Trellis
IMPORTANT: CHECK THE INSIDE OF YOUR POSTS FOR ALL MATERIALS.
ASSEMBLY INSTRUCTIONS
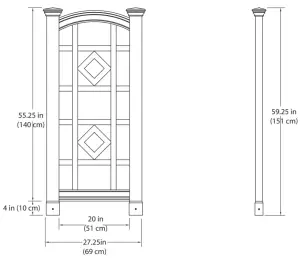
Check Box for These Contents
In the event of missing or defective parts please call our customer service dept. at 1 800 282 9346 (Mon. to Fri. 8:00 AM to 4:00 PM EST).
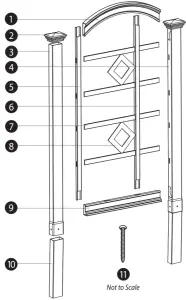
- Arched Top Rail (1) – 10643-1
- Post Caps (2) -10611
- Posts Left (1) -10629
- Posts Right (1) -10630
- Vertical Spindle Left (1) -10631
- Vertical Spindle Right (1) -10632
- Horizontal Spindles (4) -10633
- Diamonds (2) -10646-1
- Bottom Rail (1) -10635
- Ground Mounting Extensions (2) -10636-1 11. 5/8”(16 mm)Self-Auguring Stainless Steel Screw (12) -20016
Tools You Will Need
- Cordless Drill
- Hammer
- Tape Measure
- Level
- Shovel
General Information
- Read Instructions through carefully before beginning assembly.
- When assembling components, place on a non-abrasive surface (i.e. shipping box) to avoid scratching.
- We recommend an area approx 5’x 8’(1.5m x 2.4 m) for unobstructed assembling.
- You should not need to use excessive force when assembling components.
STEP ONE
Assemble the Side Panels
NOTE: There are locking tabs located at the ends of the horizontal rails. Once inserted and pushed into the routed holes, they will lock into place
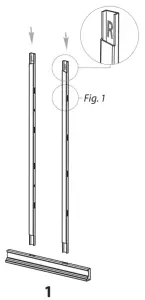
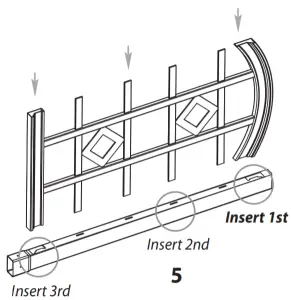
- Layout the horizontal bottom rail and insert the two long vertical spindles. Ensure the routed holes on the spindles are orientated correctly to eventually receive diamonds (see Figure 1). The spindles are identified inside the notch at the top with either the letter L for Left or R for Right.

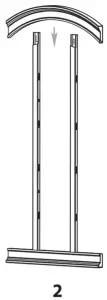
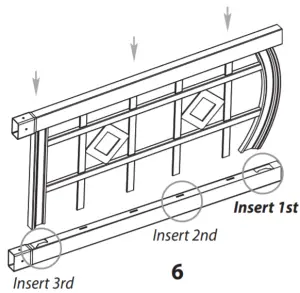
- Install the arched top rail over the ends of the vertical spindles ensuring the architectural detail faces out (same as bottom rail).

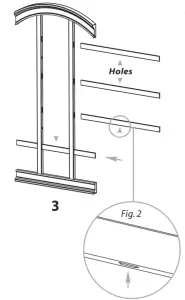
- Insert the four horizontal spindles ensuring that the routed holes on the spindles are positioned to accept the diamonds (see Figure 2).

- Pressure fit the diamonds into the square area designated by tensioning into the horizontal and vertical routed holes (four points of contact).

- Set out one post and complete the side panel by inserting it into the post. Start with the bent top rail first.

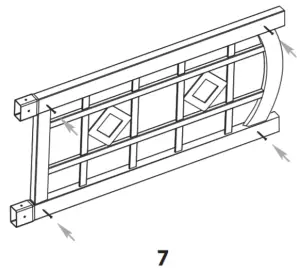
- Lay out the second post with holes facing upwards and insert the completed panel and connected post.

- Flip the trellis over and install screws into the intersection of the posts and the two rails as shown. This will lock the horizontal rails into the vertical post.

Mounting Into the Ground
Trellises must be well secured in the event of high winds, etc. We have provided two ground mounting extensions for securing the privacy screen either into the ground or into a concrete footing. If you are installing your trellis directly to the wall of your home, or on a wood deck or concrete surface, please see your hardware store for the appropriate galvanized bracket hardware
STEP TWO
Install the Ground Mounting Extensions
Insert the ground mounting extensions into the bottom of the privacy screen posts. Secure with screws into the four pre drilled holes.
STEP THREE
Install Trellis into Ground
![]() Move the trellis to its final location. When you are satisfied with the location, mark the positions of the posts, then move the trellis aside and lay it carefully on it’s side. Excavate the 2 post holes approximately 18″ (46 cm) deep x 6″ (15 cm) diameter. Carefully move the trellis back into position.
Move the trellis to its final location. When you are satisfied with the location, mark the positions of the posts, then move the trellis aside and lay it carefully on it’s side. Excavate the 2 post holes approximately 18″ (46 cm) deep x 6″ (15 cm) diameter. Carefully move the trellis back into position.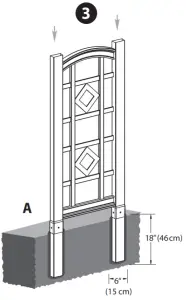
![]() Level it both vertically and horizontally into the excavated holes
Level it both vertically and horizontally into the excavated holes
![]() Backfill the holes with the excavated soil
Backfill the holes with the excavated soil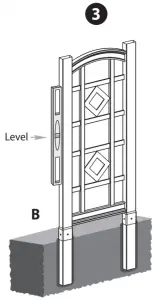
STEP FOUR
Install the Post Caps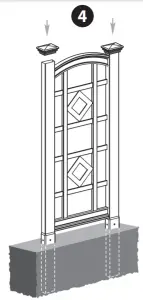
OPTIONAL
Mounting to Barcelona Planter Box
(Purchase Separately)
Please see instructions illustrated with the planter box.
References
[xyz-ips snippet=”download-snippet”]

