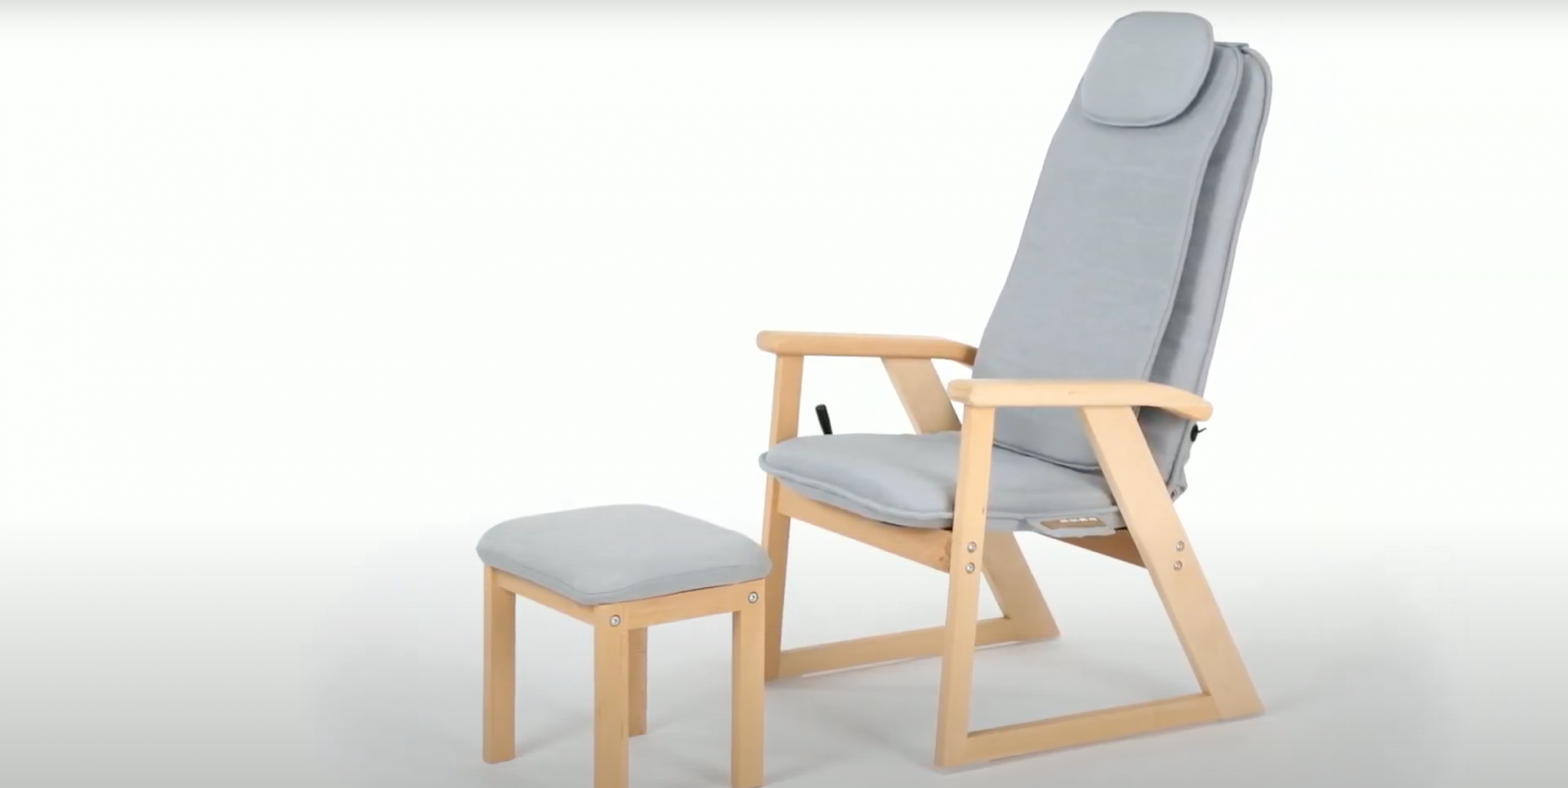
Vive RHB1096GRY Wooden Massage Chair

OVERVIEW
Your Vive Wooden Massage Chair has massage heads positioned for a stress-relieving massage of the neck. back. and waist. no matter your size. It’s reclinable and equipped with two (2) operating modes. three (3) speed options. and a heat setting for optimal relaxation.We are constantly answering questions and working to provide helpful information to make using your Massage Chair as easy as possible. Throughout the manual. we will include OR codes and links to places you can visit to help you.
WHAT’S IN THE PACKAGE
Wooden Massage Chair
- Reclining Seat Assembly
- 2x Frame Beams
- 2x Armrest Frames – left and right
- Removable Back Cushion
- Removable velcro Head Rest
- 12x Allen head Frame Screws
- 8x Flat head Frame Nuts
- 4x Wooden Dowels
- Allen Wrench w/ Phillips screwdriver tip
- Allen Wrench w/ Flat head screwdriver tip
- PowerCord

Footstool
- Padded Foot Rest
- 2x Stool Frames
- 2x Stool Beams
- 4x Allen head Frame Screws ® 4x Flat head Frame Nuts
- 4x Phillips head Surface Screws

CHAIR ASSEMBLY INSTRUCTIONS

For a video demonstrationcheck out the link here vhealth.link/sfv
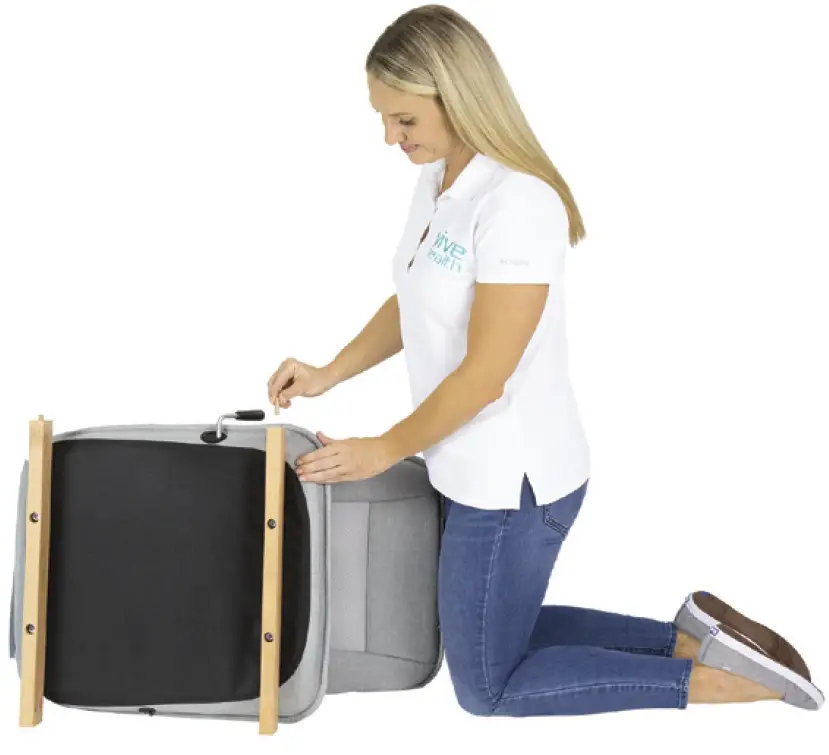
- With the Seat Assembly folded. turn the Seat Assembly over so that the underside of the Seat is facing up.

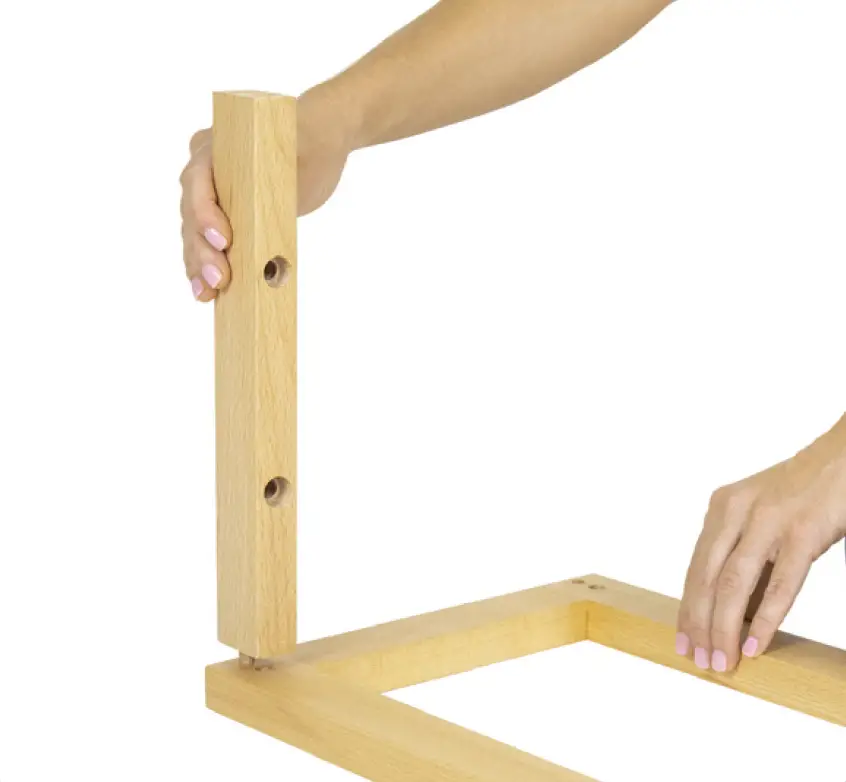
- Position each Frame Beam so that the holes along the narrow edge are lined up with the holes in the underside of the Seat. The larger set of holes in the Beam should be facing upward. and the four (4) holes on the wide side should face in towards the center of the seat.
- Secure the Beam to the underside of the Seat with two (2) of the Frame Screws using the alien wrench.
- Repeat steps 2 and 3 for the other Frame Beam.
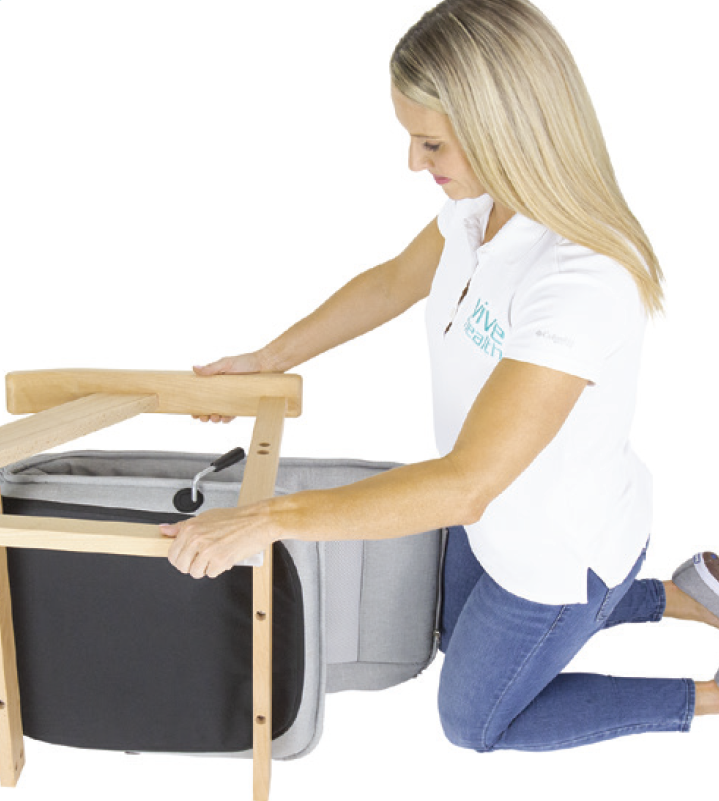
- Turn the Seat Assembly onto its side and fit a ‘Nooden Dowel into the smaller center hole on the end of each Frame Beam.
- Turn the Armrest Frame over to align the central holes on the inside of the frame with the dowels. The rounded end of the Armrest should be facing toward the back of the seat and larger holes on the legs should be facing up. With the dowels aligned and the frame oriented the correct way. fit the Armrest Frame onto the dowels on the two (2) Frame Beams.
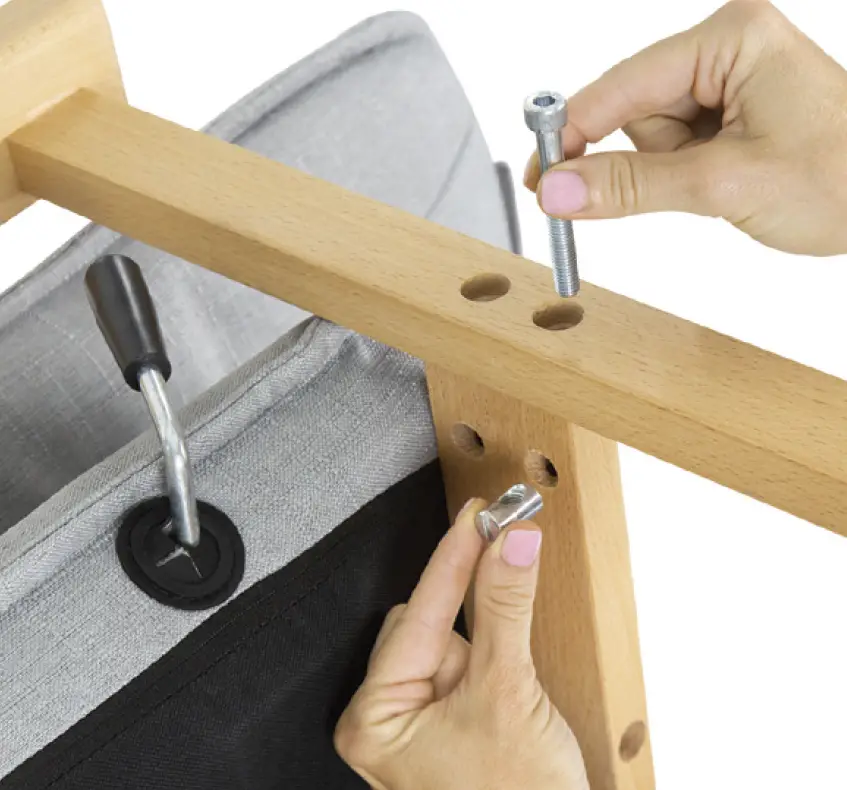
- Insert four (4) Frame Nuts into the holes on the inside face of the Frame Beams next to the Armrest Frame so that the groove in one end of the nut faces out of the hole. Align the groove so that it’s parallel with the Frame Beam.
- Fit four (4) Frame Screws into the holes on the outside the Armrest Frame. Stabilize each Frame Nut with the flathead end of one alien wrench to make sure the groove is parallel with the beam, and tighten each corresponding Frame Screw with the other alien wrench.
- Repeat steps 5 through 8 for the other Armrest Frame on the other side.
- Stand the chair upright. lift up on the recline handle, and pull the back of the Chair up to unfold the Chair. Release the recline handle, and keep pulling it back until it locks into place.
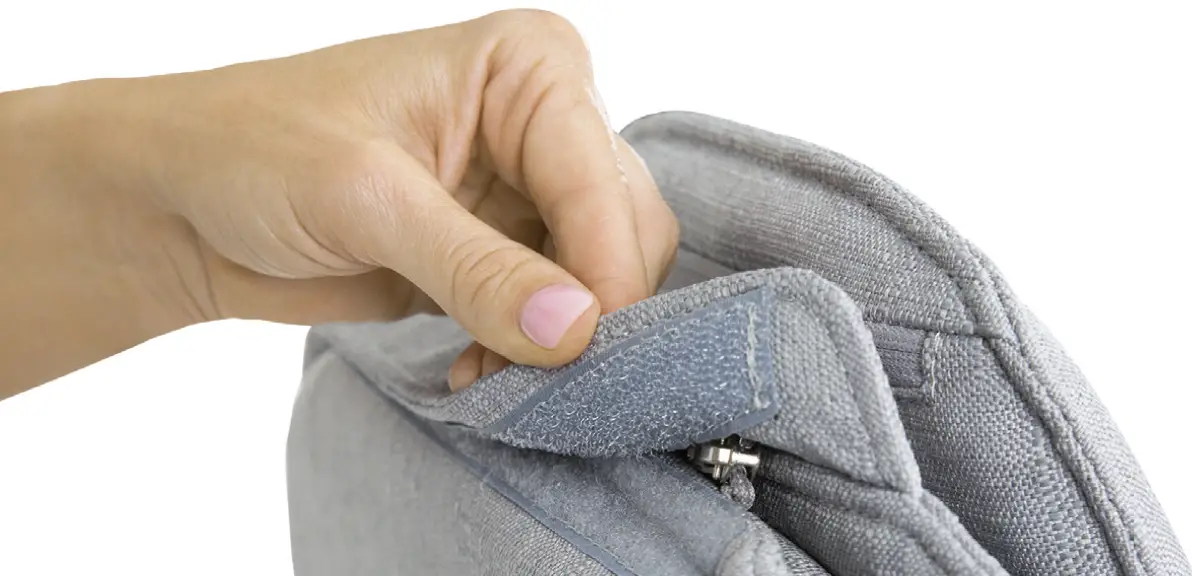
- If needed. refasten the velcro on the lower back of the Seat.
- Attach the optional Back Rest and Head Rest pads with the zipper and velcro fasteners.
- Connect the Power Cable to the cord on the side of the seat. and plug It Into a standard 110v outlet.
- Take a seat In the chair, adjust the reclining angle to your preference, and press the POWER button to turn on the Chair. Adjust the settings as desired.


FOOTSTOOL ASSEMBLY INSTRUCTIONS
- Set one Stool Frame on Its side with the 4 holes facing up. Fit a Wooden Dowel Into the smaller upper hole on each side.
- Fit a Stool Beam down onto each dowel so that the smaller hole on the end of each beam fits onto the dowels and the holes on the flat side of the beams are facing inward towards each other and the center of the stool.
- Fit a dowel into the smaller hole facing up from the unattached end of each Stool Beam.
- Fit the other Stool Frame down onto the Stool Beams so dowels fit into the smaller holes, and the large screw holes are facing up.
- Stand the connected frame up on its four legs.
- Fit a Frame Nut into the hole on the inside of the stool. and fit a Frame Screw into the large hole on the outside. Make sure the groove on the Frame Nut is parallel with the top of the frame.
- Stabilize the Frame Nut with the flathead screwdriver. and tighten the Frame Screw with the alien wrench so that it screws into the Frame Nut.
- Repeat Steps 6 & 7 for each corner of the assembled Stool Frame.
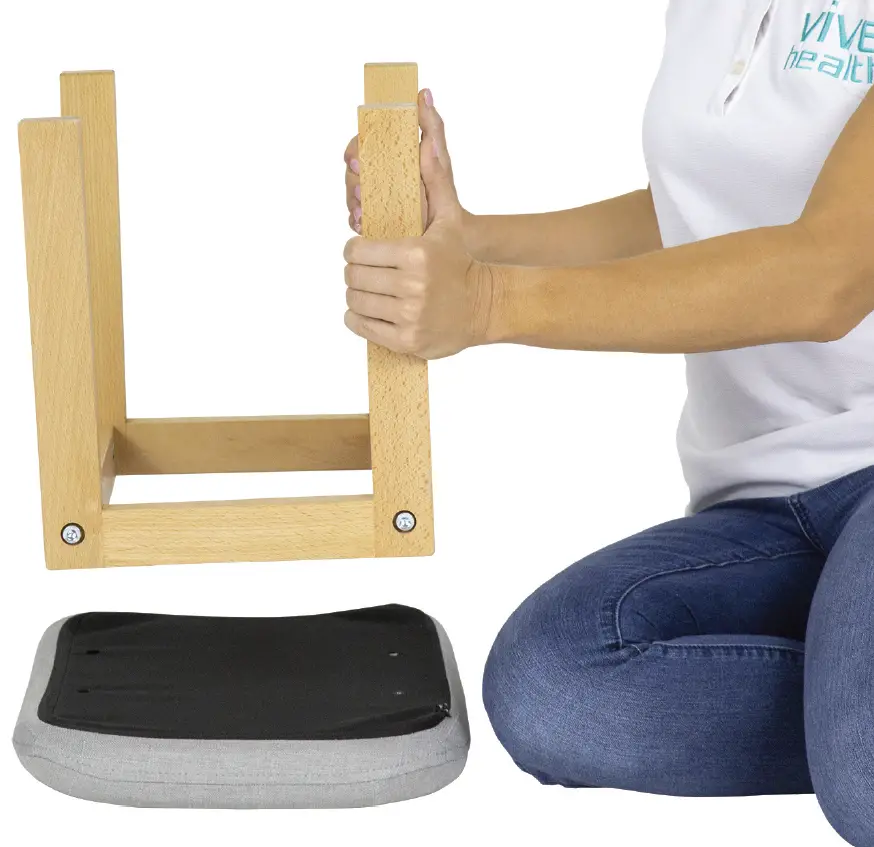
- Place the Padded Foot Rest face down. and flip the assembled Stool Frame over so that the legs are pointed upwards and the screw holes in the frame align with the holes in the foot rest.
- Secure the Surface to the assembly using the four (4) Surface Screws, and stand the Footstool back upright.


CHAIR CONTROLS

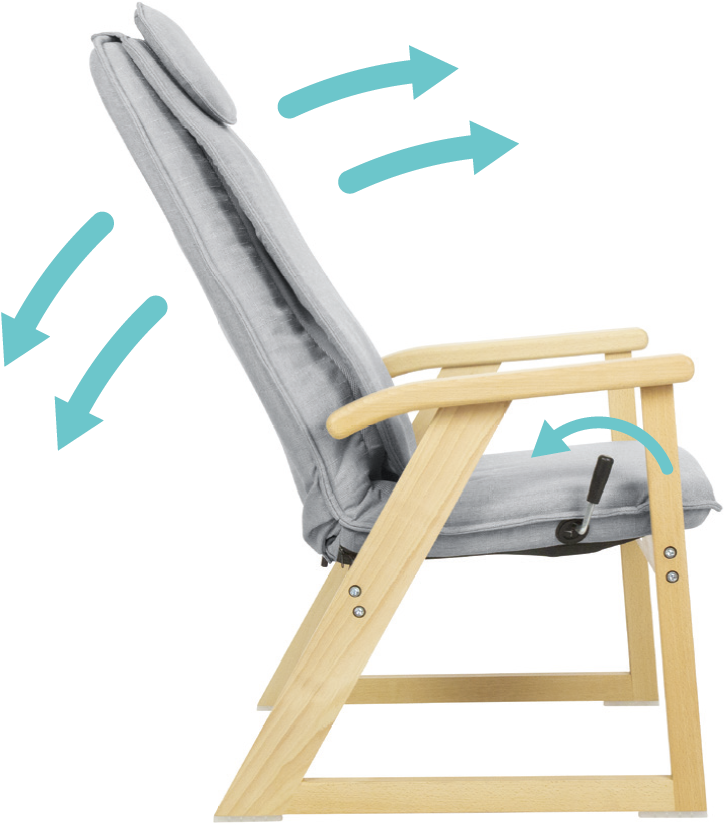
HOW TO RECLINE
To adjust the reclining angle of the Massage Chair. just follow these simple steps:
- While sitting in the Chair. use your right hand to lift up on the recline handle.
- While holding the recline handle. sit up or lean back. allowing the back of the Chair to move to a comfortable position.
- Release the recline handle.
TROUBLESHOOTING
This section includes some common problems and fixes for your Wooden Massage Chair. If it isn’t operating like you think it should. check here before contacting [email protected].
|
SYMPTOM |
PROBLEM |
CAUSE |
REMEDY |
| Massage Chair | No power | Power Adapter | Securely insert the will not start. |
| Massager turns off unexpectedly | Loss of power | Power Adapter installed incorrectly | Securely insert the Power Adapter into the adapter port and wall socket. |
| Autotimer turned the Massager off after fifteen (15) minutes | Press the POWER button to start it back up again. Do not operate for more than thirty
30 minutes per session. |
ADDITIONAL INFORMATION AND SAFETY WARNNGS
- Only use the provided Power Adapter with correct voltage.
- Please unplug the Power Adapter during a power outage to prevent surge damage once the outage ends.
- Do not attempt to operate the Chair if the Power Adapter is damaged in any way.
- Do not place your hand or any other part of your body into the massage mechanism beneath the cloth cover.
- Please consult your physician before using the Massage Chair if you have any of the following conditions:
- Pacemaker or similar implanted medical device
- Heart disease
- Back strain disease
- Fragile or broken bones
- Recent surgeries
- Pregnant or recently pregnant
- Osteoporosis
- Blood circulation problems or thrombosis
- Skin infections
- Adjunctive therapy
- Abnormalities in the limbs
- Do not use the Chair if the outer cover is damaged or if there is a mechanical or electronic malfunction.
- Do not use the Chair in extreme temperatures room, in extremely damp environments. or next to a heat source (e.g. an electric heater. a stove. etc.).
- Do not attempt to repair or carry out maintenance by yourself other than steps outlined in this manual. If you do. you will void the product guarantee.
- Do not stand on the Massage Chair or place heavy weights on it as this may damage the massage components. The Chair is designed to hold no more than 275 lbs. (125kg)
- Avoid contact with water and do not use near water sources.
- Do not fall asleep in the Massage Chair. Do not use the Chair after drinking alcohol.
- Do not use the chair if you have a high fever.
- Do not use in areas where aerosol products are being used or oxygen is being administered.
- The Massage Chair is intended for adult use. Children should only use under direct adult supervision.
- No modification of this equipment from its original specifications is allowed.
WARRANTY INFORMATION

![]()
[xyz-ips snippet=”download-snippet”]