
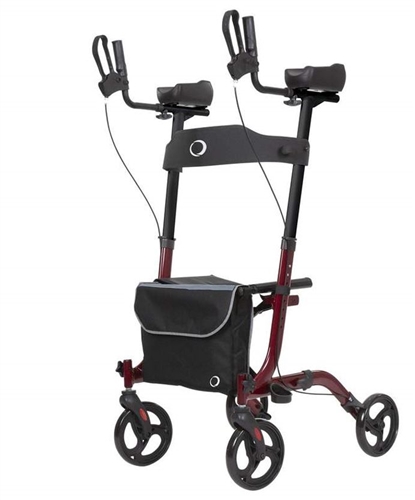
VIVE Upright Walker MOB1033
OVERVIEW
The Upright Walker allows for easier travel than traditional walkers. The 8 inch wheels and dual armrests with brakes make for a smoother, safer ride. We are constantly answering questions and recording helpful videos to make using your Vive Mobility Upright Walker as easy as possible. Check out the included QR codes and video links to help you through the process.
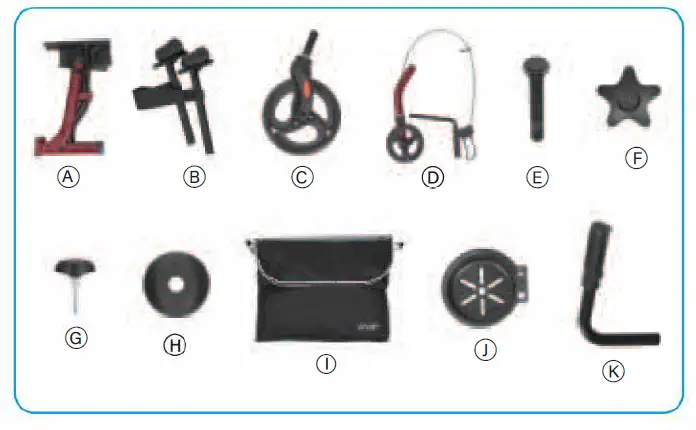
WHAT’S INCLUDED
- 1x Base
- 2x Arms combined with backrest
- 2x Front Wheels
- 2x Legs combined with hand brakes
- 6x Bolts
- 6x Female Star Locks
- 2x Tri-Grip Screws
- 2x Curved Washers CD 1x Bag
- 1x Cane Holder
- 2x Handles

UPRIGHT WALKER ASSEMBLY
The Upright Walker requires assembly before use. Please follow the instructions below:
- Identify the partially assembled base piece, unfold it, and ensure the seat is flat and locked into place.
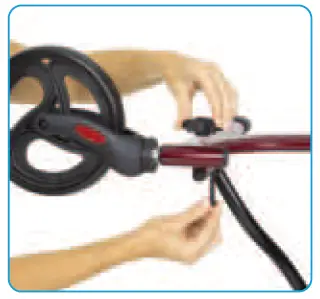
- Attach the 2 front wheels to the seat base by inserting and secure the bolt. Insert from the inside all the way through the holes and securing the female star lock on the outside of the leg of the base.
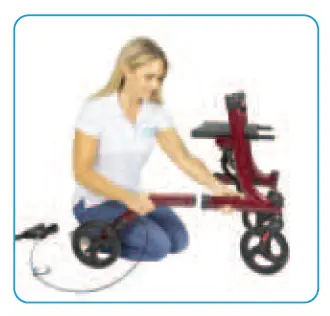
- Insert the 2 back legs. Push the push pin in and insert until the push pin depresses, locking in the hole.
- Insert the tri-grip screw from the outside of the leg and screw in to better secure the leg. Repeat for the other leg.
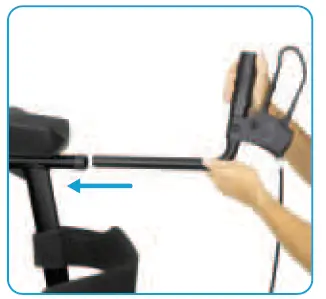
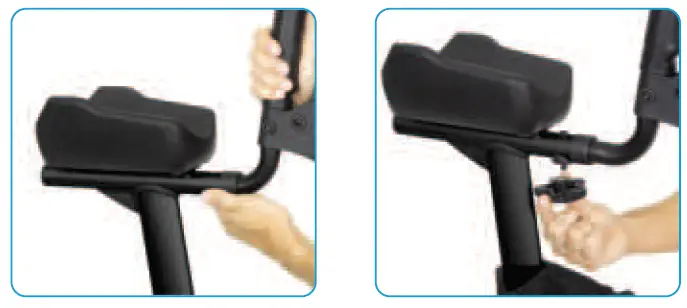
- Locate the 2 handles and insert them into the two front tubes of the legs of the walker.
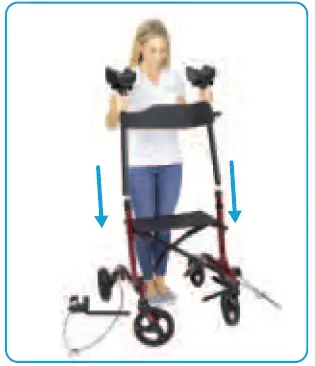
- Push the push pin in and move the arms down to the desired height.
- Insert the 2 hand grips into the designated slot within the arms.
- Choose the desired length by lining up the holes where you want the length to be and secure with the bolt, curved washer and female star lock.
- Insert the cane holder container into the pin head on the base on the walker.
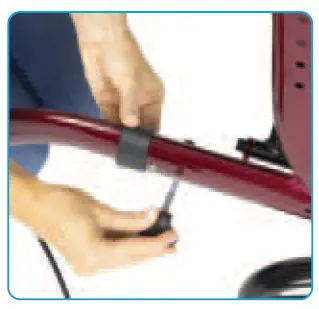
- Use the velcro straps to safely secure the break lines out of the way.
- Hang your bag from its straps on the two tubes made for holding the bag.
- Place the lift handle into the female insert on the back side of the walker and align the holes to prepare for the bolt insertion.
- Insert Bolt (E) through the insert hole and use the Star Lock to secure the handles firmly into place. Repeat steps 12 and 13 for the other handle in your package.
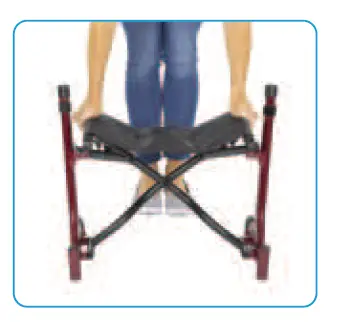


FOLDING THE UPRIGHT WALKERTo fold the Upright Walker, simply pull up at the seat. To unfold the walker for use, stretch the seat flat, and push down.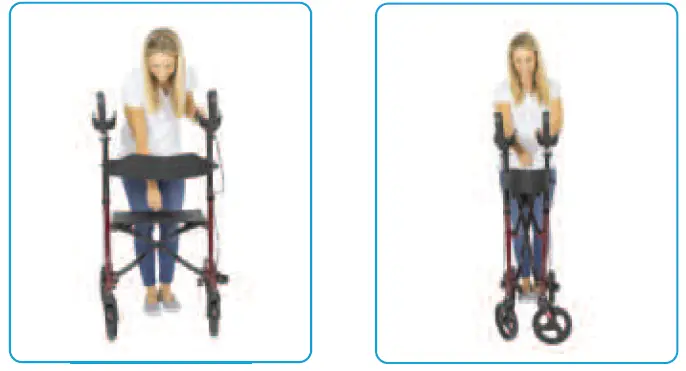
ADJUSTING THE HEIGHT OF THE HANDLESThere is a push button at each tube where the handle height can be adjusted up or down by pressing the button and snapping into place when desired height is reached. OPERATING THE HAND BRAKESPull in on the hand brake to slow or stop the walker. To lock the walker in position, push out on the hand brakes until they “click” and hold into the outward position on their own.
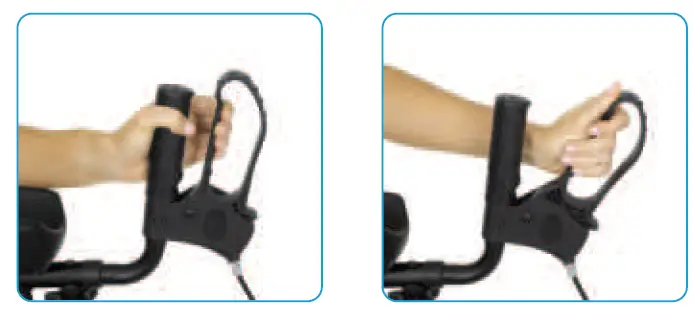
SPECIFICATION
- Overall Width: 25″
- Overall Length: 32″
- Armrest Lowest Height: 41″
- Armrest Highest Height: 46″
- Seat Width: 17.5″
- Seat Depth: 9.5″
- Folded Width: 10.8″
- Shopping Bag Weight Capacity: 11 LBS
- Product Weight: 20 LBS
- Max User Weight: 300 LBS
WARNING
- Do not use strong corrosive cleaners to clean the product’s surface. Product should not be left outside in rainy conditions.
- Product may rust if regularly exposed to moisture.
- Before sitting down on the seat, please lock both brakes to prevent the walker from sliding.
- Do not hang any heavy weighted items on either of the armrests as it will cause the walker to be unstable.
- Please fold the walker before storage.
- This item is meant to be a walking aid. This means that it is not built to support the full weight of ones body, it is only meant to assist you while walking. If a large amount of force is placed on this item, even when brakes are in locked position, this can cause the item to move out of its position.
- Use caution when going over bumps.
NOTE: Do not use the lift off handles for any other purpose than to help lift yourself into the standing position. Never apply your full body weight onto the handles as both feet should be firmly planted when attempting to lift yourself up. Only use this feature if you are comfortable with your leg strength and ability to get assistance from your both legs and your arms to raise you up to the standing position.
GOT MORE QUESTIONS?Check out our list of Frequently Asked Questions at vhealth.link/cha for helpful answers.And if that doesn’t answer your question, our customer service team would love to help! Feel free to connect with them by phone, e-mail, or chat on our website.[email protected]1-800-487-3808vivehealth.com![]()
[xyz-ips snippet=”download-snippet”]