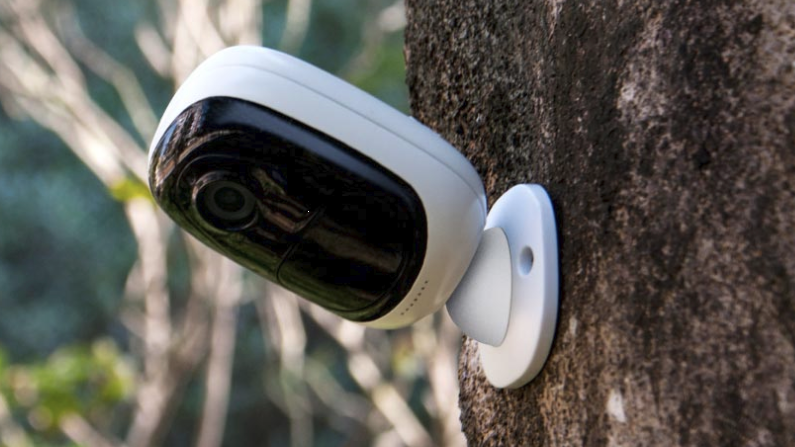
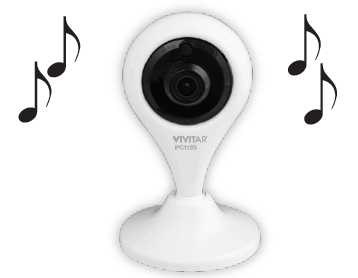
VIVITAR Smart Security High Definition Wi-Fi Camera
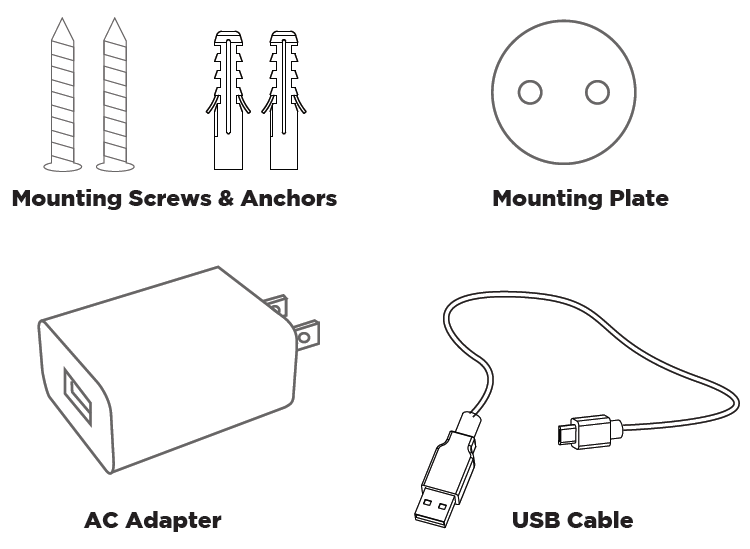
WHAT’S INCLUDED
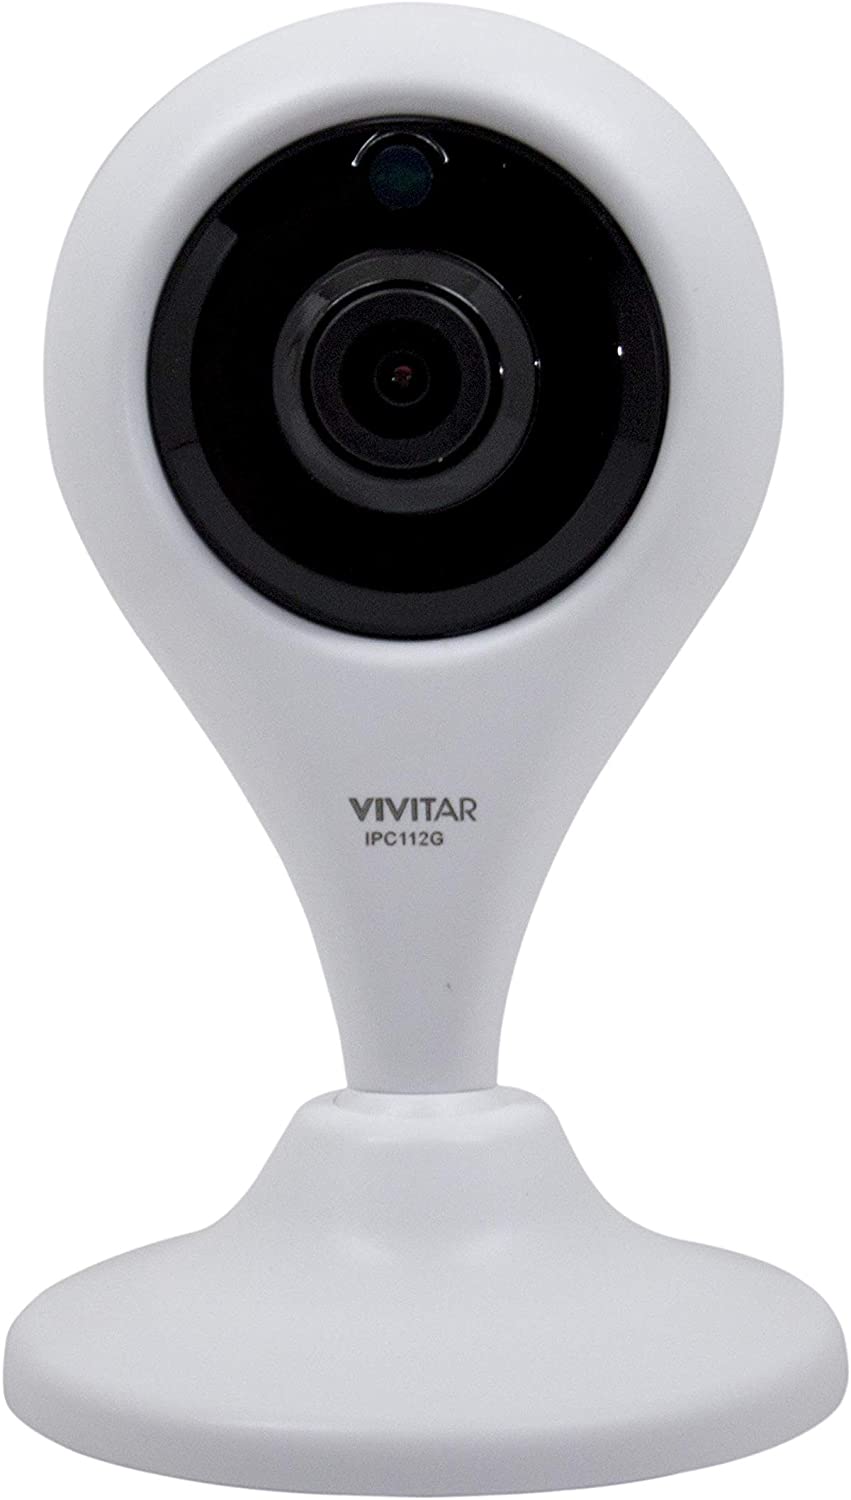
A QUICK LOOK
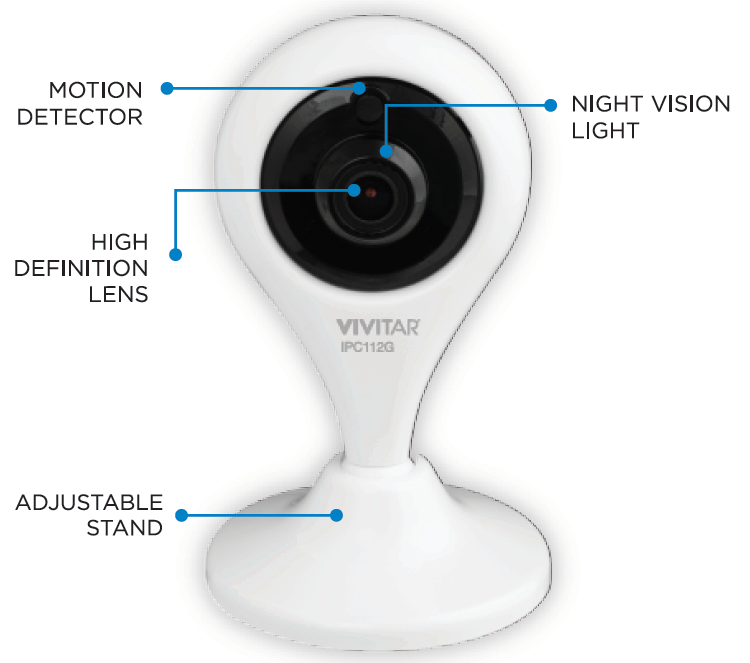
MOUNTING
To mount your camera to a wall, follow the steps below.
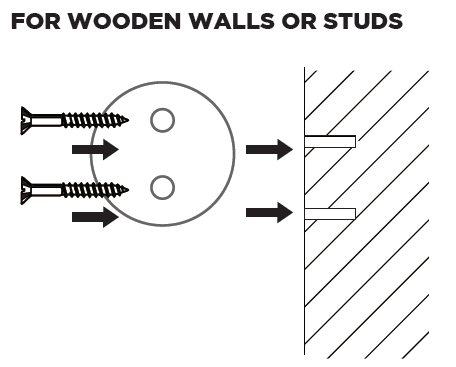
Use the included mounting screws for wooden walls or studs. They will first go through the screw holes on the mounting plate, and then screw into the wall.
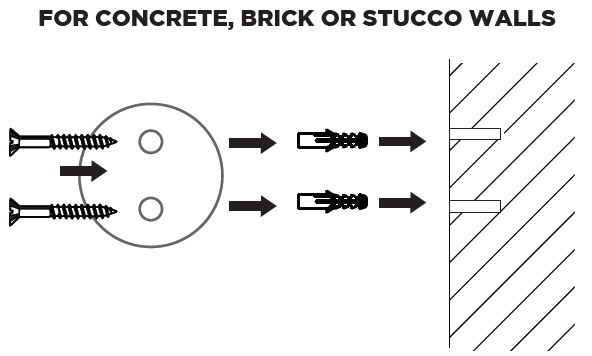
Use the included mounting anchors for concrete, brick or stucco walls. First screw the mounting anchors into the wall. Then the mounting screws will go through the screw holes on the mounting plate, and then screw into the mounting anchors.
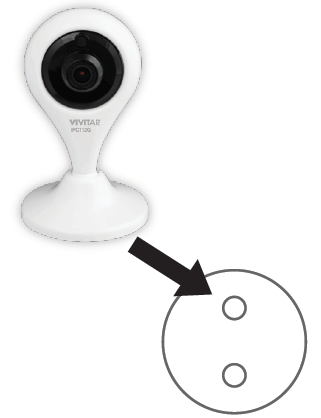
Once the mounting plate is attached to the wall, attach your camera to the mounting plate. Make sure the camera stays in place securely.
APP INSTALLATION
In order to use your camera, you will first need to download the Vivitar Smart Security 2 App, which is available on the Google Play Store and on the iPhone App Store.

APP REGISTRATION
To successfully use the Vivitar Smart Security 2 App, you will first need to create an account. To do so, follow the steps below.
Open the Vivitar Smart Security 2 App and press “Register.”

Agree to the terms of the privacy policy.

Enter your e-mail address or phone number to create an account.
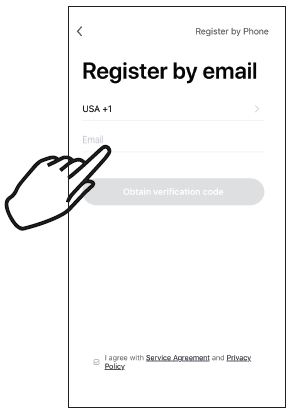
You will receive a verification code over email or text message. Enter it here.
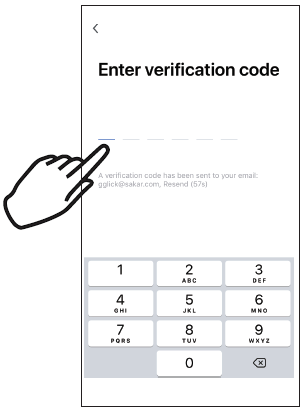
Setup a password for your account. Once finished, you can login to your account.

APP SETUP

Once you login to your account, press “Create Family” to store the location of your home and describe the different rooms where your smart home devices will be located.
CAMERA SETUP
- Near the bottom of your camera is a Micro USB port. Plug the included USB cable into this port, and connect the other end to the included power adapter.

- Wait as your camera gets ready to enter Wi-Fi setup mode. This might take up to a minute.

- Once in Wi-Fi setup mode, your camera will emit a prompt musical melody and then beep every few seconds.

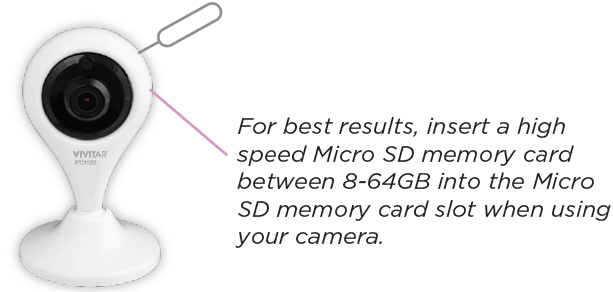
NOTE: If you are having trouble connecting to Wi-Fi, press the reset button for approximately 5 seconds to reset your camera. The reset button can be accessed by sliding a pin or paper clip in the recessed hole on the rear of your camera.
WIFI CONNECTION
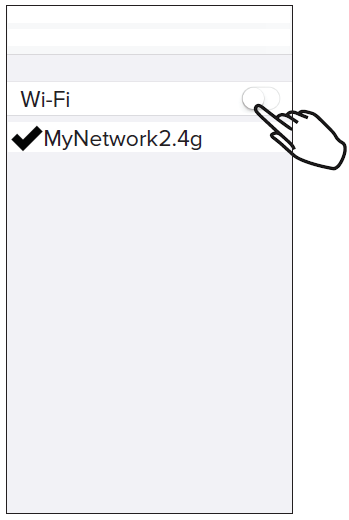 Go to your phone’s settings menu, and make sure that your phone is connected to a 2.4GHz WIFI network.

Open your Vivitar Smart Security 2 app. Choose to add a device, and In the Add Device screen, select to add a Smart Camera.
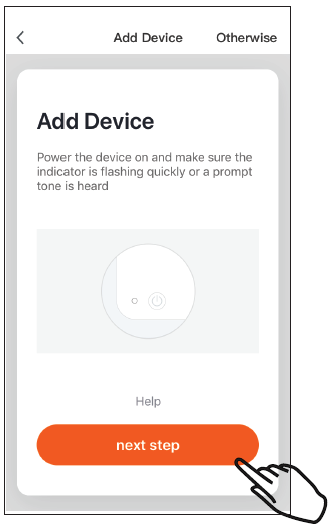
Confirm that the LED Indicator Light on your camera is still blinking rapidly, then proceed to the next step.
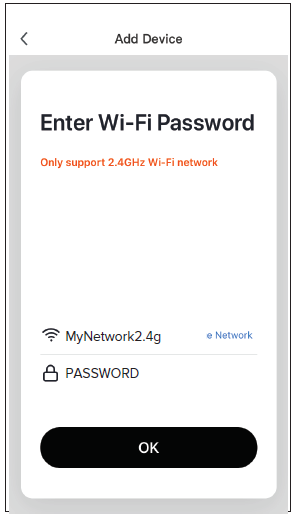
Enter your WIFI network name and password.
NOTE: For models without an LED Indicator Light, you can continue if your camera is beeping consistently.
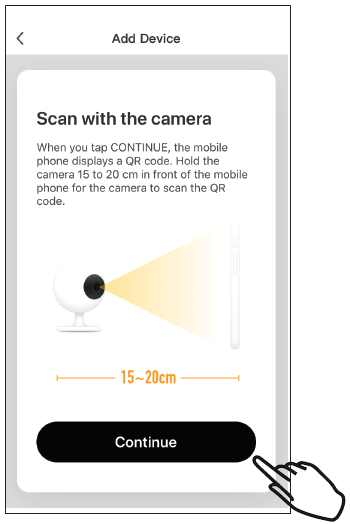
Your app will display a QR code. Once displayed on the screen, hold your phone directly in front of your camera’s lens.
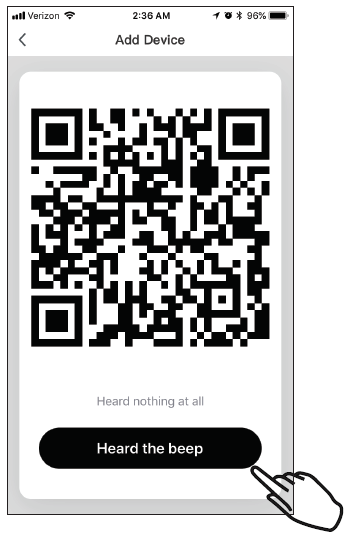
Your camera should emit a beep to indicate that it is ready to connect to your network.
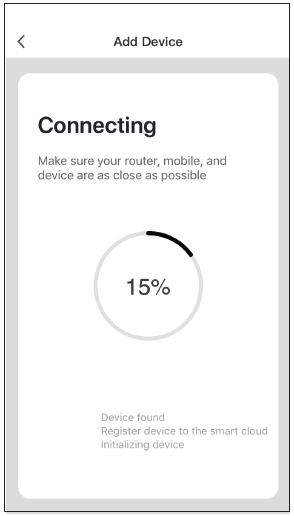
Wait as the WiFi connection is established.
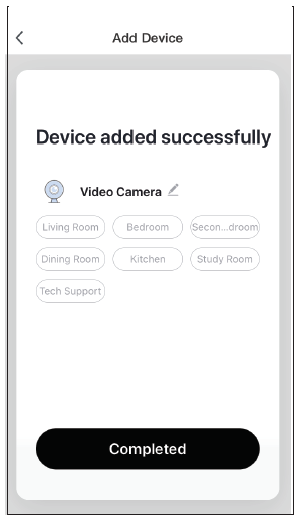
Once the connection is established, you can use the App to control your camera.
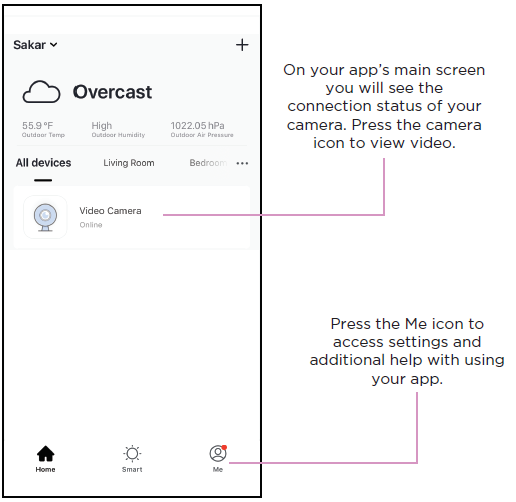
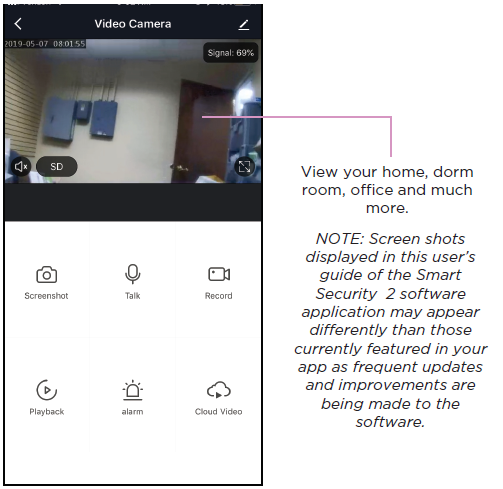
USING THE APP
FCC STATEMENT
Changes or modifications not expressly approved by the party responsible for compliance could void the user’s authority to operate the equipment.This device complies with Part 15 of the FCC Rules. Operation is subject to the following two conditions: (1) this device may not cause harmful interference, and (2) this device must accept any interference received, including interference that may cause undesired operation.This equipment has been tested and found to comply with the limits for a Class B digital device, pursuant to Part 15 of the FCC Rules. These limits are designed to provide reasonable protection against harmful interference in a residential installation. This equipment generates, uses and can radiate radio frequency energy and, if not installed and used in accordance with the instructions, may cause harmful interference to radio communications. However, there is no guarantee that interference will not occur in a particular installation.If this equipment does cause harmful interference to radio or television reception, which can be determined by turning the equipment of and on, the user is encouraged to try to correct the interference by one or more of the following measures:
- Reorient or relocate the receiving antenna.
- Increase the separation between the equipment and receiver.
- Connect the equipment into an outlet on a circuit different from that to which the receiver is connected.
- Consult the dealer or an experienced radio/TV technician for help.
WARRANTY CARD
This warranty covers the original consumer purchaser only and is not transferable.This warranty covers products that fail to function properly UNDER NORMAL USAGE, due to defects in material or workmanship. Your product will be repaired or replaced at no charge for parts or labor for a period of one year.What Is Not Covered by Warranty:Damages or malfunctions not resulting from defects in material or workmanship and damages or malfunctions from other than normal use, including but limited to, repair by unauthorized parties, tampering, modification or accident.To Obtain Warranty Service and Troubleshooting Information:Call 1-800-592-9541 or Visit our website at www.vivitar.com.To receive Warranty service along with the name and address of an authorized product service center, the original consumer purchaser must contact us for problem determination and service procedures.Proof of purchase in the form of a bill of sale or receipted invoice, evidencing that the Product is within the applicable Warranty period(s), MUST be presented in order to obtain the requested service.It is your responsibility to properly package and send any defective products along with a dated copy of proof of purchase, a written explanation of the problem, and a valid return address to the authorized service center at your expense. Do not include any other items or accessories with the defective product. Any products received by the authorized service center that are not covered by warranty will be returned unrepaired.
NO WARRANTIES, WHETHER EXPRESS OR IMPLIED, INCLUDING, BUT NOT LIMITED TO, ANY IMPLIED WARRANTIES OF MERCHANTABILITY OR FITNESS FOR A PARTICULAR PURPOSE, OTHER THAN THOSE EXPRESSLY DESCRIBED ABOVE SHALL APPLY. DISTRIBUTOR FURTHER DISCLAIMS ALL WARRANTIES AFTER THE EXPRESS WARRANTY PERIOD STATED ABOVE. NO OTHER EXPRESS WARRANTY OR GUARANTY GIVEN BY ANY PERSON, FIRM OR ENTITY WITH RESPECT TO THE PRODUCT SHALL BE BINDING ON DISTRIBUTOR. REPAIR, REPLACEMENT, OR REFUND OF THE ORIGINAL PURCHASE PRICE – AT DISTRIBUTOR’S SOLE DISCRETION -ARE THE EXCLUSIVE REMEDIES OF THE CONSUMER. IN NO EVENT WILL DISTRIBUTOR, ITS MANUFACTURERS, OR SAKAR INT. BE LIABLE FOR ANY INCIDENTAL, DIRECT, INDIRECT, SPECIAL, PUNITIVE OR CONSEQUENTIAL DAMAGES (SUCH AS, BUT NOT LIMITED TO, DAMAGES FOR LOSS OF PROFITS, BUSINESS, SAVINGS, DATA OR RECORDS) CAUSED BY THE USE, MISUSE OR INABILITY TO USE THE PRODUCT. EXCEPT AS STATED HEREIN, NO OTHER WARRANTIES SHALL APPLY. NOTWITHSTANDING THE FOREGOING, CONSUMER’S RECOVERY AGAINST DISTRIBUTOR SHALL NOT EXCEED THE PURCHASE PRICE OF THE PRODUCT SOLD BY DISTRIBUTOR. THIS WARRANTY SHALL NOT EXTEND TO ANYONE OTHER THAN THE ORIGINAL CONSUMER WHO PURCHASED THE PRODUCT AND IS NOT TRANSFERABLE.Some countries, states or provinces do not allow the exclusion or limitation of incidental or consequential damages or allow limitations on warranties, so limitation or exclusions may not apply to you. This warranty gives you specific legal rights, and you may have other rights that vary from state to state or province to province. Contact your authorized retailer to determine if another warranty applies. This product is manufactured, distributed and sold by SAKAR International, Inc. All other trademarks are the property of the respective owner, who has not sponsored, endorsed or approved this product.

References
[xyz-ips snippet=”download-snippet”]

