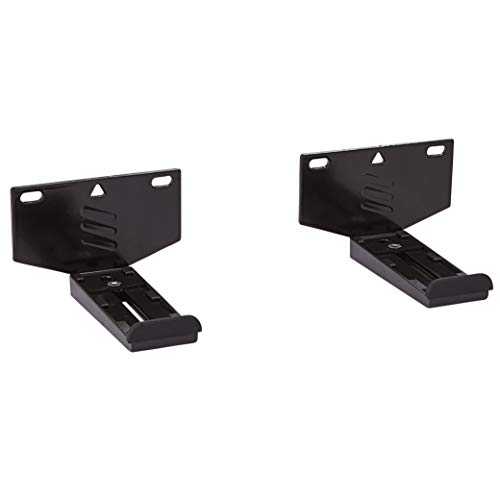

VIVO MOUNT-SPSB4 Universal Soundbar Speaker Wall Mount
WARNING! If you do not understand these directions, or if you have any doubts about the safety of the installation, please call a qualified technician. Check carefully to make sure there are no missing or defective parts. Improper installation may cause damage or serious injury. Do not use this product for any purpose that is not explicitly specified in this manual. Do not exceed weight capacity. We cannot be liable for damage or injury caused by improper mounting, incorrect assembly or inappropriate use.
WARNING: CHOKING HAZARDSMALL PARTS – NOT FOR CHILDREN UNDER 3 YEARS. ADULT SUPERVISION IS REQUIRED.
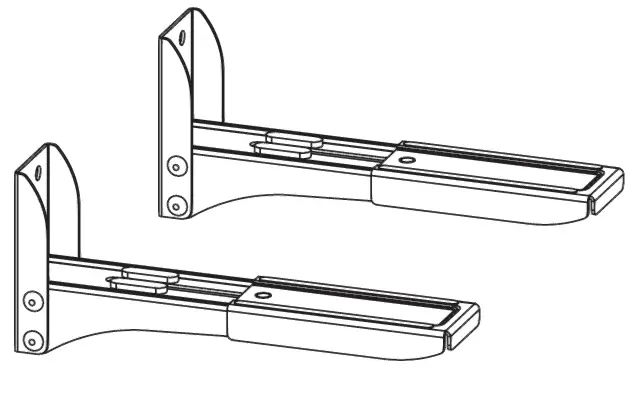
PACKAGE CONTENTS

CAUTION! DO NOT INSTALL INTO DRYWALL ALONE. VERIFY YOUR WALL CONSTRUCTION. USE WOOD STUDS TO MOUNT. We include mounting hardware for brick and concrete walls. If unsure, please contact us at vivo-us.com, email at [email protected], or call us at 309-278-5303.
TOOLS NEEDED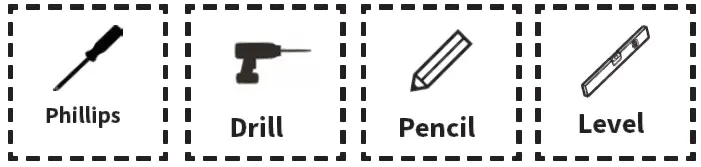 DO NOT EXCEED WEIGHT CAPACITY.Failure to do so may result in serious injury.
ASSEMBLY STEPS
STEP 1: Measure the length of your speaker for proper installation of the mounts to the wall.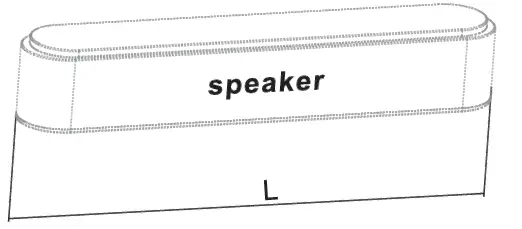
STEP 2a: OPTION A: Wood Stud WallUse mounts (A) to mark drilling locations on wall where studs are located, making sure spacing of the mounts does not exceed the length of the speaker. Use of a stud finder is highly recommended. Drill 2” (50mm) deep holes using a 5/32” (4mm) drill bit. Attach mounts to wall using screws (W-A) with washers (W-C).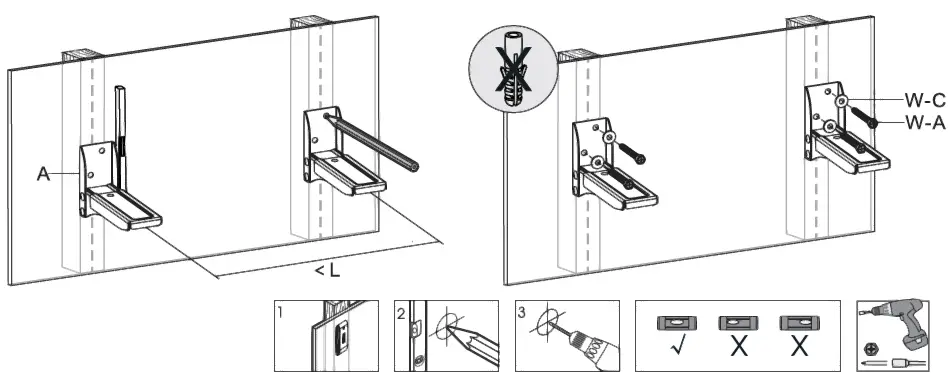
STEP 2b: OPTION B: Brick/Concrete WallUse mounts (A) to mark drilling locations on wall, making sure spacing of the mounts does not exceed the length of the speaker. Drill 2.2” (55mm) deep holes using a 5/16” (8mm) drill bit and press anchors(W-B) into holes. Attach mounts to wall using screws (W-A) with washers (W-C).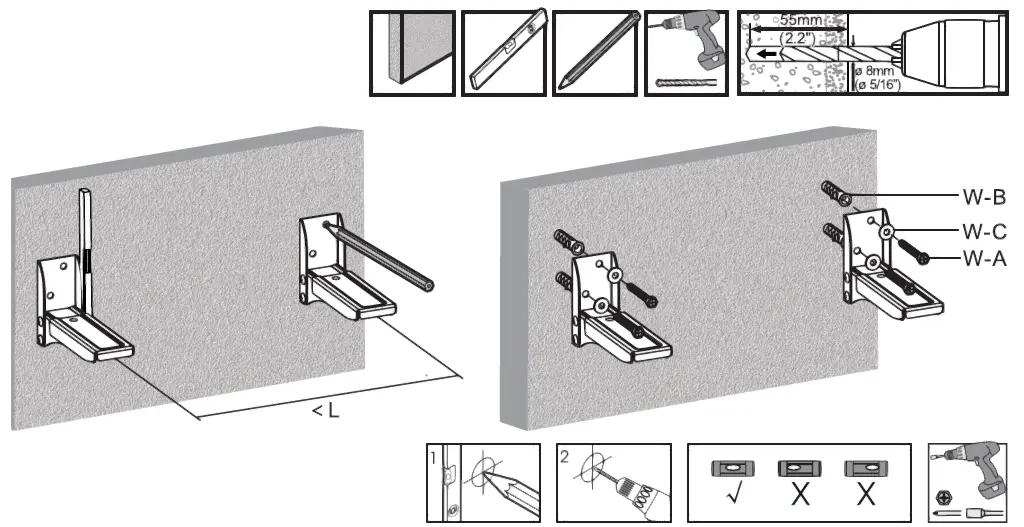
STEP 3-1: Loosen the wingnut on the bottom of each mount.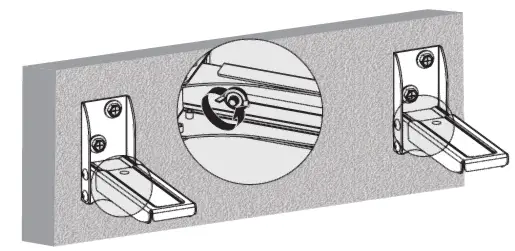
STEP 3-2: Adjust length of mounts to properly support speaker, then tighten the wingnuts.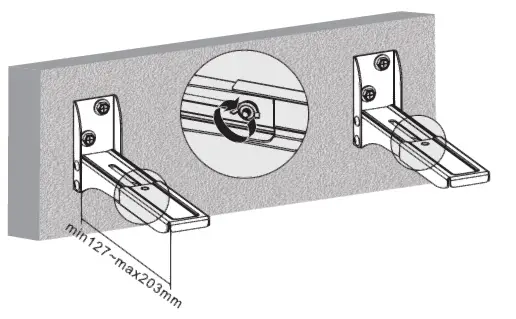
STEP 4: Apply long pads (B) to front brackets of mounts, and short pads (C) to rear brackets of mounts.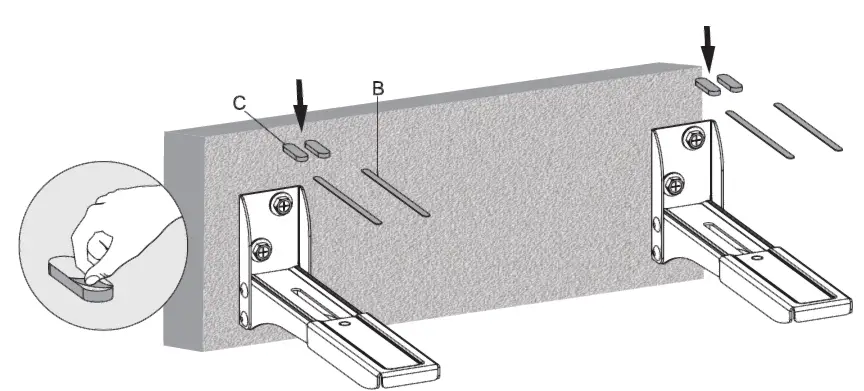
STEP 5: Place speaker on mounts.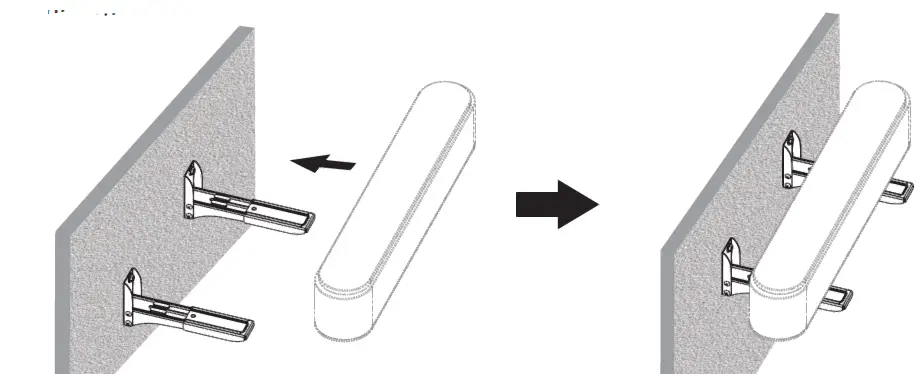
Love your new VIVO setup and want to share? Tag us in your photo! @vivo_usOpen Monday – Friday 7:00am – 7:00pm CST,our dedicated support team can offer immediate assistance with rapid response times. If any parts are received damaged or defective, please contact us. We are happy to replace parts to ensure you have a fully functioning product.
[email protected]www.vivo-us.com Chat live with an agent!
AVG. RESPONSE TIME (within office hrs): 1HR 8M
– 23% within < 15m– 38% within < 30m– 61% within < 1hr– 83% within < 2hr– 92% within < 3hr
FOR MORE VIVO PRODUCTS, CHECK OUT OUR WEBSITE AT: www.vivo-us.com
References
VIVO – Desks, Monitor Mounting, and More Home & Office Solutions – VIVO – desk solutions, screen mounting, and more
Register a .US.COM domain today!
VIVO – Desks, Monitor Mounting, and More Home & Office Solutions
– VIVO – desk solutions, screen mounting, and more
MOUNT-SPSB4Universal Soundbar Speaker Wall Mount
– VIVO – desk solutions, screen mounting, and more
[xyz-ips snippet=”download-snippet”]