![]()
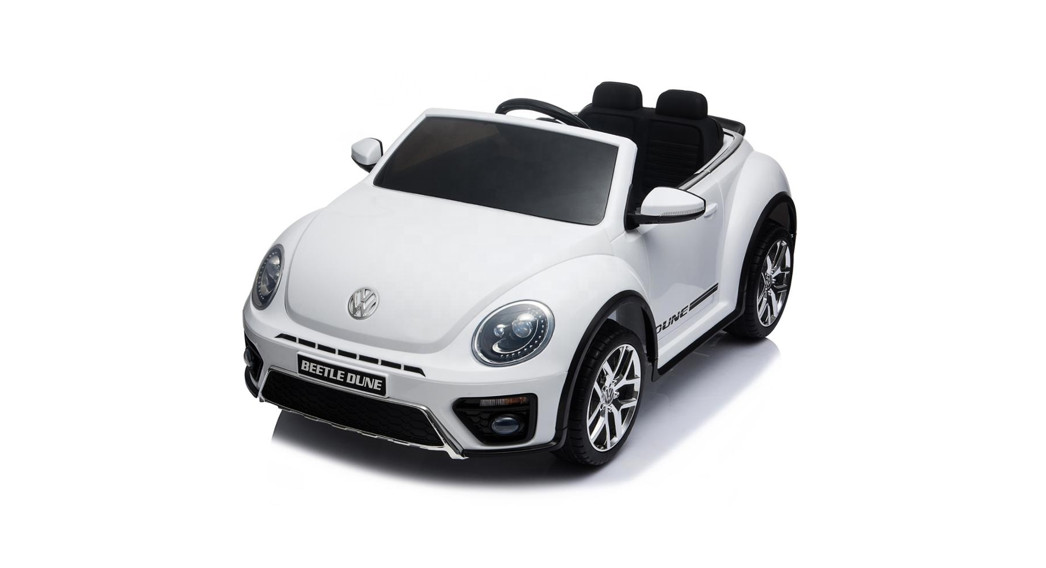
The Beetle
![]() Pinghu Little Sun ChildsVehicles CO., LTD
Pinghu Little Sun ChildsVehicles CO., LTD
 OWNER’S MANUALwith Assembly InstructionsRead and understand this entire manual before using it!Please keep this manual for future reference as it contains important information.Before first-time use, charge the battery for at least 8-12 hours.
About New Vehicle
Thank you for purchasing The Beetle children’s electric vehicle produced by “Pinghu Little Sun Childs Vehicles Co., Ltd”.Address: ONE BUILDING, NO.18 INSIDE JINHUA ROAD XINCHANG TOWN, PINGHU CITY JIAXING CITY, ZHEJIANG PROVINCE.E-mail: [email protected] TEL.: 86-573-85636126
Trademarks, design patents, and copyrights are used with the approval of Volkswagen AG
Specification
| Battery | 12V4.5AHx1 or 12V7AHx1 | Drive Motor | 12V/390/16000turnx2 |
| Fuse: | 10A | Drive Motor | 12V/540/10000turnx2 |
| Charger | 12V1000mAh | Steering Motor | 12V/380/5500turnx1 |
| Speed: | 3-5km/hr |
|
s u i t a b l e a g e : |
37~96 months |
|
L o a d c a p a c i t y : |
under 35Kg |
|
S i z e o f c a r : |
123*69*50cm |
|
C h a r g e t i m e : |
8~12 hours |
|
B a t t e r y t i m e : |
300 times |
|
Power mode: |
charging type |
BATTERY INFORMATION
- Non-rechargeable batteries are not to be recharged.
- If removable rechargeable batteries are used, they are only to be charged under adult supervision.
- Remove rechargeable batteries from the product before charging.
- Do not mix old and new batteries. Do not mix different types of batteries:alkaline, standard (carbon-zinc), or rechargeable (nickel-cadmium).
- Insert batteries as indicated inside the battery compartment. anode to anode, cathode to cathode.
- Remove batteries during long periods of non-use. Always remove exhausted batteries from the Battery leakage and corrosion can damage this product. Dispose of batteries safely.
- Never short circuit the battery terminals
Parts List
| No. | Name | Quantity (unit: pcs) | Remarks |
| Double drive | Four drive | ||
| 1 | Windshield | 1 | |
| 2 | Seat | 1 | |
| 3 | Steering Wheel | 1 | |
| 4 | Reflector | 2 | |
| 5 | Wheel | 4 | |
| 6 | Wheel Hub | 4 | |
| 7 | Remote Control | 1 | |
| 8 | Charger | 1 | |
| 9 | Sleeve Wrench | 2 |
|
Parts |
|||
| A | 0 12gasket | 2–4 | spare |
| B | M10 nut | 4–5 | spare |
| C | M4x12screw | 2–4 | install on the seat. |
| D | M5 screw | 1 | install on steering rods |
| E | M5 nut | 1 | install on steering rods |
| F | 0 10 gasket | 2 |
※Assembly Tools Required:
Parts Diagram
NOTE: Some parts shown are assembled on both sides of the vehicle
Safety
PREVENT INJURIES AND DEATHS:
- NEVER LEAVE THE CHILD UNATTENDED. ADULT DIRECT SUPERVISION IS Always keep the child in view when a child is in the vehicle.
- This toy should be used with caution since skill is required to avoid falls or collisions causing injury to the user or third parties.
- Protective equipment should be worn.
- Never use in roadways, near cars, on or near steep inclines or steps, swimming pools, or other bodies of water.
- Always wear shoes, always sit on the seat.
- Not to be used in traffic.
- This toy is unsuitable for children under 36 months due to its maximum speed; Maximum user weight is 35 kgs.
- This toy has no brake.
WARNING
- CHOKING HAZARD! NOT suitable for children under 37 months.
- ADULT ASSEMBLY REQUIRED.
Rules for Safe Riding
- Keep children within Safe Riding Areas:Never use in the roadway near motor vehicles, on lawn space, on or near steep inclines or steps swimming pools, or other bodies of water;
- Use the toy only on flat surfaces. Such as inside your house, garden, or playground.
- Never use in the dark. A child could encounter unexpected obstacles and have an Operate the vehicle only in the daytime or in a well-lit area.
- It is prohibited to change the circuit or add other electric parts
- Inspect wires and connections of the vehicle periodically.
- Do not let any child touch the wheels or be near them when the car is moving.
- This vehicle has adjustable play seat belts. Please instruct children how to tie the safety belt before using it; guarantee security.
Operation Instruction
Install front and rear driving wheel
Turn the car back up
- Fixed with M4*12 flat head screws as shown in the same way to install the other side.
- Put an ø 12 gasket into the front axle.
- Install a front wheel.
- Put another ø 10 gaskets.
- Use a wrench to fix the M10 nut.
- Install the wheel hub.Use the same way to install the wheel on the other side
- Put the driving wheel on the rear axle.
- Put an ø 10 gasket into the rear axle.
- Use a wrench to fix the driving wheel with a screw.
- Install the wheel hub.Use the same way to install the wheel on the other side.
Operation Instruction
Install steering wheel,windshield and reflector
Turn the car back up
- Connect the Music plug-in on the steering wheel to the Music plug-in next to the steering bar, and then put the plug-in into the hole on the lower side of the steering rod.
- Install the steering wheel to the end of the steering rod(distinguish between steering wheel).
- Aim at the hole on the steering wheel and the hole on the direction bar and insert the M5*45 screws.
- Twist the M5 nut on the other side.
- Clip the left and right reflectors into the clamping groove on the sides of the car body.
- Clip the windshield into the hole of the car body.
Install the seat and connect the cattery
- Find out the main power cord and insert the plug-in into the corresponding socket of the receiver.
- Fixed in the corresponding buckle groove
- Fixed the seat with M4*12 screw
Function
- Pedal button: Step on the button, the car will move when release, the car slowly stop
- Shift Switch: Change the direction of the car, Forward-Backward
- Sound /music button: Press it for sounds or music playing
- Control board

- Power button: Long Press it 3 seconds, Turn the vehicle on and off
- Bluetooth Speaker: Content the mobile phones and Bluetooth, then the car can play the music
- FM: Radio
- Music Button: play music
- Last song: Switch songs, long press will decrease volume
- High-speed button: change the speed of the car more quickly
- Slow speed button: change the speed of the car more slowly
- Light button: Turn on or off the light
- Next song: Switch songs, long press will increase
- USB
- Socket: charge
- Power display: Clearly see the battery power, in order to charge in time
![]() BATTERY WARNING!
BATTERY WARNING!
- Nonrechargeable batteries can not be charged.
- Only an adult can charge and recharge the battery.
- Different types of batteries can not be mixed.
- The battery needs put in the right polarity.
- The exhausted battery should be removed from the toy.
- Power terminals must not be short-circuited.
- Do not provide dry batteries.
Use The Remote Controller
WARNING!Only allow an adult to use remote control, can not let the children touch
Operation Manual: For the first time to use (Or Replace the battery)Need to frequently bind
- Take out the remote control, lift the battery compartment door on the back of the controller and insert two AAA batteries. install the battery
- Long press on the frequency key 2-4 seconds, Low speed LED light flashing
- Turn on the power of the car, Low speed LED light keep flashing to long lighting, then frequency bind succeeds
- If the frequency bind failed (Low speed LED light flashing), remove the battery and repeat steps 1–3
- remote control without operation after 10 seconds, indication light will off into power-saving mode
- Button Description: forward backward turn left turn right S: Speed, P: emergency brake, Press it and the running function will fail, press again, it release
NOTE: non-rechargeable batteries are not to be recharged different types of batteries or new and used batteries are not to be mixed batteries are to be inserted with the correct polarity exhausted batteries are to be removed from the toy the supply terminals are not to be short-circuited
Charge&Pull Handle
![]()
- Insert the charger jack into the charging hole of the car.
- The charger is inserted into a stable matching AC power supply. (charging jack location on the dashboard).ATTENTION: Only an adult can charge and recharge the battery!
![]()
How to use the pull handle
- Rotate the support wheels out.
- Rotate the pull handle out.
- You can move the vehicle by pulling.
Charging
Only an adult can charge and recharge the battery!When replacing a replaceable battery, first open the lid and take out the old battery. Put in the new battery, payattention to the positive and negative poles, cover the lid.Rechargeable batteries are to be removed from the toy before being charged.Owning charge protection function; all functions of the vehicle are not available when charging.
warning!
PREVENT FIRE AID ELECTRIC SHOCK:
– Use the only rechargeable battery and charger supplied with your vehicle. NEVER substitute the battery or charger with another brand. Using another battery or charger my cause a fire or explosion.
– Do not use the battery or charger for any other product. Overheating, fire or explosion could occur.
– NEVER modify the electric circuit system.. Tampering with the electric system may cause a shock, fire or explosion or my permanently damage the system.
– Do not allow direct contact between battery terminals. Fire or explosion can occur.
– Do not allow any type of liquid on the batter or its components.
– Explosive gasses are created during charging. Do not charge near or
Flammable materials.
-charge the battery in a well-ventilated area only.
- DO NOT TURN ON THE BATTERY AND CHARGER.
NO NOT TURN THE BATTERY BACK UP.
- Check the charger. battery art plug before charging. If any damage is found. stop using the charger until it is
- Battery heating during charging is normal but when the temperature is too high it should be time to check whether the charging current is too large or whether the battery is short-circuit
- The battery’s rust is fixed with a pressure plate. If the car turns the battery will probably hurt children if it falls out
- Do not allow the battery to drain recharge the battery after each use or once a month of not being used regularly
- Charger and battery are not toys. Children are not all laved to play.
- Before the first use, you should charge the battery for 4-6 hours. Do not recharge the battery for more than 10 hours to avoid overheating the charger.
- When the vehicle begins to run slowly, recharge the battery.
- After each use or once a month minimum recharge times as 8 to 12 hours, less than 20 hours at most.
Battery Replacement
FUSEThis product is equipped with a self-reset fuse, when overloaded or improper use, the self-reset fuse will automatically cut off the power supply for 15-20 seconds, and then restart. The self reset fuse of the car is installed under the seat.TO avoid losing power, follow these guidelines:
- Do not overload the vehicle, maximum 35KGS.
- Do not tow anything behind the Vehicle.
- Do not allow water or other liquid to come in contact with the battery or other electric components.
- Do not tamper with the electric system. Replacements must be conducted by professionals or under the guidance of technicians.
BATTERY REPLACEMENT AND DISPOSAL
- Check the charger’s wires, plugs, housing, and other components before use. Stop using the charger when damage is found until it is repaired.
- After a period of time, lubricate the parts of the vehicle with a small amount of lubricating oil to prevent wear and rust.
- Vehicles should be placed far away from fire sources and avoid long-term illumination. Keep it flat and facing upwards, not upside down or tilted; in wet weather, parked indoors or covered with waterproof cloth.
- Vehicles should be kept away from hot objects such as stoves and heaters. Plastic parts may melt. When charging, keep away from inflammable materials to prevent fire.
- After use, please charge in time, charging must be adult operation. If you don’t have to charge the battery for a long time, then charge it at least once a month to extend the battery life.
- Wipe the vehicle with a dry soft cloth. Non-waxy furniture polishing material can also be used instead of soft cloth to wipe plastic parts to achieve surface finish effect. Do not use chemical solvents to wipe the plastic parts of toys. Do not use soap and water to clean vehicles.Do not drive in rainy or snowy weather. Water can damage motors, electrical systems, and batteries.
- When you stop using or placing the product, please cut off the power supply of the product and dial all switches to the stop or close position.
- Please do not use a fuse that is not in conformity with the specifications of this product.Do not alter the structure and circuit system of the product without authorization. Maintenance work must be carried out under the guidance of professional or technical personnel.
Troubleshooting Guide
|
Checkpoint |
Elimination method |
|
| 1. Is the fun of the vehicle disconnected?2. Does the footswitch contact well?3. Is the welding line on the motor terminal good?4. Is the connector of the motor lead properly connected?5. Is it turning the Disconnect the plug-in of the motor and directly connect it to the battery? | Yes, out of the per for 15-20 seconds and then restart No, nextNO, fix the footswitch; Yes, nextNO, Weld the terminal wire well; Yes, next No, Plugin plug-ins; Yes, next 140, Changemotor; Yes, Driving circuit boards to need professional maintenance. contact agents or distributors | |
| 1. Check whether the battery voltage is normal.
ll2. Wi I the motor (Gearbox) directly correct to the battery and speed up? |
N), charge; yes, next Yes, Orivecircuitboard failure. contact agent order ler | |
| 1. Is the battery plug-in lost?2. Does the charger fee any s I right heat when charging? | Yes, Lock battery plugin; No, nextNo, Maybe the charger is broken. Replace the charger | |
| Driving. no soundand light | 1. Is the acoustooptic switch good? 2. Check whether the line and plug-ins from the battery to the vehicle are good. | No, change button; Yes, nextNo, p I ug I n the p I ug– in and connect the broken I i ne |
| Wheels do not move. | 1. Is the drive rotating?
 report this ad report this ad2. Check the gearbox. gear at all levels is damaged. |
Yes, Land the wheel; No, nextYes, Change a new gearbox |
| The vehicle is moving. i t stop. | 1. Does the rider weigh more than 35 kilograms? ing2. Is it drive in terrain?3. Check that the horizontal wheel can turn itself? | Yes, normal; No. nextYes, normal; The vehicle should run on the cement road No, nextNo, remove wheel and wheel fault |
| Remote controlvehicles do notrespond | 1. Does the brake function start?2. Is remote control electrified?3. Is the receiver wiring harness lost? | Yes, Press the brake key to relieve the brake function; No,normalYes,try again; No,Check whether the battery is out of power and whether the installation is in place.Yes,remove the row, reinstall;No,normal |
The above troubleshooting method, when the user is not available, please contact agents or distributors.
- This product is only suitable for sale and use in the Chinese market.
- The illustrations used in this specification are intended to illustrate the operation method and product structure of the product. If there is a small difference between thephysical object and the illustrations, the physical object shall prevail.
- In order to improve the quality of the product, we may change part of the structure and appearance of the product without notice. Please understand.
- The packaging contains important information and must be kept.
References
[xyz-ips snippet=”download-snippet”]