![]()
![]()
![]() QUICK START GUIDE AND INSTRUCTIONS
QUICK START GUIDE AND INSTRUCTIONS
See full instructions for a complete setup.
 |
 |
 |
 |
 |
 |
 |
|
|
|
|
 |
|
 |
Thank you for purchasing the Wahoo KICKR!
LEARN MORE:For instructional videos, compatible apps, FAQs, or to submit a support request please visit: www.wahoofitness.com/support
| PLEASE CONTACT US WITH QUESTIONS OR CONCERNS AT: | TELEPHONE: |
| Wahoo Fitness90 W. Wieuca Rd NESuite 110Atlanta, GA 30342 United States | United States: 1-877-978-1112Germany: +49-30-568-373827United Kingdom: +44-800-808-5773Phone Hours: Monday – Friday10 am-7 pm Eastern Time Zone |
UNPACKING
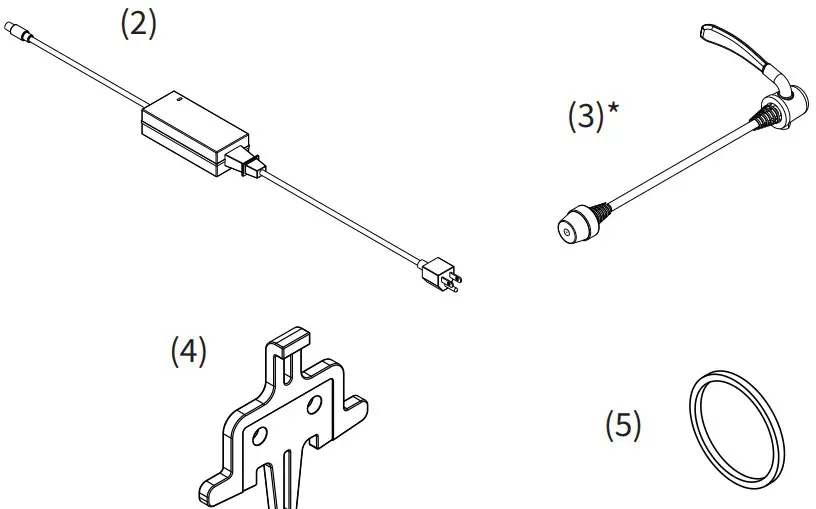
| (1) KICKR(2) AC Power Adapter(3) Quick Release Skewer(4) Disc Brake Caliper Spacer(5) 1.8mm Spacer(6) Adapter A – For 130mm and 135mmQuick Release | (7) Adapter B – Reversible hub spacer for 130mm and 135mm Quick Release(8) Adapter C – For 12×142 and 12×148 Thru Axle(9) Adapter D – Reversible hub spacer for 12×142 and 12×148 Thru Axle |
* These items come preinstalled on the KICKR
(P) PROTIP: Save all packaging and protective material for transportation and storage.
CAUTION!
|
|
KICKR SETUP
 |
 |
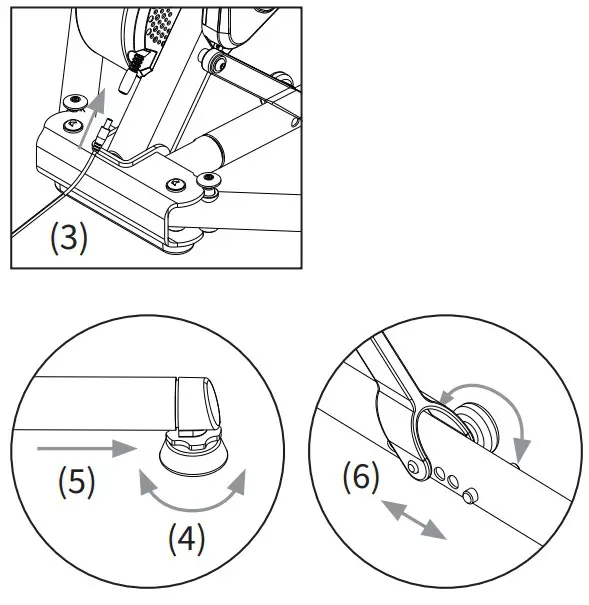 |
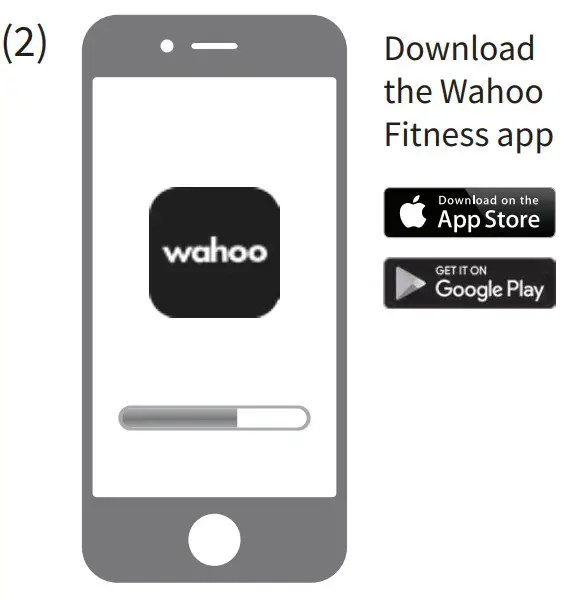
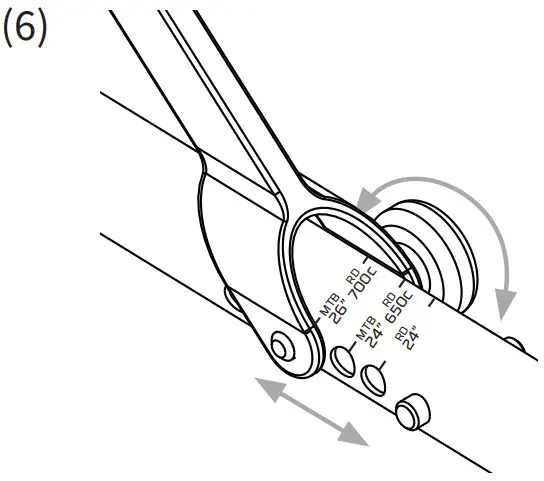
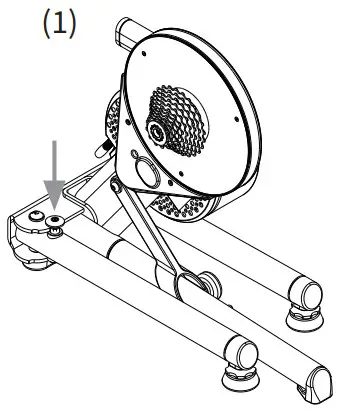
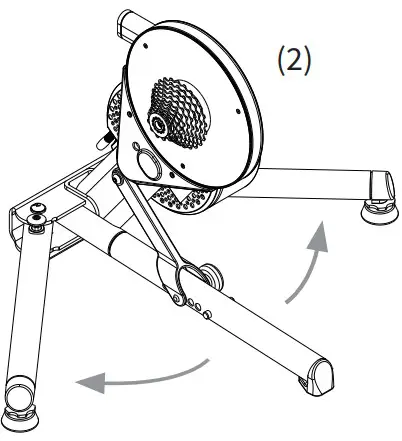
![]() Download the Wahoo Fitness app for free from the Apple App Store or from the Android Google Play Store. Place your KICKR on a stable, level surface and open the legs by (1) pressing down on the blue leg-lock tabs and (2) pivoting the legs outward until they snap in place.(NOTE: Ensure the leg-lock tabs have popped back up and secured the legs in an open position.) (3) Use the included AC power adapter to connect the trainer to a standardwall outlet.Follow the in-app setup guide to complete your profile and to pair sensors.To stabilize the trainer, adjust the two leveling feet (4) by twisting them left or right until the trainer is level and (5) lock them into place by tightening the blue locknuts against the KICKR leg frame.(NOTE: Check that your trainer is stable before every ride; if needed re-adjust the leveling feet.)Adjust the height of the trainer to fit your specific wheel size by (6) relocating the height adjustment knob on the center leg to the appropriate setting. If you are unsure of your wheel size, check the tire sidewall or consult your local bike shop.
Download the Wahoo Fitness app for free from the Apple App Store or from the Android Google Play Store. Place your KICKR on a stable, level surface and open the legs by (1) pressing down on the blue leg-lock tabs and (2) pivoting the legs outward until they snap in place.(NOTE: Ensure the leg-lock tabs have popped back up and secured the legs in an open position.) (3) Use the included AC power adapter to connect the trainer to a standardwall outlet.Follow the in-app setup guide to complete your profile and to pair sensors.To stabilize the trainer, adjust the two leveling feet (4) by twisting them left or right until the trainer is level and (5) lock them into place by tightening the blue locknuts against the KICKR leg frame.(NOTE: Check that your trainer is stable before every ride; if needed re-adjust the leveling feet.)Adjust the height of the trainer to fit your specific wheel size by (6) relocating the height adjustment knob on the center leg to the appropriate setting. If you are unsure of your wheel size, check the tire sidewall or consult your local bike shop.
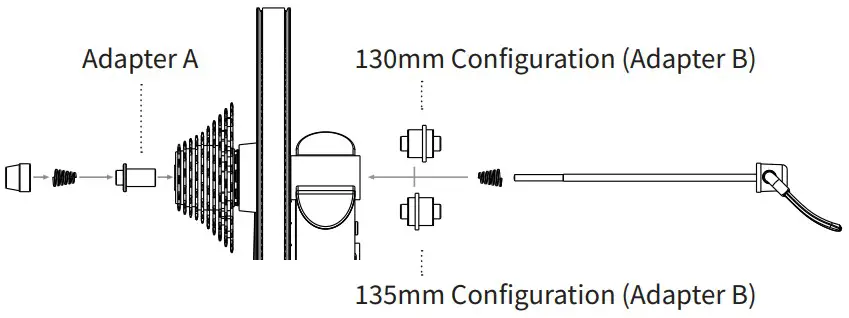
FOR 130MM OR 135MM QUICK RELEASEAdapters Needed: A and BKICKR comes pre-configured out of the box for bicycles with 130mm quick-release spacing. If you have a bicycle with 130mm spacing proceed to “Attaching your Bicycle”. For 135mm spacing, remove quick-release skewer, reverse Adapter B, and reinstall quick-release skewer.
 FOR 142MM OR 148MM THRU-AXLEAdapters Needed: C and DTo be used with the 12mm thru-axle supplied with a bicycle.
ATTACHING YOUR BICYCLEShift your bicycle chain into the smallest sprocket in the front and rear, then remove your rear wheel. Install your bicycle on the KICKR by aligning the chain with the smallest sprocket on the KICKR and pressing down to fully seat the dropouts on the KICKR’s axle.
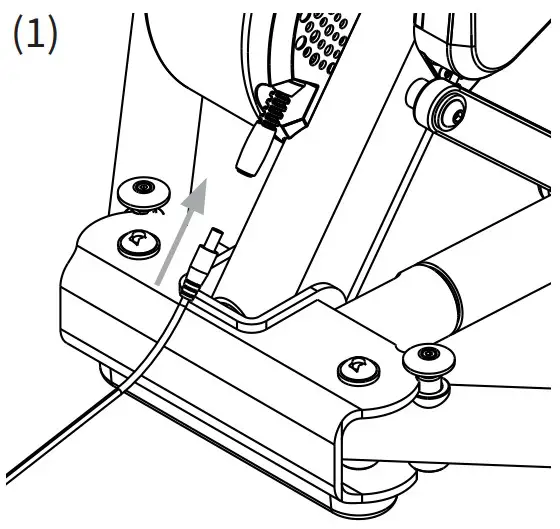
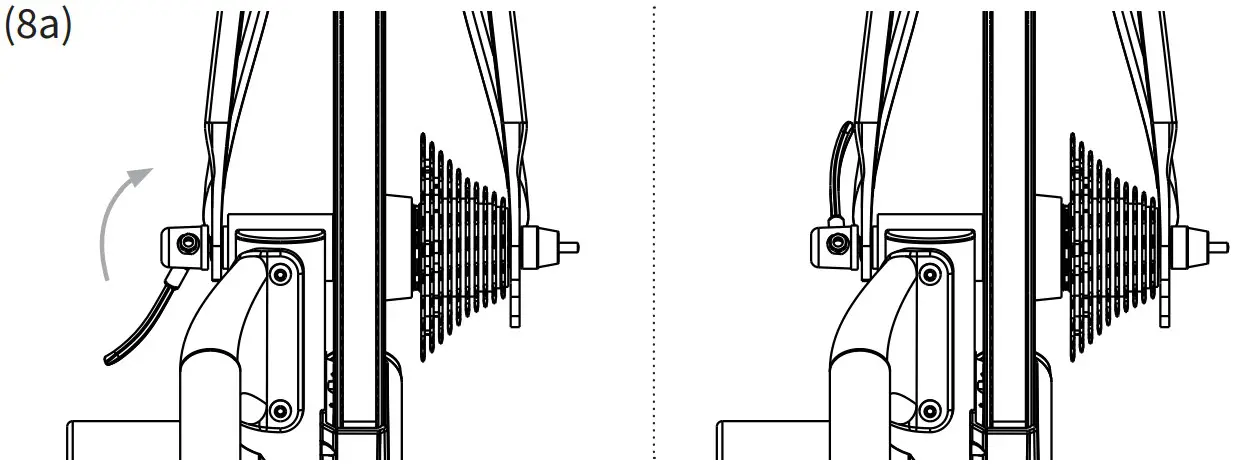
For bicycles with quick-release – Secure your bicycle by tightening the quick-release acorn nut and clamping the quick-release lever shut. The quick-release lever is “open” when it curves away from the bicycle frame (1); the lever is “closed” when it curves towards the bicycle frame (2). The handle of the quick release skewer is always on the non-drive (noncassette) side of the KICKR. Only use the provided quick release skewer while using the KICKR.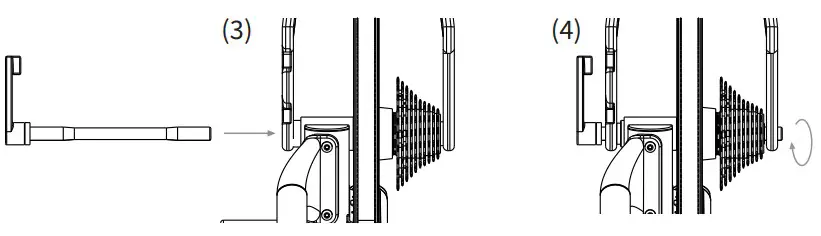 For bicycles with thru-axle –Secure your bicycle by reinstalling your bicycle’s thru-axle (3) and tightening to manufacturer specifications (4).
CAUTION! Failure to properly tighten the quick release skewer or thru-axle may result in property damage or personal injury. If you are unsure of the proper tension, please consult your local bike shop or contact Wahoo Fitness for assistance. Do NOT ride the KICKR until the quick release skewer or thru-axle is tightened.
(P) PROTIP: Lift the front wheel up while pressing down on the saddle to ensure the bicycle is fully seated on the trainer.
COMPLETE YOUR SETUP USING THE WAHOO FITNESS APP
SPINDOWN: Before using the KICKR for the first time you should perform a spindown to calibrate your device. Additionally, a spindown should be repeated approximatelyevery 2 weeks through the Wahoo Fitness App to ensure the most accurate power data.START A WORKOUT:From the workout, the screen selects the green “Start” button to begin the workout. Swipe right to view the KICKR page. This page enables you to view your workout and control the KICKR.KICKR WORKOUT MODES:The Wahoo Fitness App has the following workout modes that you can use to control your KICKR:
| LEVEL: Just like riding on a fluid orwind trainer, the faster you go, the harder it gets. The level you select determines theprogression of your power curve. | RESISTANCE: This allows you to set the resistance of the brake anywhere from 0 to 100%. Regardless of speed, the brakewill remain set until you decide to change it. | ERG: Set your desired power, the KICKR will increase or decrease the resistance to maintain a constant power output, regardless of speed. | SIM: Enter your weight, bike type, riding position, headwind, and grade and the KICKR will accurately model the power curve just as if you were riding outdoors. |
COMPATIBILITY
From your phone, tablet, or laptop to your bike computer, heart rate monitor, or bike sensors, KICKR Smart Trainers offer the widest range of compatibility and connectivity.
- iOS must be running version 8 or newer
- Android 4.3 or newer and BLE enabled
- Mac requires ANT+ USB Stick or BLE enabled
- Windows PC when paired with ANT+ USB Stick or BLE enabled
 report this ad
For a full list of KICKR compatible apps visit:www.wahoofitness.com/fitness-apps#kickr!
References
[xyz-ips snippet=”download-snippet”]