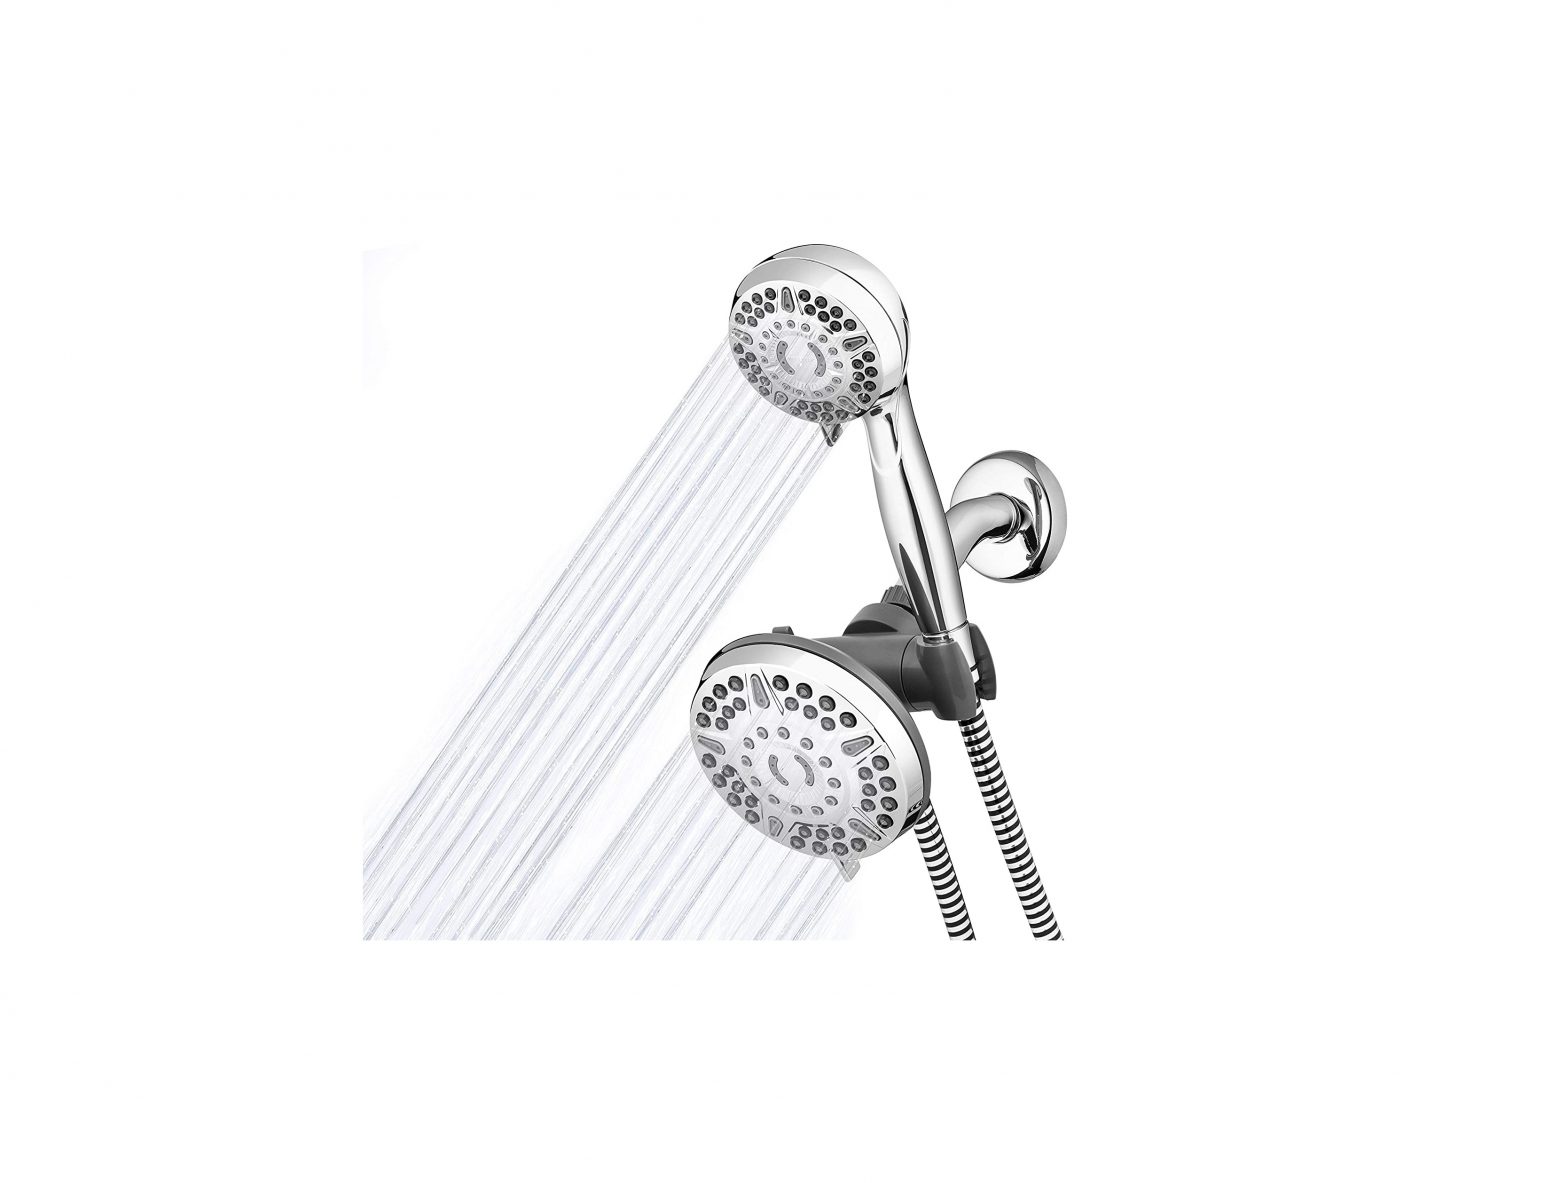
Waterpik High Pressure Shower Head Handheld Spray Instruction Manual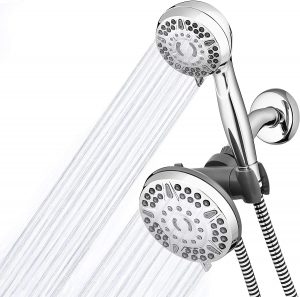
To begin your Waterpik® shower experience we want to give you all of the proper information to make installation easy and quick. This way you are that much closer to enjoying an invigorating shower with your new shower head.You can access more products and information on your product at www.waterpik.com.Note: Pictures shown may not directly match your shower head.
PRIOR TO INSTALLATION
- Write down your model number in the allotted space above. (Model number is found on the packaging near barcode.)If you do not have the package you may find the model number on our website www.waterpik.com.
- Remove old shower head and remove all pipe tape as well.
- Ensure that the washer from the old shower is not connected to the pipe. Use a thin utensil to check inside the pipe for washers, such as a pencil or screw driver. Do not use your fingers.
- Gather the tools necessary to install your new shower head.
 OR
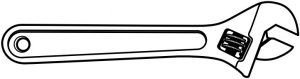
OR 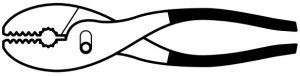 Adjustable Wrench or Pliers (not included)
 Pipe tape is not recommended.
INSTALLATION
Hand Held Shower Head
 Type A Shower Head Bracket Type B Shower Head Bracket
 Type C Shower Head Bracket
Type A or B Bracket:
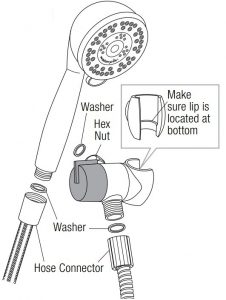
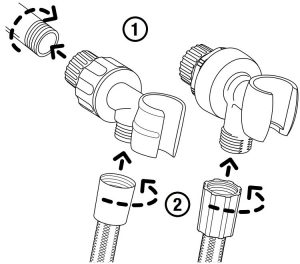
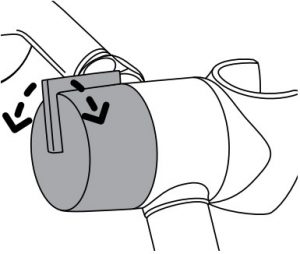
- Tighten pivot ball to pipe. Ensure large nut is secure by hand tightening.

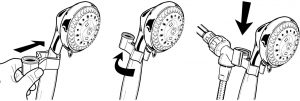
- Type A or B Bracket:If your hose has a ridged connector, connect the ridged connector to the bracket and hand tighten. (See note below).
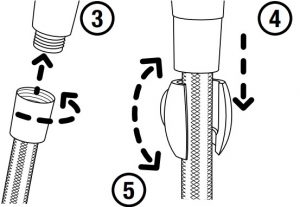
- Type A: Connect other end of hose to hand held shower head and hand tighten.Type B: Connect the other end with the rubber ring to the hand held shower head and hand-tighten.
- Place hand held shower head in bracket.
 Type B: Connect the other end with the rubber ring to the hand held shower head and hand-tighten.
Type C Bracket:
- Tighten hex nut to pipe using necessary tools. Do not over tighten.
- Connect the ridged end of the hose to the bracket and hand tighten.
- Connect the other end with the rubber ring to the hand held shower head and hand-tighten.
- Place handheld shower in the bracket.
- Rotate bracket forward or back to adjust the spray angle.

Note: Several U.S. state and local municipal plumbing codes require the use of a backflow prevention device when installing a hand shower. This device is termed a vacuum breaker. If your hand shower includes a vacuum breaker it will be located in the hose, and the hose end with the vacuum breaker will include a sticker that reads “attach this vacuum breaker end to shower bracket.” If the hose is not installed in this manner, water will not flow. If your hand shower does not include a vacuum breaker, and you would like to obtain one free of charge, please contact us at 1-800-525-2774 (U.S. calls only) and request part number 20009558.
OPERATION
Spray Selector:
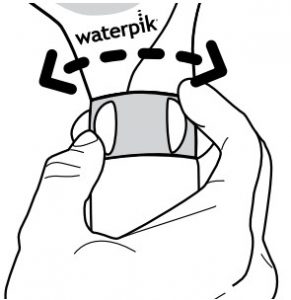
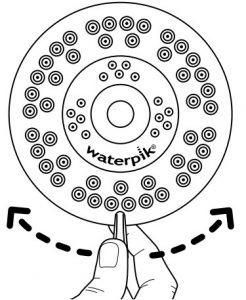 Spray Selector allows you to select from various spray patterns. On some models spray pattern is controlled by the small lever that rotates left and right. Some models do not have a small lever. Rotate the trim ring around the face of the shower head to change settings.
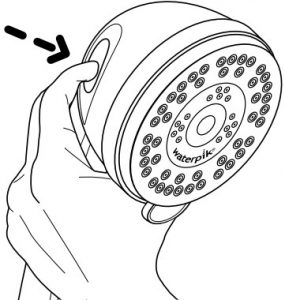
EasySelect® Spray Selector (some models):
 On some models spray pattern is controlled by a rotating ring on the handle. Rotate selector in either direction to control pattern.
SPECIAL FEATURES FOR SELECT MODELS
Water Saving Trickle Setting (some models):To use the water saving trickle, simply push the toggle switch on the back of the shower head. This will reduce water flow to approximately 0.5 gallons per minute. To return to original setting, push toggle on other side of shower head.
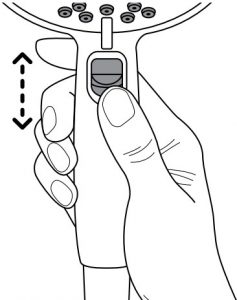
Pause in Handle (Some Models):Some models have a water saving flow control that allows you to control water flow from full power to a water saving trickle. This flow control is located on the handle.
Sliding Switch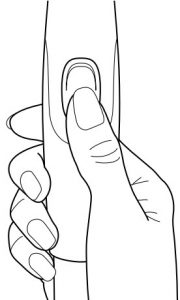 Push ButtonNote: This pause button will not shut off water flow completely. A small amount of continuous water flow is necessary to meet plumbing code requirements. The ASME A112.18.1 standard is the official regulation used by the U.S. Dept. of Energy and plumbing code and states that a flow control device shall not completely shut off the flow of water downstream of the primary shut-off valve when fitted to, or integral with, a shower head or hand-held shower.
Hybrid Power Dial (some models):Move dial left and right to customize any spray setting. Select from full power to an eco power to conserve water.
Extension Clip (some models):If, following installation, the position of the shower head is too high, you may install the included extension clip.
Slide the clip onto the shower head from the side. Rotate the clip 90 degrees so that it extends off the rear of the shower head. Slide the clip into the bracket.
WARNINGS:
- To avoid hot water dangers and conserve even more energy, make sure your water heater is set at 120°F (48.9°C) or below.
- Test the tub/shower water with your hand before bathing.
- For additional safety for Ecoflow® or high efficiency shower heads, it is recommended that all homes have installed a pressure balance tub and shower valve with the rotational limit stops properly set by a plumber. If you are unsure of your valve type consult your plumber.
- For external use only. The potentially deadly amoeba, Naegleria fowleri, may be present in some tap water or unchlorinated well water.
- Always ensure the handheld shower head is properly placed in the bracket, so as to prevent the shower head from falling.
- Do not pull on or tug the flexible hose. This may result in the shower head coming loose and falling.
CARE AND CLEANING
- To maintain proper working conditions cleaning is required when mineral deposits appear on the spray orifices. To clean mineral deposits, gently rub the rubber nozzles on the face of the shower head to dislodge.
- To clean heavier deposits, remove shower head and soak face down in 1-2 cups of white vinegar (use white vinegar only) for about 2-3 hours. Replace shower head and run in each mode to flush out vinegar. Repeat as necessary.
- Do not clean or rinse any part with harsh chemicals, heavy duty cleaners, or abrasives; this may damage parts or finish and will void warranty.
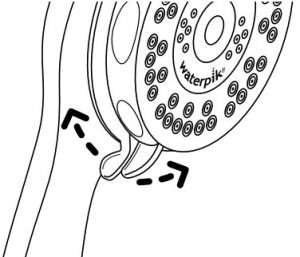
- Clean filter screen by unscrewing from the pivot ball and rinse by back flushing to remove particles. Follow steps 1-3 under installation to reinstall shower head, making sure washer is re-seated on top of filter screen.
TROUBLESHOOTING GUIDE
| Problem |
Solution |
| No water flow from installed shower head. |
|
| Low water pressure or missing spray patterns. |
|
| Leaking at pipe/pivot ball connection. |
|
| Bracket is too stiff to change angle. |
|
LIMITED LIFETIME WARRANTY
Save your receipt as proof of purchase is required for warranty action. Water Pik, Inc. warrants to the original purchaser of this product that it is free from defects in material and workmanship for as long as the original purchaser owns this product. Water Pik, Inc. will replace any part of the product which in our opinion is defective, provided that the product has not been abused, misused, altered or damaged after purchase. (This includes damage due to use of tools or harsh chemicals.) In the event an item has been discontinued we will replace with what we deem to be the closest product. Water Pik, Inc. is not responsible for labor charges, installation, or other consequential cost. The responsibility of Water Pik, Inc. shall not exceed the original purchase price of the product. This warranty gives you specific legal rights. You may also have other rights that vary where you reside.
Have any questions or need assistance?For quick service prior to calling have your model number and receipt ready.
In the U.S., call our toll-free Customer Assistance Line1-800-525-2774.
In Canada, call our toll-free Customer Assistance Line1-888-226-3042.
Outside the U.S., write us at Water Pik, Inc.1730 East Prospect Road Fort Collins, CO 80553-0001 U.S.Awww.waterpik.com
If product malfunctions or becomes damaged, stop use and contact Water Pik, Inc. for replacement.
Waterpik ® is a trademark of Water Pik, Inc. registered in Argentina, Australia, Austria, Benelux, Canada, Chile, China, Czech Republic, EU, Finland, France, Germany, Hong Kong, Hungary, India, Israel, Italy, Japan, Kazakhstan, Korea, Mexico, Norway, Poland, Russian Federation, South Africa, Spain, Sweden, Switzerland, Taiwan, Turkey, Ukraine, and the United States.
Waterpik ® (stylized) is a trademark of Water Pik, Inc. registered in Australia, Canada, China, EU, Hong Kong, India, Israel, Japan, Korea, Mexico, Russian Federation, Switzerland, Taiwan and the United States.
EcoFlow ® is a trademark of Water Pik, Inc. registered in Australia, Canada, China, EU, Hong Kong, Mexico, and the United States.
Optiflow ® is a trademark of Water Pik, Inc. registered in Australia, Canada, China, EU, Hong Kong, India, Japan, Korea, Mexico, Taiwan, and the United States.
EasySelect ® is a trademark of Water Pik, Inc. registered in Australia, Canada, China, EU, Mexico, Taiwan and the United States.
Shower Massage ® is a trademark of Water Pik, Inc. registered in Canada.The Original Shower Massage ® is a trademark of Water Pik, Inc. registered in the United States.Treat Yourself Better ® is a trademark of Water Pik, Inc. registered in the United States. The Plus is in the Power® is a trademark of Water Pik, Inc. registered in Canada, Mexico and the United States.A Powerful and Invigorating Experience ® is a trademark of Water Pik, Inc. registered in Canada, Mexico and the United States.© 2017 Water Pik, Inc. Printed in China.
Waterpik
Water Pik, Inc.1730 East Prospect RoadFort Collins CO 80553-0001 U.S.A.www.waterpik.com
References
[xyz-ips snippet=”download-snippet”]