![]() WAVESJJP DRUMSUser Guide
WAVESJJP DRUMSUser Guide
Chapter 1 – Introduction
Welcome
Thank you for choosing Waves! In order to get the most out of your new Waves plugin, please take a moment to read this user guide.To install software and manage your licenses, you need to have a free Waves account.Sign up at www.waves.com. With a Waves account, you can keep track of your products, renew your Waves Update Plan, participate in bonus programs, and keep upto date with important information.We suggest that you become familiar with the Waves Support pages: www.waves.com/support. There are technical articles about installation, troubleshooting, specifications, and more. Plus, you’ll find company contact information and Waves Support news.
Product Overview
The Waves Signature Series is our exclusive line of application-specific audio processors, created in collaboration with the world’s top producers, engineers, and mixing engineers. Every Signature Series plug-in has been precision-crafted to capture the artist’s distinct sound and production style. For experienced and aspiring audio professionals alike, the Waves Signature Series allows you to dial up the sound you’re looking for quickly, without interrupting the creative flow.The JJP Collection consists of 6 plug-ins, each designed to handle a specific mixing task.
- JJP Vocals
- JJP Drums
- JJP Bass
- JJP Guitars
- JJP Cymbals & Percussion
- JJP Strings & Keys
Components
WaveShell technology enables us to split Waves processors into smaller plug-ins, which we call components. Having a choice of components for a particular processor gives you the flexibility to choose the configuration best suited to your material.
The Waves JJP Drums has several components:
- JJP Drums Mono – Mono into Mono out component
- JJP Drums m>s – Mono into Stereo out component
- JJP Drums Stereo – Stereo into Stereo out component
Please note: In order to maximize performance while optimizing the correct processing for different applications, we split the drums into two separate plug-ins:
- JJP Drums for kicks, snares, and toms
- JJP Cymbals & Percussion, for hi-hats, overheads, room, and loops
A Few Words from JJP
“There are certain things you usually just take for granted when you’re mixing drums.Sure, the snare has to snap. Or maybe you want it to have a woodier sound. The bass drum has to have a nice bottom. But beyond that, there’s a whole other range of things you need to consider to really make the song come alive. Maybe there’s some tonality in the drum kit that you want to emphasize. How do the drums relate to the rest of the song? And once you figure all that out—how do you get there? Well, what’s really great is, JJP Drums is a plug-in that can do it all.”
Chapter 2 – Quickstart Guide
- Insert the JJP Drums plug-in on the track you wish to process.
- Choose the Drum Type:
KICK IN – For main kick/bass drum tracks.KICK OUT– If your kick was recorded using two microphones, used them for the mic positioned further away from the drum.SNR TOP – For main snare track. If your snare was recorded using two microphones, use this to process the top mic.SNR BOT – If your snare was recorded using two microphones, use this to process the bottom mic.TOMS – For both mounted and floor toms.
- Adjust the Sensitivity control until you achieve proper (yellow) levels, as indicated by the Sensitivity LED.
- Adjust the various Main Section controls located below the Sensitivity knob to shape your sound.
- Use the Center Section faders to adjust the sonic color.
- If the Clip LED lights up repeatedly or stays lit, lower the Output level fader accordingly.
JJP has optimized the default settings for each Type. These settings may or may not require additional adjustment once optimal Sensitivity has been achieved.
Chapter 3 – Controls, Concepts, and Terminology
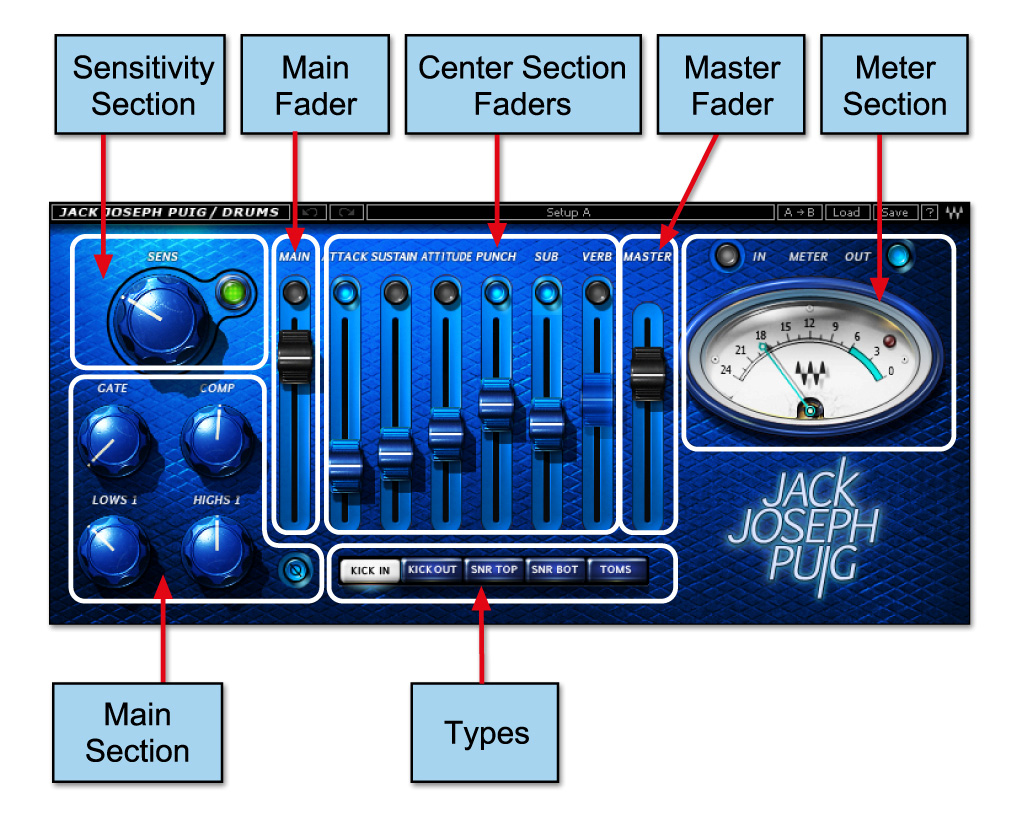
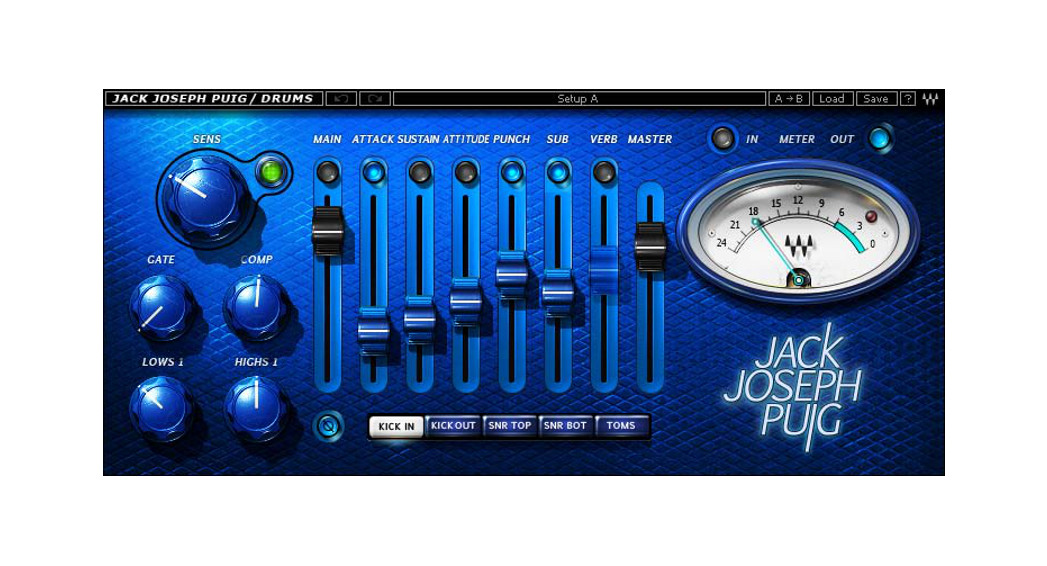
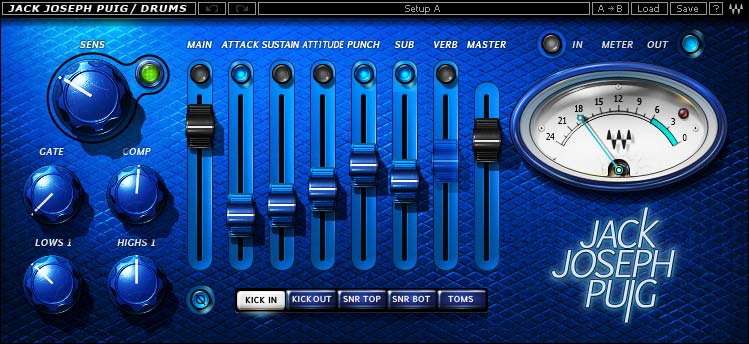
TypesThe JJP Drums plug-in includes five Types to address a range of source materials:Kick In, Kick Out, Snr Top, Snr Bot, and Toms.
Sensitivity SectionThe Sensitivity LED’s 3 colors indicate when appropriate levels are reached:
- LED Off (too low)
- Green (good)
- Yellow (optimal)
- Red (very hot)
Turn the Sensitivity Control until the LED lights up. For best results, use the section of your track with the highest peaks.In most cases, the Sensitivity LED indicates that your levels hit the processor in a way that will give you the intended output result. However, it’s important to keep in mind that optimal results for your source material may be achieved even when the Sensitivity LED does not display “optimal” levels (yellow). As always, trust your ears.
Main SectionThe Main Section gives you control over basic dynamics & EQ. All processing is influenced by this section. The JJP Drums plug-in also includes a Phase reversal switch.
Please note: Since the EQ ranges of certain drums differ from the default settings, they are labeled “Low 2” and “High 2” for automation purposes.Main Fader The Main Fader controls the Main Section direct level.
Center Section FadersThe Center Section faders represent auxiliary returns with additional processing, sent from the main fader pre-fader. Above each fader, there is a dedicated mute button.It may help to think of each plug-in as a mini-mixing console.Please note: Certain faders may change, depending on the selected Type. This is intentional and represents the actual processing JJP uses for that source or instrument.Master Fader The Master fader controls the master output signal level.Meter SectionThe Meter Switch toggles meter monitoring between input and output modes. The Clip LED lights up when levels reach 0 dBFS; click to reset.
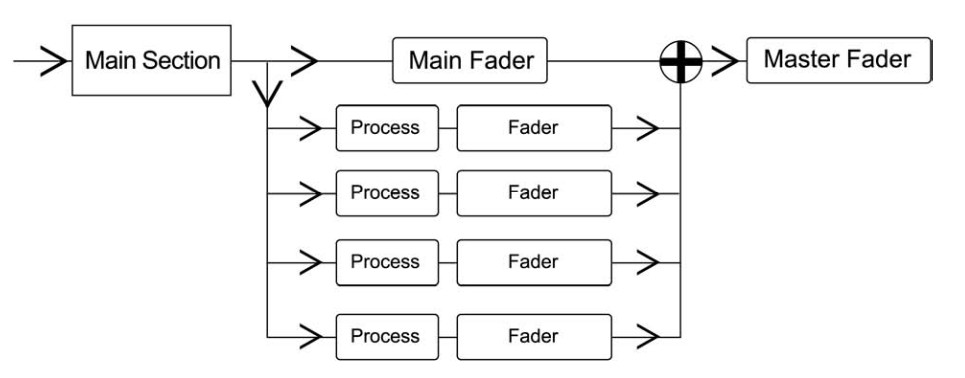
Signal Flow
 WaveSystem ToolbarUse the bar at the top of the plugin to save and load presets, compare settings, undo and redo steps, and resize the plugin. To learn more, click the icon at the upper-right corner of the window and open the WaveSystem Guide.
References
[xyz-ips snippet=”download-snippet”]