WAVESKramer HLS ChannelUser Guide
Chapter 1 – Introduction
1.1 Welcome Thank you for choosing Waves! In order to get the most out of your new Waves plugin, please take a moment to read this user guide.To install software and manage your licenses, you need to have a free Waves account. Sign up at www.waves.com. With a Waves account, you can keep track of your products, renew your Waves Update Plan, participate in bonus programs, and keep up to date with important information.We suggest that you become familiar with the Waves Support pages: www.waves.com/support. There are technical articles about installation, troubleshooting, specifications, and more. Plus, you’ll find company contact information and Waves Support news.
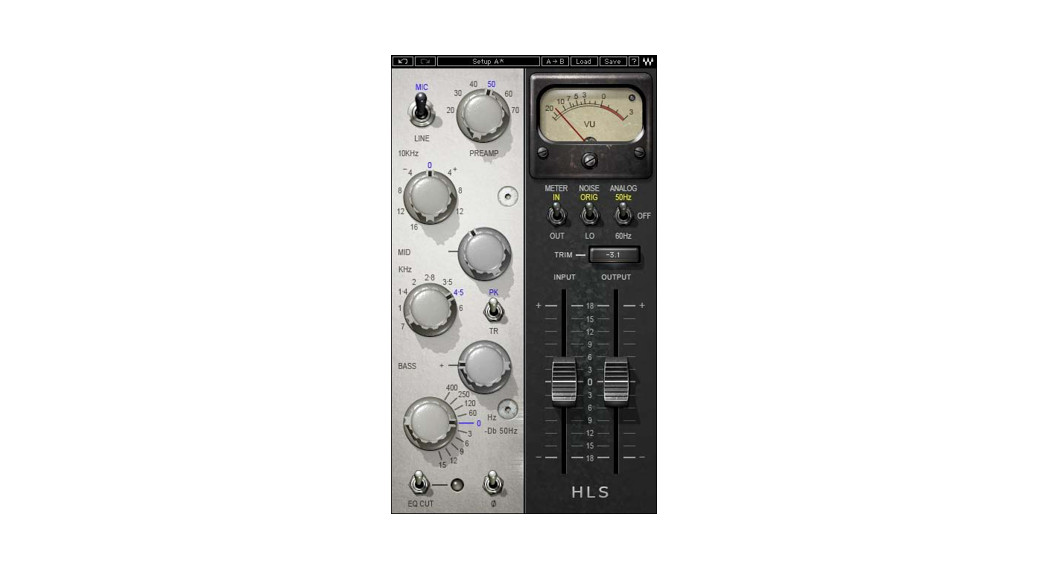
1.2 About Kramer HLS ChannelThe HLS Channel is modeled after the legendary Helios console channels, designed and built by Richard Swettenham, and used by Eddie Kramer during the late ’60s to record some of rock’s most classic tracks at London’s Olympic Studios. During the early ’60s, Swettenham worked at EMI’s Abbey Road Studios as a service/design engineer, later moving to Olympic studios, where he was asked to design and build an especially “musical” recording desk. The desk was a success and began a golden era for Olympic studios, which hosted recording sessions for such artists as Jimi Hendrix, Rolling Stones, Led Zeppelin, Traffic, and many others.
Following the success of the first Olympic desk came its successor. Both desks had silver-faced panels with 3-band EQs that had variable boost or cut for midrange frequencies, a high shelf at 10 kHz, and a special low filter that could boost at frequencies of 60Hz – 400Hz and cut at 50Hz. Their mic preamps used an especially musical transformer made by Lustraphone, a London-based consumer and pro audio equipment manufacturer.
This success of these designs drew special interest from Chris Blackwell, founder of Island Records, who wanted to base a new studio venture on Swettenham’s console designs. In order to avoid conflict with Olympic, rather than commissioning Richard Swettenham to build a console, Blackwell funded Swettenham’s going into business for himself, under the brand name Helios. Under the Helios brand, Swettenham continued to produce custom-made recording desks for various studios using Olympic-style EQ’s, with Beyer transformers replacing Lustraphone’s and other small variations.
Swettenham’s channels shared many basic features, but were essentially custom-built to order, with some user-driven changes. Since the original Olympic desks have gone through several restorations jobs and lost the original transformers, Waves called upon Eddie Kramer, the engineer at Olympic during its heyday. Kramer helped us find the Helios channel that best characterized the sound of the classic rock recordings we all know and love. Eventually, we chose the first desk revision from the Rolling Stones mobile truck, courtesy of Mr. David Kean and the Audities Foundation. Thanks to them, we were able to model original channels that were in the truck from 1970 – 1973, when the console was redone by Helios according to specs from engineer Mick McKenna. Our long, arduous search for the perfect Olympic-style channel reflects the rarity of the original units, and we are truly excited and proud to present the Helios sound for posterity, and for the creative use of generations to come.
1.3 About the ModelingMany different elements contribute to the unique sonic characteristics of analog gear such as the Helios mixing console. Waves painstakingly modeled and incorporated these elements into the Kramer HLS Channel, in order to fully capture and replicate the sound and performance of the original equipment. In addition to modeling the Helios EQs, we also modeled the unique behavior, coloration, and drive of the console’s preamps.These are some of the most important elements of analog behavior:
- Total Harmonic DistortionPerhaps the most important analog behavior is Total Harmonic Distortion or THD, which is defined as the ratio of the sum of the powers of all harmonic components to the power of the fundamental frequency. THD is usually caused by amplification and changes in signal shape and content by adding odd and even harmonics of the fundamental frequencies, which can change the overall tonal balance. THD can also change peak output gain, usually by no more than+/- 0.2-0.3 dB.
- TransformersSome hardware uses transformers to stabilize or change Input/Output loads and signal levels. In earlier days, transformers did not have a flat frequency response and often introduced low and super-high frequency roll-offs. The original channel has transformers that cause high-frequency roll-off, so if you encounter loss above 10 kHz, this is due to the modeled transformers.
- HumWaves modeled both 50 Hz power current and 60 Hz power current. If you listen closely, you will hear that there is a difference in the hum level between 50 Hz and 60 Hz. Since hum is unique to each region and dependent upon the local electrical conditions, you may find that the modeled hum is different than the hum already present in your studio, and may not be suitable for your particular use.
- NoiseAll analog equipment generates internal noise or a noise floor. In vintage equipment, the noise floor is sometimes quite high and colored. Waves modeled the noise to match the level and color of noise exhibited by the original unit, both with and without a signal present.
1.4 Components
WaveShell technology enables us to split Waves processors into smaller plug-ins, which we call components. Having a choice of components for a particular processor gives you the flexibility to choose the configuration best suited to your material.
The Kramer HLS has two component processors:
- Kramer HLS Stereo – A 3-band stereo channel
- Kramer HLS Mono – A 3- band mono channel
LatencyHLS latency differs for Native & TDM versions:Native161 samples (all supported sample rates)TDM292 samples @ 44.1/48 kHz548 samples @ 88.2/96 kHz
Chapter 2 – Quickstart Guide
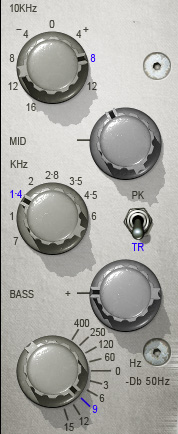
At left: The EQ section of the Kramer HLS.
- High-frequency EQ: Grab and turn the top knob to boost or cut high frequencies.
- Midrange EQ is controlled by a combination of two knobs and a switch:o The Mid gain knob sets the amount of midrange frequency gain adjustment.o Below it is the switch that determines whether to boost (PK) or cut (TR).o The knob to the left selects the center frequency of the midrange EQ (in kHz).
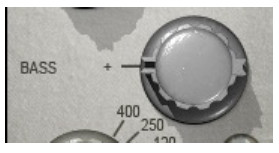
- Low-frequency adjustment is controlled by two knobs:o The top Bass knob specifies the amount of boost for the frequency selected in the top half of the bottom knob’s scale.o The lower half of the bottom knob’s scale cuts lows at 50Hz. (In this mode, the upper bass knob is inactive.)
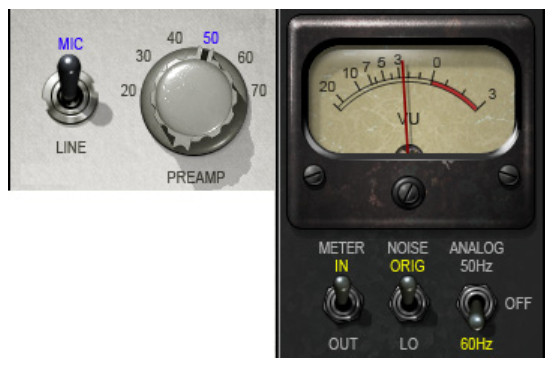
To control analog coloration, use the Source switch to select Mic/Line amplification and the Preamp knob to select the amount of coloration. Higher values introduce more harmonic distortion with increased noise and hum. The overall level will not change significantly, as the HLS recreates the coloration alone, not the amplification itself. If the noise level is excessive, set the Noise switch to LO. To retain only the modeled harmonic distortion, bypass the noise and hum by setting Analog to OFF.
Chapter 3 – Interface and Controls
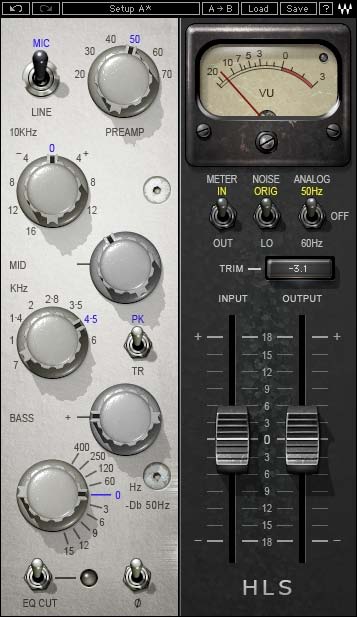
3.1 Interface
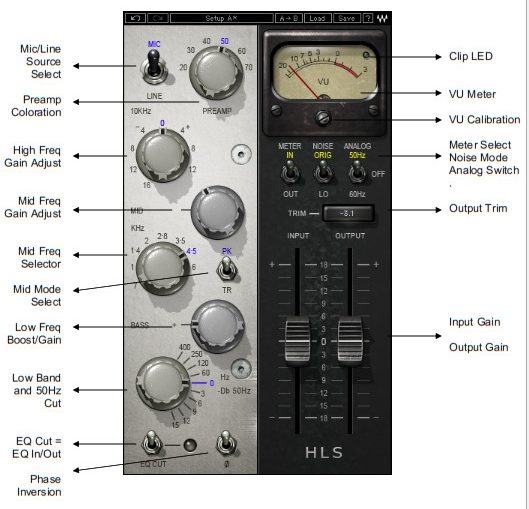
3.2 ControlsSource Select toggles between Mic and Line levels.
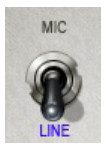 |
Range Mic, LineDefaul Line |
Preamp determines the amount of preamp coloration. Higher values introduce more harmonic distortion with increased noise and hum. The overall level will not change significantly, as the HLS recreates the coloration alone, not the amplification itself.
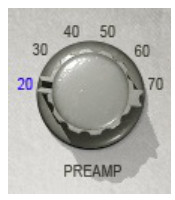 |
Range 20 – 70 (in 10 dB steps)Default 20 |
High Frequency Gain controls high shelf gain at 10 kHz.
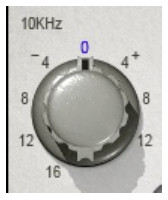 |
Range -16 dB to +12 dB (-16, -12, -8, -4, 0, 4, 8, 12)Default 0 |
Mid Gain sets the amount of gain applied to the midrange bell filter, according to the selected mode.
 |
Range 0 to 15 (15 dB in 0.1 steps)Default 0dB |
Mid Frequency selects frequency for the midrange bell filter.
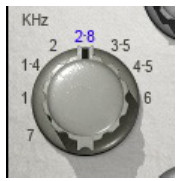 |
Range 700 Hz to 6 kHz (700, 1, 1.4, 2, 2.8, 3.5, 4.5, 6)Default 2.8 |
Mid Mode selects between boost (PK) and cut (TR).
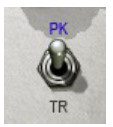 |
Range PK (boost), TR (cut)Default PK |
Low Band Freq/Cut From 60 to 400, this knob is used to select the boost frequency. From 3 to 15, it is used to select the amount of attenuation (in dB) of the 50 Hz low shelf.
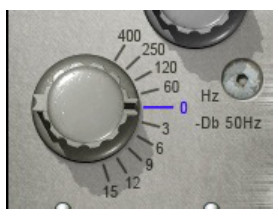 |
LF Selection (upper half) 0 (Off) to 400 (60, 120, 250, 400 Hz)50 Hz Attenuation (lower half) 0 (Off) to 15 (-3, -6, -9, -12, -15 dB)Default 0 (Off) |
Low Band Boost sets the amount of boost (in dB) for the frequency selected using the Low Band Freq/Cut control described above.
 |
Range 0 to 15 (15 dB boost in 0.1 steps)Default 0 |
EQ Cut turns the EQ on (in) and off (cut), while maintaining the analog and preamp characteristics.
 |
Range In/CutDefault In |
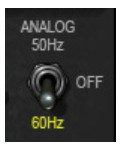 |
Analog controls turns the analog noise and um modeling on and off, and sets the pitch of the hum to match either European or American currents. To retain only the modeled harmonic distortion, bypass the noise and hum by setting Analog to Off. |
 |
Range Original, LowDefault Original |
Noise pads the modeled noise and hum by 20 dB. If the noise level is excessive, set the Noise switch to Low.
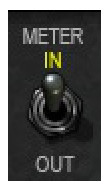 Meter toggles the meter display between input and output monitoring.

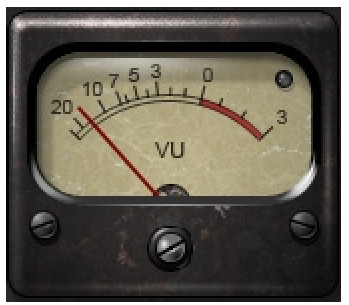
Clip LED lights up when levels exceed 0 dBFS. Click to reset.
 |
Range 24 – 8 dBDefault 18 dB of headroom (0 dBVU = -18 dBFS.) |
VU Meter displays input or output level in dBVU. Please note: The HLS Stereo component meter displays the sum of both channels. The same signal fed to both channels will show an increase of 6 dB. If this is problematic, use the VU Calibration function to compensate.

VU Calibrate controls the VU meter headroom calibration.
Please note: The VU Calibration control is represented by the little screw-head right below the VU meter display. It does not have a visible label and, for most users, the 18 dB default headroom should be the best choice. However, if you use outboard gear in your studio and your VU meters are calibrated for 14 dB headroom, the HLS allows you to calibrate its VU meter as well.
 |
Range -12 – +12 dBDefault 0 |
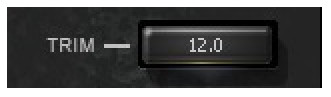
Trim displays the maximum peak level of the output signal and its distance from 0 dBFS. Clicking on the trim value button will reset it to 0, and apply the differential to the output trim (up to 12 dB at a time.)
 |
Range -18 dB to +18 dB (in 0.1dB steps)Default 0 dB |
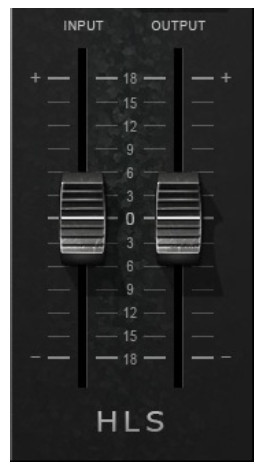
Input controls the input level.Output controls the output level.
3.3 WaveSystem ToolbarUse the bar at the top of the plugin to save and load presets, compare settings, undo and redo steps, and resize the plugin. To learn more, click the icon at the upper-right corner of the window and open the WaveSystem Guide.
Waves Kramer HLSUser Guide
References
[xyz-ips snippet=”download-snippet”]