WAVES Renaissance Compressor Plugin
Introduction
Thank you for choosing Waves! In order to get the most out of your new Waves plugin, please take a moment to read this user guide.To install software and manage your licenses, you need to have a free Waves account. Sign up at www.waves.com. With a Waves account you can keep track of your products, renew your Waves Update Plan, participate in bonus programs, and keep up to date with important information.We suggest that you become familiar with the Waves Support pages: www.waves.com/support. There are technical articles about installation, troubleshooting, specifications, and more. Plus, you’ll find company contact information and Waves Support news.
About the Renaissance Compressor
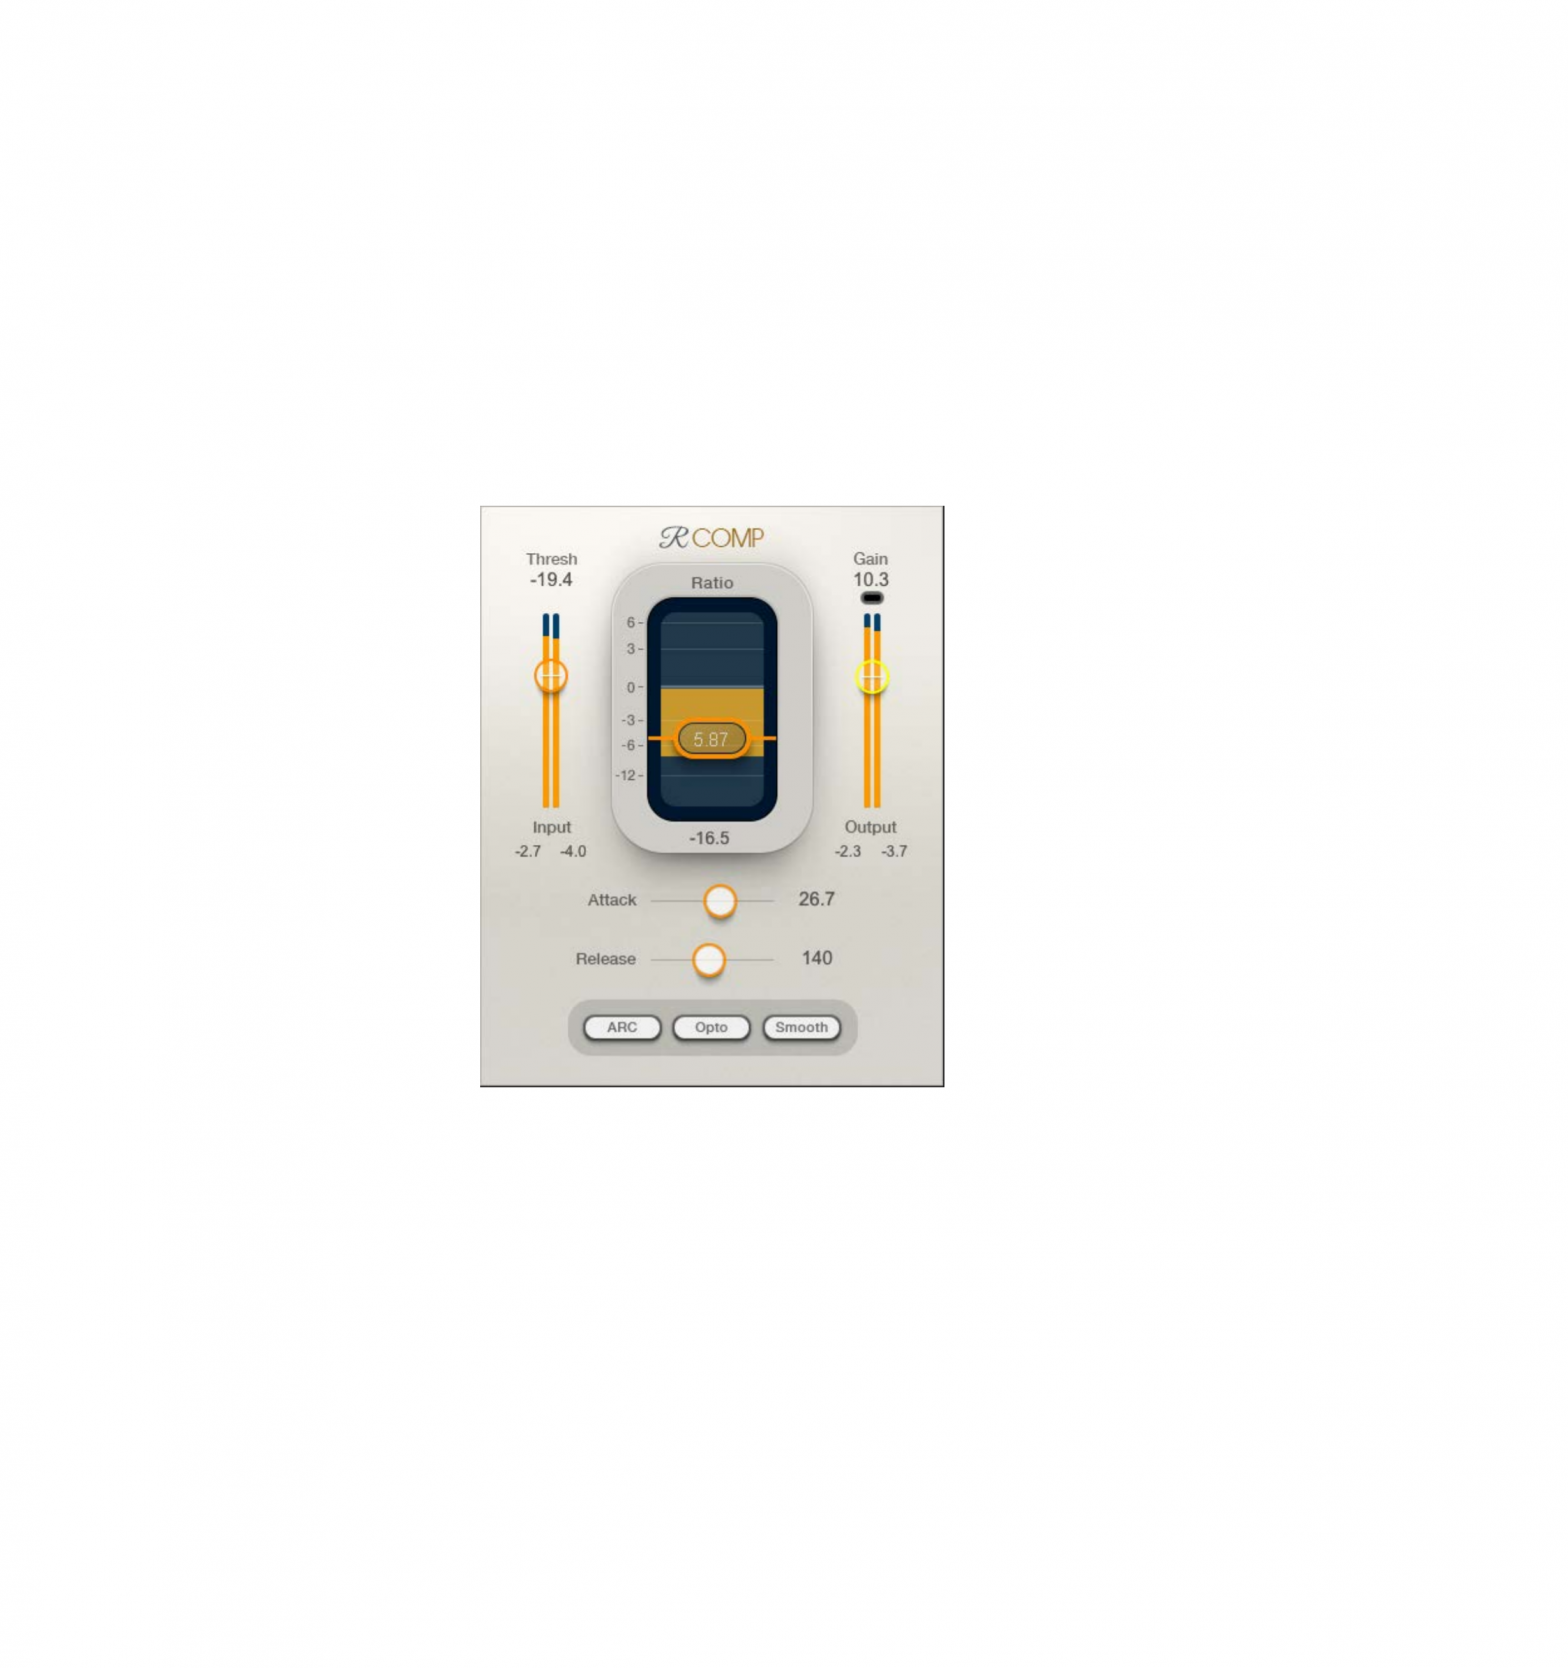
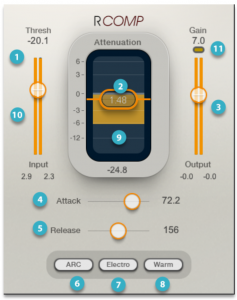
Renaissance Compressor is a classic warm compressor and expander with a simple, straightforward interface. Since its introduction, RComp has been the gold standard for smooth, accurate, great-sounding compression. It combines the proven technologies found in the C1 Compressor/Gate and the L1 Ultramaximizer, coupled with Waves Auto Release Control (ARC) technology. The ARC algorithm enables RComp to deliver very high RMS levels (lower peak/RMS ratio) for heavier compression, but it can also yield very smooth gain reduction.The interface includes the five conventional compressor controls, along with a release Mode selector (ARC/Manual), a gentle Character control (Warm/Smooth), and a Behavior control (Opto/Electro).Internal resolution is 64-bit floating point. The signal is dithered to 32-bit floating point at the final output.
Interface
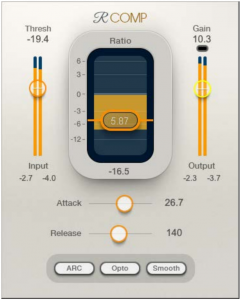
You can view the Renaissance Compressor interface in any of three styles.
Select a style with the Skins drop-down menu, on the left side of the WaveSystem Toolbar, at the top of the interface.

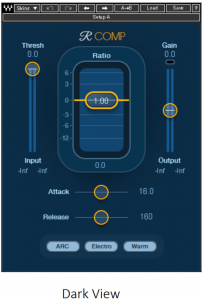
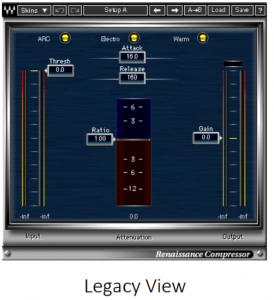
- All three skins have the same controls. When you change skins, the values don’t change.
- The skin of the current instance sets the default view, so new instances will open with that skin.
Controls
CONVENTIONAL COMPRESSOR CONTROLS
 Threshold
 Ratio
Ratio Output gain control
 Attack time
 Release time
COMPRESSOR CHARACTERISTICS CONTROLS
 Auto-release On/Off
 Compression behavior (Electro/Opto)
 Compressor character (Warm/Smooth)
METERS
 Gain reduction meter
 Input meter
 Limiter activity indicator
Renaissance Compressor is easy to control, especially when you consider its flexibility. Like any compressor, there are countless ways to use it, but as you get started, we suggest that you set ARC, Electro/Opto, and Warm/Smooth first, and then adjust the other controls. This way, you set up a “feel” for the compressor as you set the dynamics.
Controls
THRESHOLD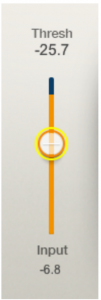
Threshold is the input level around which compression or expansion starts acting to a significant degree. The Threshold slider is integrated into the input meter so that you can see the relationship between threshold setting and input gain. To control input level, adjust the track volume on your DAW.
Range: -60 dBFS to 0.0 dBFSDefault: 0.0 dB
| Renaissance Compressor uses a soft knee, so compression and expansion begin when the signal is about 6 dB below the threshold. |
RATIO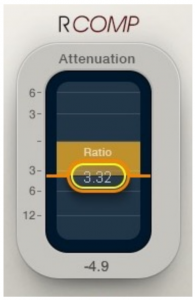
Ratio defines how much compression or expansion will take place as the signal approaches or reaches the threshold. It covers a wide range of compression ratios (1.01:1 to 50.0:1), as well as expansion ratios (0.99:1 to 0.50:1). The Ratio fader is incorporated into the Gain Reduction meter, and its value is displayed in the box.
Range: 0.5 to 50.0Default: 1.0
GAIN CHANGE METERThe Gain Change meter (above) shows the instantaneous gain reduction or increase. The amount of compression is indicated with an orange, downward-pointing meter. Compression values are yellow and negative. Positive expansion values are blue and point upward.
Compression Characteristics Controls
Controls for attack, release, compressor behavior, and compressor character are located on the panel at the bottom of the interface
ATTACKAttack is the response time, in milliseconds, for the onset of compression or expansion once the signal approaches or exceeds the threshold. It sets how long it will take for the gain adjustment to reach its target. Shorter attack times provide better peak control. Longer attack times let more transients pass uncompressed.
Range: 0.5 ms to 500 msDefault: 16 ms
RELEASESets the time it will take for the attenuation to return to 0 dB when the energy falls below the threshold. When ARC is set to Manual, release time is set directly by the Release control. When ARC is on, the Release control acts as an overall scaling factor around which ARC calculates the ideal time for the signal to return to zero.
Range: 5 ms to 5000 msDefault: 160 ms
RELEASE MODESelects between Manual and Auto Release Control (ARC) and release modes.Manual release lets you set the release value. Slow release times usually result in gentle gain changes, which are smooth and can gracefully move between notes. There’s a chance, however, that a sudden, large transient peak will cause substantial gain reduction in the middle of a recovery, resulting in a dip.With fast release times, the effect may sound loud and aggressive. The downside of fast release times is that the signal can pump, since the “air” between notes (or words or whatever the signal is) comes and goes, which can feel artificial.ARC dynamically tracks the signal for best release values. It calculates the release time of each sample for optimum level with minimal artifacts. Set the release time as an overall scaling factor and, depending on the input signal, ARC adjusts it from there. Its character is similar to very responsive vintage compressors; it can produce increased RMS level with great clarity. There are of course occasions, whether technical or artistic, for manually setting a release time. We suggest, however, that you keep ARC engaged at all times, unless you want a very specific type of limiter behavior, such as pumping or distortion effects.
RELEASE BEHAVIORElectro has a release time that becomes increasingly faster as the gain reduction approaches zero, but only when gain reduction is less than 3 dB. When gain reduction is above 3 dB, the release time becomes slower, behaving like a leveler in high gain-reduction situations. Therefore, when used with moderate compression, the Electro mode produces a great increase in RMS (average level), which is perfect when you want it really loud.Opto is the inverse of Electro. Opto-coupled behavior always “puts on the brakes” as gain reduction approaches 0 dB. Release time gets slower as the gain reduction comes back to zero. This is true only when the gain reduction is less than 3 dB; when greater than 3 dB, the release time is faster. This is the vintage emulation that sounds great on vocals, bass, drums, and the stereo buss.
CHARACTERChoose between Smooth and Warm low-frequency characteristics, which can also affect wideband character, depending on the source material. This influences the overall color of the compressor.Warm adds low frequency harmonics as deeper compression is applied. This also results in greater gain reduction.Smooth doesn’t add such harmonics, keeping the sound as close as possible to the original.
OUTPUT METERSFull-scale meters with peak hold values at the bottom of each channel. Click on the meter to reset peak hold.
OUTPUT GAIN FADERTrims the output gain of the plugin. As such, it determines the behavior of the output limiter. Fader position is indicated above the meter.
Range: -30 dB to +30 dBDefault: 0.0 dB

LIMITER SECTION
Just above the output meters is a status light for the built-in limiter. Threshold and Output Ceilings are set to 0 dBFS and the limiter is activated only when output level would exceed 0 dBFS. Generally, as output gain increases, limiting becomes more aggressive. When the limiter is activated, the total plugin gain reduction (shown in the Gain Reduction meter) is the compressor’s gain reduction added to that of the limiter.The limiter status light shows the activity of the limiter:
- When the compressor’s output exceeds 0 dBFS and limiting begins, the light turns yellow, indicating activation.
- When the limiting is very heavy (approximately 6 dB or more), the display turns red.
Working with Presets
Renaissance Compressor offers a large collection of presets. These are useful starting points for solving problems and creating effects: load the most relevant preset and go from there. In some cases, a factory preset will give you just the settings you need.
There are also Artist presets. These were designed by recording, mixing, FOH, and broadcast engineers so, they capture a personal point of view about sound. They provide a head start with an attitude when you’re creating a specific sound or making a track sound better.
Use the bar at the top of the plugin to save and load presets, compare settings, undo and redo steps, and resize the plugin. To learn more, click the icon at the upper-right corner of the window and open the WaveSystem Guide.

References
[xyz-ips snippet=”download-snippet”]