![]() Installation Overview
Installation Overview
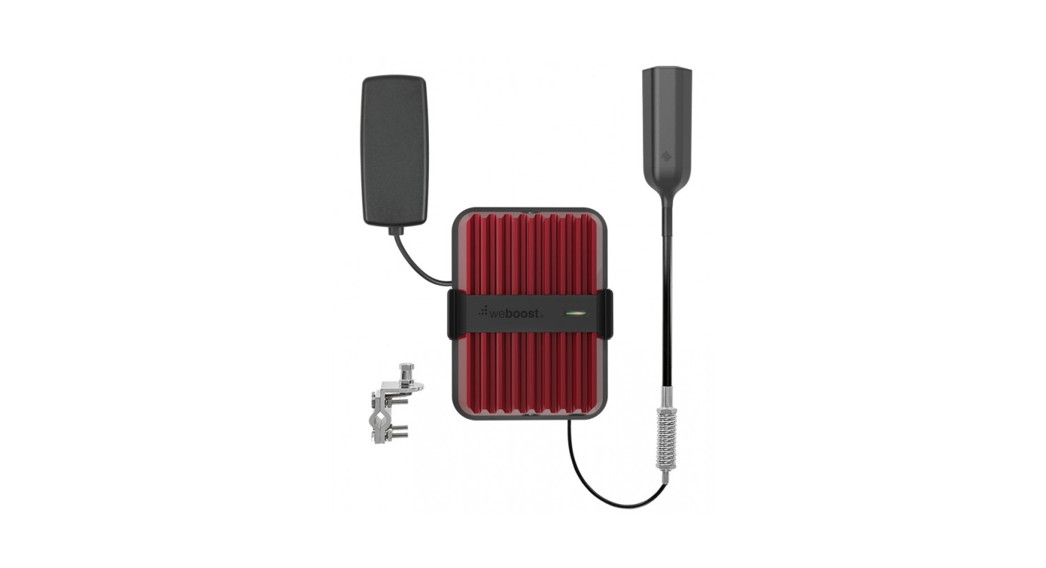
 Drive Reach OTRCell Signal Booster
STEP 1: Select Mounting Location & Assemble the Outside AntennaOnce you have determined the best location for the Outside Antenna, insert cable through mast(s) then through Side Exit Adapter.Screw together as shown.
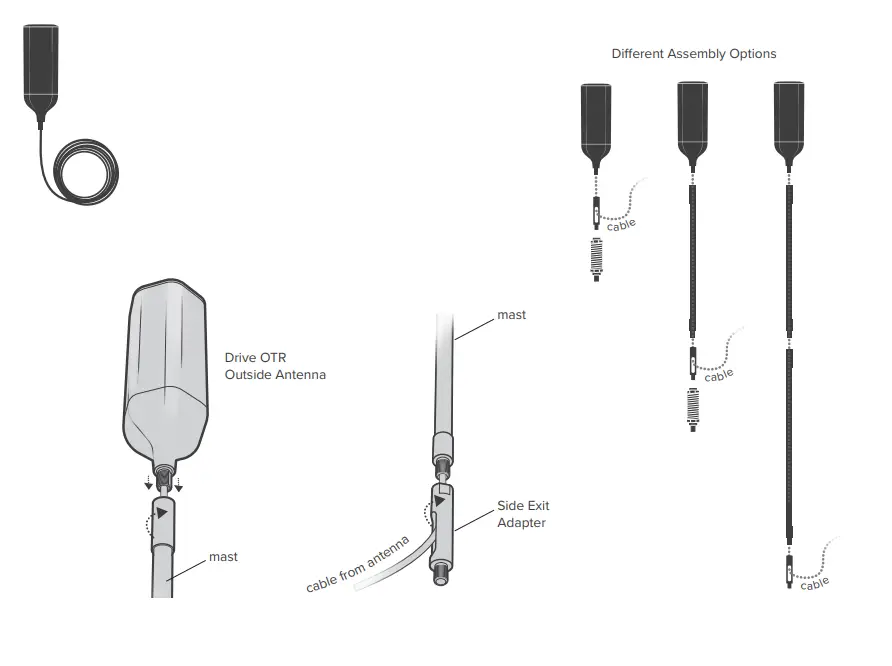
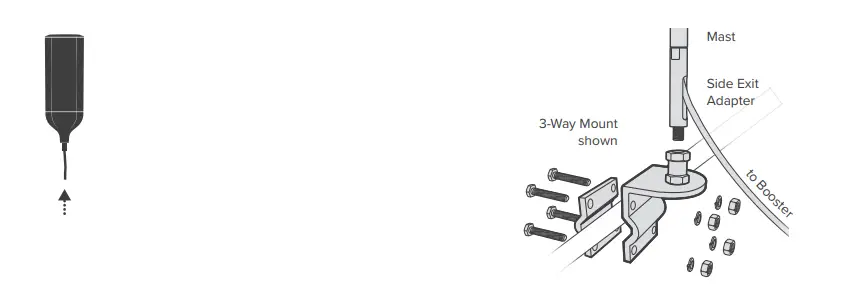
STEP 2: Mounting the Outside AntennaIf the vehicle does not have built-in mounting points, a Three-way Mount is included that will work on vehicles with mirror rails. For more info on using Spring, see
Installation Guide.
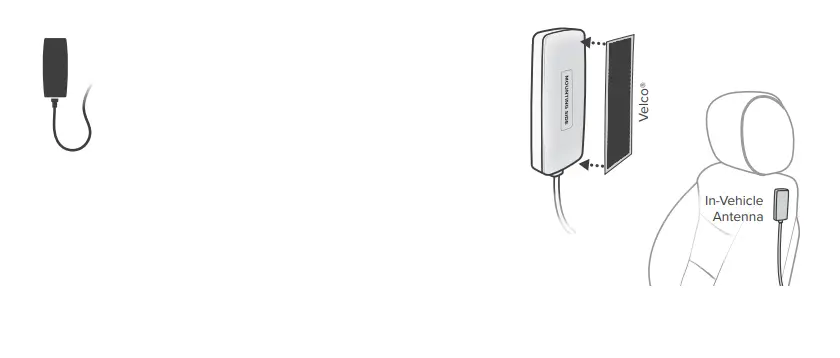
STEP 3: Mounting the Inside AntennaIdentify a place to mount the In-Vehicle Antenna, either on the side of the seat or on the dash and mount. The location should be at least 18 inches but no more than 36 inches from where the cable cellular device will be used.
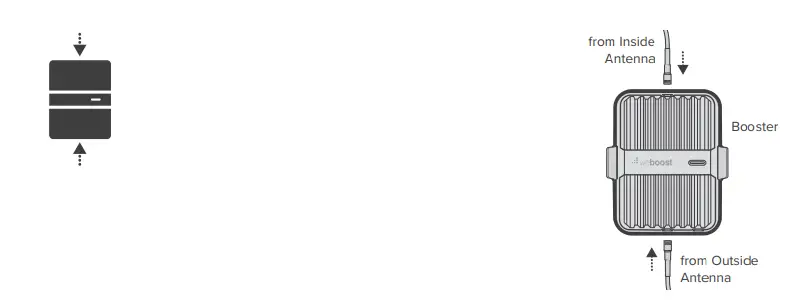
STEP 4: Booster Location & Connect CablesFind a location to place the Drive Reach Booster and secure it with provided bracket. Connect the cable from the Outside Antenna to the labeled booster port and connect the cable from Inside Antenna to the labeled booster port.
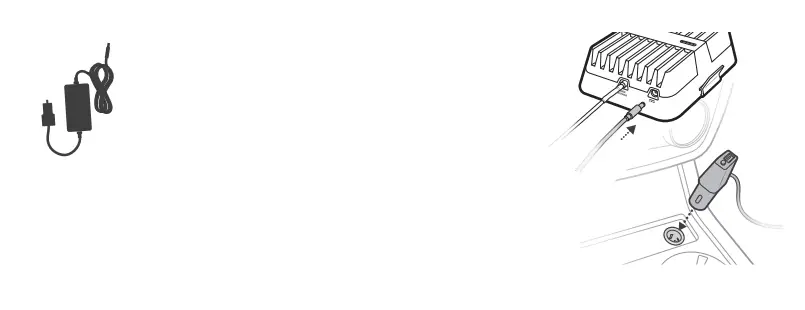
STEP 5: Connect Power Supply To BoosterConnect the power supply cord to the end of the booster, labeled “ ![]() ”, and plug the power adapter into the vehicle’s 12V DC power supply. Enjoy your boosted signal!
”, and plug the power adapter into the vehicle’s 12V DC power supply. Enjoy your boosted signal!
 Refer to Installation Guide for Detailed Instructions.
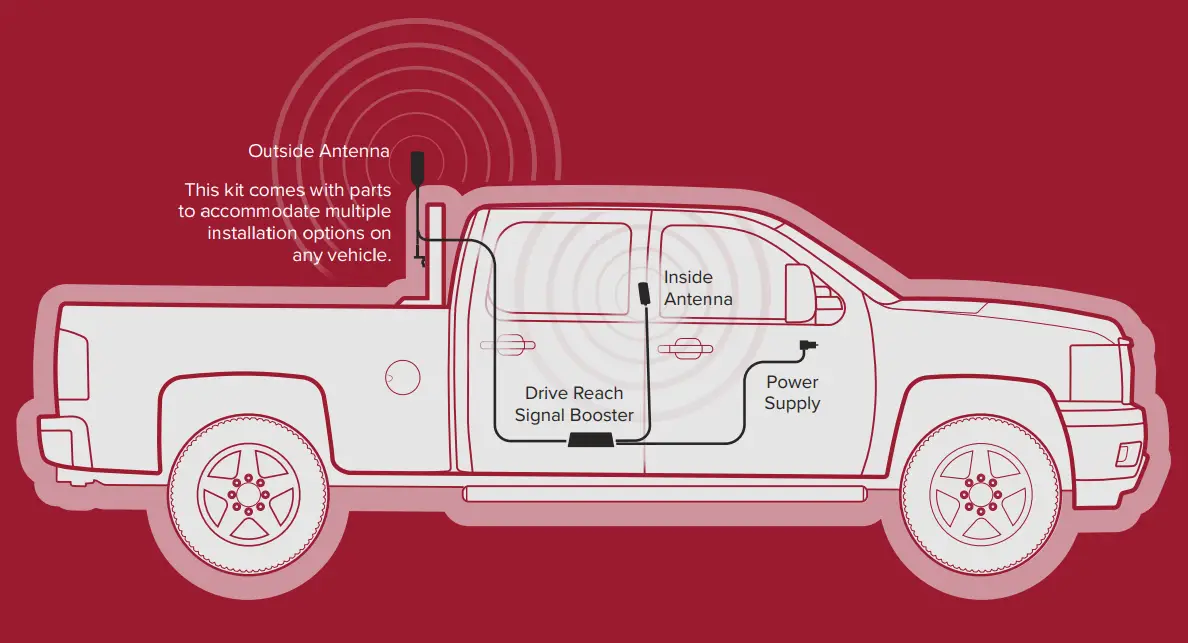
Diagram
For product installation videos and more, visit: weboost.com/install
Register your Signal Booster now!Complete the two easy steps to register your booster and receive premium customer service, special offers, and more!Step 1: Take a photo of your Photo register Code including the points (Θ ).
Step 2: Send it in. Smartphone U.S. onlyText photo to 71403OR
![]() Email U.S./CAN[email protected]OR
Email U.S./CAN[email protected]OR Onlineregister.weboost.com
Need help? Visit photoregister.com/help or text HELP to 71403.
![]() weboost.comGDE000284_Rev01_09.22.20
weboost.comGDE000284_Rev01_09.22.20
References
[xyz-ips snippet=”download-snippet”]