
Drive Reach RV Cell Signal Booster
Installation Overview
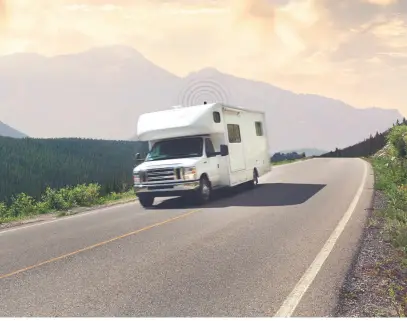
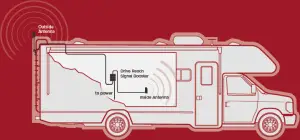
Diagram
For product installation videos and more, visit: weboost.com/install
Register your Signal Booster now!
Complete the two easy steps to register your booster and receive premium customer service, special offers and more!
Step 1: Take a photo of your Photoregister Code including the points ( ![]() ).
).
Step 2: Send it in.Smartphone U.S. only Text photo to 71403OREmail U.S./CAN OR Online register.weboost.com
Need help? Visit photoregister.com/help or text HELP to 71403.GDE000228_Rev01_09.22.20 weboost.com
Installation OverviewDrive Reach RVCell Signal Booster
STEP 1: Mount Outside Antenna & Route Cable
Determine where you want the Outside Antenna on your RV. Mount the Outside Antenna to a ladder or pole so that the entire Outside Antenna is above the roof line of the RV. Route 25′ RG-6 cable from inside RV to Outside Antenna. NOTE: L-Bracket Pole Mount and hardware is provided. If installing with Spring, the Side Exit Adapter must be used.
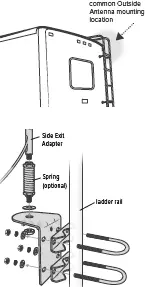 L-Bracket Mount & hardware
STEP 2: Connect Cable To Outside Antenna
After routing the RG-6 Cable into the RV, connect the cable to the Outside Antenna.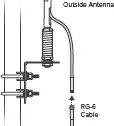
STEP 3: Inside Antenna LocationPlace Inside Antenna where stronger signal is desired in the RV.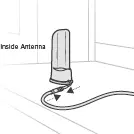
STEP 4: Booster Location & Connect Cables
Find a location to place the Drive Reach Booster and secure it with provided bracket. Connect cable from Outside Antenna to labeled booster port and connect cable from Inside Antenna to labeled booster port.

STEP 5: Connect Power Supply To Booster
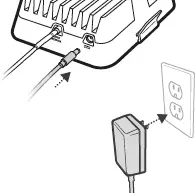
Connect the power supply cord to the end of the booster, labeled “![]() “, and connect into a 110V wall plug. Enjoy your boosted signal!
“, and connect into a 110V wall plug. Enjoy your boosted signal!
 report this ad
Refer to Installation Guide for Detailed Instructions.
References
[xyz-ips snippet=”download-snippet”]