WeedRazer LWE0014 Owner’s Manual Model # 580110 (LWE0014)
! WARNING !
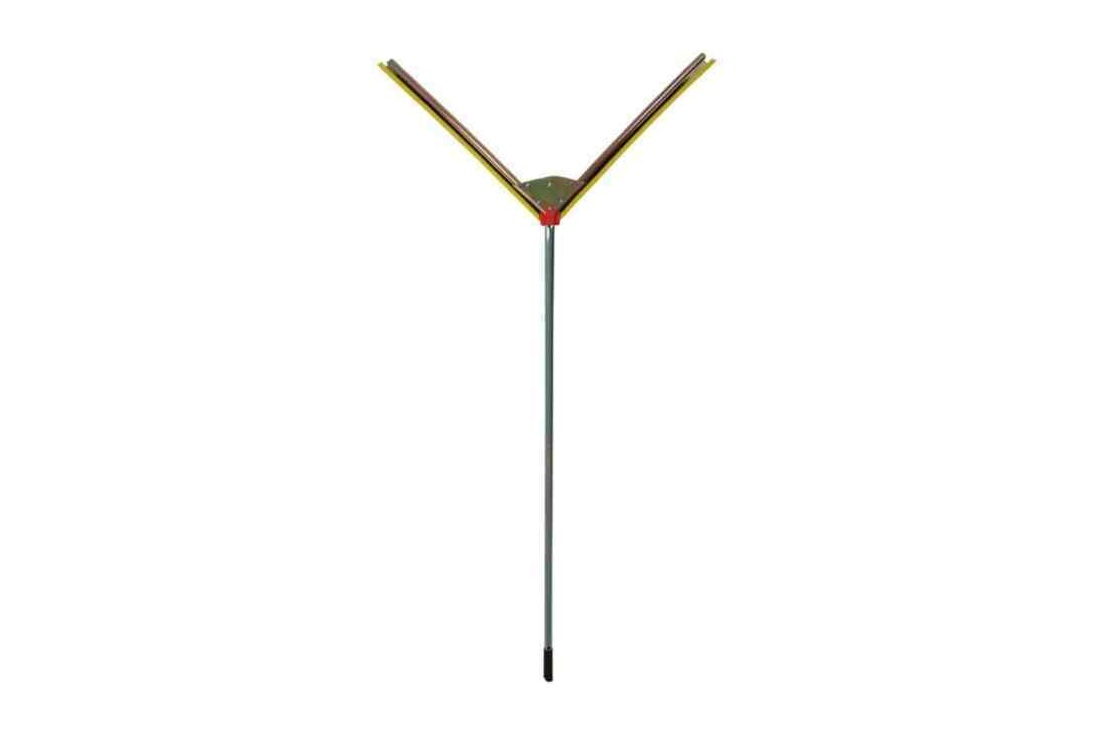
The WeedRazer is designed for cutting submerged, partiallyemergent, or emergent aquatic vegetation from underwater. Any other use is strictly prohibited.Before using the WeedRazer, please read this manual carefully to understand the proper use of the unit.
! WARNING !
The WeedRazer blade(s) are razor sharp. The blade covers should be on while assembling the tool and when tool is not in use. Failing to comply can result in severe lacerations, dismemberment, and even death.
SAFETY FIRST
Instructions containing a warning within this manual are marked with a symbol. These concern critical points which must be taken into consideration to prevent serious bodily injury. For this reason you are requested to read all such instructions carefully and follow them without fail.
- Keep out of reach of children.
- Do not use with children in immediate area.
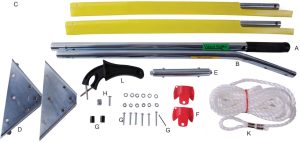
Parts List
| Ref. Letter | Part Number | Description | Quantity |
| A | 580143 (WRZHD09) | Handle Section w/ Black Grip | 1 |
| B | 580139 (WRZHA09) | Curved Handle Section | 1 |
| C | 580122 (WRZBL09) | Single Blade w/ Cover | 2 |
| D | 580250 (WRZSB09) | Support Bracket | 2 |
| E | 580145 (WRZHC09) | Handle connector w/ 2 Spring Clips | 1 |
| F | 580144 (WRZWD09) | Weed Deflector | 2 |
| G | 580149 (WRZNS09) | Hardware (1.5″ Bolt, Nut, Washer 1ea.) (1.2″ Bolts, Nuts, Washers 5 ea.) (Nylon Spacers 2 ea.) | 1 |
| H | WRZRB18 | 1.5” Bolt and T Nut | 2 |
| K | 580146 (WRZRP09) | 25′ Rope | 1 |
| L | 580127 (WRZSR09) | Blade Sharpener, Black | 1 |
Please refer to the Ref. Letter when assembling the tool and Part Number when placing an order for a replacement part.
Assembly Instructions
Read all instructions before assembly and use. Do not remove the blade cover when assembling.
Step 1Insert all 5 bolts (J) into one of the triangular metal support brackets (d) with the bolt heads on the domed side of the bracket. Insert bolt (i) into the domed side of one of the red weed deflectors (f) pieces then slide bolt (i) into the hole at the apex of the support bracket triangle so that the curved edges of both pieces match. Lay the bracket (d) curved side down on a flat surface. Place the nylon spacers (g) onto the bolts that are farthest apart on the un-curved edge of bracket (d).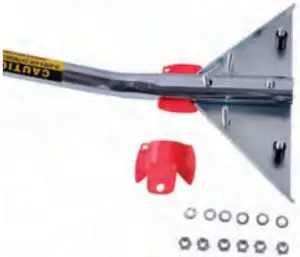
Step 2Slide the blade cover off a few inches during this part of the assembly. Lay each blade (c) into the bracket (d) with the angled end of the blade pointing toward the weed deflector piece (f) and the bolt closest to the weed deflector through the hole in the blade. (d) through the holes in the blades. Place the curved end of the handle (b) into the bracket assembly lining up the bolts with the holes in the handle. The handle should be projecting up from the flat surface. Place the other half of the support bracket (d) over the assembly so that the bolts sticking up match up with the holes in the bracket (d).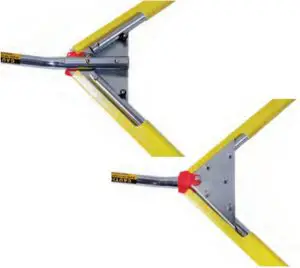
Thread a washer and nut over the nylon spacer bolts and handle bolt closet to these nuts. Put the other half of the weed deflector (f) in place and snap the two halves together with the pins molded into the weed deflector. Place the remaining washers and nuts on the assembly. Hand tighten the nuts. Lift the assembly and use a flat head screw driver and an adjustable wrench to tighten the nuts. Push the blade covers back in place (Note:The blade cover will ride up over the weed deflector as pictured.) If desired, the blade covers can be trimmed 1 1/8” on the end next to the handle.
Step 3Insert the looped end of the rope (k) into the rubber handle end of handle (a). Twist the rope until the open portion of the loop is lined up with the hole just below the rubber handle. Insert bolt (H) into the hole securing the loop inside the handle.Thread the flat-topped T nut to the bolt and tighten.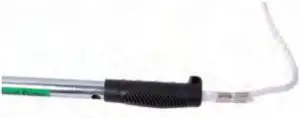
Step 4Handle Assembly – Press the spring loaded buttons on one end of the handled connector (E) slide into the open end of the handle (B) turn until the buttons snap into the holes in the handle. Repeat this process for the other half of the handle.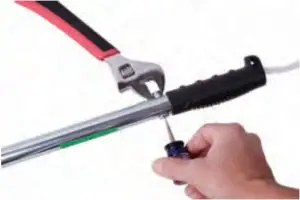
Blade Sharpening Instructions
- Always wear cut resistant gloves when sharping the WeedRazer.
- Rest the handle of the WeedRazer Express against a building or wall.
- Kneel or sit in front of the WeedRazer Express in a stable position (Figure i). Do not sharpen while standing or leaning over the cutting edge.

- Hold the sharpener with your thumb resting on the flared ridge of the sharpener. Wear cut resistant gloves to protect your hands if you slip while sharpening.
- Run the sharpener down the cutting blade edge in four to six strokes using less pressure as the edge gets sharper. Press one edge of the sharpener’s steel on the edge of the blade that you want to sharpen, then switch to the other side of the sharpener’s steel for the other side of the blade.
- To sharpen the opposite blade, either switch hands or turn the WeedRazer Express around so the opposite edge is in position for sharpening.

Operating Instructions

- Step 1Always wear cut resistant gloves whenever you use the WeedRazer.
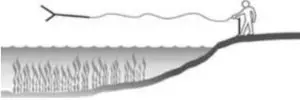
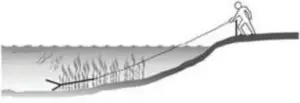
- Step 2Secure the rope (tie it around a post, or step on the rope). If you are on a dock, tie the rope to a post so you don’t throw too far. The rope floats, so if you lose control of the rope the tool can still be retrieved.
- Step 3Remove the blade covers by pressing the spring loaded buttons on the ends of the blade cover furthest from the handle and sliding the cover off.
- Step 4Toss the WeedRazer Express out over the area you want to cut. Use an under hand motion and keep the blades parallel to the water as the tool sails through the air. Let the cutter sink to the bottom.The WeedRazer Express can be used while holding the handle, howeverit is easier and safer if you toss it out and retrieve it with the rope.
- Step 5Retrieve the WeedRazer Express using a jerking motion.
- Step 6Repeat Step 3 to Step 5 as needed.
- Step 7Inspect. If it comes back with many weeds on it, it may be time tosharpen the blades. Cutting weeds when the wind is blowing towards theshore makes removal easier.
NOTE:
It is important to remove cut vegetation from the water. If not removed, the decaying vegetation will provide an additional food source for re-growth. The WeedRaker is the perfect tool for this purpose. It is the longest and widest aquatic rake in the industry. Ask your retailer for details.
Safety Instructions
- Always wear cut resistant gloves when handling the WeedRazer when removing or after the blade covers are removed.
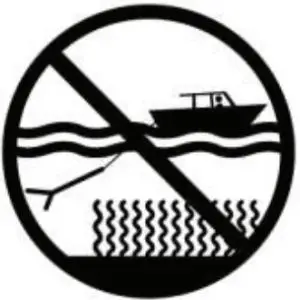
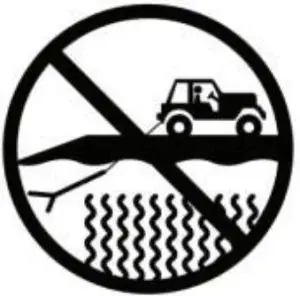
- The WeedRazer Express is to be operated by hand only Do not pull the WeedRazer Express behind a boat, or any other machine driven equipment. Doing so will void the warranty and damage your WeedRazer.
- Do not use with children in immediate area.
- Do not use the WeedRazer Express when humans and/or animals are present within 100 feet from the launch point.
- Do not place or use near electrical wires or cords.
- Never touch the sharp edges of the blades with bare hands at any time.
- Leave blade covers on the cutting edges when not in use.
- Check all bolts, connections, and rope before use.
- Avoid areas with underwater structures.
- When not in use, store in a safe location out of the reach of children.
- Do not pull behind the boat
- Do not pull behind the vehicle or any mechanical device
 report this ad
NOTE: Failing to comply can result in severe lacerations, dismemberment, and even death.
References
[xyz-ips snippet=”download-snippet”]