
Intelligent Sensor Soap DispenserK9 Pro
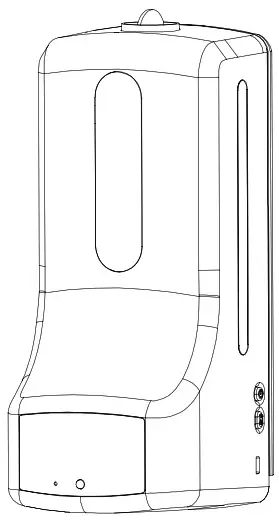
Appearance
Specification
- Accuracy: ±0.2℃ (34~45℃, put it in the operating environment for 30 minutes before use)
- Alarm type: flashing + bleeping “DIDIDI”
- Measuring distance: 5cm~10cm
- LED display: Number
- Interface: Type-C
- Bottle Capacity: 1000mL
- Mounting Type: Wall-hanging, Tripod-fixed
- Working Temperature: 10℃~40℃ ( 15℃~35℃ Recommended)
- Measuring range: 0~50℃
- Response time: 500ms
- Standby time: 5s for non-working, dynamic loop with white light
- Power Supply: DC 5V 1500MA(or 4 AA batteries)
- Dimension: 119*133*280mm
- Liquid type: hand sanitizer or liquid disinfectant
Conditions
- Standby: the white dot on the bottom of the right corner flashing by turns. (Fig. 1)

- Normal temperature: displays current temperature and green light flashes once on the display. (Fig. 2)
- Abnormal temperature: displays current temperature and red light flashes on the display. (Fig. 3)
- Out of measuring range(Note: do not spray hand sanitizer):“Lo”: Ultra-low temperature alarm.(Fig. 4);“HI”: Ultra-high temperature alarm. (Fig. 5)


Instructions
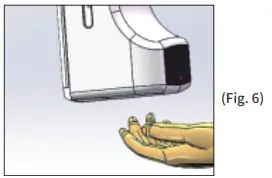
- Temperature measuring and handwashing: Put your hand on the bottom until you hear a “DI” sound, then the LED screen will display the temperature and hand sanitizer squeezed out. (Fig. 6)
- The function of a button:(1) Button ①: Function setting(Fig. 7)
- (2)Button ②: Specific function settings(Fig. 8)
- Function settingPress the button ① once to set the temperature unitPress the button ② to switch between Celsius and FahrenheitC: Celsius F:Fahrenheit (Fig. 9, Fig. 10)
Press the button ① twice to set the working modePress the button ② to switch the working mode. Bo: body mode co: counting mode sure: surface mode
Press the button ① 3 times to set the alarm temperaturePress the button ② to switch the alarm temperature between 36℃ to 39℃
Press the button ① 4 times to set the volumePress the button ② to switch the volume from U0 to U4
Press the button ① 5 times to set the languagePress the button ② to set the language CH/EN/KO/PT/ES/JP/IT/DE/FR/RU/NL/ARCH: Chinese EN: English KO: Korean PT: Portuguese ES: Spanish JP: Japanese IT: Italian DE: GermanFR: French RU: Russian NL: Netherlands AR: Arabia
Press the button ① 6 times to set the squeeze amount of hand sanitizerPress the button ② to set the extrusion time between 0.1 and 2.0 seconds

Press the Button ① for 2S or more: on/off
Mounting
- Tripod mounting: There is a screw connection on the bottom which can be connected with a tripod. (Fig. 11)
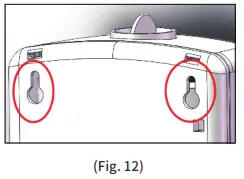
- Wall-handing: There are two handing holes on the backside that can be fixed with nails. (Fig. 12)
- Desktop stand: Put the Intelligent Sensor SoapThe dispenser in the desktop stand to use(Fig. 13)
- Wall-handing Desktop stand: there are two hanging holes on the backside that can be fixed with nails.(Fig. 14)
- Hanging the desktop stand on the tripod (Fig. 15)
- Power On/Off: Press the switch button on the right side of the device(Fig. 16)
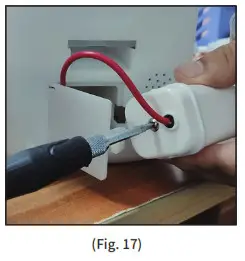
- Battery installation: Open the battery cover, take out the battery box, unscrew the screws, and put in 4 AA batteries (Fig. 17).

Warnings
- Do not pour hand sanitizer into Temperature Measuring Probe and Proximity Sensor.
- Make sure that it is standing upright after filling in hand sanitizer.
 report this ad
[xyz-ips snippet=”download-snippet”]