
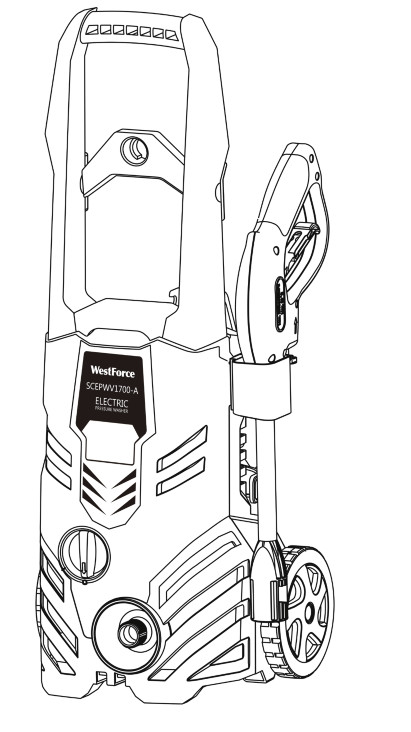
Westford Electric Pressure WasherSCEPWV1700-A
User Manual
Thank you for purchasing this product! To ensure proper use and trouble-free operation, please read this manual carefully and store it in a safe place for future reference.
GENERAL POWER TOOL SAFETY WARNINGS
 WARNING!Read all safety warnings and all instructions. Failure to follow the warnings and instructions may result in electric shock, fire, and/or serious injury.Save all records and instructions for future reference.
- This appliance is not intended for use by persons (including children) with reduced physical, sensory or mental capabilities, or lack of experience and knowledge unless they have been given supervision or instruction concerning use of the appliance by a person responsible for their safety.
- Children should be supervised to ensure that they do not play with this appliance.
- If the supply cord is damaged, it must be replaced by the manufacturer, its service agent, or similarly qualified persons in order to avoid hazards.
ADDITIONAL POWER TOOL SAFETY WARNINGS
WARNING!Do not use this appliance without reading the user manual.
- It is recommended to wear safety boots, safety gloves, safety helmets with visors, hearing protection, etc. while operating this machine.
- When opening the trigger gun, there is a danger of kickback force and sudden torque on the spray assembly. Please hold the nozzle tightly.
- WARNING: High-pressure jets can be dangerous if subject to misuse. The jet must not be directed towards persons, live electrical equipment, or the machine itself.
- WARNING: Do not use this machine within range of persons unless they are wearing protective clothing.
- WARNING: Do not direct the jet towards yourself or others in order to clean clothes or footwear.
- Disconnect from the electrical power supply before carrying out user maintenance.
- High-pressure cleaners should not be handled by children or untrained persons.
- WARNING: Risk of explosion – do not spray flammable liquids.
- WARNING: To ensure machine safety, use only original spare parts from the manufacturer or parts approved by the manufacturer.
- WARNING: Water that has flown through backflow preventers is considered non-potable.
- WARNING: This machine should be disconnected from its power source by removing the plug from the outlet during cleaning, maintenance when replacing parts, or converting the machine to another function.
- WARNING: Do not use this machine if a supply cord or important parts of this machine are damaged, e.g. safety devices, high pressure hoses, trigger gun.
- WARNING: If an extension cord is used, the plug and socket must be watertight.
- WARNING: Improper extension cords can be dangerous.
- The electric supply connection should be made by a qualified electrician and in compliance with IEC 60364-1. It is recommended that the electric supply to this machine should include either a residual current device that will interrupt the supply if the leakage current to earth exceeds 30 mA for 30 mS or a device that will prove the earth circuit.
SAFETY SYMBOLS
The following table depicts and describes safety symbols that may appear on this product. Read, understand, and follow all instructions on the machine before attempting to assemble and operate.
 |
WARNING: Do not direct the jet at persons, animals, or electrical equipment. |
 |
Read the manual |
 |
Machine not suitable for connection to the potable water mains. |
| Double insulation. | |
 |
RCM approval mark. |
SAFETY INSTRUCTIONS
![]() NOTE: Before using the tool, read the instruction book carefully.CAUTION!
NOTE: Before using the tool, read the instruction book carefully.CAUTION!
- Never use this pressure washer to draw in water that has been contaminated with solvents (e.g. paint thinners, gasoline, oil, etc.).
- Dirt in the water feed will damage this unit. To avoid this risk, we recommended checking the water filter located outside the water inlet (for filter cleaning, see the maintenance section).
- Always prevent debris from being drawn into the unit by using a clean water source, and an additional accessory water filter if necessary.
WATER SUPPLY (COLD WATER ONLY)
- Do not draw non-water liquids through this unit. For use with cold water only.
- Water hose must be at least 1/2 inches (12.7 mm) in diameter.
- Flow rate of water supply must not fall below 1.59 GPM (6 timin).
- Flow rate can be determined by running the water for 1 minute into an empty container.
- The water supply temperature must not exceed 104 °F (40 °C).
PACKING UST
| Pressure Washer Main Unit | 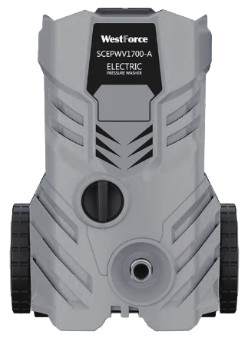 |
| Pressure Washer Handle | 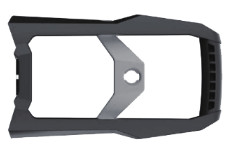 |
| Spray Gun Holder |  |
| Spray Gun | 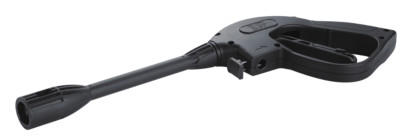 |
| Spray Lance with Built-in Nozzle Holder | 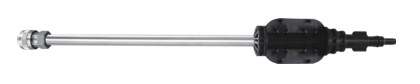 |
| 20 ft High -Pressure Hose | 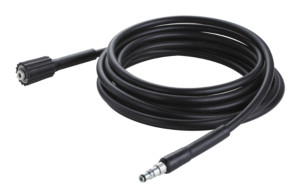 |
| Soap Bottle | 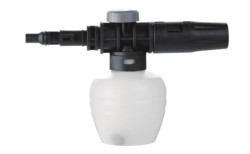 |
| Cleaning Pin |  |
| 0° Quick-Connect Nozzle (Red) | 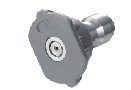 |
| 25° Quick-Connect Nozzle (Green) | 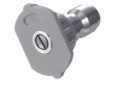 |
| 40° Quick-Connect Nozzle (White) | 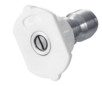 |
| Screws |  |
TECHNICAL SPECIFICATIONS
| Electrical Requirements | 120 V/60 Hz |
| Power | 1600-1800 W |
| Noise Level | 76 dB |
| High-Pressure Hose Length | 20 ft (6 m) |
| Power Cable Length | 32.8 ft (10 m) |
| Gross Weight | 16.5 lbs (7.5 kg) |
| Net Weight | 14.3 lbs (6.5 kg) |
ASSEMBLY
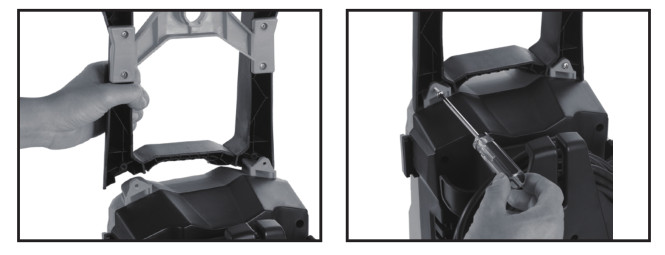
Assembling the Pressure Washer Handle
- Slide the handle into the slots until it locks into place.
- Insert the included screws into the holes and tighten with a screwdriver (not included).
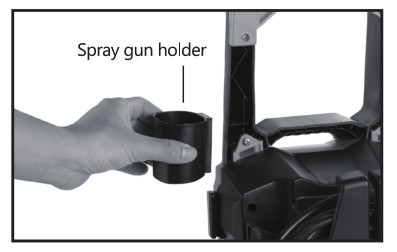
Assembling the Spray Gun Holder• Attach the spray gun holder onto the machine.
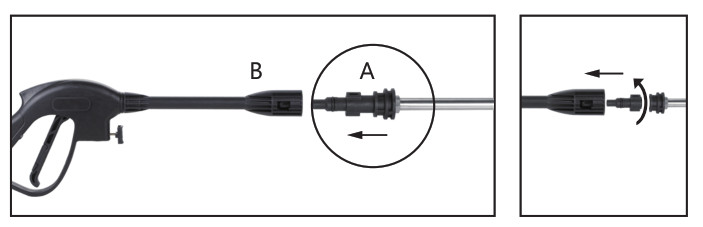
Assembling the Spray Gun
- Align the tabs on the male end (A) of the spray lance with the slots inside the female bayonet outlet (B) of the spray gun and insert firmly.
- While pushing in the lance, twist 1/4 turn clockwise until tabs lock into place to ensure a leak-free connection.
Connecting the High-Pressure Hose
- Make sure the ON/OFF switch is in the OFF position. Press down on the release tab and insert the high-pressure hose into the spray gun, then release the tab to tighten the hose.
- Remove the protection cap of the water outlet on the pressure washer.
- Firmly insert the metal tip of the high-pressure hose into the water outlet and then screw the collar to tighten the connection. To disconnect, fully loosen the collar and then firmly pull on the hose.
Note: The end of the hose must be inserted into the water outlet far enough so the collar can thread onto the outlet threads until hand tight.
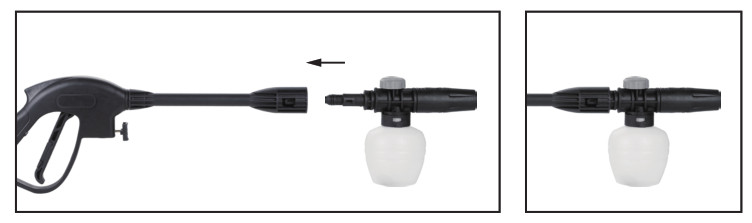
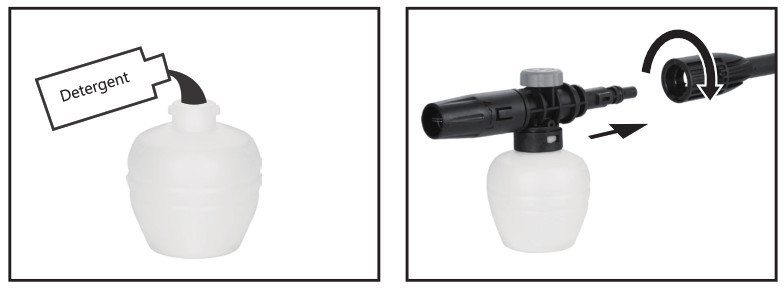
 Installing the Soap Bottle
- With the spray lance detached, align the tabs on the male end of the soap bottle with the slots inside the female bayonet outlet on the spray gun and insert firmly.
- While pushing firmly on the bottle, twist 1/4 turn clockwise until tabs lock into place to ensure a leak-free connection.
- Unscrew the bottle from the assembly and fill with pressure washer detergents/soaps only.
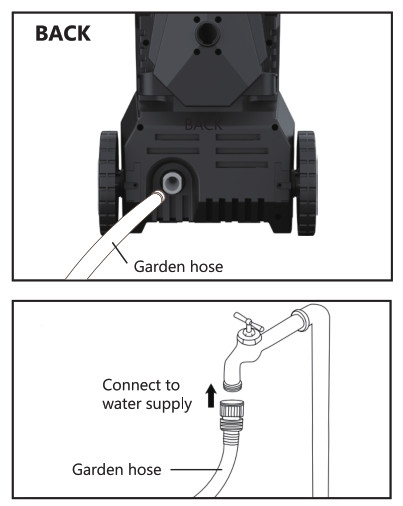
Connecting the Garden Hose (not included)Before connecting the garden hose:
- The garden hose adapter is preinstalled on the water inlet of the pressure washer.
- Connect your garden hose into the garden hose adapter.
- Attach garden hose to water supply.
OPERATION
Adding Detergent to the Pressure WasherTo penetrate and remove dirt more effectively, it is recommended to use the detergent dispensing function.NOTE: Detergent needs to be diluted to achieve the most effective cleaning. It is recommended to dilute the detergent in a suitable container to the required concentration before use.
- Unscrew the foam lance from the soap bottle.
- Fill the bottle with pressure washer detergent.
- Screw the foam lance back onto the bottle.
- Attach the soap bottle to the spray gun.
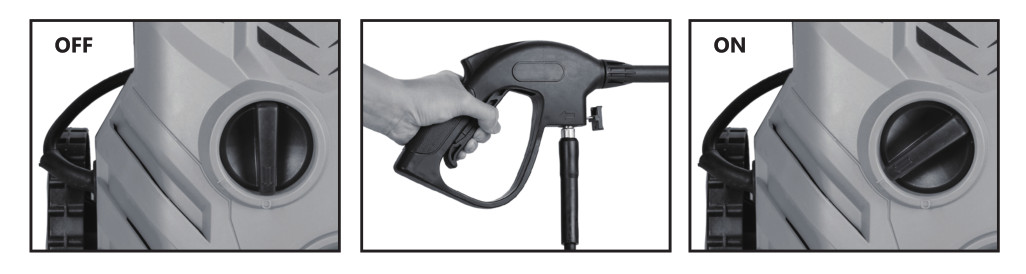
 Starting and Stopping the Pressure Washer
- Connect the garden hose.
- Before operating the high-pressure washer, turn the garden hose on and then press the trigger switch to bleed any trapped air out of the pump and hose.
- After ensuring the ON/OFF switch is in the OFF position, connect the pressure washer to the power supply.
- Plug the pressure washer into the outlet.
- Switch the pressure washer to the ON position to start the motor.
- To stop the motor, release the trigger and turn the switch to the OFF position.
Reminder: the motor will not run continuously, but only when trigger switch is squeezed.
Soap ApplicationSoap is applied under low-pressure high volume for optimum performance.Soap/detergent can only be applied with this machine when the soap bottle is installed.
Using the Spray Gun Trigger
- Engage the trigger to operate the pressure washer.
- Release the trigger to stop the flow of water through the spray gun.
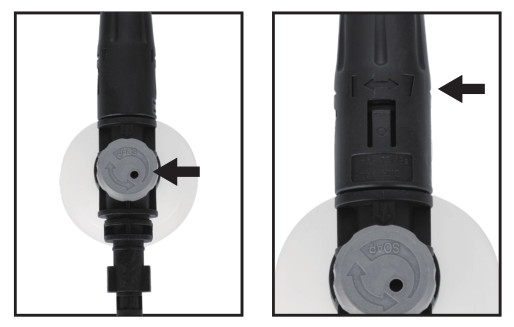
Safety Switch
- Push up on the safety switch until it clicks into the slot. This will prevent any unintentional starts of the pressure washer.
- To unlock the safety switch, press down the safety switch to the “unlocked” position, and then the trigger switch is ready to be triggered.

Using the Quick-Connect NozzleWARNING: NEVER change nozzles without locking the spray gun using the safety switch and NEVER point the wand at your face or at others.
CAUTION!
- The water pressure on the surface you are cleaning increases as you move the spray gun closer to the surface.
- It is recommended that for most cleaning applications, a 20-degree spray angle should be used to avoid damage to the surface being sprayed.
- Turn off the pressure washer and shut off the water supply. Pull trigger to release water pressure.
- Lock the safety switch on the spray gun handle.
- Pull back the quick-connect collar on the spray lance.
- Push the nozzle into place in the spray lance.
- Push the collar forward so that the nozzle is secured properly. Check to see that the spray nozzle is secure.
- Attach the spray lance to the spray gun.

Nozzle OverviewBefore beginning any cleaning task, determine the best nozzle for the job.40′: For gentle cleaning25*: For all-purpose cleaning0*: For spot cleaning or hard-to-reach areasWhen using the pressure washer to clean wooden decks, siding, vehicles, etc., always start using the fan spray and begin spraying from a minimum of 3 feet (0.9 m) away to avoid damaging the surface of the material you are cleaning.
Operating the Pressure WasherBefore starting any cleaning task, it is important to inspect the area for objects that could create a hazard. Remove any objects from the working area that could be tripped over, such as toys or outdoor furniture. Ensure that all doors and windows are closed tightly.
To Clean
- Install the soap bottle on the spray gun.
- Start the pressure washer and spray the detergent on a dry surface using long, even, overlapping strokes. To prevent streaking, do not allow detergent to dry on the surface.
- Twist the cap on the soap bottle to adjust foam density, and turn the front end of the foam lance to adjust spray pattern if needed.
To Rinse
- Using the desired nozzle, spray away from the rinsing surface for approximately 10 seconds to allow any remaining detergent to be flushed from the line.
- Start at the top of the area to be rinsed and work down, overlapping the strokes.
STORAGE
The machine should be stored in a frost-free room!Pump, hose, and accessories should always be emptied of water prior to storage as follows:
- Stop the machine and detach water hose and accessory.
- Restart the machine and activate the trigger. Let the machine run until no more water runs through the spray gun.
- Stop the machine, then unplug and wind up the hose and cable.
- Place the spray gun, nozzle, and other accessories in the holders of the machine. Should the machine freeze over, it will be necessary to check it for damage.
NEVER START UP A FROZEN MACHINE.Frost damage is not covered by the warranty!
Winding Up the Power Cable and High-Pressure HoseTo avoid accidents, the electric cable and the high-pressure hose should always be carefully wound up around the handle or cord winder. Wind up the cable on the appropriate hook.
Storage of AccessoriesThe lance and nozzles can be stored on the pressure washer.
MAINTENANCE
WARNING!Always disconnect the electrical plug from the socket prior to maintenance or cleaning. To ensure a long and problem-free life, it is recommended to comply with the following:
- Wash out the water hose, high-pressure hose, spray lance, and other accessories before mounting.
- Clean the connector, removing any dust and sand.
- Rinse the soap bottle after use.
- Clean the nozzles.
If any repair is needed, please contact customer service.If the supply cord is damaged, it must be replaced by the manufacturer, its service agent, or similarly qualified persons in order to avoid hazards.Cleaning the Water Inlet Filter
- Clean the water inlet filter regularly (once a month or more frequently) according to use.
- Unscrew the quick-connect nozzle and remove the hose.
- Check that it is intact before remounting it.
- The inlet filter must always be fitted inside the water inlet pipe to filter out sand, limestone, and other impurities, as they will damage the pump valves.
CAUTION! Failure to fit the filter will invalidate the warranty.Cleaning the NozzleClogging in the nozzle causes the pump pressure to become too high. This is why cleaning is required immediately.
- Stop the machine and disconnect the nozzle.
- Clean the nozzle. 3. Backflush the nozzle with water.
IMPORTANT: The cleaning tool should only be used while the nozzle is detached!Cleaning the Machine VentsThe machine should be kept clean to let cool air pass freely through the machine vents.
Greasing CouplingsTo ensure an easy connection and that the 0-rings do not dry up, the couplings should be greased regularly.
TROUBLESHOOTING
| Problems | Causes | Solutions |
| The machine does not work. | 1.The machine is not properly plugged into the power outlet.2.The power outlet is defective. The extension cable is defective. | 1.Make sure the machine is properly plugged into a power outlet.2.Try another power outlet.Try without the extension cable. |
| The pressure is fluctuating. | 1.The pump has sucked in air.2.The valves are dirty, worn out or are stuck.3.The pump seals have worn out. | 1.Check that hoses and connections are airtight.2.Clean and replace or contact customer service. |
| The machine stops working periodically. | 1.Incorrect mains voltage is used.2.Thermal cut-out has activated.3.The nozzle is partially blocked. | 1.Check that the mains voltage corresponds to specifications.2.Leave the washer for 5 minutes to let it cool down.3.Clean the nozzle. |
| The machine is pulsating. | 1.There is air in the inlet hose.2.The water supply is inadequate.3.The nozzle is partially blocked.4.The water filter is blocked.5.The high pressure hose is kinked. | 1.Allow the machine to run with the trigger fully depressed untilregular working pressure resumes.2.Make sure that the flow rate of water supply does not fall below 1.59 GPM (6 L/min). Avoid using long, thin hoses (min 1/2″).3.Clean the nozzle.4.Clean the filter.5.Straighten out the hose. |
| The machine often starts and stops by itself. | The pump/spray gun is leaking. | Contact customer service. |
| The machine starts, but no water comes out. | 1.The pump/hose or accessory is frozen.2.There is no water supply.3.The water filter is blocked.4.The nozzle is blocked. | 1.Wait for the pump/hose oraccessory to thaw.2.Connect water supply and turn on.3.Clean the filter.4.Clean the nozzle. |
| There is water coming out of the spray gun, but after the spray lance is installed, no water comes out. | 1.The nozzle is not correctly installed.2.The nozzle is blocked or dirty.3.The nozzle is damaged. | 1.Reinstall the nozzle properly (see “Using the Quick-Connect Nozzle” section).2.Unclog the nozzle using the cleaning pin provided and then flush debris backwards out of the nozzle.3.Change with another nozzle. |
DISPOSAL
This product must not be disposed of as household waste. Dispose of the device at an authorized collection point for the recycling of electrical appliances.
WARRANTY
For your peace of mind, we have provided you with a 45-day unconditional money-back guarantee and a 24-month warranty from the date of purchase. If you encounter any problems, please contact us via the after-sales service email and we will respond to you as soon as possible.Website: www.west-force.comEmail: [email protected]Made in China
[xyz-ips snippet=”download-snippet”]