WESTGATE LFX-LG-50-150W-30K High Lumen Flood Light Instruction Manual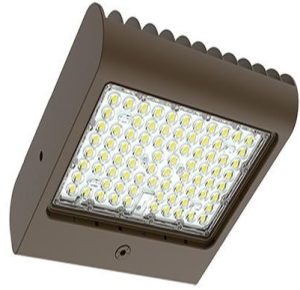
Model number parameter list:
|
Item |
Model |
Input Voltage |
Watt |
Input
Current |
Maximum Weight |
|
1 |
LFX-LG-50-150W-xxK-480V | 200-480V AC | 50W/80W/100W/150W | 0.8A | 9 lbs |
| 2 | LFX-LG-50-150W-xxK | 100-277V AC | 50W/80W/100W/150W | 1.8A |
8 lbs |
|
3 |
LFX-XL-150-300W-xxK | 120-277V AC | 150W/200W/240W/300W | 3.5A | 13.2 lbs |
| 4 | LFX-XL-150-300W-xxK-480V | 277-480V AC | 150W/200W/240W/300W | 1.8A |
16.8 lbs |
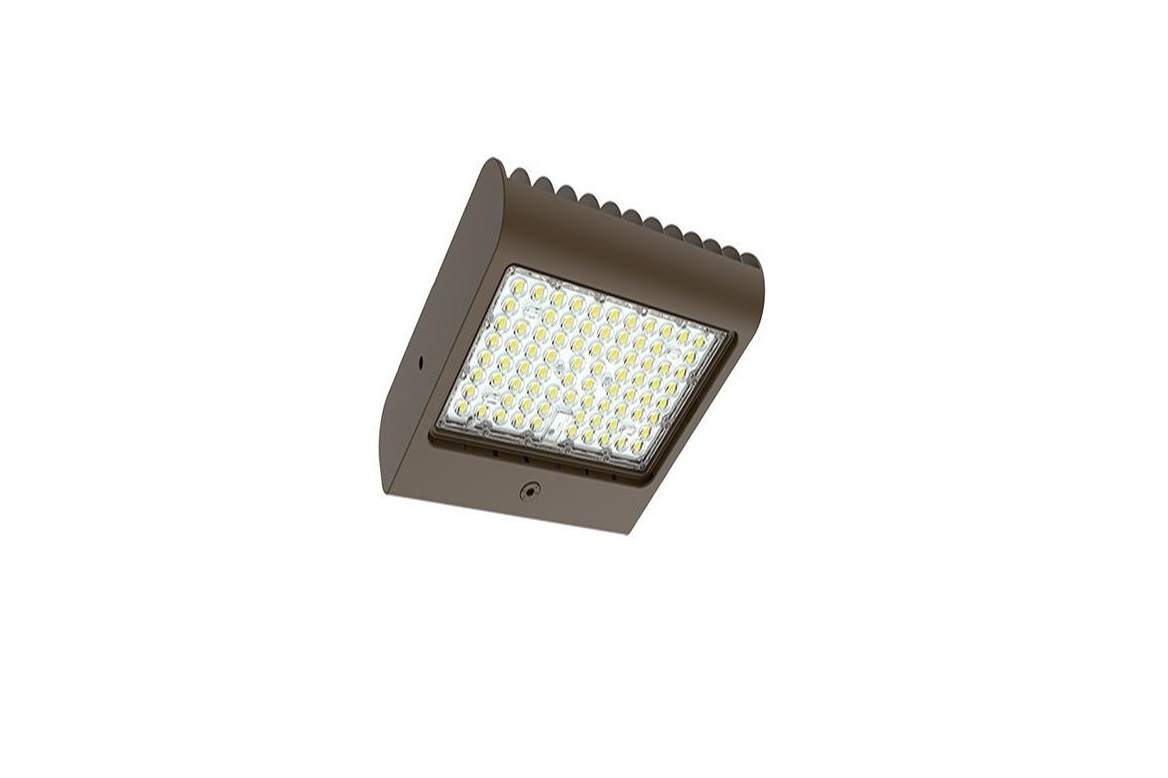
Introduction
- This LED Flood light uses the latest in solid state lighting technology for long life, low maintenance, and high efficiency.
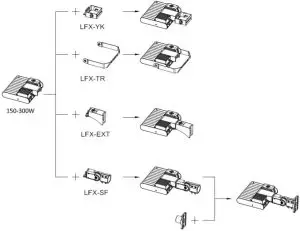
- The same as traditional HID lighting. 150~300W there are five different mounting options, suitable for various occasion.
- Use100-277V&200-480V, 50/60Hz AC supply.
- Suitable for using in the following locations:
- Ambient Temp: -40~ +104°F
- Wet Locations
Note: Save these instructions for future reference.
Installation
Warning:To avoid the risk of fire, explosion, or electric shock, this product should be installed, inspected, and maintained by a qualified electrician only, in accordance with all applicable electrical codes.All the products can not be installed on woods.
Warning:To avoid electric shock:
- Make sure electrical power is OFF before and during installation and maintenance. Luminaire must be connected to a wiring system with an equipment-grounding conductor.
Warning:To avoid explosion:
- Make sure the supply voltage is the same as the rated luminaire voltage.
- Do not install where the marked operating temperatures exceed the ignition temperature of the hazardous atmosphere.
- Do not operate in ambient temperatures above those indicated on the luminaire nameplate.
- Keep lens tightly closed when in operation.
For supply connections use wire rated for at least 194°F
Installation Steps:
Refer to the following diagram when you install the fixture. Five installation methods, directly fix to the mounting surface or fix to a post with a knuckle.
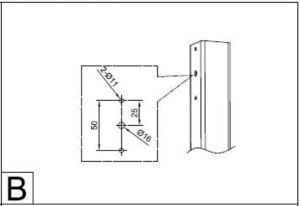
- Directly fix to mounting surface
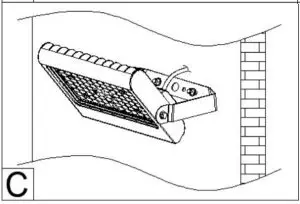
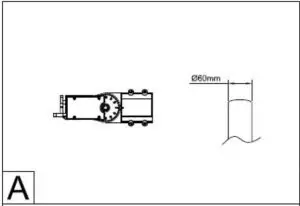
- Mounting with a Slip fitter:
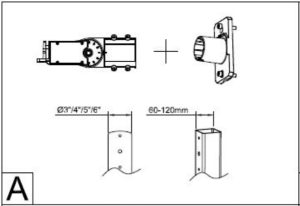
- Mounting with Slip fitter and Wall-mounted adapter:
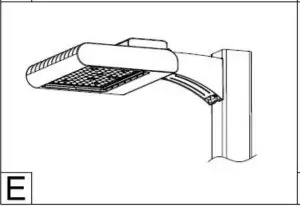
- Mounting with Arm.
- Wall mounted installation

- The mounting method of the straight arm is added to a wall mounted fixing plate, and the fixing plate is mounted on the wall, and the fixing plate is fixed by a nut.Wiring enlarged illustrationConnect the lamp pole internal cable with the luminaire cable. The neutral line is connected to the neutral line. The ground line is grounded, and the live line is connected to the fire line.
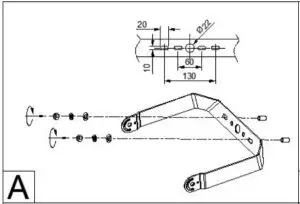


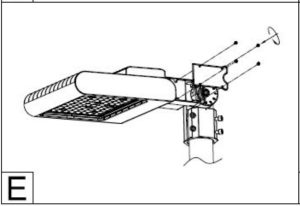


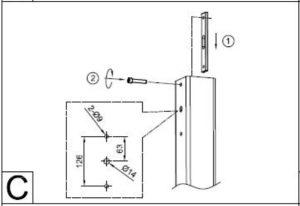


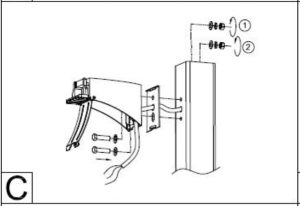
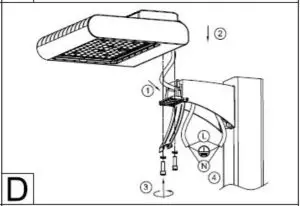

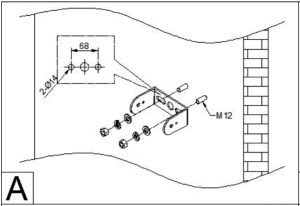


 The mounting method of the straight arm is added to a wall mounted fixing plate, and the fixing plate is mounted on the wall, and the fixing plate is fixed by a nut.Wiring enlarged illustration
 Connect the lamp pole internal cable with the luminaire cable. The neutral line is connected to the neutral line. The ground line is grounded, and the live line is connected to the fire line.
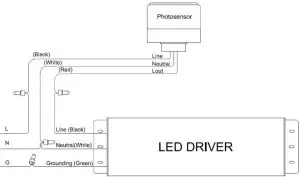
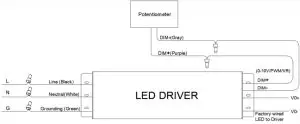
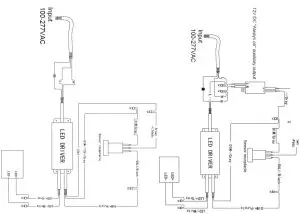
 - Without sensor or photocell
- With sensor
- With photocell
- With photocell(0-10VDC)
- With Potentiometer
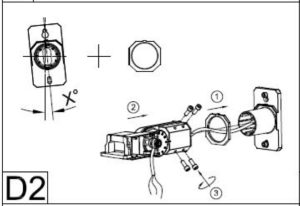
- Wiring diagram for plug-in sensor


Positions for Sensor and Photocell installed:
- Reserved 1/2″-14T thread hole for sensor
- Reserved the hole for Photocell


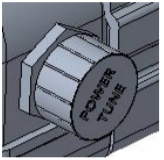
Function description of Wattage Tunable:
If the luminaire is designed to be wattage tunable. Please unscrew the knob cap before using the watt selectable function. According to the watt selectable label shown in Fig. 1,please toggle the DIP switch 1,2,3 to select the corresponding watt. Screw the knob cap after using the watt selectable function.
- Wattage Adjustable


After installation, please
- check whether the lighting fixture is firmly fixed.
- check whether wires are connected correctly.
- At last, turn on the power, and check if the lighting fixture works well. If not, please turn off the power and contact with local dealer.
[xyz-ips snippet=”download-snippet”]