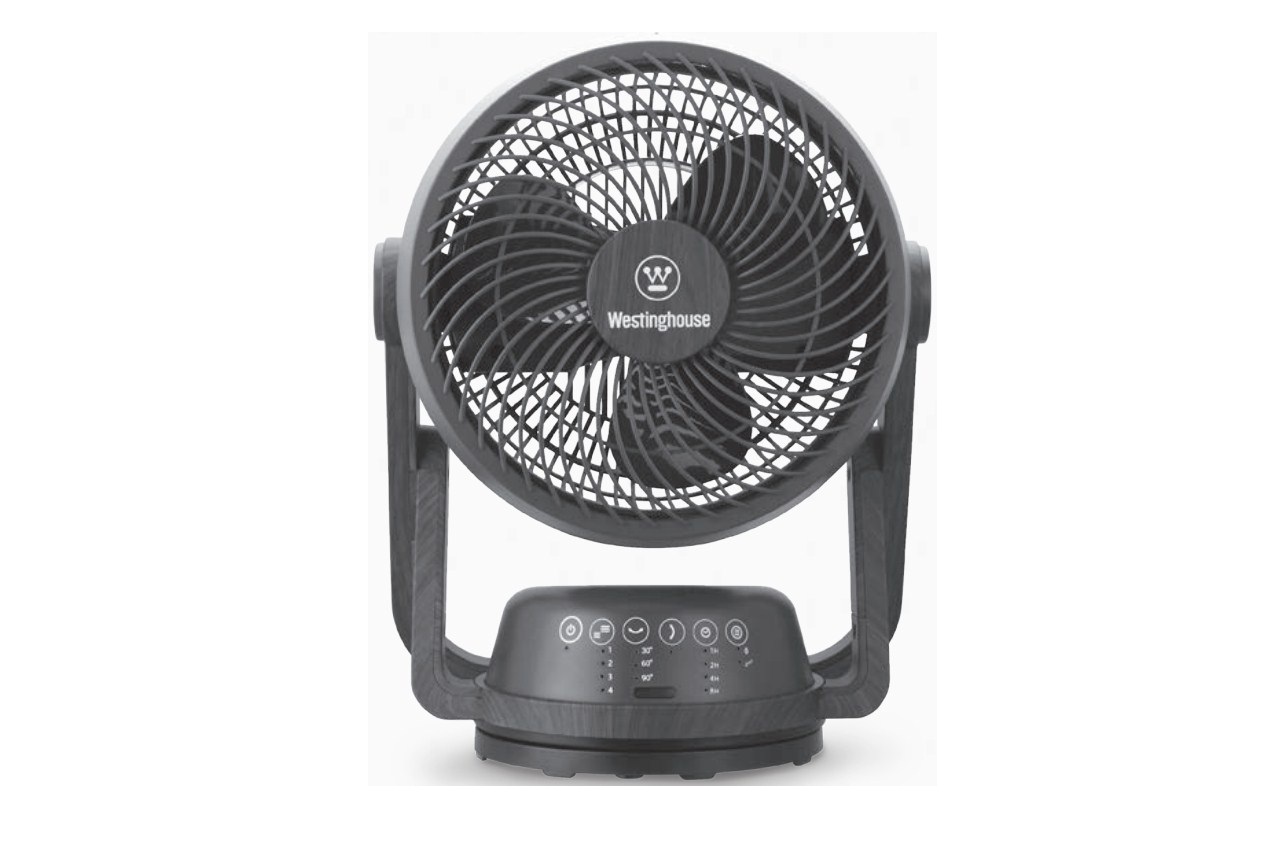
Westinghouse WSFSFSL 9″ Digital Aromatherapy Fan Instruction Manual
SAFETY INFORMATION
DANGER – Immediate hazards which WILL result in sever personal injury or death
WARNING – Hazards or unsafe practices which COULD result in severe personal injury or death.
CAUTION – Hazards or unsafe practices which COULD result in minor personal injury.
WARNINGWhen using electrical appliances, basic safety precautions should always be followed, including the following
IMPORTANT SAFEGUARDS
Read these safety instructions before using the fan for the first time and store them in a safe place. They contain important information on basic safety precautions that must be followed.
- Use this appliance only as described in this manual. Using the appliance for other purposes may cause a fire or electric shock.
- Only connect the appliance to a mains socket that matches the voltage specified on the appliance rating plate (120 V ~ 60 Hz).
- This product is intended for household use only and not for commercial, industrial or outdoor use.
- To prevent the risk of an electrical shock, do not place the appliance near a window where it may be exposed to rain.Never immerse the appliance, power cord or plug in water or any other liquids.
- This appliance can be used by children aged 8 and above and by people with reduced physical, sensory or mental capabilities or lack of experience and knowledge if they have been given supervision or instructions concerning the use of the appliance in a safe way and understand the hazards involved. Children must not play with the appliance. Cleaning and maintenance must not be done by children unless they are older than 8 years of age and supervised by an adult.
- Close supervision must be provided when the appliance and remote control is used by or near children.
DANGER! CHEMICAL BURN HAZARD. KEEP USED AND NEW BATTERIES OUT OF THE REACH OF BABIES AND CHILDREN. Swallowing can cause severe internal burns and even death in as little as 2 hours. If you suspect that a child has swallowed a battery, or has inserted it into any part of the body (such as nose and ears), go to a hospital emergency room immediately.
WARNING! CHOKING HAZARD. Do not allow children to change batteries without adult supervision. If the battery compartment does not close properly, stop using the remote control and keep it out of the reach of children.
- Always dispose of used batteries immediately. Dispose of batteries in compliance with your local laws and regulations.
WARNING! RISK OF EXPLOSION. Do not charge, reactivate, disassemble, burn, bury or short-circuit the batteries.
WARNING! Avoid contact with moving parts. Never insert fingers, pencils or other objects into the rotating fan blades or any openings of the appliance, as this may cause an injury, electric shock, fire, or damage to the appliance. Keep hands, hair, clothing, and jewelry away from the protective guards during operation to prevent injury.
- Use the appliance upright on a dry, level and hard surface.
WARNING! Do not let the power cord hang over the edge of a table or counter. Ensure that the power cord is not in a position where it can be pulled by children or pets, or tripped over.
WARNING! Always unplug the appliance from the wall socket:
- before assembling/disassembling any parts,
- before moving the appliance,
- before cleaning and storing, or
- when it is unattended.
- To disconnect the appliance from the mains, grip the plug and pull it from the wall outlet. Do not pull on the cord.
- Do not use the appliance in the presence of explosive and/or flammable fumes.
DANGER OF ELECTROCUTION! Never use the appliance in the bathroom, or near any source of water or significant moisture (e.g. near a swimming pool, bathtub, basin, or in a damp basement, etc.). Do not place any objects filled with liquids (e.g. vases) near or on the appliance.
- Only use the appliance with the original accessories and parts supplied. The use of accessories or fittings other than those supplied with this appliance may result in an injury, fire or damage and will void the warranty.
- If the power cord is damaged, it must be replaced by the manufacturer’s authorized service centre.
DANGER OF ELECTROCUTION! This appliance has no userserviceable parts. Never attempt to dismantle or repair the appliance yourself. The warranty will not cover any claim for damage due to mishandling.
WARNING! Never use a damaged appliance. Do not use the appliance after it malfunctions, or has been dropped or damaged in any manner. In case of malfunction or any damage, unplug the appliance and contact an authorized service centre for repairs.
WARNING:
- CHOKING HAZARD! Keep small parts and the safety screw away from children and pets.
- Before plugging in the appliance, always ensure that all parts are properly assembled and securely in place.
POLARIZED PLUG

The appliance has a polarized plug (one blade is wider than the other). To reduce the risk of electric shock, this plug is intended to fit into a polarized outlet only one way. If the plug does not fit fully into the outlet, reverse the plug. If it still does not fit, contact a qualified electrician.
DO NOT ATTEMPT TO MODIFY THIS PLUG OR ATTEMPT TO DEFEAT ITS SAFETY FEATURE IN ANY WAY.
RETAIN THESE INSTRUCTIONS FOR HOUSEHOLD USE ONLY
HOW TO USE
DESCRIPTION OF PARTS
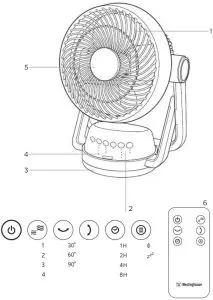
- Front guard
- Control panel and indicator lights
- Base
- Remote control signal receiver
- Aromatherapy cap
- Remote control
- Rear guard
- Power cord
- Handle/Remote control storage compartment
| Control Panel | Remote Control | Function | |
|
Button |
|||
| POWER |
|
Press to turn the fan ON or to STANDBY MODE (stop).The indicator lights on the Control Panel indicate the current status of the fan. | |
SPEED |
|
Press to select the wind speed (1/2/3/4). | |
| Control Panel | Remote Control | Function | |
|
Button |
|||
| MODE |
|
|
|
LEFT- RIGHT oscillation |
|
Press to start the LEFT-RIGHT oscillation at a 30⁰/60⁰/90⁰ angle, or to stop the function. | |
UP-DOWN oscillation |
|
Press to start or stop the UP-DOWN oscillation. | |
| Control Panel | Remote Control | Function | |
| Button | |||
| TIMER |
|
Press to set the Auto On or Auto Off Timer and automatically turn the fan ON or to STANDBY MODE (stop) at a later time.
|
REMOTE CONTROL
- Before the first use, pull out the battery insulating strip from the battery compartment to start using the remote control (6).The battery is included with the product.
- The remote control can be stored in the handle (9) on the back of the fan.
- Replace the battery with the same or equivalent type of battery.
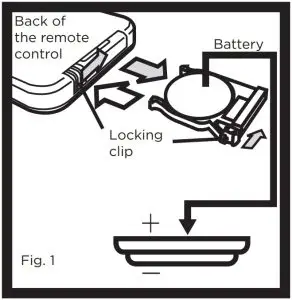
Replacing the battery
- Hold the remote control with the back side facing up.
- On the bottom of the remote control, use your thumb (or a flat screwdriver) to push and hold the small locking clip towards the opposite corner of the clip. While still holding, pull the groove on the battery compartment to slide it out (Fig. 1).
- Install a new battery (1 x CR2032 3V Lithium button battery) with the + side facing up and close the battery compartment.
DANGER! CHEMICAL BURN AND CHOKING HAZARD. KEEP USED AND NEW BATTERIES OUT OF THE REACH OF CHILDREN. If accidentally swallowed, seek medical attention immediately.
USING THE APPLIANCE
- Place the fan upright on a dry, level and stable surface.
- Plug the power cord firmly into a 120 V ~ 60 Hz wall socket. The fan will beep twice to indicate that it has entered STANDBY MODE.
- Press the POWER button to turn the fan ON.
- Press the buttons on the Control Panel (2) or remote control (6) to select the desired functions (see OVERVIEW OF CONTROL BUTTONS). The indicator lights on the Control Panel show the current status of the fan.
- Once you have finished using the fan, press the POWER button to turn the fan to STANDBY MODE (stop), and then unplug the power cord from the wall socket.
CAUTION! Always unplug the appliance from the wall socket when it is not in use to disconnect it completely from the power supply.
AROMATHERAPY FUNCTION
To use the fan’s aromatherapy function:
- While the fan is off, turn the aromatherapy cap (5) anticlockwise to remove it from the front guard (1).
- Then turn the cotton pad compartment anti-clockwise to access the replaceable cotton pad.
- Add a few drops of your favorite essential oil to the cotton pad.
- Close the cotton pad compartment and attach the aromatherapy cap (5) back onto the front guard (1).
INDICATOR LIGHTS – AUTO-DIMMING AND OFF FUNCTIONThe Control Panel has an Auto-dimming function that reduces the brightness of the indicator lights 60 seconds after the last button is pressed.
- To turn the indicator lights off completely, press and hold the MODE button for 3 seconds. Repeat to turn the indicator lights back on.
12-HOUR AUTO POWER OFF FUNCTIONThis function automatically switches the fan off after 12 hours of continuous use. We recommend using the fan with the function activated.
- To disable the 12-hour Auto Power Off function, press and hold the SPEED button for 5 seconds. The SPEED indicator will blin continuously on the Control Panel to indicate that the function is disabled.
- Turn the fan off once you have finished using the appliance. The function will be automatically re-activated the next time you turn the fan on.
CLEANING AND CARE

- DO NOT disassemble the rear guard (7) and motor unit. Only wipe the surfaces with a soft dry cloth, or a soft cloth lightly moistened with water. Gently remove dust with a soft dry toothbrush if necessary. Dry with a soft cloth and allow to air dry completely.
- After removing the front guard (1), fan blade cap (A), and fan blades (B), rinse them under the tap, or clean them in mild soapy water with a soft sponge/cloth. Dry thoroughly after cleaning.
- Allow all parts to dry completely before reassembling them.
STORAGE
- If the fan will not be used for a long period of time, unplug the fan and store it in its original box.
- Store in a cool, dry and well-ventilated place, away from dust.
- Do not wrap the power cord tightly around the appliance or apply tension, as this may damage the appliance.
- Remove the battery from the remote control to prevent leaks.
DISPOSAL
Proper disposal of this product.
![]() This symbol indicates that this appliance may not be treated as household waste. Instead, it should be taken to the appropriate collection point for recycling electrical and electronic equipment.
This symbol indicates that this appliance may not be treated as household waste. Instead, it should be taken to the appropriate collection point for recycling electrical and electronic equipment.
Please use the return or collections services available in your community or contact the retailer where you purchased this product.
INFORMATION AND SERVICE
If you have questions or concerns about your product, please visit our website: www.westinghousehomeware.com, or contact our overseas offices/agents.
report this adIn line with our policy of continuous product development, we reserve the right to change the product, packaging and documentation specifications without prior notice.
- Model: WSFSFSL
- Voltage: 120 V/AC, 60 Hz
- Power: 25 W
- Dimensions: 275 x 185 x 355 mm
- Net weight: 2.61 kg
References
[xyz-ips snippet=”download-snippet”]