INSTALLATION INSTRUCTIONS for 4317824 Cord Kit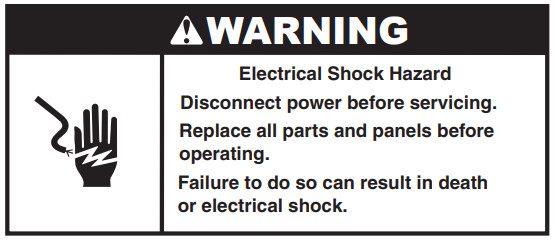

Electrical Shock HazardPlug into a grounded 3 prong outlet.Do not remove the ground prong.Do not use an adapter.Do not use an extension cord. Failure to follow these instructions can result in death, fire, or electrical shock.NOTE: Before mounting the cord to the dishwasher, check the electrical requirements and outlet location.
Electrical requirements
If codes permit and a separate grounding wire is used, it is recommended that a qualified electrician determine that the grounding path is adequate.A 120-volt, 60-Hz. AC-only, 15- or 20-ampere, fused electrical supply is required. A Time-delay fuse or circuit breaker is recommended. It is recommended that a separate circuit serving only this dishwasher be provided.
Grounding instructions
This appliance must be grounded. In the event of a malfunction or breakdown, grounding will reduce the risk of electric shock by providing a path of least resistance for electric current. This appliance is equipped with a cord having an equipment-grounding conductor and a grounding plug. The plug must be plugged into an appropriate outlet that is installed and grounded in accordance with all local codes and ordinances.WARNING: Improper connection of the equipment-grounding conductor can result in a risk of electric shock. Check with a qualified electrician or service representative if you are in doubt whether the appliance is properly grounded. Do not modify the plug provided with the appliance; if it will not fit the outlet, have a proper outlet installed by a qualified electrician.
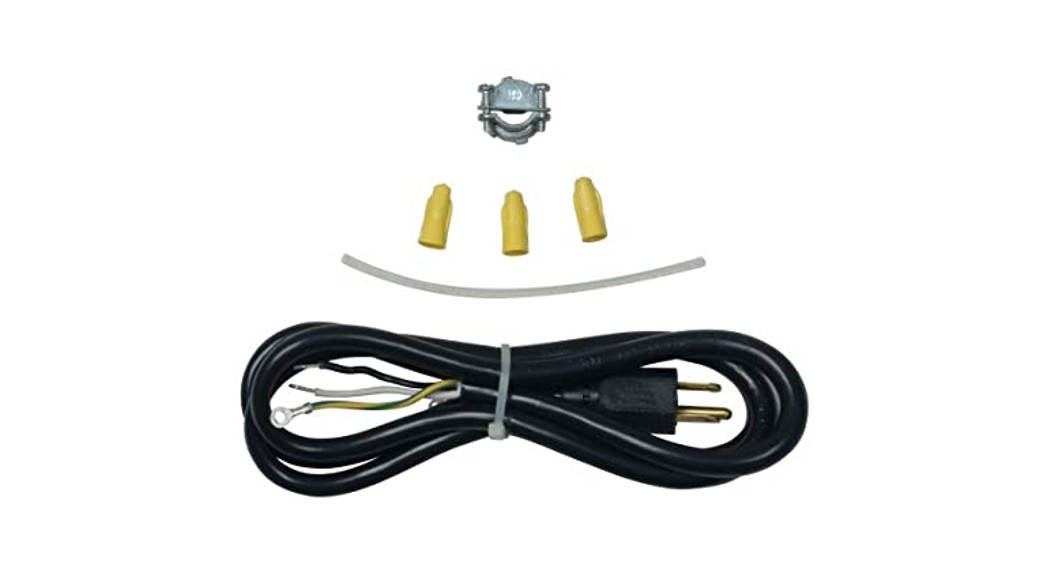
Kit Contains:1 Power Cord 5-1/2′3 Wire Connectors1 Protective Grommet1 Metal Strain Relief (clamp type connector)
Tools Required:1 Phillips Screwdriver1 Plier1 Flat Blade Screwdriver1 Nut Driver or Hex Socket 1/4″
Outlet Location
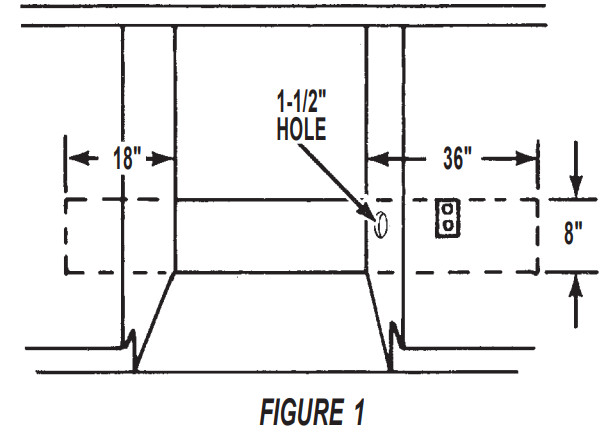
- The receptacle outlet should be within a reasonable distance of the dishwasher in order for the cord to reach without being strained. See dotted lines in figure 1.IMPORTANT: Do not use an extension cord.
- If necessary, cut a 1-1/2″ (4cm) diameter hole in either of the cabinet side walls to allow the new cord to pass through. See figure 1.
3. If the cabinet side walls are wood, sand the edge of the hole until smooth. If the sidewall is metal, install the protective grommet supplied in this kit.
To mount the new assembly
- Disconnect power or unplug the dishwasher.
- Remove the access panel and the terminal box cover.
- Install metal strain relief in a hole in the back of the terminal box. See figure 2.
- Install the wires (opposite the plug end) of the cord into the terminal box through the metal strain relief. Tighten clamp or connector on power cord using Phillips screwdriver.
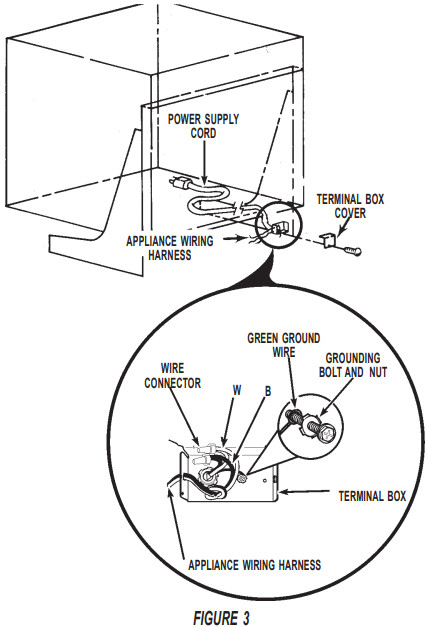
- Connect the white and black wires of the power supply cord to the white and black wires in the terminal box using wire connectors supply. See figure 3.
- Ground wire connection:6a. Units with grounding bolts. Remove the grounding bolt and place the ring terminal of the green ground wire on the power cord over the bolt. Reattach and tighten the green bolt. See figure 3.6b. Units without grounding bolts. Locate the power cord green grounding wire and remove the ring terminal. Remove ½” of the outer green wire jacket to expose the inner wire. Mate this wire to the remaining green wire from your dishwasher. Use the remaining wire nut to complete the connection (see helpful tip for proper connection technique.)
- Replace the terminal box cover.
- The dishwasher should be plugged in or the cord passed through the hole in the cabinet before the access panel is reinstalled.IMPORTANT: The strain relief MUST BE USED to prevent the power cord wires from being pulled out of the terminal box accidentally.
- Replace the access panel.
- Reconnect power or plugin the dishwasher.
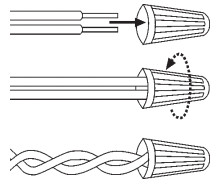
HELPFUL TIP:
- Select the proper size twist-on connectors to connect your household wiring to 16-gauge dishwasher wiring
- Insert wire ends into the twist-on connector. Do not pre-twist bare wire.
- Twist connector.
- Gently tug on wires to be sure both are secured.
 4317825-E(continued)Instruction Sheet 4317825 Rev. E 7/12© Whirlpool Corporation 2012 (All Rights Reserved) (continued) Instruction Sheet 4317825 Rev. E 7/12
[xyz-ips snippet=”download-snippet”]