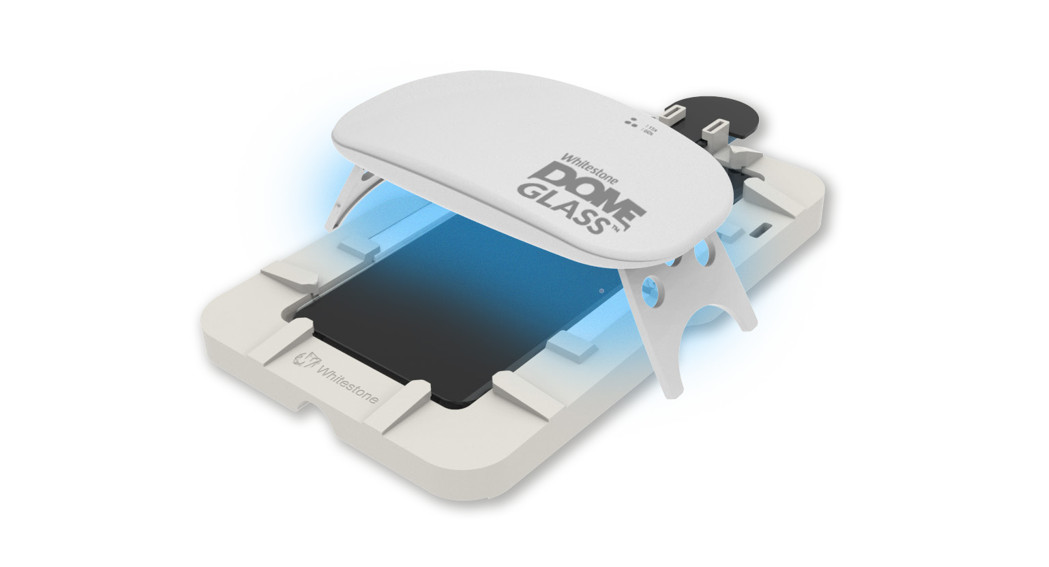
![]() DOME GLASS®New Seesaw Installation User GuideUser Guide
DOME GLASS®New Seesaw Installation User GuideUser Guide
- Please check all manual and attachment videos before using the product.
- Products damaged or damaged by user negligence cannot be exchanged or refunded.
New Seesaw Installation Guide
![]() Please make sure to check the manual and installation video before using the product.
Please make sure to check the manual and installation video before using the product.![]() Products damaged or damaged by user usage, cannot be exchanged or refunded.
Products damaged or damaged by user usage, cannot be exchanged or refunded.
After checking the Quick guide, check the User guide.

<Quick guide / User guide>http://m.site.naver.com/0lpjS
![]() Please check the model and components before using the product.
Please check the model and components before using the product.
- Match your device model with the product in advance.
- Please check all the components listed on page3 and if there is any problem with the components, please contact us before the installation.
Cautions before Dome glass installation
- Watch the Installation video and manual carefully before start to install.
- Please see all introductions, since each device has a different installation way.
- Install the Dome glass after removing any film on the screen.
- Must check if the installation spot is flat using a level meter or an app.
- Please avoid a dusty place or sunlight.
- Be careful of any impacts while getting out the jig from the box in order to prevent any damage.
- Please check whether the installation can be started within enough space.
- Be careful not to force the jig apart or break it.
- The liquid adhesive is harmless to your body but be careful not to consume it.
- If there is a problem with the subsidiary materials, please do not attempt installation and contact customer service immediately.
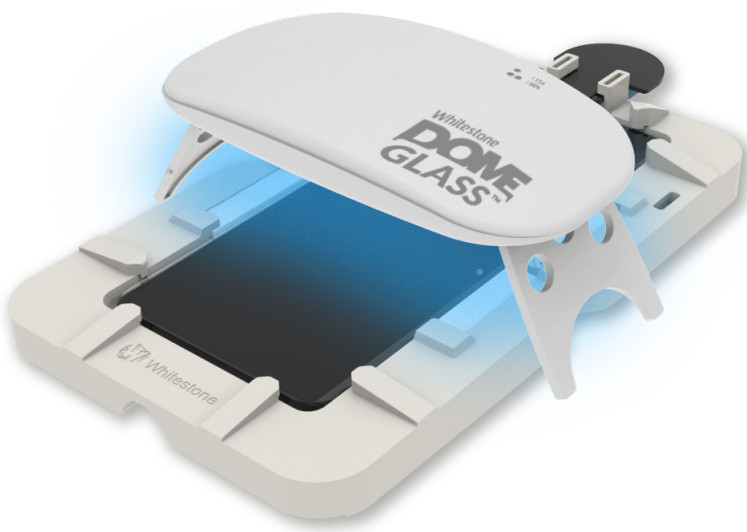
UV Curing Machine
Not included in the replacement kit.

- UV curing machine recommends using 2A or higher power.
- When using low current (A) power (laptop or power bank) After the 2nd curing, proceed with 2~3 additional curing.
New Seesaw Installation Guide
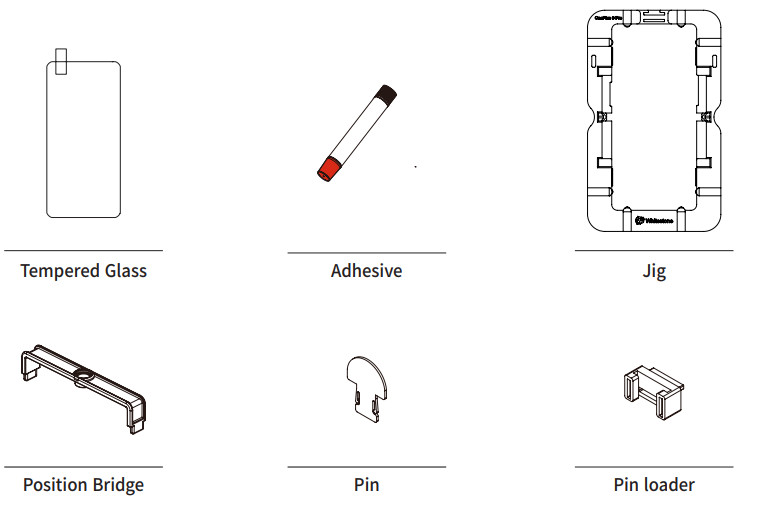
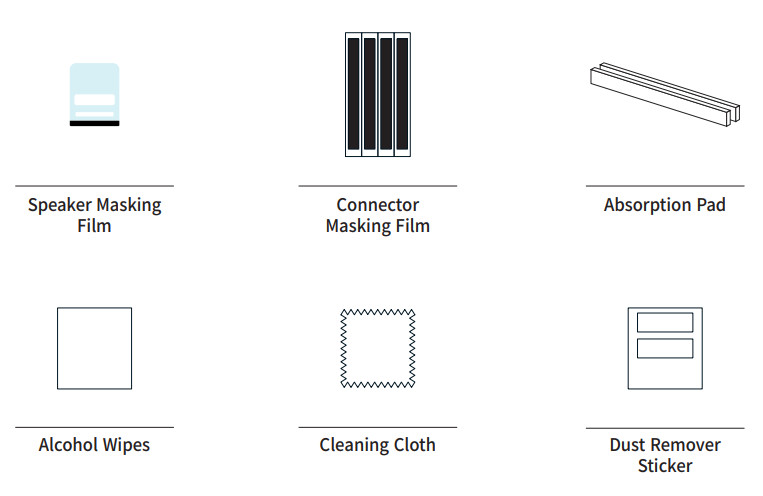
 Components
![]() Reference
Reference
- There may be differences in components depending on the model.
- To improve the product, component’s appearance or specifications, etc. can be changed without prior notice.
- Some components can be purchased separately if necessary.
UV Curing MachineNot included in the replacement kit.
New Seesaw Installation Guide Installation
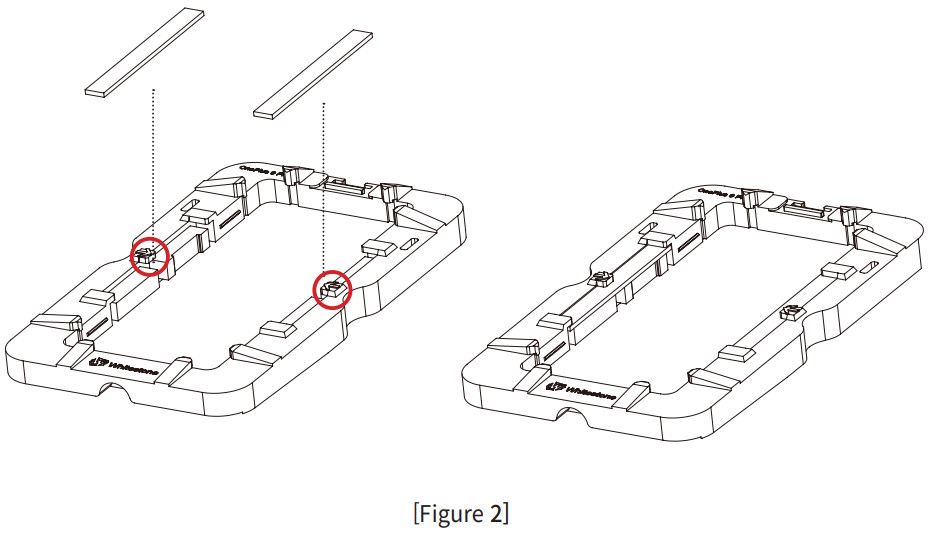
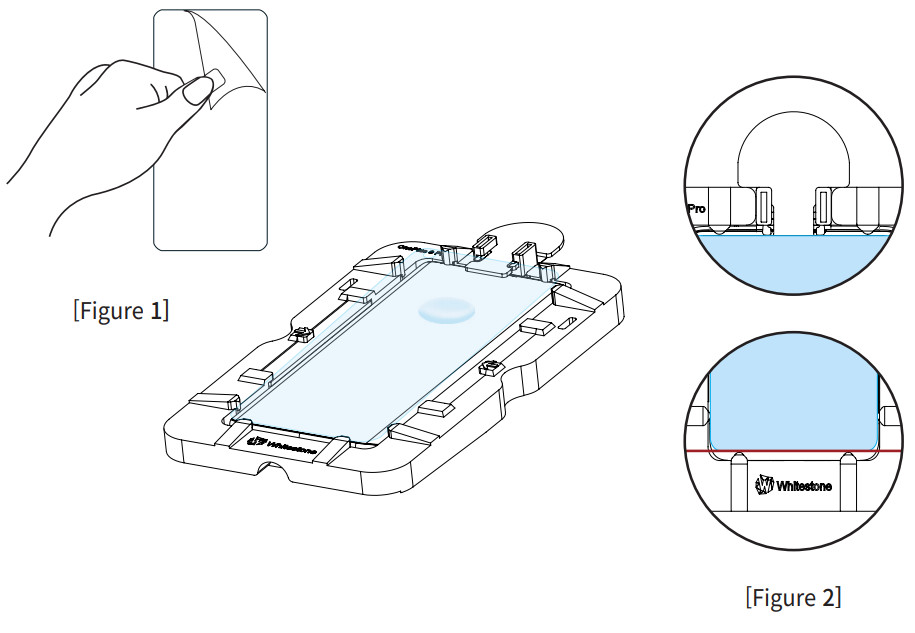
STEP1[Figure 1] Attach the connector masking film to the top, bottom, left, and right sides of the device. Must cover buttons, charging port, S-pen inserted part of the deviceto avoid any inflow of adhesive.[Figure 2] Insert absorption pads into both sides of the JIG.
![]()
- When attaching it, be careful not to cover the device screen.
- Make sure the absorption pads are inserted firmly into the JIG.

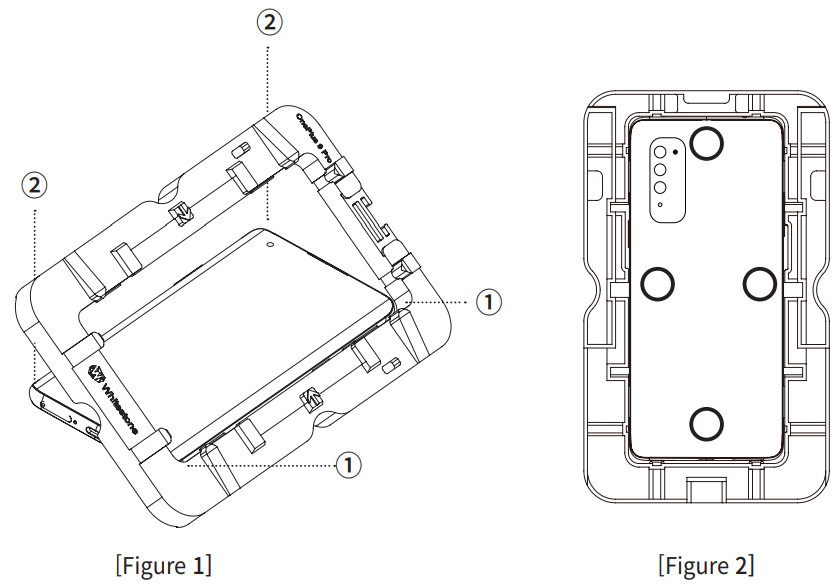
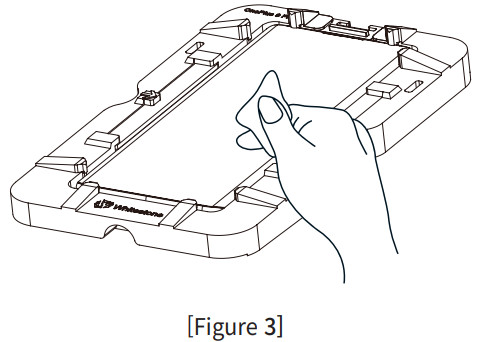
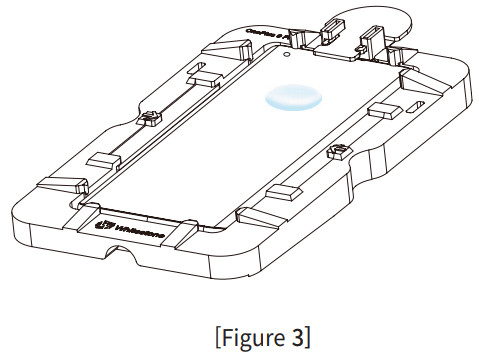
STEP2[Figure 1] Place the JIG onto the device and insert it from the right side of the JIG ① and then push to insert the opposite side ② as well.[Figure 2] Make sure to push the back of the device all the way to make a “click” sound.(Back 4 points of the device as shown in the image.)[Figure 3] Clean the screen with an alcohol wipe and a microfiber cloth, and then remove any dust with a dust removal sticker.![]() Make sure to combine the device and the JIG accurately to prevent any flow of adhesive during the installation.
Make sure to combine the device and the JIG accurately to prevent any flow of adhesive during the installation.
STEP3[Figure 1] Insert the *speaker masking film to the top hole of the JIG and then attach black part of the film tape to the speaker of the device.[Figure 2] Insert Pin Loader onto the top of the JIG (on the speaker masking film).Watch for the correct direction as shown in the image.[Figure 3] Insert the position bridge into the JIG and Pin into the Pin Loader.
![]()
- Be careful not to touch the cleaned screen when attaching the speaker masking film.(*Only for models with speaker masking film.)


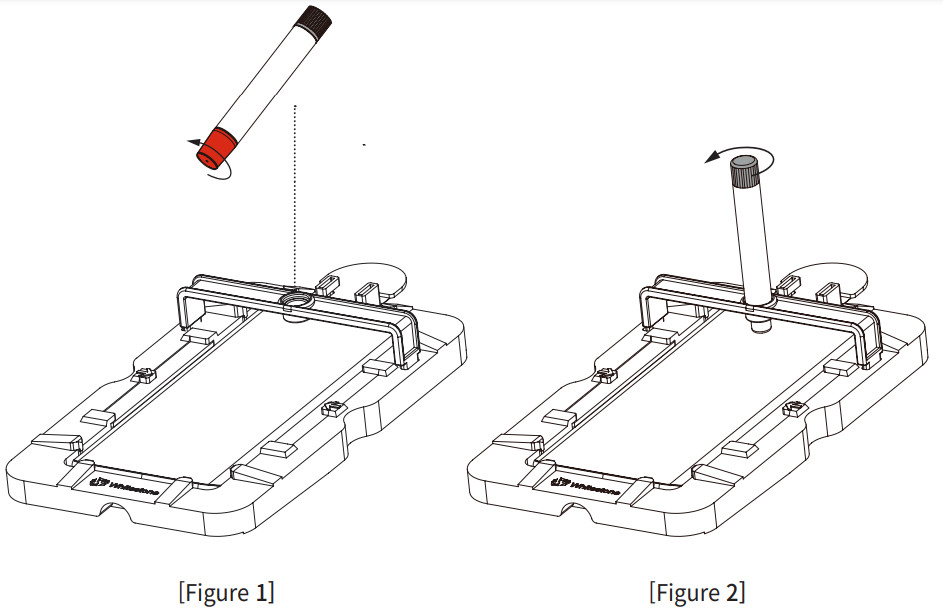
STEP4[Figure 1] Open the color cap of the adhesive and completely fit it into the position bridge hole.[Figure 2] Open the black cap and wait 30 seconds for the adhesive to flow out completely.[Figure 2] Hold the center of the JIG lightly and lift the Position Bridge and remove both Position Bridge and adhesive bottle together.
![]()
- Use only one adhesive for installation.
- Use extra adhesive if you failed the first installation attempt, before UV curing step.
- Excessive pressure when opening the black cap may cause insufficient or shift in the position of adhesive.
- When the adhesive is out of the center, level the JIG and carefully move adhesive to the center.
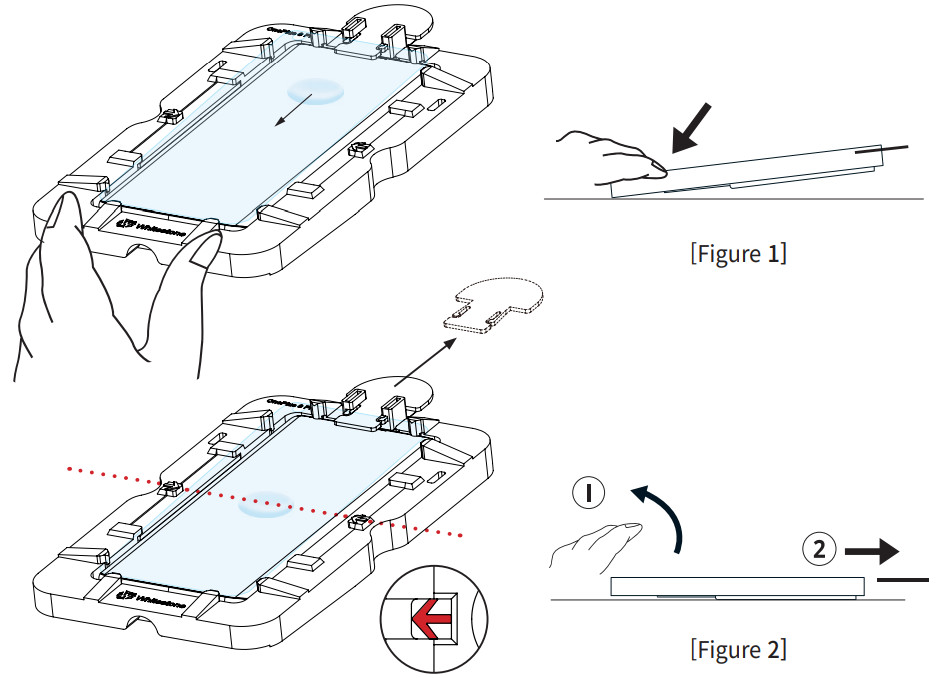
STEP5[Figure 1] Remove the liner film on the back of the tempered glass, and align the glass at the bottom of the JIG[Figure 2] Place the tempered glass diagonally on the Pin.
![]()
- Please keep the liner film for the cover back of the glass in case you need the second attempt installation.
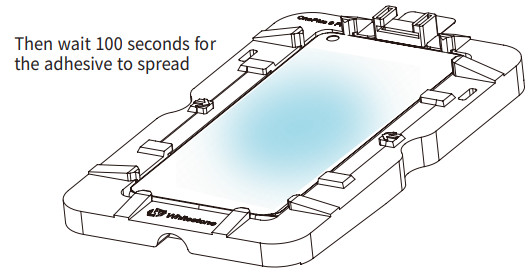
STEP6[Figure 1] Press the bottom of the JIG for adhesive moves to the center.[Figure 2] When the adhesive touches the tempered glass and is located on the arrow line that is marked on the JIG, 1) Release the hand that was pressing the JIG2) Remove the Pin. Then wait 100 seconds for the adhesive to spread, make sure the adhesive is completely spread out to the edge.
![]()
- Do not touch or move the JIG or the glass while adhesive spreads.
- Check if the adhesive spread out completely before UV curing.
![]() The adhesive doesn’t spread completely on the screen!
The adhesive doesn’t spread completely on the screen!
- Please check the manual and the video for re-installation.

<Re-installation Manual/Video>before curinghttp://m.site.naver.com/0Nfi1
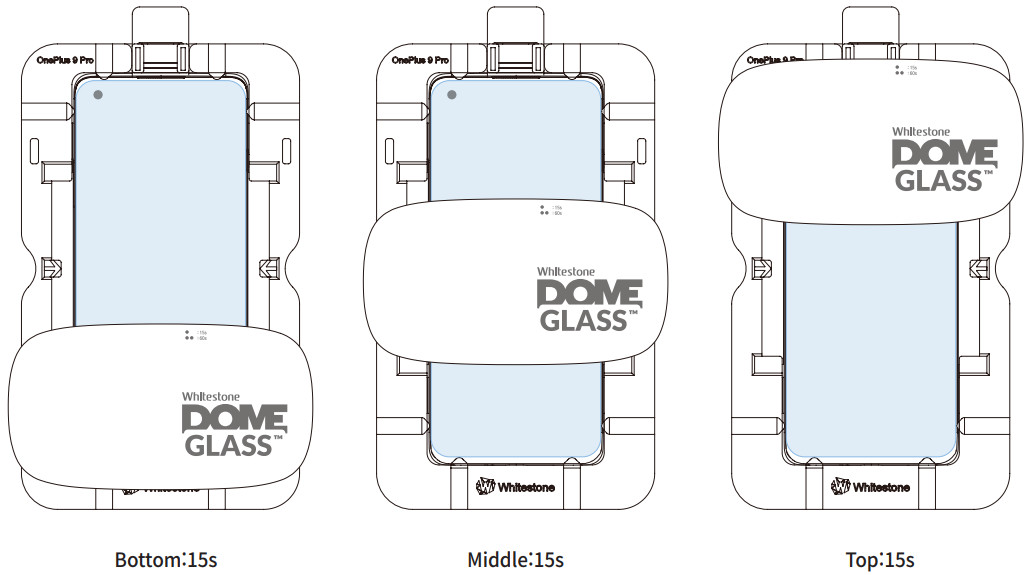
STEP71st curing process: Cure with UV machine 15 seconds each from bottom to top part of the device. Remove the JIG from the device and then clean the side of the device with an alcohol wipe.
![]()
- Remove *speaker masking film after 1st curing. (*Only for models with speaker masking film.)
- Wipe the device in one direction.
- Be careful not to press the device or glass too hard when cleaning with an alcohol wipe.It may cause glass lifting or loss of adhesive.

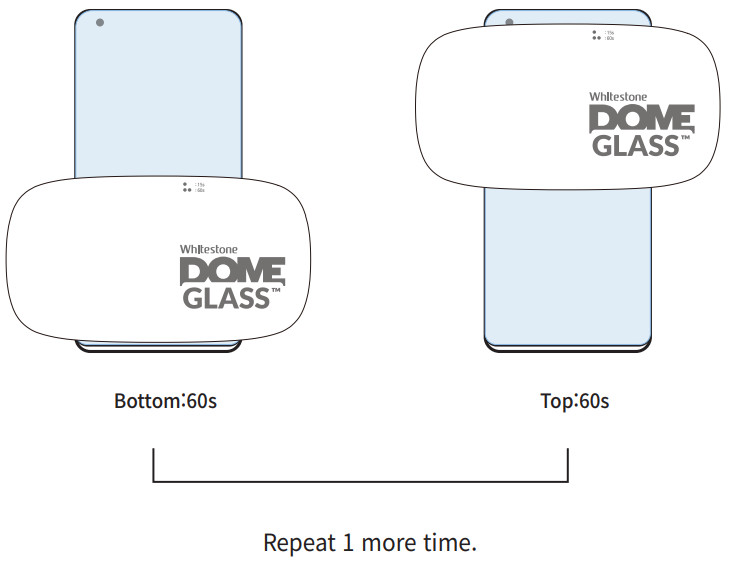
STEP82nd curing process: Cure 60 seconds each for the bottom and top of the device and repeat 1 more time.(2nd curing total time: bottom 120 seconds / top 120 seconds)
![]()
- Please re-register your fingerprint after installation.
- Please enable touch sensitivity in the device setting to improve the touch sensitivity.
- Fingerprint recognition sensor performance may be affected when tempered glass is attached.
Precautions after installation
- Dome glass may be damaged by impacts or external strength.
- Although Dome glass includes shatter-resistant film, recommend users change the Dome glass to new one once glass is broken in order to prevent any harm.
- Bubbles or lifting may occur by physical impacts such as drop impact, incompatible phone cases use, excessive strength while cleaning with alcohol wipes or etc.
- No refund or exchange for any type of user damages.
- Refer to the Reuse of Jig manual when reusing the jig.
Precautions when removing the tempered glass
- When removing the tempered glass from the device, face it towards the ground before removing it.
- Remove it outdoors or near a trash can.
- Use your fingernails and slowly lift the glass from the corner to remove it.(Removing it suddenly could lead to damages or injuries)
※Global A/S※CONTACT US[email protected]HOMEPAGEwww.whitestonedome.com> WARRANTY REQUESTWe always provide friendly and fast service to your questions.WHITESTONE Ltd.27, Baekseokgongdan7-ro, SeoBuk-gu, Cheonan-si,Chungcheongnam-do, Republic of Korea
![]()
The unique Component Manufacturer, Whitestone (www.whitestonedome.com) for Mobile Device.Copyright ⓒ 2021 Whitestone Ltd. All rights reserved.
References
[xyz-ips snippet=”download-snippet”]