Installation InstructionsREAD BEFORE INSTALLING UNITWindow Mounting (8,000~12,000 BTU)
INSTALLATION WARNINGS AND CAUTION
- The unit is for window mounting only.
- Carefully read the installation manual before beginning.
- Follow each step as shown.
- Observe all local, state, and national electrical codes and by qualified, licensed, authorized personnel only.
- Pay attention to danger and safety notices.
To avoid the risk of personal injury, property damage, or product damage due to the weight of this device and sharp edges that may be exposed:
- Air conditioners covered in this manual pose an excessive weight hazard. Two or more people are needed to move and install the unit. Wear protective gloves whenever lifting or carrying the unit. AVOID the sharp metal fins of the front and rear coils. To prevent injury or strain, use proper lifting and carrying techniques when moving the unit.
- Carefully inspect the location where the air conditioner will be installed. Be sure it will support the weight of the unit over an extended period of time.
- Handle air conditioner with care.
- Make sure the air conditioner does not fall during installation.
![]() NOTE:
NOTE:
- SAVE CARTON and this INSTALLATION INSTRUCTIONS for future reference. The carton is the best way to store unit during winter, or when not in use.
- DO NOT USE ANY SCREWS OTHER THAN THOSE SPECIFIED HERE.
- FOR SAFETY REASONS, THE TOP RAIL MUST BE SECURELY FASTENED WITH ALL FOUR (4) SCREWS.
Some assembly is required. Please read these instructions carefully.
| Top Rail Hardware | Qty. | |
 |
3/8″ Screw | 4 |
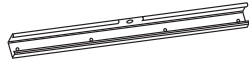 |
Top Rail | 1 |
| Mounting Hardware | Qty. | |
| 1/2″ | 7 | |
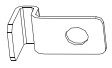 |
lock frame(For Wooden windows) | 2 |
 |
lock frame(For Vinyl-clad windows) | 2 |
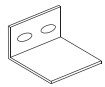 |
sash lock | 1 |
| Weatherstripping (10” X 1 1/2” X 1/6”) | 2 | |
 |
window sash seal foam | 1 |
| TOOL NEEDED |
| Philips Screwdriver |
| Drill (If pilot holes are needed) |
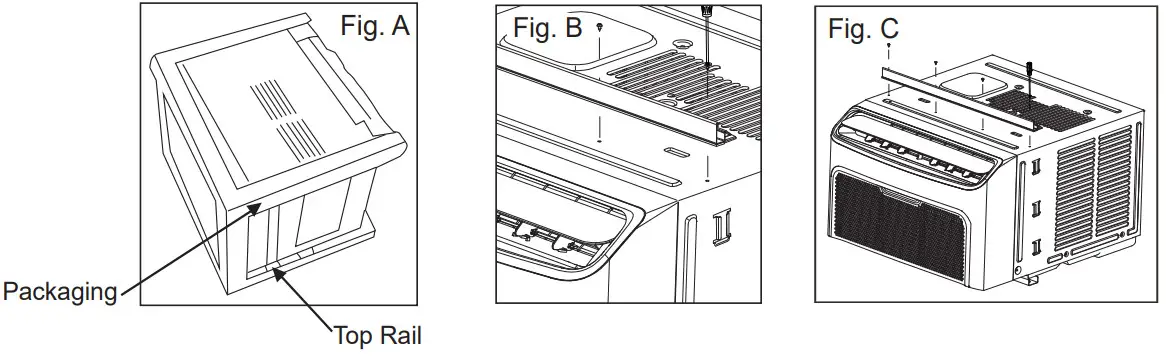
Before installing, the top rail must be assembled on the unit.A. Remove the air conditioner from the carton and place on a flat surface.B. Remove top rail from the rear of the packaging material as shown in Fig. AC. Align the hole in the top rail with those on the top of the unit as shown in Fig. BD. Secure the top rail to the unit with the 3/8 Screws as shown in Fig. C
Installation
LEFT + RIGHT FILLER PANEL ASSEMBLY
NOTE: Top Rail and Side Panels at each side are offset to provide the proper pitch to the rear of (5/16”). This is necessary for proper condensed water utilization and drainage. If you are not using the Side Panels for any reason, this pitch to the rear must be maintained!
- Place unit on the floor, a bench or a table. There is Left and Right side Filler Panels – be sure to use the proper panel for each side. When installed, the flange for securing the panel in place to the window sill will be facing into the room.A. Hold the side Panel in one hand and gently pull back the center to free the open end. See FIG. 1.B. Slide the free end “T” section of the panel directly into the cabinet as shown in FIG. 2. Slide the panel down. Be sure to leave enough space to slip the top and bottom of the frame into the rails on the cabinet.C. Once the panel has been installed on the side of the cabinet, make sure it sits securely inside the frame channel by making slight adjustments. Slide the top and bottom ends of the frame into the top and bottom rails of the cabinet. See FIG. 3.D. Slide the panel all the way in and repeat on the other side.
 Your air conditioner is designed to install in standard double-hung windows with opening widths of 23.6 to 38.8 inches (600 mm to 985mm) (FIG. 4A, FIG. 4B).The lower sash must open sufficiently to allow a clear vertical opening of 13.8 inches (350 mm). Side louvers and the rear of the air conditioner must have clear air space to allow enough airflow through the condenser, for heat removal. The rear of the unit must be outdoors, not inside a building or garage. There should be at least 11.8 inches (300mm) clearance around the unit. See FIG. 4C & FIG. 4D.
 - Storm Window:If the air conditioner is blocked by Storm Window, add wood as shown in FIG. 5, or remove storm window before air conditioner is installed.If Storm Window Frame must remain, be sure the drain holes or slots are not caulked or painted shut. Accumulated Rain Water or Condensation must be allowed to drain out.
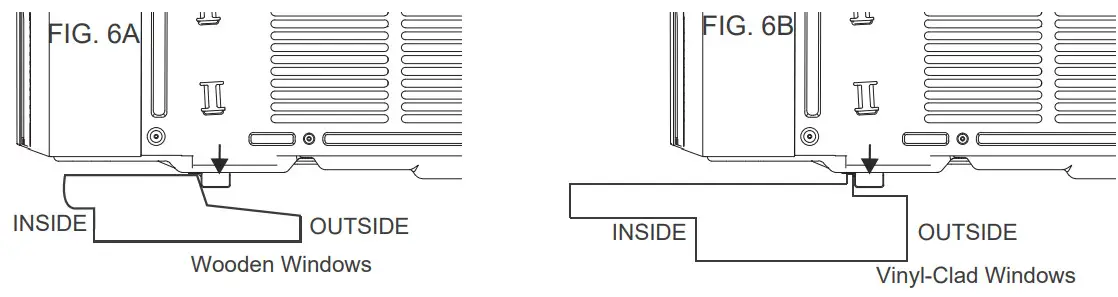
- Keep a firm grip on the air conditioner, carefully place the unit into the window opening so the bottom of the air conditioner frame is against the window sill (FIG. 6A & FIG. 6B). Carefully close the window behind the top rail of the unit.
- Extend the side panels out against the window frame (FIG. 7A for wooden windows), (FIG. 7B for Vinyl-Clad windows).
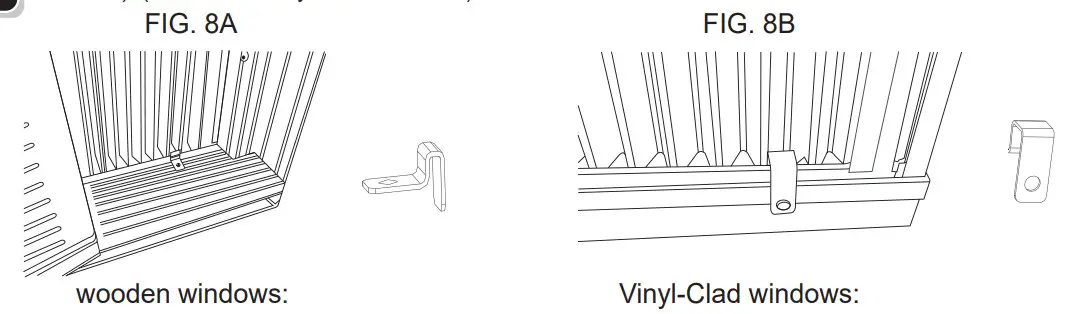
- Place the frame lock between the frame extensions and the window sill as shown (FIG. 8A for wooden windows), (FIG. 8B for Vinyl-Clad windows).
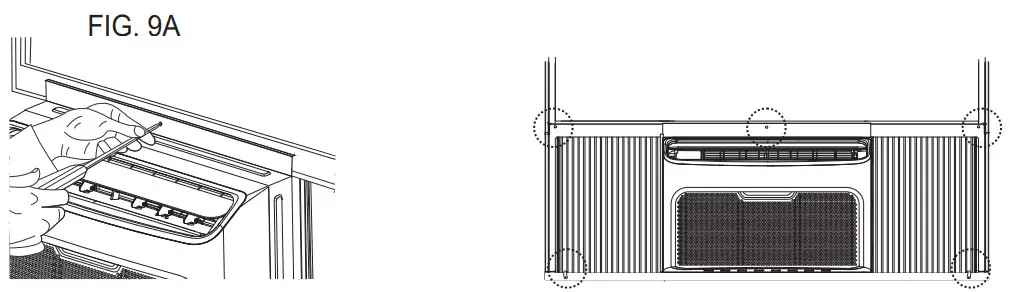
- Drive locking screws:A: For wooden windows:Drive 1/2 (12.7 mm) locking screws through the frame lock and into the sill (FIG. 9A). NOTE:To prevent window sill from splitting, drill 1/8 (3mm) pilot holes before driving screws. Drive 1/2 (12.7 mm) locking screws through frame holes into window sash (FIG. 9B).B: For Vinyl-Clad windows:Drive 1/2 (12.7 mm) locking screws through the frame lock and into the window sash (FIG. 9B). NOTE: Before driving the screws, use a drill to drill 5 holes through the holes in the frame lock and frame extensions into the windows sash as shown ( FIG. 9B).
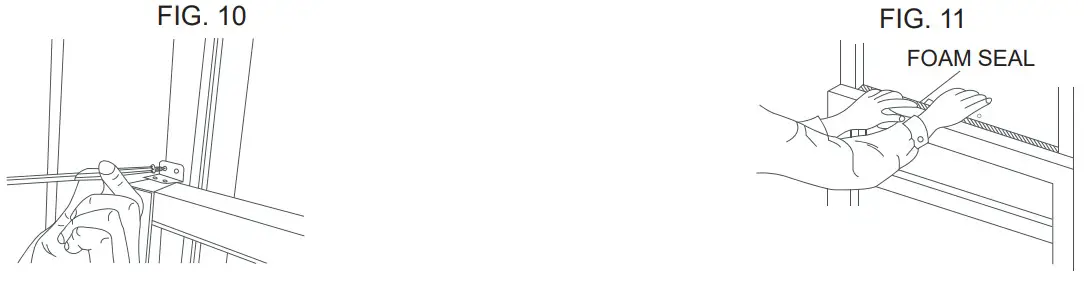
- To secure lower sash in place, attach right angle sash lock with 1/2″ (12.7mm) screw as shown (FIG. 10).NOTE: It is difficult to lock the windows with the sash lock for Vinyl-Clad windows, so you can use a lock by the window itself.
- Cut foam window seal and insert it into the space between the upper and lower sashes (FIG. 11).
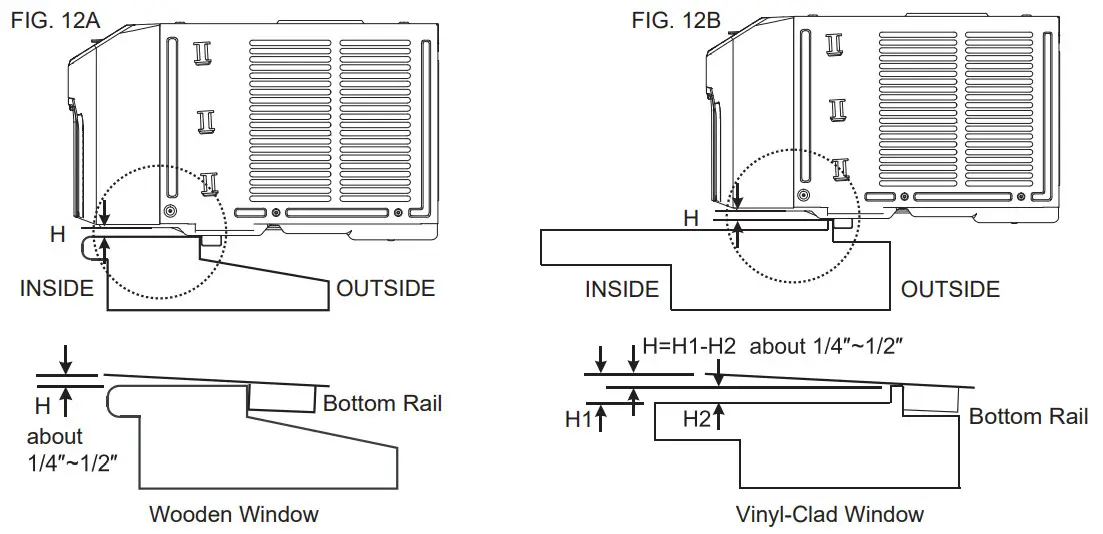
- Check that the air conditioner is tilted back about 1/4″ to 1/2″ (tilted about 2° to 4° downward to the outside, see FIG. 12A & FIG. 12B). After proper installation, condensate should not drain from the overflow drain hole during normal use, correct the slope otherwise.
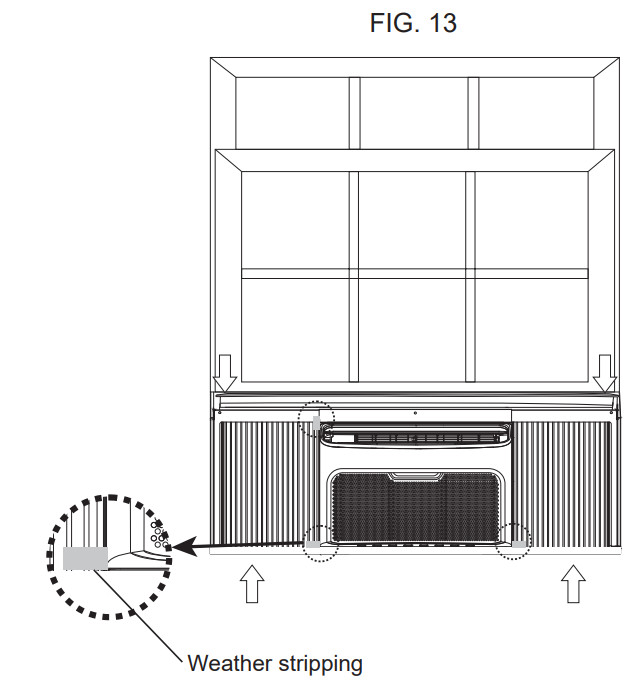
- In order to minimize air/light leaks between the room air conditioner and the window opening, suitable weatherstripping(trim the provided weather stripping into suitable size) should be applied in case of any gaps found at the location as indicated by the arrows in Fig. 13.
 Your air conditioner is designed to install in standard double-hung windows with opening widths of 23.6 to 38.8 inches (600 mm to 985mm) (FIG. 4A, FIG. 4B).The lower sash must open sufficiently to allow a clear vertical opening of 13.8 inches (350 mm).
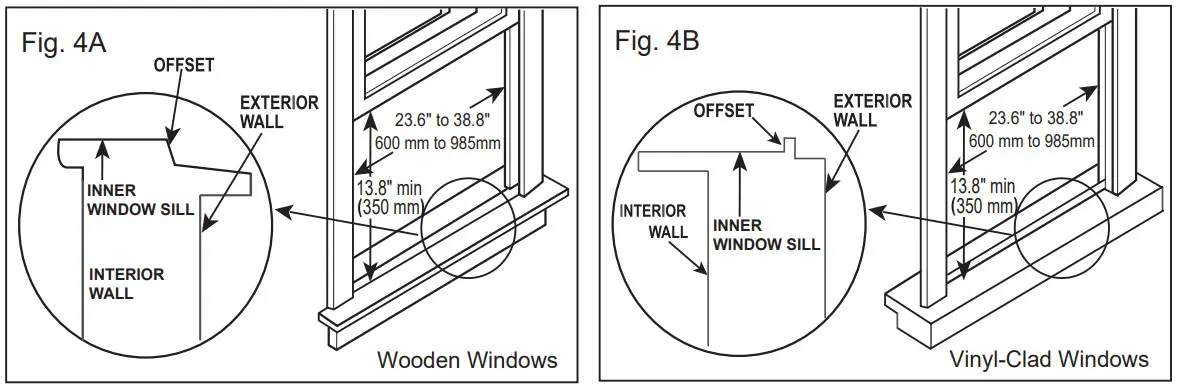 Side louvers and the rear of the air conditioner must have clear air space to allow enough airflow through the condenser, for heat removal. The rear of the unit must be outdoors, not inside a building or garage. There should be at least 11.8 inches (300mm) clearance around the unit. See FIG. 4C & FIG. 4D.
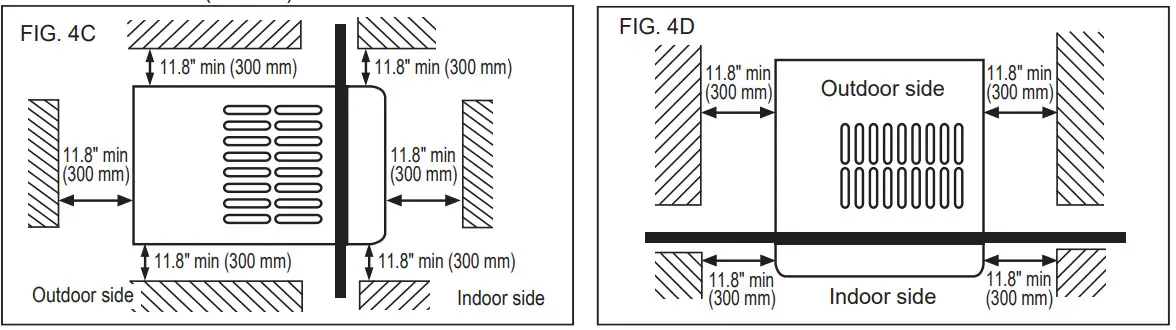


Removing the air conditioner From Window
- Turn the air conditioner off, and disconnect the power cord.
- Remove sash seal from between windows, and unscrew sash lock.Remove screws installed through frame and framelock.
- Remove the insulation panel and close (slide) side panels into the frame.
- Keeping a firm grip on the air conditioner, raise the sash and carefully remove.
- Be careful not to spill any condensate water while lifting the unit from the window. Store parts WITH air conditioner.
[xyz-ips snippet=”download-snippet”]