![]() Portable PA SystemUser Manual & Instructions
Portable PA SystemUser Manual & Instructions

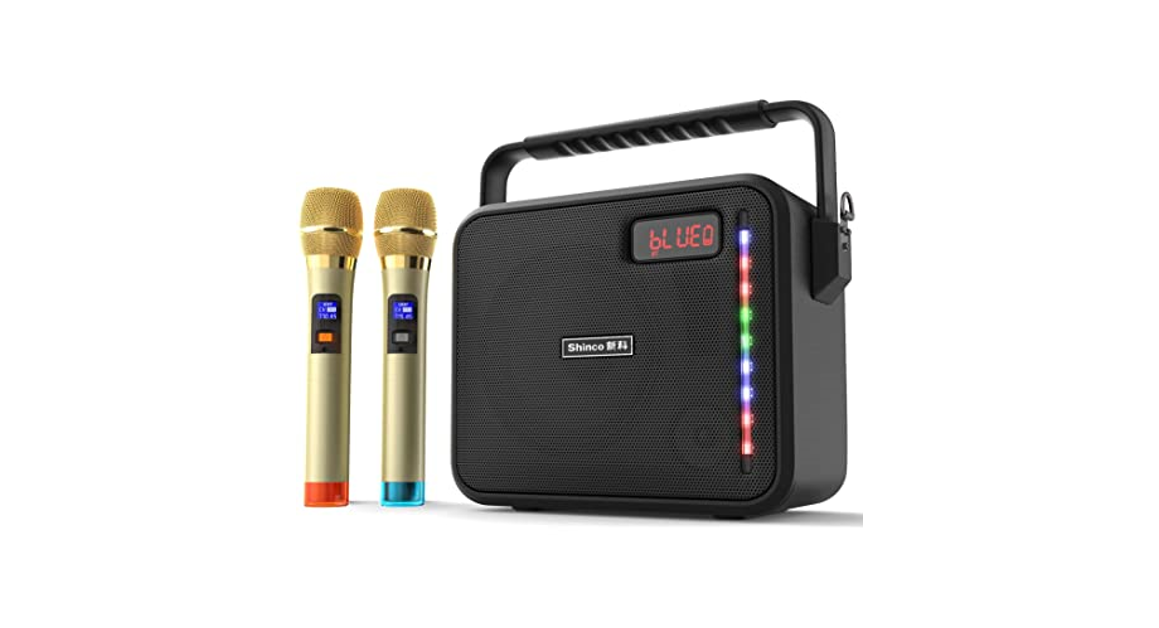
T9
Front View·
![]() : Source Selection for UHF Microphone, AUX In, Bluetooth, TF/Micro SD, USB Flash Drive;
: Source Selection for UHF Microphone, AUX In, Bluetooth, TF/Micro SD, USB Flash Drive; Under UHF Model Long Press 3s o Enter Pairing Status with A Voice Prompt: UHF Waiting for Connection;)![]() : In Audio Playing Mode, Press To Pause, Press Again To Play;
: In Audio Playing Mode, Press To Pause, Press Again To Play;![]() : Press To select Previous;
: Press To select Previous;
Black View
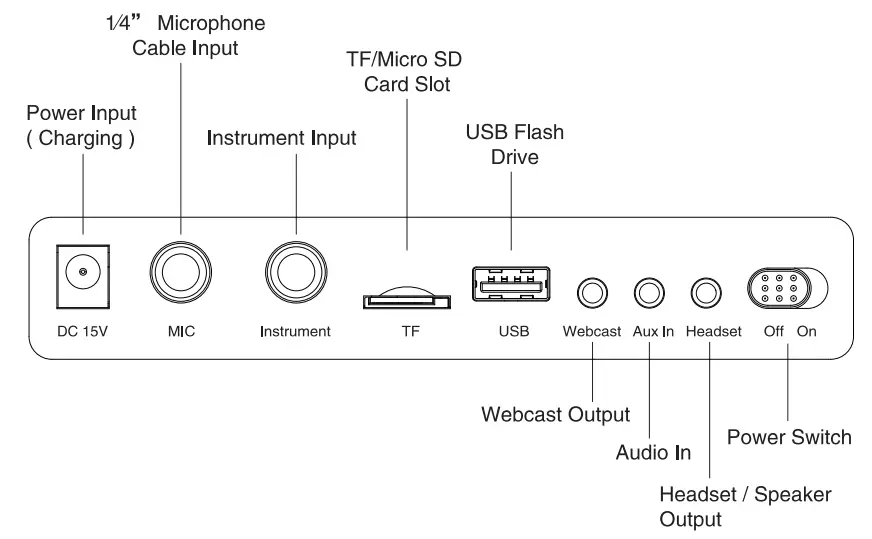
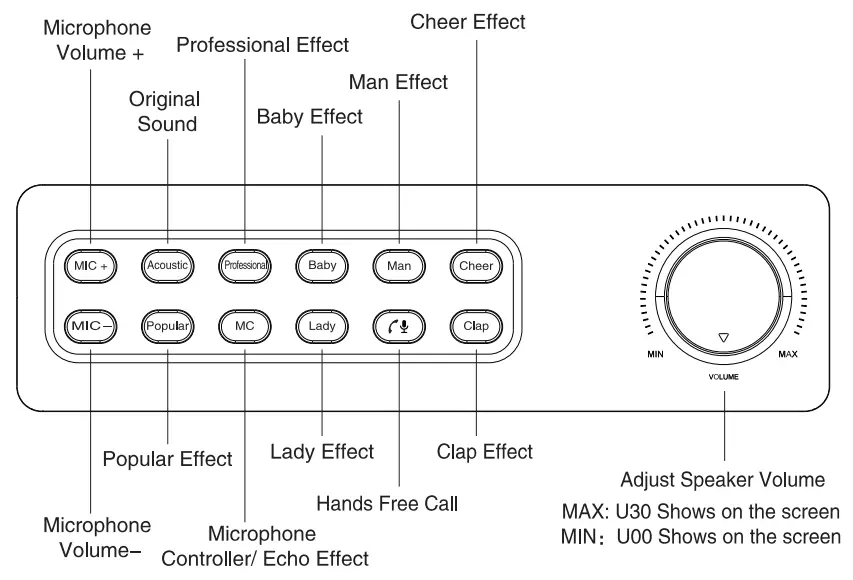
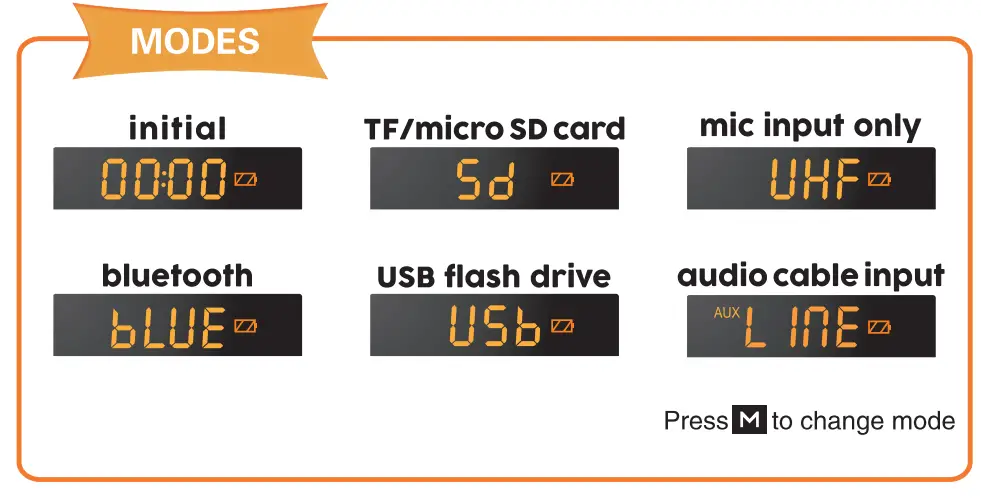
Common Function Instructions:
- MIC: Support 1/4″ Microphone Cable Input;
- USB Port: Support a USB Flash Drive, Maximum Up To 32G (MP3 WAV WMA);
- TF Card Slot: Support TF/Micro SD Cards, Maximum Up To 32G (MP3 WAV WMA);
- Audio In: Support 3.5mm Audio Cable Input;
- Webcast: Refer To Page 5;
- The headset I Speaker Output: Refer To Page 5;
Top View
UHF Wireless Microphone
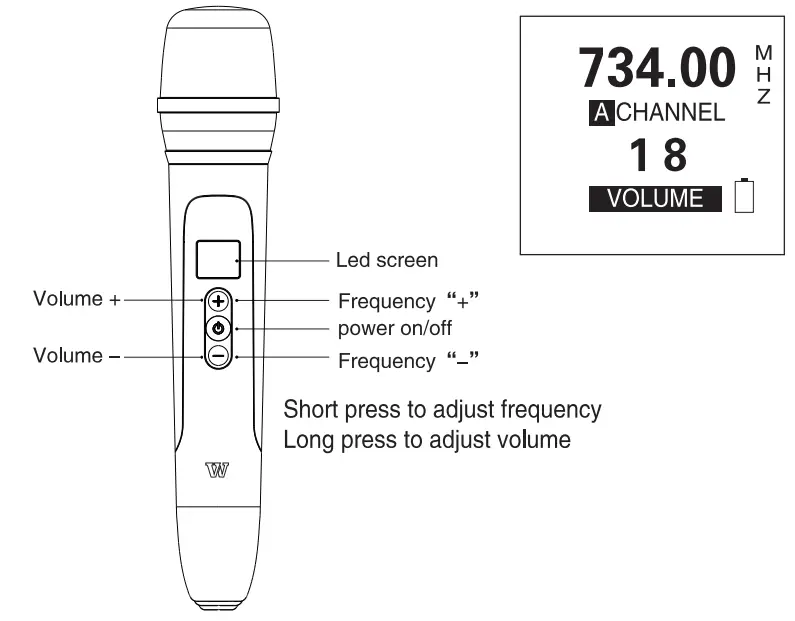
Remote Function

How to Connect UHF Microphone to the PA Speaker
- Tum on PA speaker with the power switch on the black of control panel: “
 “
“ - Short press M button on the front of control panel to switch to UHF model with screen shows:
- Long press M button again for 3 seconds to enter UHF pairing mode with voice prompt: “UHF is waiting for connection … “
- Turn on the UHF microphone by pressing the power switch;
- Press mic power switch button 3 times rapidly;
- when the frequency on the mic screen flashing, you should hear the voice prompt: “UHF is connected!” which means pairing was successful;
Friendly Reminder:
Please strictly follow the above steps, especially the second and third steps;
How to Do A Live Stream

- Pair UHF wireless microphone to the speaker; or you could plug wired 1/4 microphone included to MIC jack;
- Connect
REDcable end into webcast jack, another end into your phone or computer for live stream; If you sing and would like have accompaniment, then connectBLACKcable end intoAUXin jack, another end into your phone or speaker ( optional connect ); - or you could connect Bluetooth from your phone to get music accompaniment;
- Plug headset/earphone/headphone into the headset jack, then you could hear what you said and music play;
Friendly Reminder:
- Please read the structure diagram above carefully before doing a live webcast;
- The idea for youtube, Karaoke, Audio Performance, etc, Support A Variety of Mainstream Live Software;
How to Connect Blueooth?
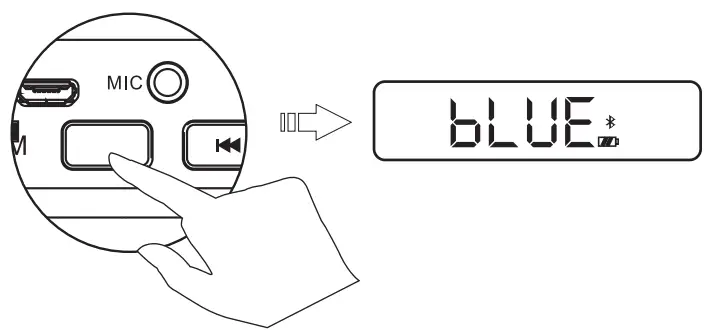
- Click m to switch to Bluetooth mode with a screen that shows bLUE”, and there will be voice prompts:Bluetooth is waiting for connection;
- Turn on Bluetooth device and search named “T9” to pair.
Music Play
| Supports: | 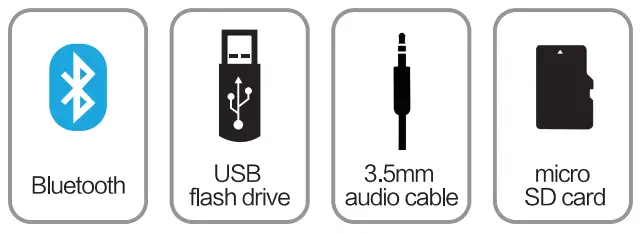 |
Refer toMODES |
How to Play Aux
plug the 3.5mm audio cable into the AUX hole
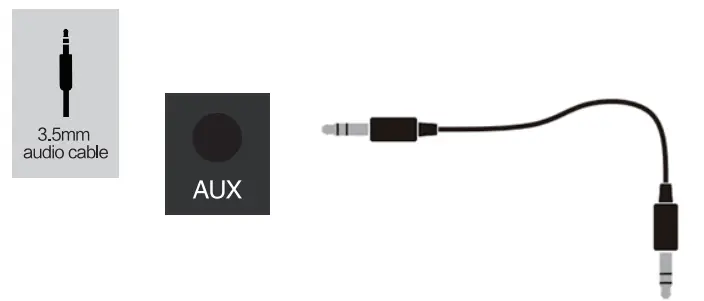
connect to any device with 3.5mm audio output
Audio Format Supported:

How to Play USB drive or TF card
Just connect a USB drive or TF card, then the speaker will play music automatically. Please make sure your USB or TF card has music files.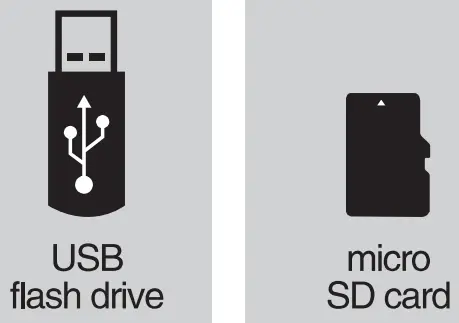
HOW TO CHARGING & MAINTAINING SPEAKER

Please note:
- use the included 15V AC power adapter to charge the speaker’s internal rechargeable battery.
- Plug adapter into 110-240 AC outlet. connect the cable end into the DC 15V power input on the black control panel of the PA speaker system.
- It will normally take 6-8 hours to fully charge the battery if it is lower at 0% strength.
- Battery status: there are 4 battery strength indicator bars on the LED screen on the front of the PA speaker system unit, each bar represents 25% of the total battery strength.
- When charging is required, a voice prompt will indicate, “low battery, please charge.” the battery indicator will blink while charging. It will stop blinking when the battery is fully charged.
- Recharge the battery within 48 hours of the “low battery” voice prompt. In order to extend the life of the internal battery, please charge it regularly even if the system is not being used.
- It is suggested that you charge the internal battery an additional 1-2 hours after fully charged to extend its life.
- Please DO NOT overcharge the battery by leaving the system plugged in continuously. This will reduce the life of the internal rechargeable battery and could cause overheating.
HOW TO CHARGE UHF MICROPHONE

Please note:
- Use the included 5V AC power adapter to charge the wireless microphone internal rechargeable battery.
- Plug adapter into 110-240 AC outlet. connect the cable end into the microphone.
- It will normally take 4-5 hours to fully charge the battery if it is lowe rat 0% strength.
- Battery Status: sufficient battery power with “” Indication showed on-screen; it’ slow battery with “” indication showed on screen. El
- It is suggested that you charge the internal battery an additional 1–2 hours after fully charged to extend its life.
- Please DO NOT overcharge the battery by leaving the system plugged in continuously. This will reduce the life of the internal rechargeable battery and could cause overheating.
Troubleshooting Guidelines
|
PROBLEM |
POSSIBLE REASONS |
WHAT TO DO |
| Power switch is on, but there is no sound coming from the PA speaker system | 1. PA Speaker internal rechargeable battery is dead | Recharge battery using (DC 15V) power adapter. See page 8. |
| 2. No Audio input | Audio files from Bluetooth, USB or TF/MicroSD Card may be corrupt. Try playing with a different file, card or song. | |
| 3. Volume is turned down | Adjust Master Volume level using VOLUME knob. See page 2. | |
| Sound is distorted coming from the PA speaker system | 1. Volume is turned up to high | Adjust Master and/or Microphone volume levels with the VOLUME and MIC knobs. See page 2. |
| 2. Speaker is “blown” and needs repair or replacement | Please contact us for Maintenance. See page 11 for technical service/repair contact information. | |
| No Sound from the PA Speaker System when using Karaoke function and/or Microphone(s) | 1. Wired Microphone is not connected properly | Insert wired microphone cable into 1/4– Microphone Cable Input. See page 1 |
| 2. Wired Microphone not switched to ON setting | If the wired microphone has an on/off switch, turn to the ON setting. | |
| 3. MIC Volume is not turned up high enough | Adjust the microphone volume level with the MIC knob. See page 2 | |
| 4. UHF Microphone(s) not connected/paired | Property connect/pair the UHF microphone(s). See page 4. | |
| 5. UHF Microphone(s) battery is low or dead | Replace recharge the UHF Microphone(s). See page 9. | |
| UHF Wireless Microphone(s) pairing is unsuccessful | 1. Speaker enter UHF mode but forget to long-press UHF button again to enter pairing status | Perform step 3 strictly after step 2. see page 4 |
| 2. Not press switch power on the mic Rapidly for 3 times | Please press rapidly for 3 times instead of slowly pressing, see page 4 |
![]() After sale serviceWinBridge provides one year warranty and lifetime technical support.
After sale serviceWinBridge provides one year warranty and lifetime technical support.![]() [email protected]
[email protected]![]() Please be confident that Seller support is just a mail away from you in case you find any difficulty. Kindly do not hesitate to write back to us if you need any clarification or any kind of support. http://www.winbridgepower.com
Please be confident that Seller support is just a mail away from you in case you find any difficulty. Kindly do not hesitate to write back to us if you need any clarification or any kind of support. http://www.winbridgepower.com
[xyz-ips snippet=”download-snippet”]