
Wisenet In-Ceiling Housing Installation Manual
SHP-1680F
Overview
This In-CEILING HOUSING is a mounting ADAPTOR that is designed to mount the smart dome camera in built-in style on a double-layer ceiling.
What’s Included
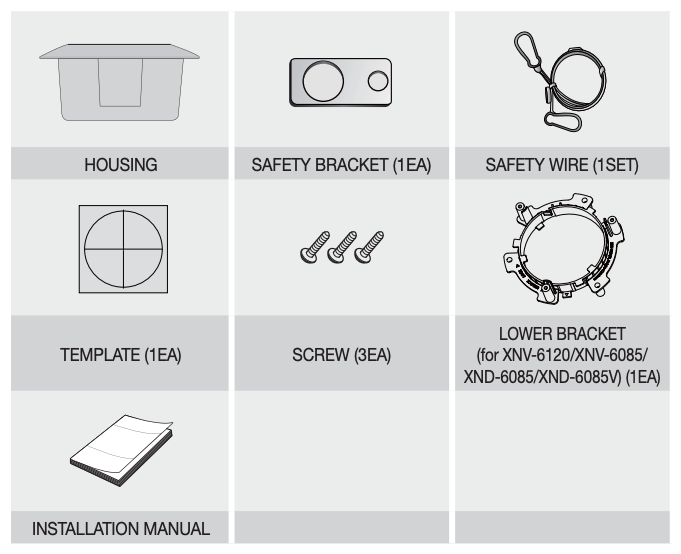
Installation Instructions
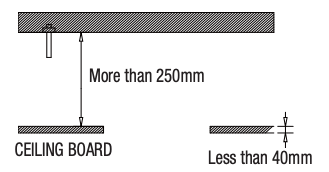
- Select an installation position or place that can endure more than 4 times of the total weight of the installation structure.
- At least 250mm or more of spare height is required above the CEILING BOARD.
- CEILING BOARD’s thickness should be less than 40mm.
- Be sure to secure the SAFETY WIRE to avoid a product fall.
- If you want to attach the camera to the ADAPTOR, use the only provided SCREWS.
How to install (XNP-6120/HCP-6120 SERIES)
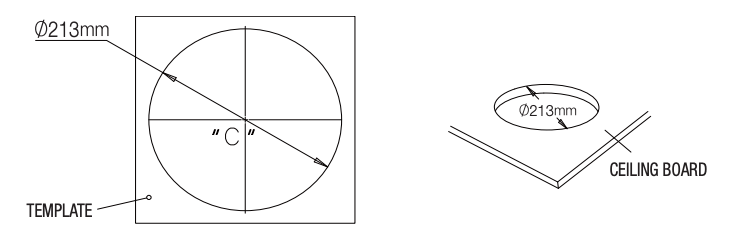
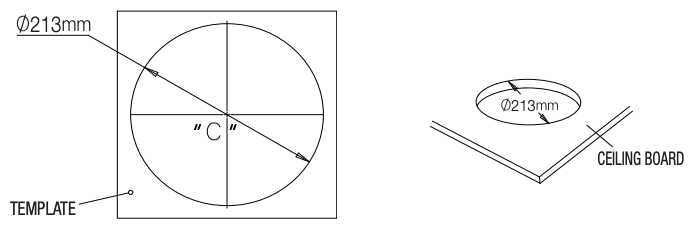
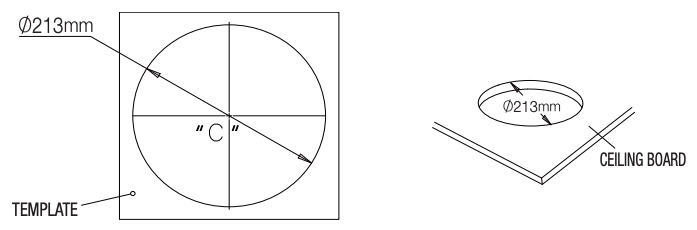
- Place the TEMPLATE on the CEILING BOARD and drill a guided hole.❶ Remove the round filling (“C”) from the TEMPLATE.➋ Place TEMPLATE A onto the CEILING BOARD to which you will attach the ceiling mount ADAPTOR and drill a hole of Ø213mm in diameter.See the figure below for the hole shape.

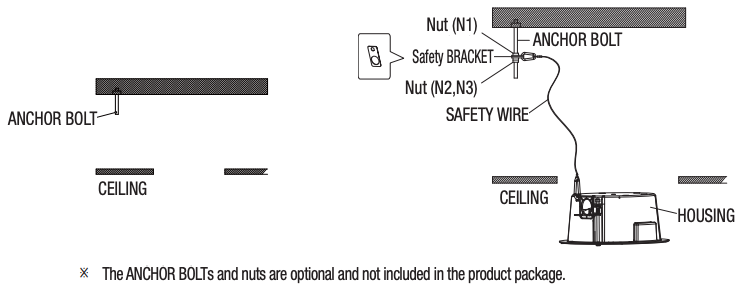
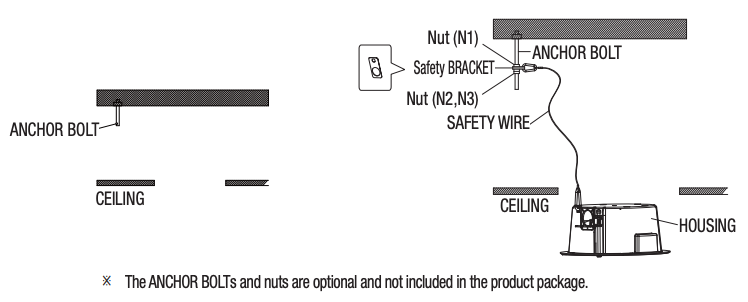
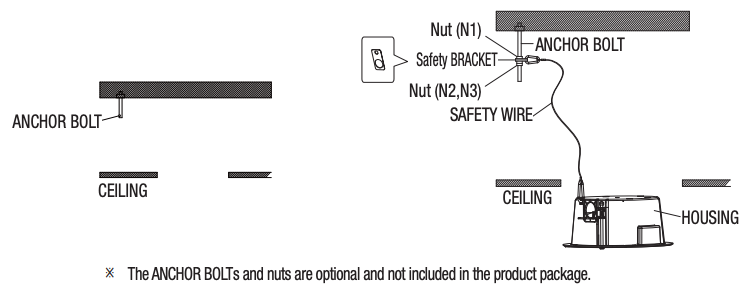
- Fix the ANCHOR BOLT onto the concrete CEILING, and secure the SAFETY WIRE to the ANCHOR BOLT as below:❶ Tighten the nut (“N1”) on the ANCHOR BOLT.➋ Insert the provided SAFETY BRACKET into the ANCHOR BOLT.➌ Tighten two nuts (“N2”,”N3”) onto the ANCHOR BOLT.➍ Hook and fix one end of the SAFETY WIRE onto the SAFETY BRACKET.➎ Hook and fix the other end of SAFETY WIRE onto the HOUSING as shown below.
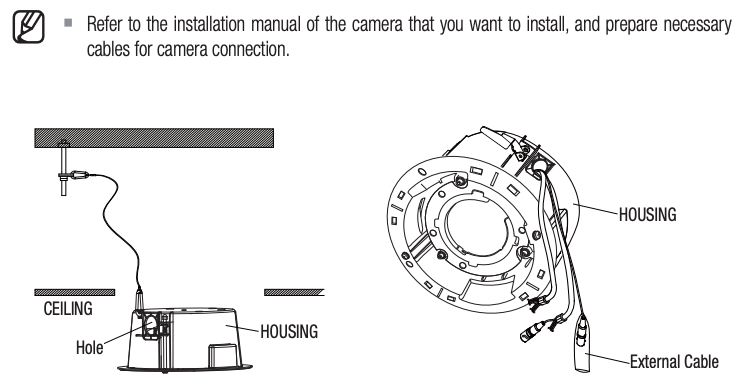
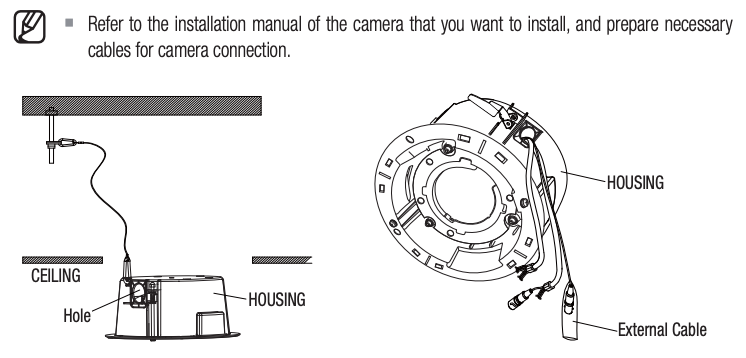
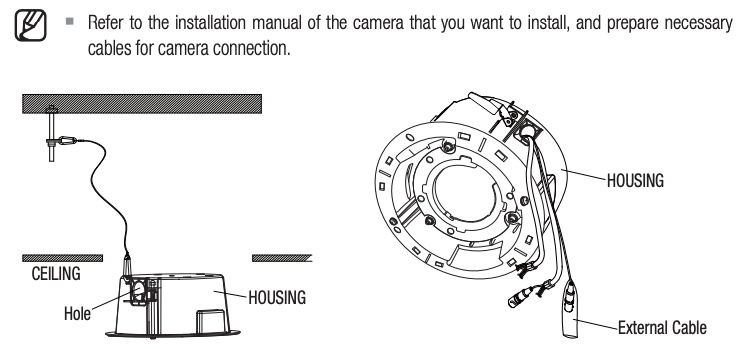
- To connect to the camera, insert the external cable through the side hole on the housing to the inside of the housing as shown in the figure.
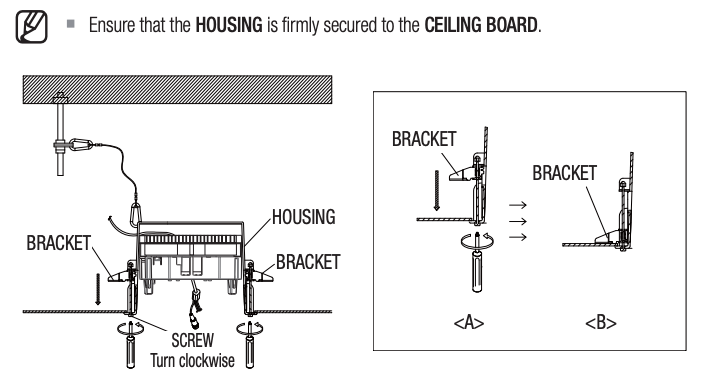
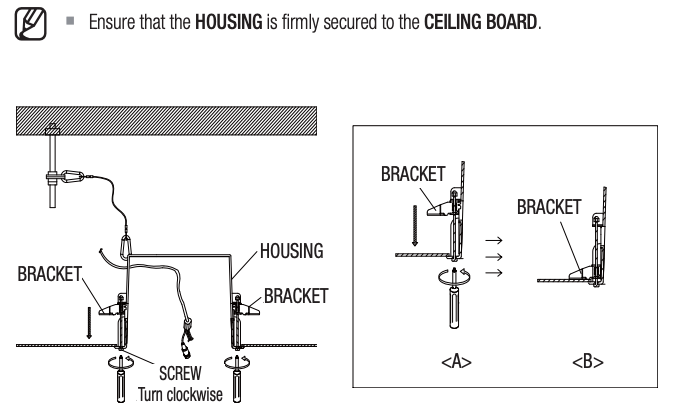
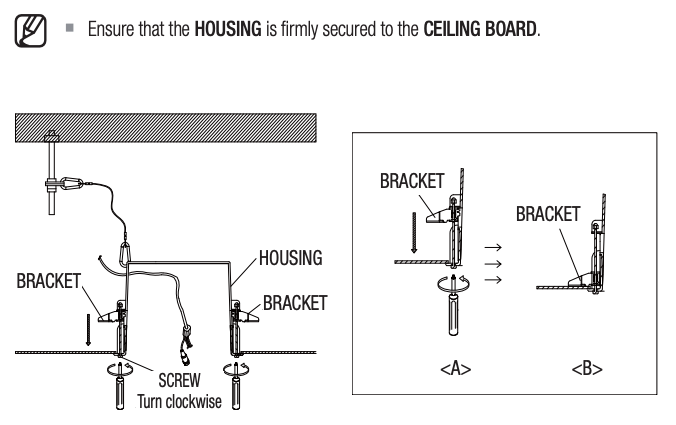
- Push the HOUSING inside the CEILING through the CEILING hole, and tighten the SCREWs (x2) clockwise to fix the HOUSING on the CEILING.(The BRACKET will be positioned from <A> to <B> as shown.)
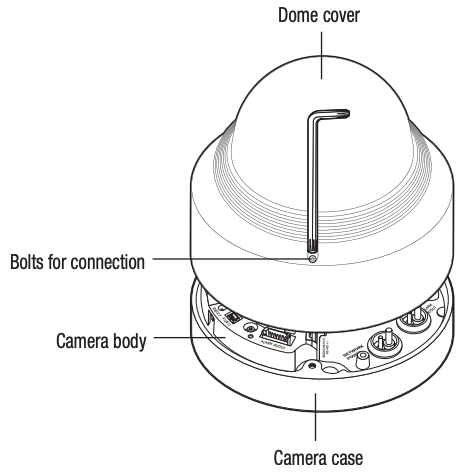
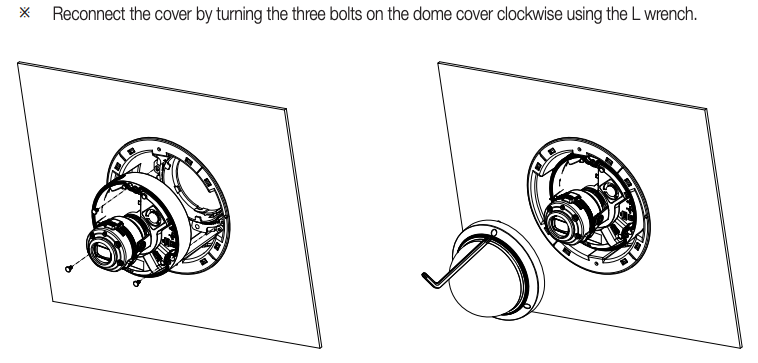
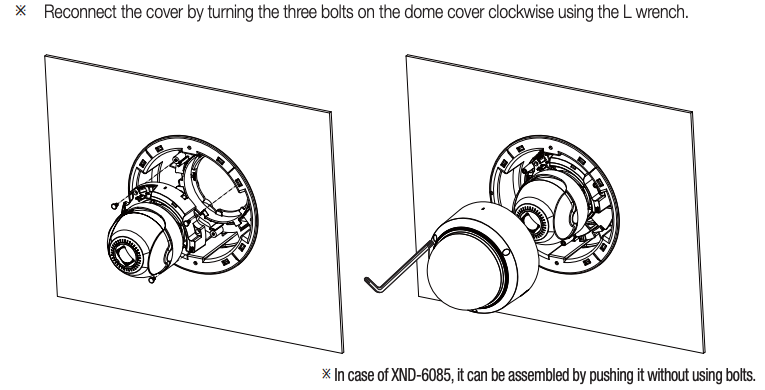
- Remove the dome cover after loosening the three bolts by turning them counterclockwise using an L wrench.
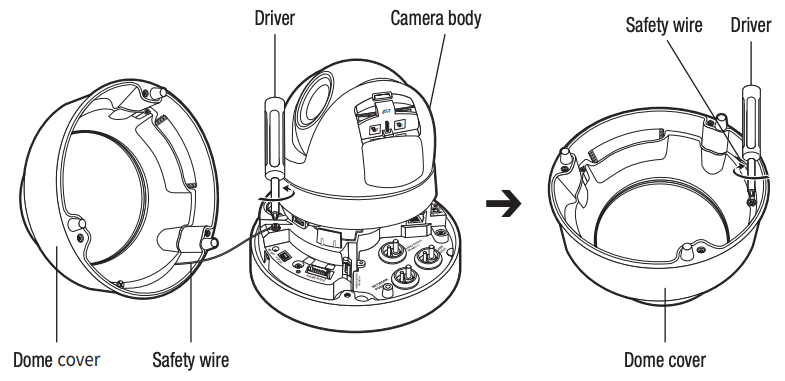
- Remove the safety wire that is connected to the dome cover and camera body, and connect it inside of the dome cover as shown in the picture.
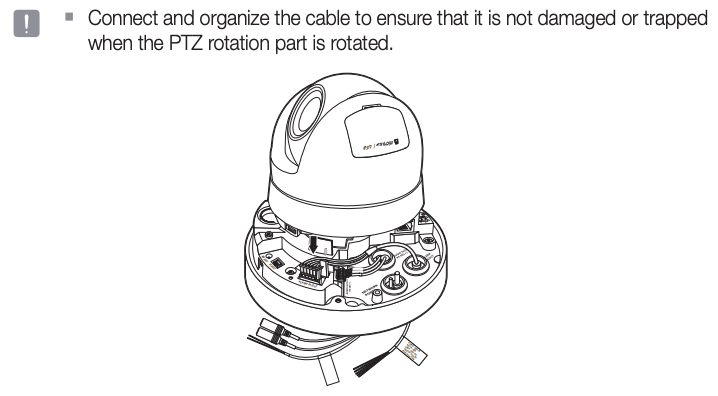
- Connect the required cable to the terminal on the camera. Please refer to the installation guide for details on camera installation.
- Connect the camera to the bracket placed in the housing using the screws (3 EA).
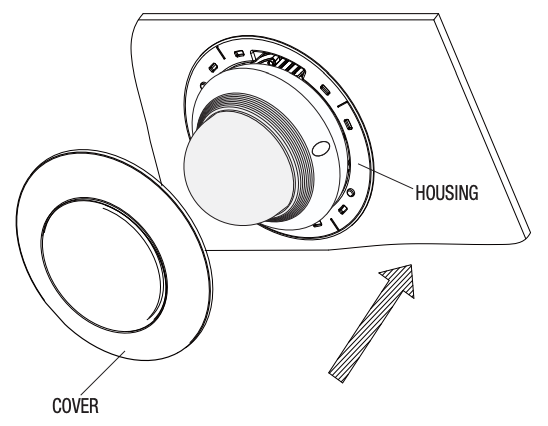
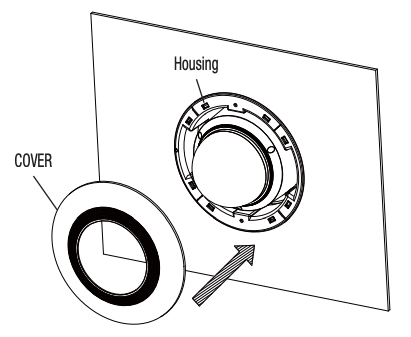
- Attach the COVER to the HOUSING.

How to install (XNV-6120 SERIES/XNV-6085 SERIES)
- Place the TEMPLATE on the CEILING BOARD and drill a guided hole.❶ Remove the round filling (“C”) from the TEMPLATE.➋ Place the TEMPLATE A onto the CEILING BOARD to which you will attach the CEILING mount ADAPTOR and drill a Ø213mm hole.See the figure below for the hole shape.
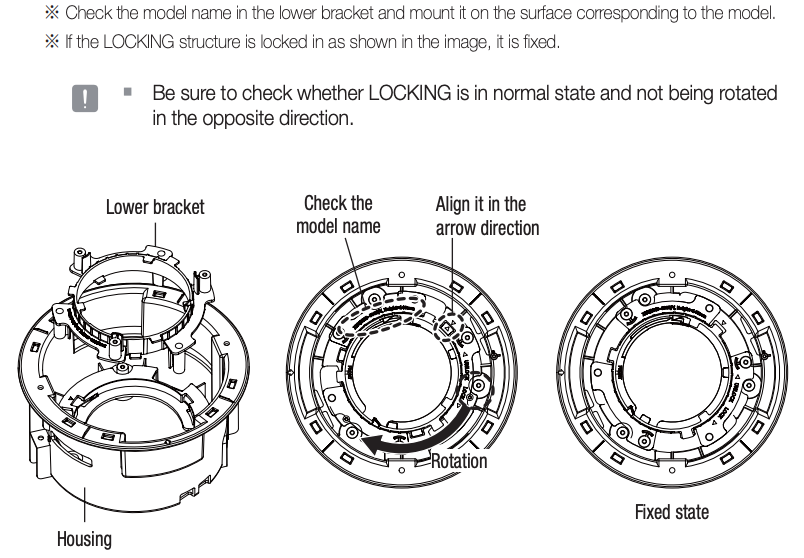
- Insert the lower bracket into the housing and turn it in the [LOCK] direction to fix it.
- Fix the ANCHOR BOLT onto the concrete CEILING, and secure the SAFETY WIRE to the ANCHOR BOLT as below:❶ Tighten the NUT (“N1”) on the ANCHOR BOLT.➋ Insert the provided SAFETY BRACKET into the ANCHOR BOLT.➌ Tighten two NUTs (“N2”,”N3”) onto the ANCHOR BOLT.➍ Hook and fix one end of the SAFETY WIRE onto the SAFETY BRACKET.➎ Hook and fix the other end of SAFETY WIRE onto the HOUSING as shown below:
- To connect to the camera, insert the external cable through the side hole on the housing to the inside of the housing as shown in the figure.
- Push the HOUSING inside the CEILING through the CEILING hole, and tighten the SCREWs (x2) clockwise to fix the HOUSING on the CEILING.(The BRACKET will be positioned from <A> to <B> as shown.)
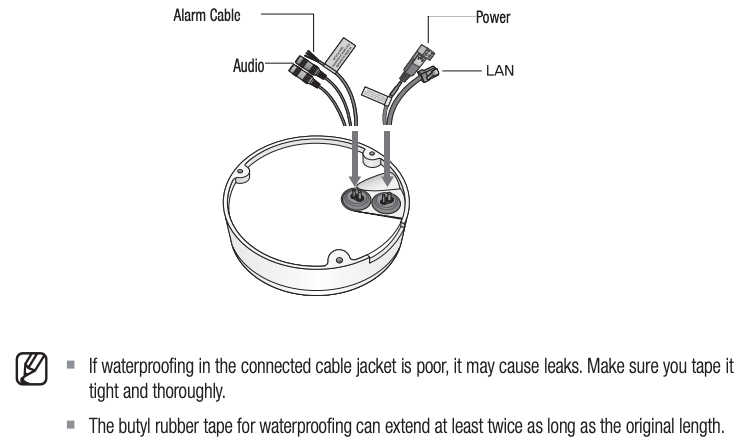
- As shown in the figure, pull out the protrusions of the rubber cap in the bottom to make a small hole and remove the cable through it to connect to the external cable.
- Connect the camera to the bracket placed in the housing using the screws (3 EA).
- Attach the COVER to the HOUSING.

How to install (XND-6085/XND-6085V SERIES)
- Place the TEMPLATE on the CEILING BOARD and drill a guided hole.❶ Remove the round filling (“C”) from the TEMPLATE.➋ Place the TEMPLATE A onto the CEILING BOARD to which you will attach the CEILING mount ADAPTOR and drill a Ø213mm hole.See the figure below for the hole shape.
- Insert the lower bracket into the housing and turn it in the [LOCK] direction to fix it.
- Fix the ANCHOR BOLT onto the concrete CEILING, and secure the SAFETY WIRE to the ANCHOR BOLT as below:❶ Tighten the NUT (“N1”) on the ANCHOR BOLT.➋ Insert the provided SAFETY BRACKET into the ANCHOR BOLT.➌ Tighten two NUTs (“N2”,”N3”) onto the ANCHOR BOLT.➍ Hook and fix one end of the SAFETY WIRE onto the SAFETY BRACKET.➎ Hook and fix the other end of SAFETY WIRE onto the HOUSING as shown below:
- To connect to the camera, insert the external cable through the side hole on the housing to the inside of the housing as shown in the figure.
- Push the HOUSING inside the CEILING through the CEILING hole, and tighten the SCREWs (x2) clockwise to fix the HOUSING on the CEILING.(The BRACKET will be positioned from <A> to <B> as shown.)
- Connect the camera to the bracket placed in the housing using the screws (3 EA).
- Attach the COVER to the HOUSING.

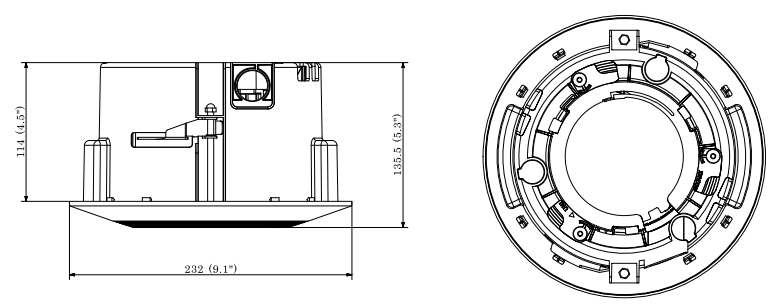
Product Specifications
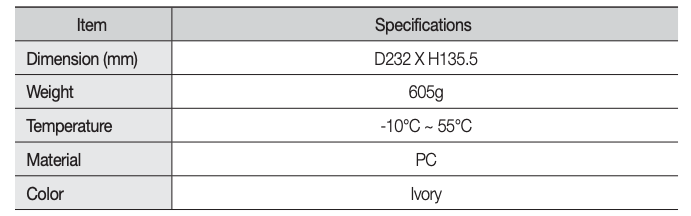
Unit: mm (Inches)
Head Office6, Pangyo-ro 319 beon-gil, Bundang-gu, Seongnam-si,Gyeonggi-do, 463-400 Rep. of KOREATel : +82.70.7147.8753 Fax : +82.31.8018.3740www.hanwha-security.com
Hanwha Techwin America500 Frank W. Burr Blvd. Suite 43 Teaneck, NJ 07666Toll Free +1.877.213.1222 Direct +1.201.325.6920Fax +1.201.373.0124www.hanwha-security.com
Hanwha Techwin EuropeHeriot House, Heriot Road, Chertsey, Surrey, KT16 9DT, United KingdomTel +44.1932.57.8100 Fax +44.1932.57.8101www.hanwha-security.eu
References
[xyz-ips snippet=”download-snippet”]