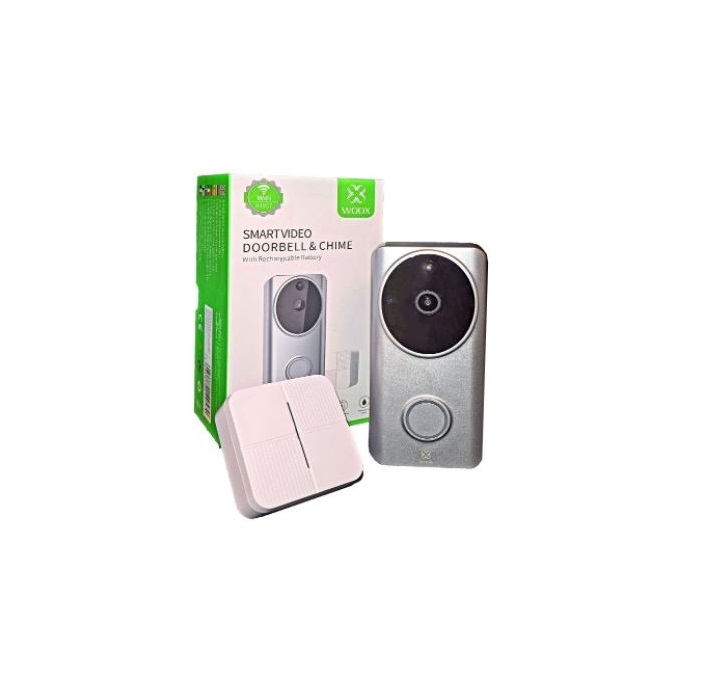
woox Smart Video Doorbell Chime


Specifications
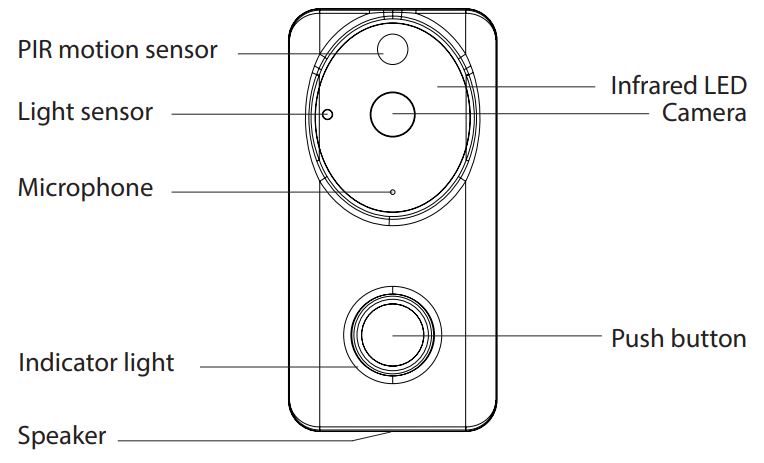
Smart video doorbell
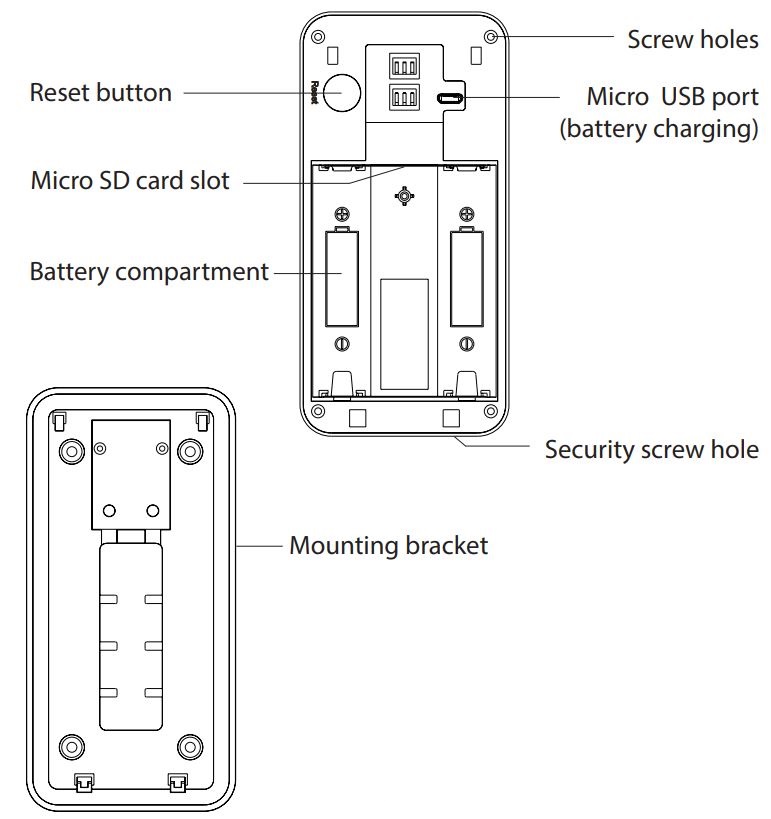
- Batteries: 2 x 18650 2600mAh Rechargeable batteries (included)
- Battery lifetime: approximate 6 months / Resolution: 1280x720P
- View Angle: 166° / Infrared Light: 6 pieces LED lights / Night vision
- Motion Detection: PIR motion detection
- Audio: Two-way voice with echo cancel function
- Storage: Supports SD card 128GB max (not included).
- Operating Temperature: -10°c to +55°c / Waterproof grade: IP54
- WLAN-Standard: 802.11 b/g/n 2.4GHz
- Dimensions:135mm x 65mm x 38mm
Chime
- Voltage: 220-240V~50Hz
- Power Consumption: <0.5W
- Transmission Range: 30 60 meters (Line of sight)
- Selectable Ring Tones: 58
- Volume Range: 0 to 110dB, 5 Levels
- Audible Range: Up to 60 meters
- Up to 6 x Chimes can be used with the Woox video doorbell

Package includes:
- 1 x Smart video doorbell
- 1x Chime
- 2 x Rechargeable lithium battery
- 1 x Screw tool kit
- 1 x Micro USB cable
- 1 x User manual
Requirement to use
- Woox home app
- WiFi router: 2.4GHz channel
Install the doorbell
- Remove the mounting bracket from the body of the doorbell by pulling it down.
- Mark the position of the mounting holes on the wall using the mounting bracket as a template. Drill out the mounting holes taking care to avoid any joists, electrical cables, or water/gas pipes that may be hidden beneath the surface.
- Once the holes have been drilled out insert the rawl plugs into the holes and fix the wall plate to the wall using the correct mounting screws provided.
- Before placing the body of the Wi-Fi doorbell on the wall plate, pull the insulation sheet from the battery compartment of the doorbell. The unit should switch on and be ready for pairing.
- It is recommended that the pairing process is complete before fully affixing the product to the wall as the unit may need resetting during this process. If you wish to register on the Woox home App and pair the device before mounting the product to the wall, skip to the next section of the manual. It is also worth noting that the installation location should be in a suitable area where a 50% or more Wi-Fi signal can be established.
- Once pairing is complete mount the body of the Wi-Fi doorbell to the wall plate and tightens the retaining screw so the body and wall plate are held firmly together.
Pair the doorbell with the Woox home app
- Download and install the app “WOOX Home” from Apple App Store or Google Play Store on your mobile device.
- Launch the app “WOOX Home”.
- Create a new account or log in to your existing account.
- Tap “+” to add the device.
- Select the applicable product type from the list of products.
- Ensure the indicator light is quick flashing (flashing 2 times persecond). If the indicator light isn’t flashing: hold and press the reset button on the back of the doorbell until the indicator light starts to flash.
- Confirm the Wi-Fi network and password. Note: only 2.4GHz WiFi is supported.
- The App will prompt you to scan a QR code that needs to be read by the camera in the Wi-Fi doorbell to initiate pairing, the press continues on the App and a QR code should now be generated to pair the product to your account. Position your mobile or tablet device in front of the camera lens and ensure the QR code is in the full-frame of view, once you hear the sound prompt confirm this on the App, this will commence the final stage of pairing the WiFi doorbell to your account.
- The app will now search for the device and register it to your account.
- Enter the device name. Note: The device name will also be used by Amazon Alexa and Google Home.
Pair the chime to the doorbell
- Ensure that the chime is firmly plugged into a 220V-240V AC mains socket.
- To pair the chime to your Wi-Fi doorbell, press and hold the volume button for 5 seconds.
- The chime will make an audible sound to show it is in pairing mode.
- Within 3 seconds of the chime being in pairing mode, press the doorbell button to establish a connection. The Chime should now activate in line with the Wi-Fi doorbell.
Charge the battery
- Make sure included batteries are secure in the Doorbell in the correct polarity positions
- Plug the Micro USB end of the USB cable into the back of the video doorbell
- Plug the other end of the USB cable into a DV 5V USB power supply
NOTE: Not to be charged with USB wall chargers exceeding 5V. Charging the batteries from the flat will take up to 10 hours depending on the output current of your wall charger. Any 18650-lithium battery chargers can also charge the batteries.
Safety
![]()
- Read the manual carefully before use. Keep the manual for future reference.
- Only use the device for its intended purposes. Do not use the device for other purposes than described in the manual.
- Do not use the device if any part is damaged or defective. If the device is damaged or defective, replace the device immediately.
- Do not expose the product to water or moisture.
- Do not touch the device with wet hands.
Cleaning and maintenance Warning!
- Do not use cleaning solvents or abrasives.
- Do not clean the inside of the device.
- Clean the outside of the device using a soft, damp cloth.
Support
If you need further help or have comments or suggestions please visit www.wooxhome.com
References
[xyz-ips snippet=”download-snippet”]