
XODO Smart Doorbell Security Camera VD1

Read before installing or using this product. Keep this guide for future reference.Visit Contixo.com for literature updates!
WelcomeThank you for purchasing Xodo Smart home products!We are committed to bringing you excellence with smart technology products that make life more comfortable, convenient, and provide a more dynamic healthy lifestyle.
What’s included in the box
You will find the following contents included to help you get started:
NOTICEMake sure to always follow these safety instructions:
- Please check for damaged caused by shipping. Contact supplier as needed.
- Follow instructions and only use products in safe operating condition.Keep out of reach of children. This product is not a toy.
- Do not disassemble or alter the smart doorbell. Doing so will void the warranty.
Specifications
Product Name: Xodo Wireless DoorbellModel: VD1Rated Voltage: 100V-240V AC 50Hz-60HzMaterial: PCSupport System: Android or IOSResolution: 1920 x 1080Recording Angle: 166 degreesIR LED: 6 x 850mmWiFi: IEEE 802.11 b/g/n 2.4GHzAudio: Two-way talk, noise cancellationMemory Type: Micro SD CardStorage Support: 8 / 16 / 32 / 64 GBBattery: 2 X 18650 (5200 mAh total)Monitoring: Doorbell button, motion detection, remote wake upPower Consumption Standby: 20 uA; Working 170 mA
Smart Doorbell Introduction
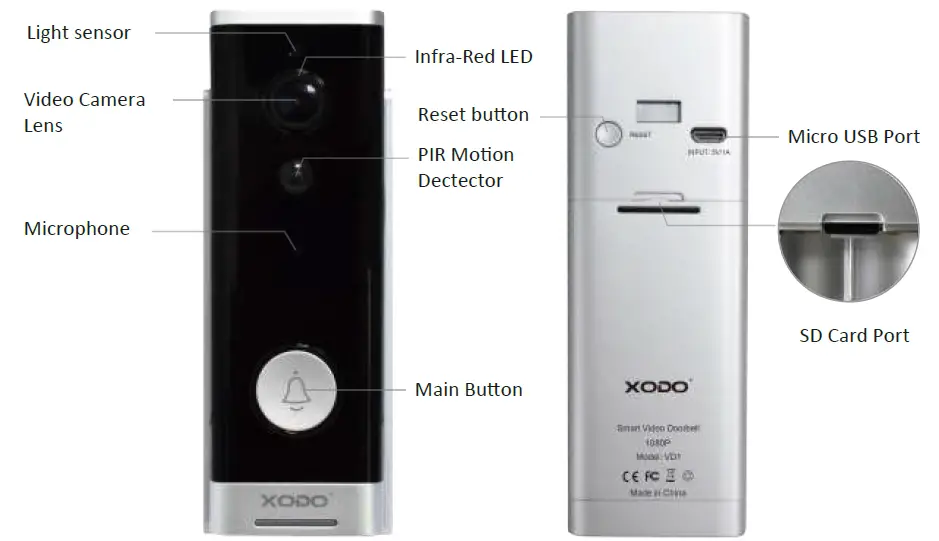
Smart Doorbell Components
IR LED — The infrared light measures ambient light and will increase video play back brightness.Light Sensor — Determines when to turn on IR LED.MIC — Captures audio volume.Button — Press to ring doorbell.PIR — Motion sensor will send alerts to smartphone.Lens — Captures video image.Reset Button — Reset the camera to factory setting.Micro USB Port — After the power is turned on, the camera starts working.SD Card Port — Install the memory card into the doorbell.
Indicator Light
Blinking blue: Configuration status.Red light ON: Failed to connect to WiFi.Blue light ON: Connect to phone successfully.Red and blue flash: Confirmation of WiFi connection.
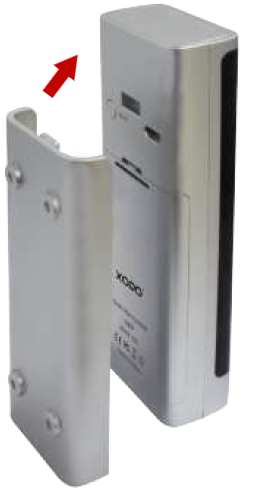
Installation of Smart Doorbell
- Remove the mounting bracket. (Remove oblique upper)

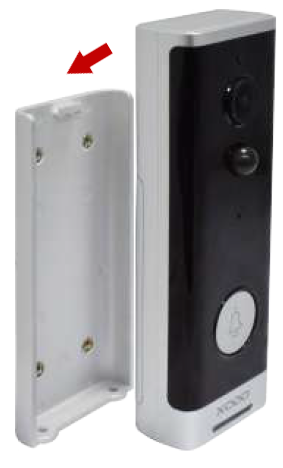
- Mount the bracket to the wall.
- Install the doorbell to the bracket.
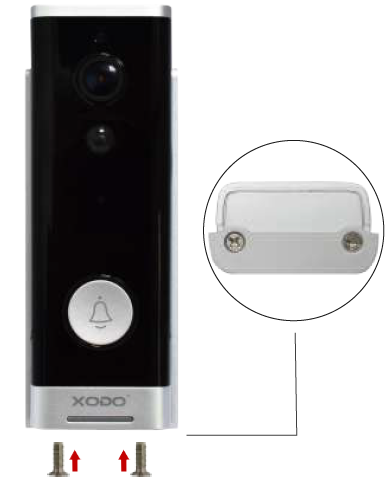
- Install the mounting screws under the bracket.
Download and Install the Xodo Smart APP
Download and install the APP. It can be also be found by searching “XODO Smart” by Contixo Inc. in the App Store (for IOS) or Google Play Store (for Android).
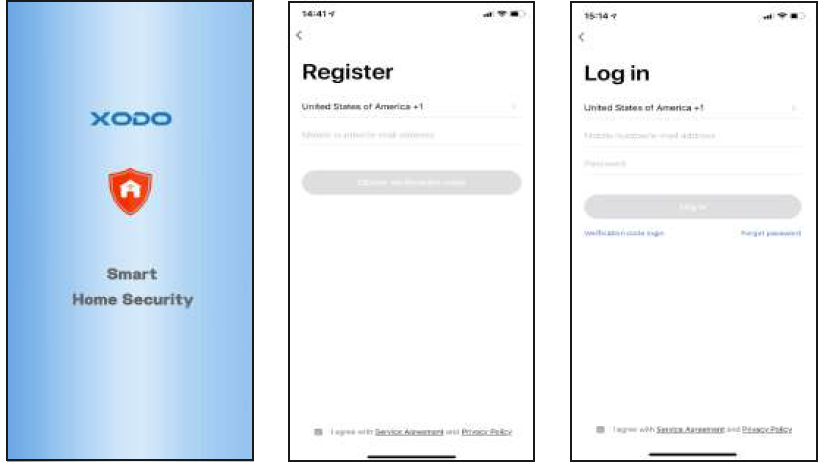
Open the APPThe welcome screen will appear and then you will be asked to login or register a profile. Register an account by entering your email address and setting up a profile or logging in with an existing account.
Adding DevicesYou will be able to manually add a device. Select Video Doorbells to continue.

Detecting DeviceWhen detecting devices manually, power on the device and confirm the indicator light is blinking rapidly. Once you confirm the smart device is ready, press the “nest step” button. Continue on to the next step. Pressing the Help button will offer some troubleshooting guidelines to follow.
Connect to a WiFi networkThe next step to connect the smart device is to connect to a WiFi network. If the proper network is not listed on this page, select the “Change Network” link to see a list of available networks. Enter the password next to the lock icon. Press “Confirm” to continue.
Scan with Camera ScreensThe pairing process will ask for your to use the doorbell to scan a QR barcode on the screen. Press “Continue” to begin. The QR barcode will appear on the screen. Hold doorbell camera in front of the QR barcode until you hear a beep.Press the “Heard the beep” button to continue. Pressing the “Heard nothing at all” will provide some trouble shooting steps to help get doorbell to scan the QR barcode.

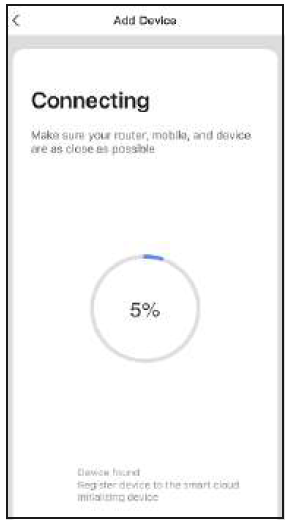
ConnectingAfter you hear the beep and continue on, the “Connecting” screen will appear. It will usually register within by approximately 30% range. The Device found will checkmark green, then Initializing device will complete. After connecting process completes it will continue on toward the next screen.
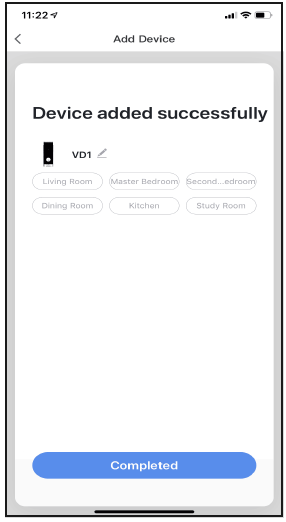
Confirmation ScreenThe smart device is added once they are communicating on the same network. You can rename the smart device by clicking on the pencil icon. You can specify the location. Press the “Completed” button at the bottom of screen to continue to next step.
Home Screen UpdatedNow that your device has been added, it will show on the home screen along with all other paired Xodo Smart Products. Now you are all set.

Doorbell Home ScreenThe home screen will show the live camera feed along with doorbell controls.
- Press the “Speak” button to communicate with people next to the smart doorbell.
- Press the “Record” button to record video.
- Press the “Take a Photo” button to take a snapshot.
- “Playback” will access stored video from the memory card.
Configure The Doorbell Settings
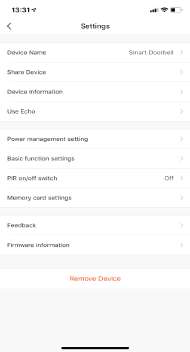
Different features can be adjusted from the menu button on the upper right hand button on the AP
- Device Name can be changed as desired.
- Add Members to be able to control the device in the Share Device setting.
- Device Information provide network configuration information.
- Use Echo provide the information about how to connect your device to Amazon Alexa.
- Power management setting show battery level along with alert setting. If the unit is plugged in to a power source it will read as 100%.
- Basic function settings can set below functions: Flip Screen: on/off; Time Watermark: on/off; Talk Mode: One-Way Talk/ Two-Way Talk.
- PIR on/off switch control if the motion sensor is on. Having the motion sensor on will alert the smart device each time there is movement.
- Memory Card settings will display info regarding the removeable memory module.
- Firmware Information allows to check software or install updates to device.
- Remove device will remove the doorbell from the Xodo Smart app and remove pairing. This is necessary if pairing with a new device.
External Ringer PairingAn external ringer has been provided and can be setup to hear the doorbell ring. This is useful in the event if no smartphone that has been configured is available, others can still hear the doorbell sound when guests arrive at the door. Configure the external ringer by long pressing the volume button for 3 seconds. Then press the button of the doorbell to complete the pairing. For multiple connections, please note only one (1) external ringer can be connected to a smart doorbell. But a smart doorbell can have multiple external ringers. Additional external ringers are sold separately.
Link Xodo Smart account to Google Home Screen
- Open Google Play Store or Apple Store and download Google Home
- Open the Google Home app. Click on Get Started.
- Login with a Google Account or create a new account.
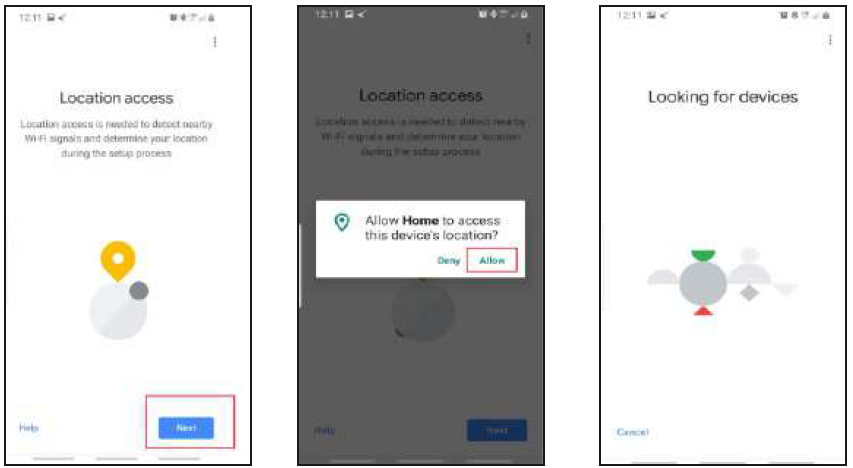
- Use Location access to find devices on the same wifi network.
- You will need to permission so Google Home can access device.
- The app will search for devices to connect.
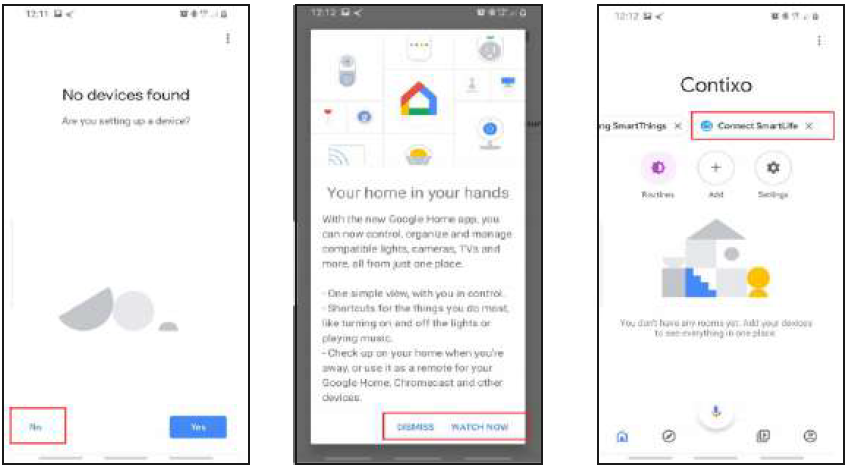
- If no devices can be found that are already setup, select NO.
- A youtube video is available to help instruct how to use smart devices.
- The app will show settings to add devices, setup routines, and adjust settings.
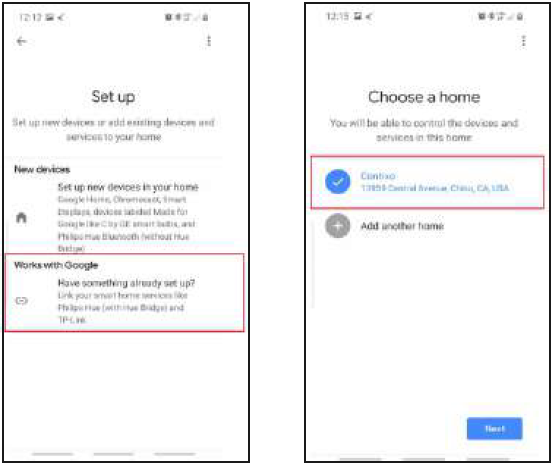
- If the devices are already installed and setup through the Xodo app, you can select the “Works with Google” setup option to continue.
- Configure the home settings by adding address and name to a “Home” group.

Control your smart devices through Google HomeNow you can control your smart devices through Google Home. Take bedroom light as the example, the supported voice commands are as below:
- Ok Google, turn on/off bedroom light.
- Ok Google, set bedroom light to 50 percent.
- Ok Google, brighten bedroom light.
- Ok Google, dim bedroom light.
- Ok Google, set bedroom light to red.
Link Xodo Smart account to Alexa
- Download the free Alexa app from the Amazon Appstore, Google Play, or the Apple App Store.
- Open Alexa app to home screen
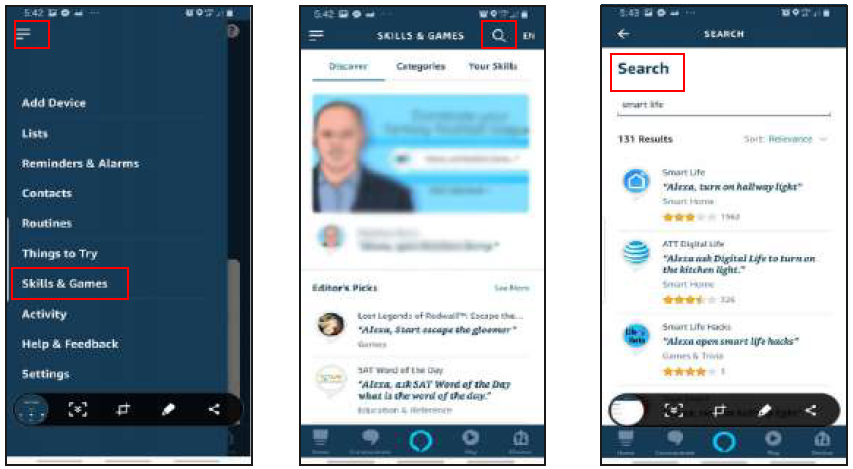
- In upper left hand corner open the menu.
- Next click on “Skills & Games”
- In top of app you can now search for “Smart Life”
- Smart Life App will appear.
- Open the smart life app to add
- Click Settings
- Manage Smart Home Devices to verify Smart Life has been added.
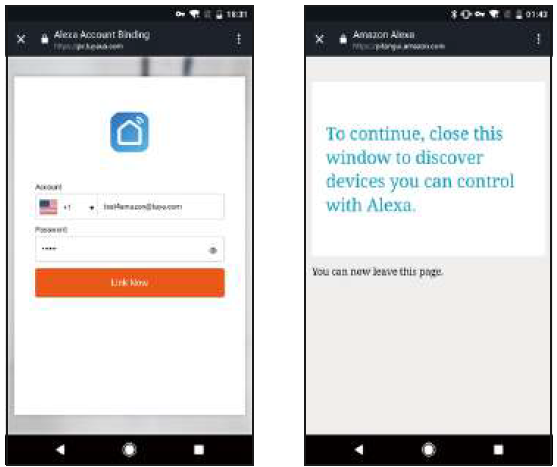
- You will be redirected to the account link page. Type in your Xodo Smart account and password, don’t forget to select the country/region where your account belongs to. Then tap “Link Now” to link your Xodo Smart account. The country/region, the account, and the password must match.

Customer Service and Tech Support
Your satisfaction is important to us. We are here to help!Contact us at [email protected]Include your order number and product description.See our website for more products www.contixo.comWe enjoy your feedback!
Xodo is a subdivision of the Contixo Inc. group., and the respective logos are registered trademarks of Contixo Inc. and may not be used, reproduced, or altered without written Permission. All other trademarks are the property of their respective owners and used with permission.To find the latest revision of this publication, visit our website at www.contixo.com
 report this ad
![]()
[xyz-ips snippet=”download-snippet”]