WiFi Smart PlugWP1 User Manual
 Read before installing or using this product. Keep this guide for future reference.Visit Contixo.com for literature updates!
Welcome
Thank you for purchasing Xodo Smart home products!We are committed to bringing you excellence with smart technology products that make life more comfortable, convenient, and provide a more dynamic healthy lifestyle.
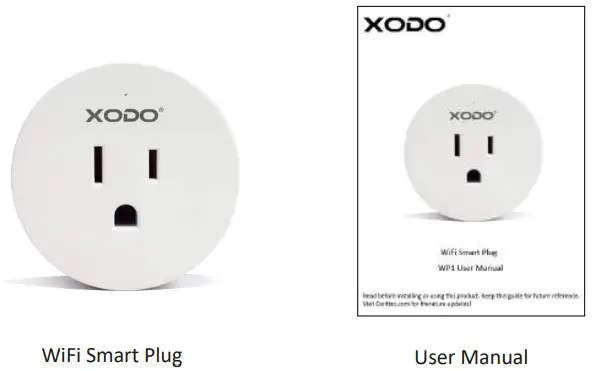
What’s included in the boxYou will find the following contents included to help you get started:
NOTICEMake sure to always follow these safety instructions:
- Please check for damage caused by shipping. Contact supplier as needed.
- Follow instructions and only use products in safe operating conditions.Keep out of reach of children. This product is not a toy.
- Do not disassemble or alter the smart socket. Doing so will void the warranty.
Specifications
Product Name: Xodo WiFi Smart PlugModel: WP1Rated Voltage: 100V-240V AC 50Hz-60HzRated Current: 10AMax Power: 1100WOutput Port: 1 AC (US)Working Temp: -10~50°CSupport System: Android or IOSWiFi: 802.11 b/g/n 2.4GHz
Smart Plug Introduction

WiFi Smart Plug ComponentsButton — Press to turn on/off the PlugOutput AC plug — Charging via chargerInput AC plug — Plug in a normal socketIndicator LightBlinking blue: Configuration statusBlue light ON: Smart plug is workingBlue light OFF: Smart plug stop working
Download and Install the Xodo Smart APPDownload and install the APP. It can be also be found by searching “XODO Smart” by Conxo Inc. in the App Store (for IOS) or Google Play Store (for Android).
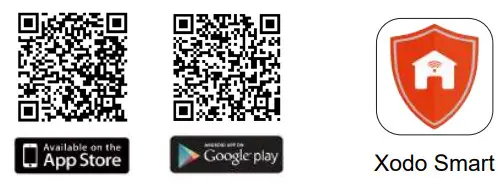
https://apps.apple.com/us/app/xodo-smart/id1468630689?l=zh&ls=1https://play.google.com/store/apps/details?id=com.contixo.smart
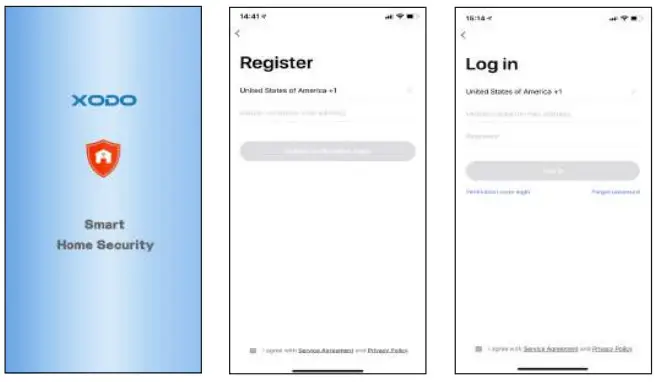
Open the APPThe welcome screen will appear and then you will be asked to log in or register a profile. Register an account by entering your email address and sign up for a profile or logging in with an existing account.
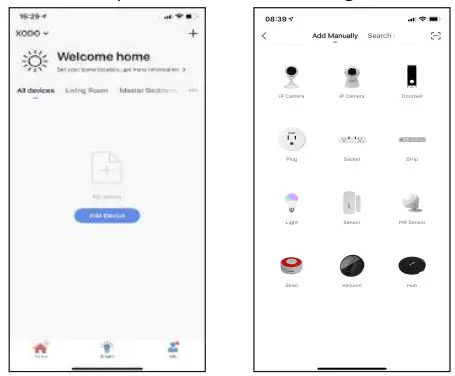
Adding DevicesYou will be able to manually add a device. Select Plug to continue.
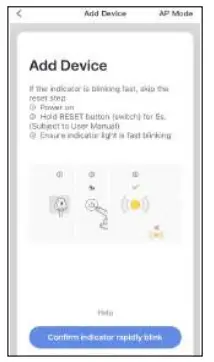
Detecting DeviceWhen detecting devices manually, power on the device and confirm the indicator light are blinking rapidly (Hold the reset button for 5 seconds).Once you confirm the smart device is ready, press the “Confirm indicator rapidly blink” button. Continue on to the next step. Pressing the “Help” button will offer some troubleshooting guidelines to follow.
Connect to a WiFi networkThe next step to connect the smart device is to connect to a WiFi network. If the proper network is not listed on this page, select the “Change Network” link to see a list of available networks. Enter the password next to the lock icon.Press “Confirm” to continue.

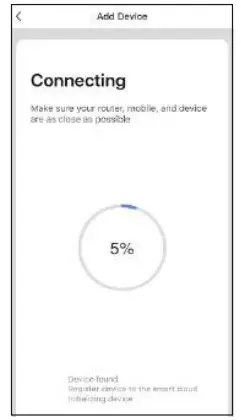
ConnectingThe “Connecting” screen will appear. It will usually register within by approximately 30% range. The Device found will checkmark green, then The initializing device will be complete. Aer connecting process completes it will continue on toward the next screen.
Confirmaon ScreenThe smart device is added once they are communicating on the same network.You can rename the smart device by clicking on the pencil icon.You can specify the location. Press the Completed button at the boom of the screen to continue to the next step.
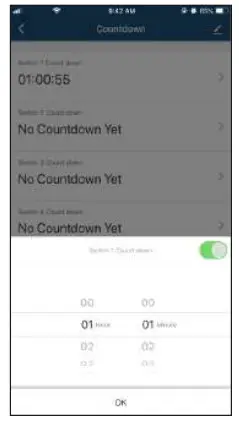
Countdown functionThis will keep the sock in ON position for a specific duration of me.
- Click “Countdown”.
- Select the switch that needs to be set.
- First, configure the hours (left)
- Next configure minutes (right)
- Click “OK” to save the songs.
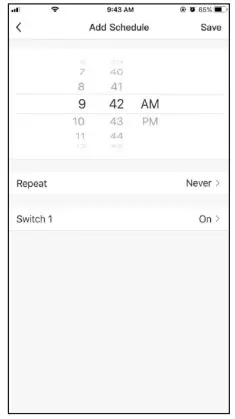
Timer functionThis will keep the sock in ON position for a specific duration of time.
- Click on “Alarm”.
- Select the switch that needs to be set.
- Click “Add Schedule”.
- First, configure the hours (left)
- Next configure minutes (middle)
- Select AM or PM on the right.
- Click “Repeat” and choose the day of the week.
- Click “Save” to save the settings.
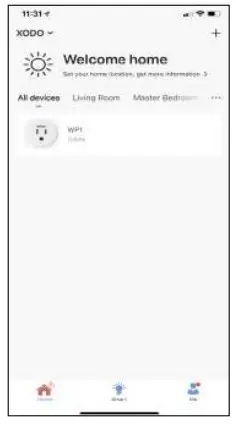
Home Screen UpdatedNow that your device has been added, it will show on the home screen along with all other paired Xodo Smart Products. Now you are all set.
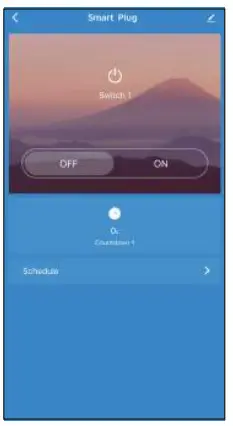
Smart Plug Home ScreenThe home screen will show the live plug status.
- Press the “OFF”/”ON” button to turn off/on the smart plug.
- Press the “Countdown” button to set a countdown on or off.
- Press the “Schedule” button to set a schedule.
Configure the Smart Plug Settings
Different features can be adjusted from the menu button on the upper right-hand button “![]() ” on the APP.
” on the APP.
- The device Name can be changed as desired.
- Device Location can set the location of the plugin your home.
- supported Third-Party Control provides information about how to connect your device to Amazon Alexa and Google Assistant.
- Add Members to be able to control the device in the Share Device setting.
- Create Group to control another smart device at the same time.
- Device Information provides network configuration information.
- Add to Home Screen allows adding the plug to the home screen of your
- Firmware Information allows checking software or installation updates to the device.
- Remove device will remove the smart plug from the Xodo Smart app and remove pairing. This is necessary if pairing with a new device.
- Restore Factory Setting allows to reset the Surge Protector to the factory
![]()
Link Xodo Smart account to Google Home Screen
- Open Google Play Store or Apple Store and download Google Home
- Open the Google Home app. Click on Get Started.
- Login with a Google Account or create a new account.

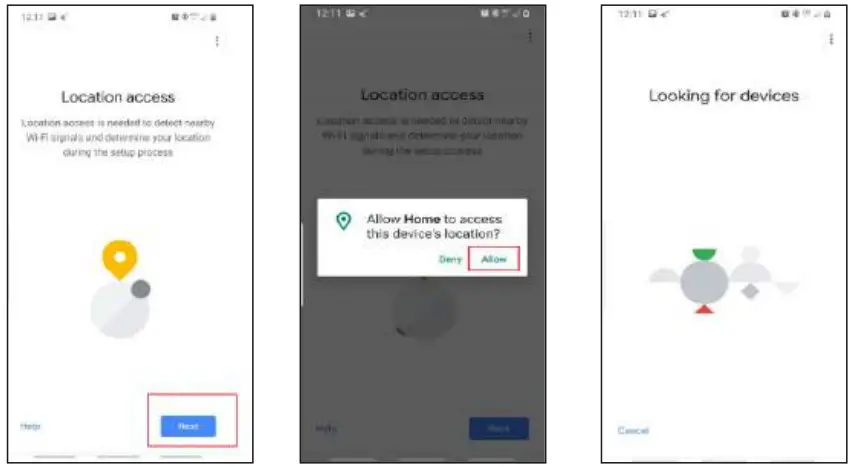
- Use Location access to find devices on the same wifi network.
- You will need permission so Google Home can access the device.
- The app will search for devices to connect.
- If no devices can be found that are already set up, select NO.
- A youtube video is available to help instruct how to use smart devices.
- The app will show signs to add devices, set up routines, and adjust settings.
- If the devices are already installed and set up through the Xodo app, you can select the “Works with Google” setup option to continue.
- Configure the home songs by adding address and name to a “Home” group.

Control your smart devices through Google HomeNow you can control your smart devices through Google Home. Take bedroom light as the example, the supported voice commands are as below:
- Ok Google, turn on/off bedroom light.
- Ok Google, set bedroom light to 50 percent.
- Ok Google, brighten bedroom light.
- Ok Google, dim bedroom light.
- Ok Google, set bedroom light to red.
Link Xodo Smart account to Alexa
- Download the free Alexa app from the Amazon Appstore, Google Play, or the Apple App Store.
- Open Alexa app to home screen
- In upper left hand corner open the menu.
- Next click on “Skills & Games”
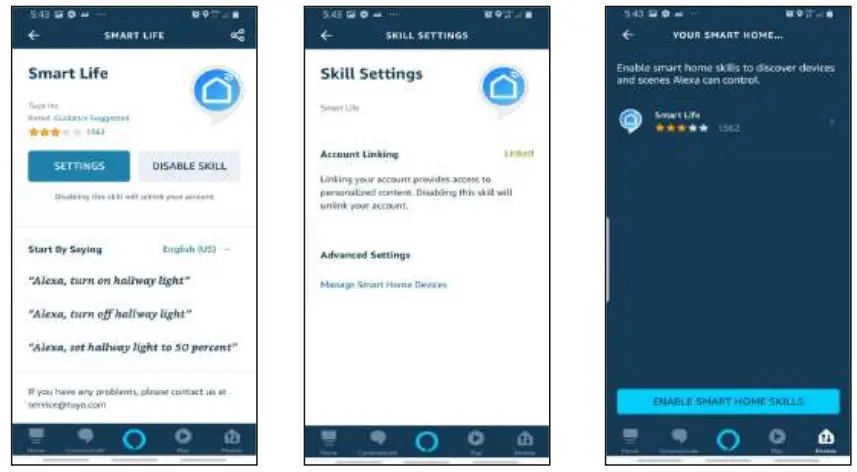
- In top of app you can now search for “Smart Life”
- Smart Life App will appear.
- Open the smart life app to add
- Click Setings
- Manage Smart Home Devices to verify Smart Life has been added.
- You will be redirected to the account link page. Type in your Xodo Smart account and password, don’t forget to select the country/region where your account belongs to. Then tap “Link Now” to link your Xodo Smart account. The country/region, the account, and the password must match.

 report this ad
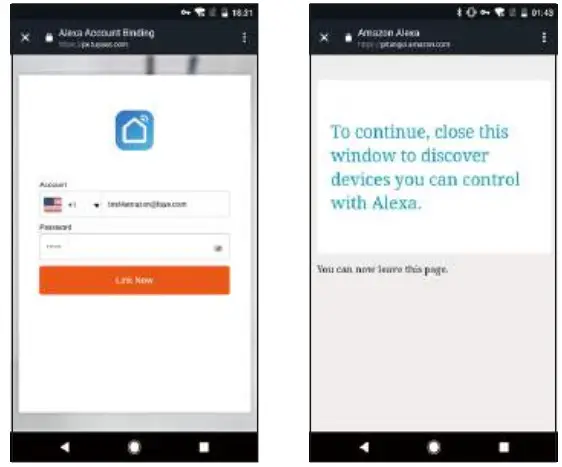
Customer Service and Tech Support
Your satisfaction is important to us. We are here to help! Contact us at [email protected]Include your order number and product description. See our website for more products www.contixo.com We enjoy your feedback!Xodo is a subdivision of the Contixo Inc. group., and the respective logos are registered trademarks of Contixo Inc. and may not be used, reproduced, or altered without written Permission. All other trademarks are the property of their respective owners and used with permission.To find the latest revision of this publication, visit our website at www.contixo.com
[xyz-ips snippet=”download-snippet”]