XYZPRINTING 3D Printer Da Vinci nano
Thank you for purchasing the da Vinci Nano 3D printer. (Hereinafter referred to as da Vinci nano. )This product is a small and portable 3D printer, you can use da Vinci nano to take your imagination to a new level and bring any idea to life.
Before you start printing, please read this manual to learn how to use da Vinci nano correctly. This manual describes da Vinci nanosafety instructions, operating instructions, maintenance information, and application tips. For the latest information on the da Vinci Nano 3D printer, you can contact your local Authorized Distributors or refer to the official website of XYZprinting. (http://www.xyzprinting.com).
 XYZmaker is a software that is used to operate the da Vinci nano and prepare 3D models for printing. Download XYZmaker from http://xyzptr.com/go2nano and install it on your computer. The first-time installation requires an Internet connection.

Product Overview
Product Details
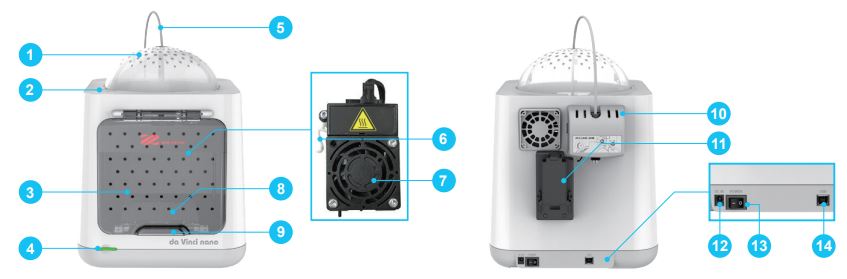
- Top cover
- Top cover latch
- Print bed
- Function button/ Status indicator
- Guide tube
- Detection head trigger
- Extruder module
- Hold-open component
- Front cover handles
- Feed module
- Filament holder
- Power socket
- Power switch
- USB port
Specification
Print Technology Fuse Filament Fabrication (FFF)Dimensions 378*280*355 mmPrint Resolution 0.1-0.4 mmPrint Material PLAPrint Software XYZmakerOperating System Microsoft Windows 7 + Mac OSX 10.9 +Weight 4.5kgPrint Dimension 120*120*120 mmNozzle Diameter 0.4 mmFilament Diameter 1.75 mmFile Format .3w/ .stl/ .3mfConnectivity USB cord 2.0
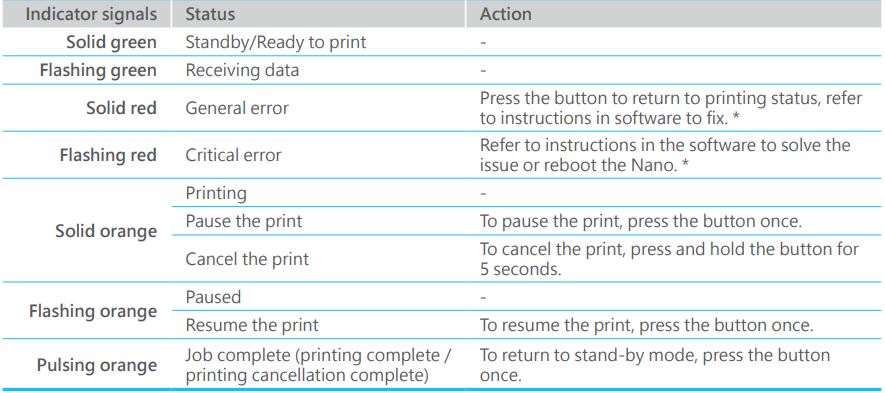
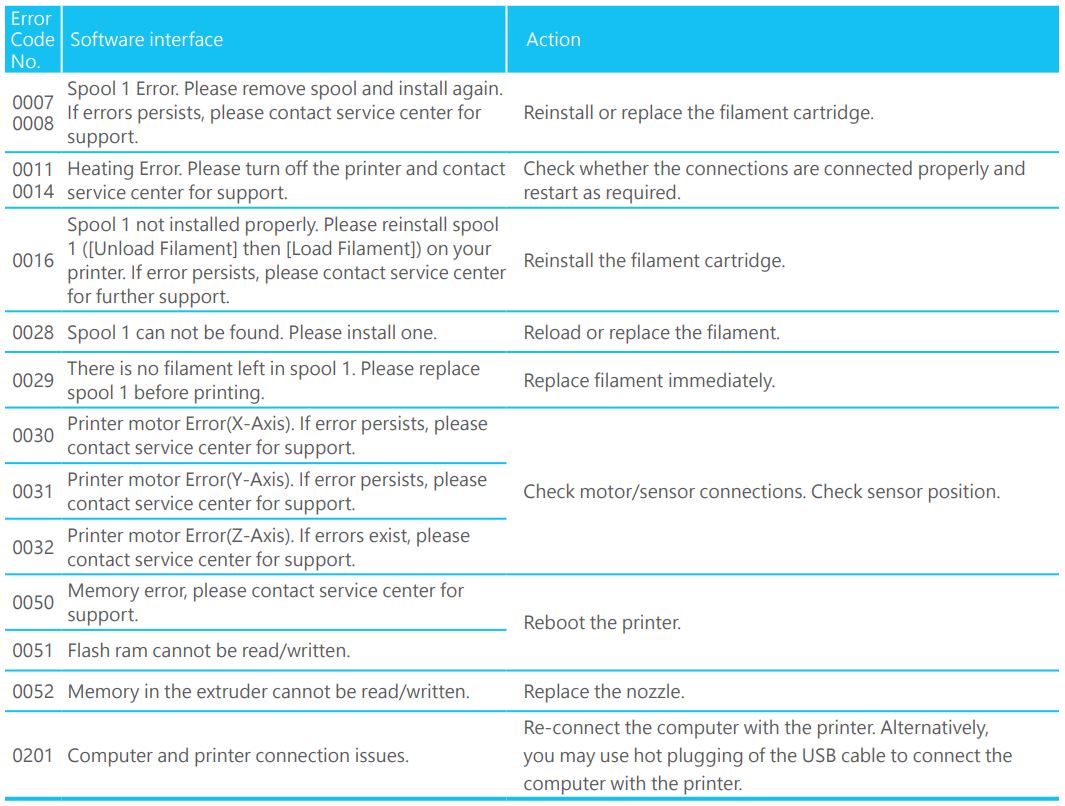
*Please refer to the “XYZmaker” software screen to solve the problem.
Printer Setup
Accessory Checklist
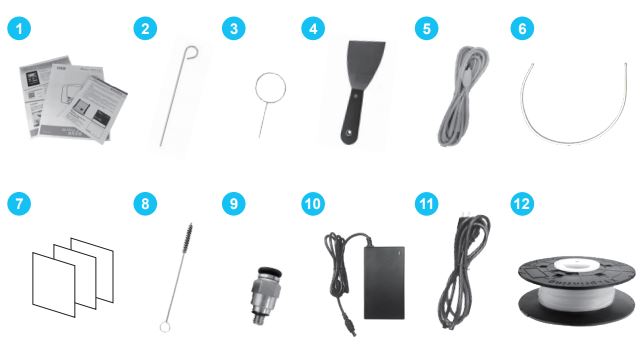
- Quick Guide & Warranty Card
- Feeding Path Cleaning Wire
- Nozzle Cleaning Wire x 5
- Scraper
- USB Wire
- Guide Tube
- Bed Tape x 3
- Cleaning Brush
- Feeder
- Power Adapter
- Power Cord
- Bundled Filament
Unpacking
NoteKeep original packaging materials in case you need to send your unit back for repair during the warranty period. If other packing materials are used instead, the printer may become damaged during transportation. In such a situation, XYZprinting reserves the right to charge a repair fee.
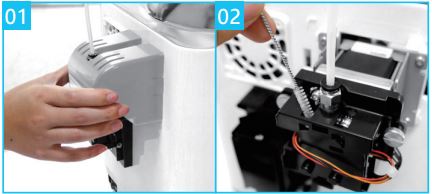
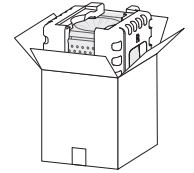 (01) Take out the accessories, top cover, and printer.
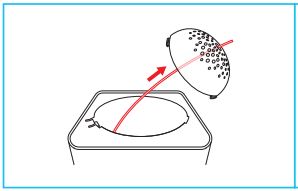
 (02) Remove the styrofoam packing material on the sides and the plastic bag.
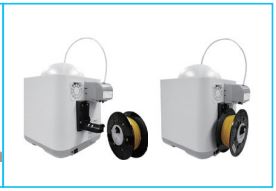
 (03) Remove the fixed tape from the printer bottom and take out the filament.
 (04) Remove the fixed tape on the front cover sides.
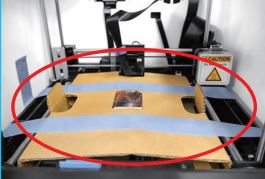 (05) Remove the fixed tape on the extruder module and print bed packaging.
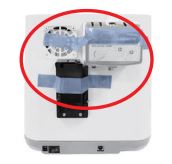 (06) Remove the fixed tape on the filament spool holder and the feed module.
Printer Setup
Install the Guide Tube and Extruder Module
WARNING: Hazardous Moving Parts. Keep Fingers and Other Body Parts Away.
 (01) Insert the guide tube into the extruder module port.
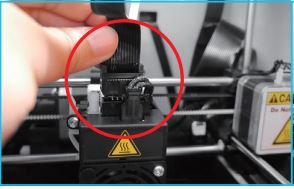
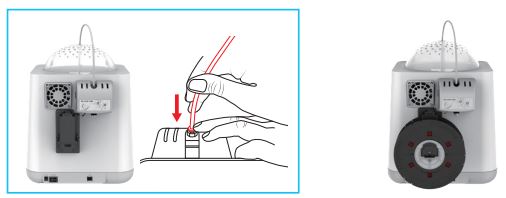
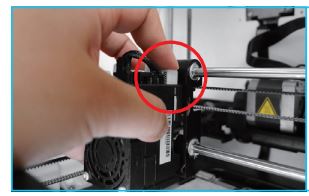 (02) Press the white button and align the extruder module with the bracket. Once aligned, release the white button to connect the extruder module with the bracket.
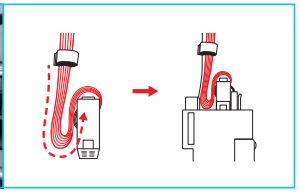 (03) Follow the illustration to bend the flat cable.
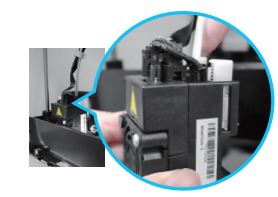
 (04) Connect the flat cable to the extruder module. (Be sure to insert the flat cable in the right direction.
 (05) The flat cable is bending for printing smoothly purposes, please do not adjust.
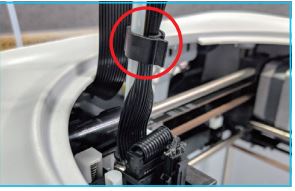 (06) Use the cramp ring to hold the filament guide tube and flat cable. (Place the cramp ring on the flat cable marker.)
 (07) Feed the guide tube through the top cover
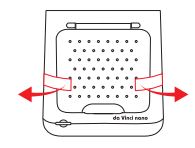
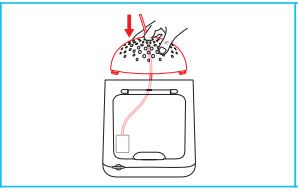 (08) Attach the top cover to the machine.
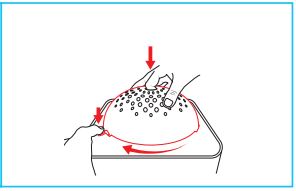 (09) Direct the bottom locking catches toward their slots then press the latch to rotate clockwise.
 (10) Ensure that the guide tube has been tightly inserted into the feed module port.
Note To load the filament, refer to Note to the [Software Setup] section.
Installing the Filament
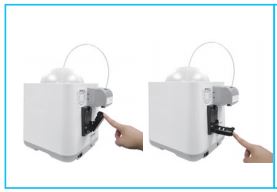 (01) Lower the filament spool holder on the backside of the printer until horizontal.
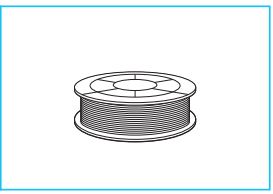
 (02) Place the assembled filament spool (with the spool ring) on the spool holder.
Note
- The filament will load better when the tip of the filament is cut at a 45° angle.
- When the printer is not in use, raise the filament spool.
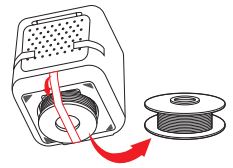
Replace the New Filament Spool
*If you have just unboxed the da Vinci Nano, the sensor chip should already be loaded.
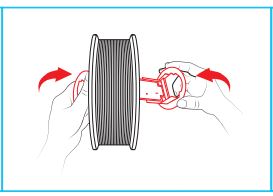
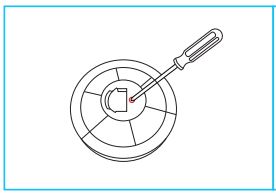 (01) Use a Phillips head screwdriver to loosen the securing screws of the filament spool ring.
 (02) Separate the spool ring from both sides of the spool.
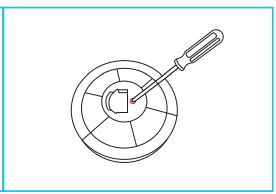
 (03) Take out the filament spool and the sensor chip.
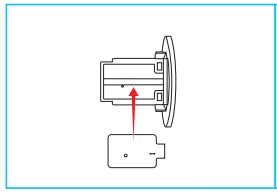 (04) Install the sensor chip. Note the orientation of the sensor chip on the spool ring.
 (05) Feed both parts of the spool ring through the center hole of the spool and assemble them together.
 (06) Use a Phillips head screwdriver to tighten and secure the spool ring to complete the installation.
Software Setup
XYZmaker is a software that is used to operate the da Vinci nano and prepare 3D models for printing. Download XYZmaker from http://xyzptr.com/go2nano and install it on your computer. The first-time installation requires an Internet connection.
Load Filament
(01) Open up XYZmaker and click File > Print > da Vinci Printer. This will display a print screen that lets you set print settings and prepare your printer.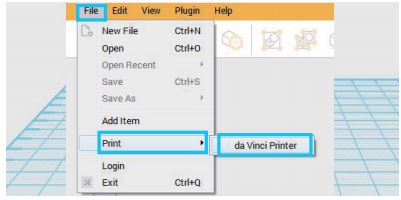
(02) Click DASHBOARD then click Filament > Load Filament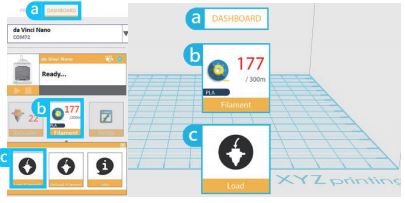
(03) Follow the on-screen instructions to install the filament.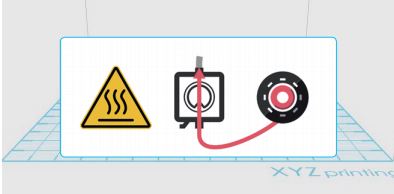
(04) Take the tip of the filament and insert it into the feeding hole. The printer will start to load the filament automatically.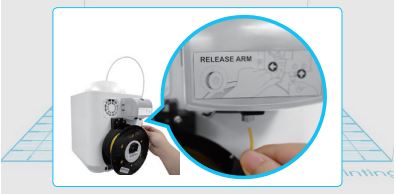
Printing
* For better printing results, we recommend that you calibrate before printing.
(01) Click File > Open. Import your favorite 3D files. Click on the object to adjust the size you need.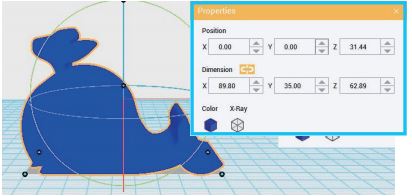
(02) When the object is adjusted, you can start printing. Click File > Print > da Vinci Printer.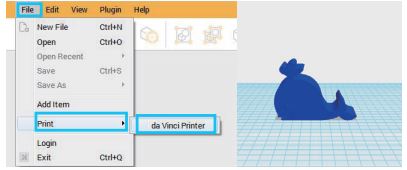
(03) When you’re done adjusting the print parameters you need, click PREPARE.
(04) After preparing, please check if the object is a complete model. After the confirmation, click PRINT.
Note
- When the printer starts printing, you can monitor the status by clicking DASHBOARD.
- The recommended operating temperature is 15 ~ 32 (59 ~ 90 ). If the room temperature is above this, please open the front cover to maintain print quality.
- After the print is finished, the object may be removed with a scraper.
- When using different types of filament, we recommend changing the extruder module.
Software Functional Descriptions
Interface Introduction
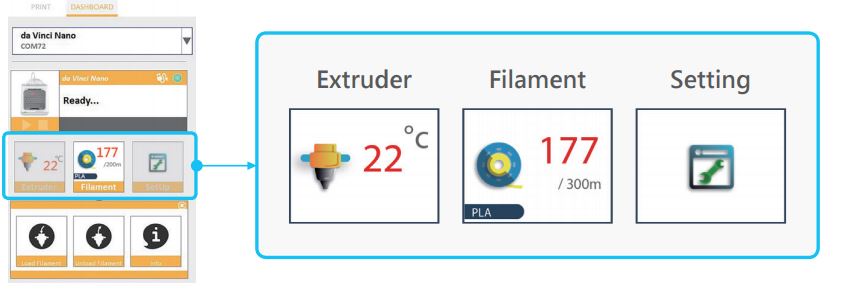
Extruder Once this function is selected, the nozzle will heat up automatically and move the nozzle to a proper location where you can easily clear away all residual plastic on the nozzle.

The extruder module information, including Temperature, Nozzle Diameter, Total Print Time, and Serial Number.
Filament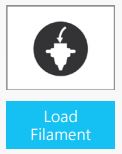 Please follow the on-screen instructions.The extruder module will automatically move to the working position.The nozzle will then heat up and begin the filament loading process.After this is complete, verify that plastic has been extruded. If not,please repeat the filament loading process.
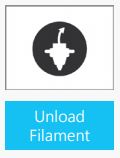 Please follow the on-screen instructions.The printing module will automatically move to the working position. The nozzle will then heat up and begin the filament unloading process.

Information related to filament use.
Interface Introduction
Setting
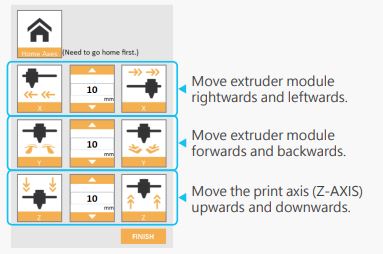
 Manually adjust the movement of X/Y/Z Axis for printer maintenance.
Note
1. First click on Home Axes. The extruder module will be returned to the initial axis position.2. You may manually enter the adjustment value: Range: 1 to 150; step: 1 mm
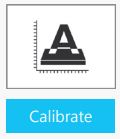 Please follow the on-screen instructions.Print bed calibration may be implemented before the printing process.Move the extruder module to the lower-left corner of the printing area. Please refer to the calibrate instructions provided by the software.
 Automatic horizontal calibrationAutomatic horizontal calibration may either be ON or OFF. Default: ON.
The software would automatically implement horizontal calibration and compensation accordingly.Printing speed will be improved if the automatic horizontal calibration has been switched to OFF. However, this may affect printing quality.
BuzzerThe buzzer may either be ON or OFF. Default: ON.When the buzzer is turned on, the printer will output an audible signal when a button is pressed, receiving data, the print job is finished, or the issue is detected.
Restore DefaultClick Restore Default to reset to the default setting.
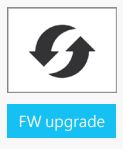 Please upgrade the latest firmware version for the best printing quality of the printer.

Information related to printer setting.
Maintenance
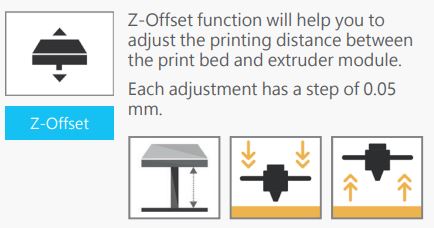
Z-offsetWhen the printing module has been moved, we recommend that you use a z-offset. This function will help you to adjust the printing distance between the print bed and the extruder module.Step
- Please unload the filament and clean the Step nozzle before using z-offset.
- Click DASHBOARD > SetUp > Z offset to start z-offset adjustment.
- Adjust Z up or Z down to find the proper distance.
Note
- This product is factory tested and adjusted, we suggest you note the default value for z-offset before your adjustment.
- The suggested distance between nozzle and print bed(including bed tape) is 0.3mm.
Clean the nozzleIn order to maintain a good printing quality, it is recommended that you clean the nozzle after every 25 hours of printing. Please use the Clean Nozzle function in the software.Step1. Switch on the power and click Step DASHBOARD > Extruder > Clean Nozzle. 2. Please clamp the nozzle cleaning wire with needle-nosed pliers to insert it into the head of the nozzle carefully for cleaning.3. Lightly press the spring around the feed hole and remove the filament guide tube (don’t need to remove the heating cable at the side)
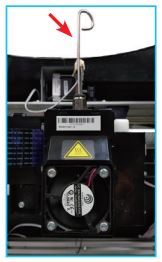 4. Insert the Feeding Path Cleaning Wire into the feeding path all the way down and “floss” the inside of the nozzle to pull the residue out.5. After cleaning the feeding path, reinstall the filament guide tube and extruder module.
Tool Nozzle Cleaning Wire
Feeding Path Cleaning Wire
Print bed calibrationPrint bed level will affect the 3D printing quality, XYZprinting’s 3D Printer has been adjusted to the best condition before leaving the factory. After long periods of use, the print bed level may change. If you have print adhesion problems, you may need to re-level the print bed.Step1. Switch on the power and activate the Step Calibrate function in XYZmaker.2. Please follow the on-screen instructions.
Clean the filament feed moduleAfter long periods of use, the automatic feed system may inconsistently extrude filament, due to a buildup of residual plastic in the feed module. The printer filament feed module should be cleaned if this happens or after cleaning the nozzle.
Step1. Open the feed module cover. Step2. Clean the gears by using a gear cleaning brush.Tool Cleaning Brush ![]()
Please switch off the power before cleaning the filament feed module.
Troubleshooting
References
[xyz-ips snippet=”download-snippet”]