YAMAHA NS-IW760 In-Wall Speaker
UNPACKING
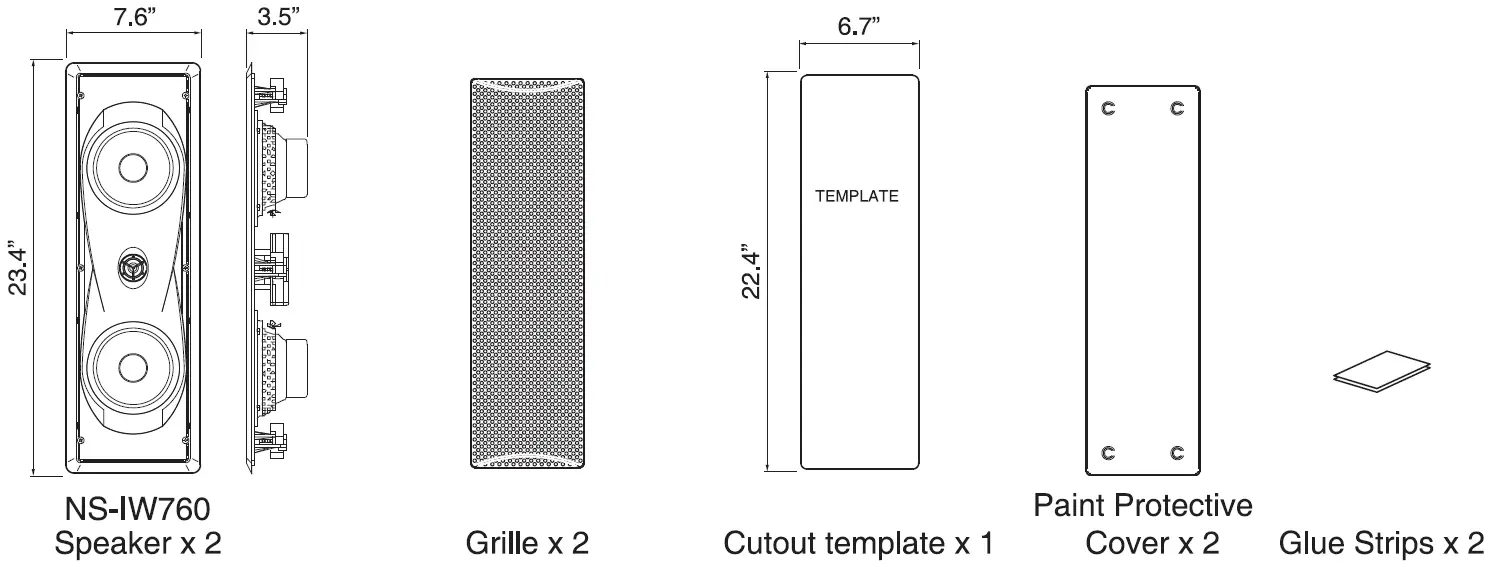
After unpacking, check that the following items are contained.
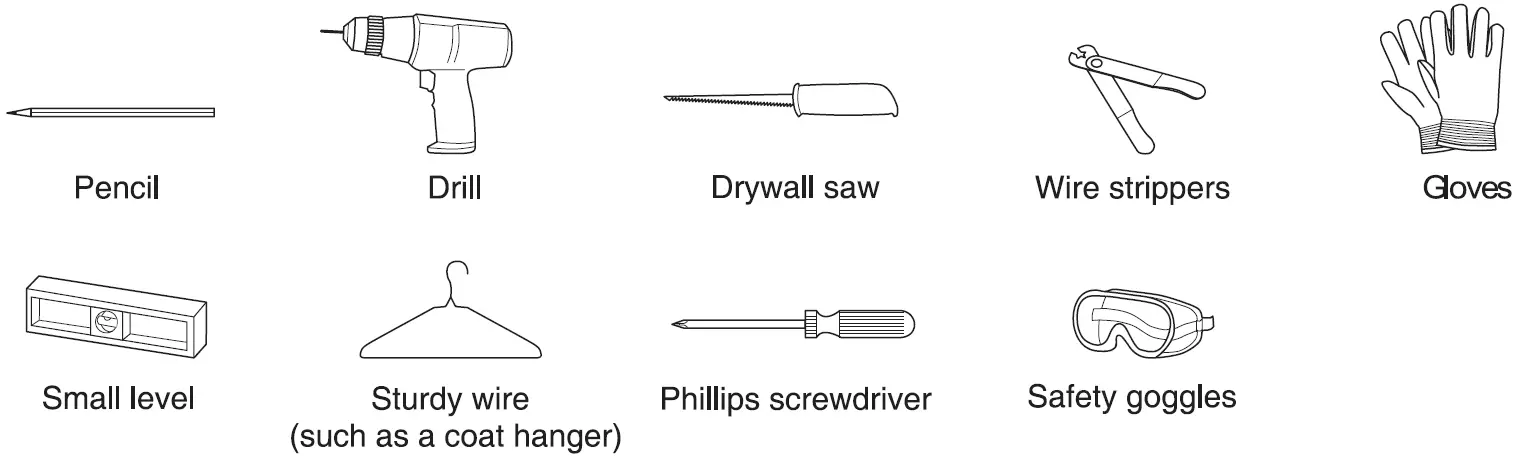
TOOLS NEEDED
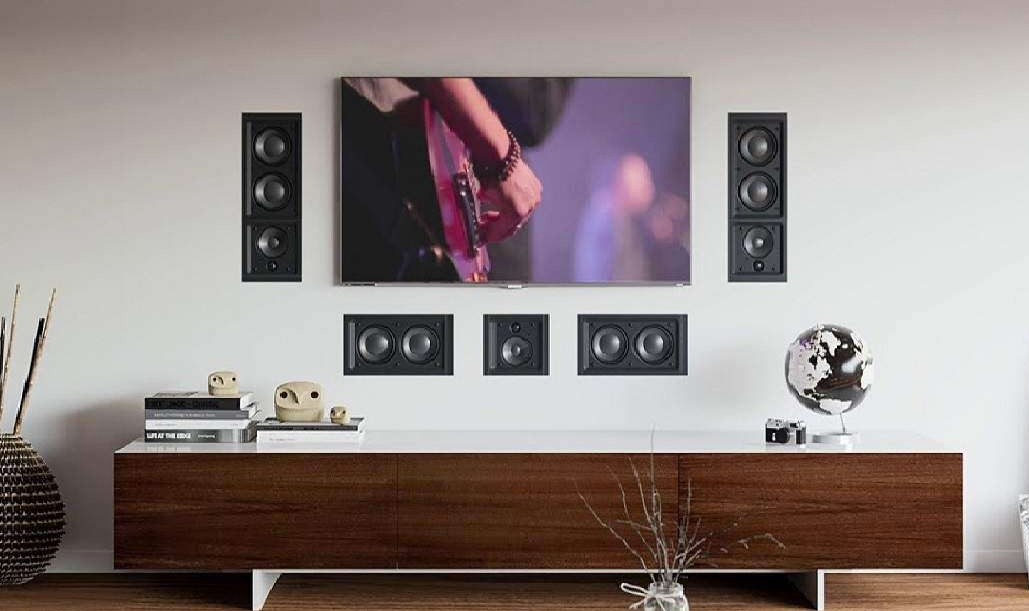
SPEAKER PLACEMENT
Though this speaker is a magnetically shielded type, there may be some influence on a TV picture depending on the type of TV or the placement of the speaker. In such a case, place the speaker apart from the TV so that there is no influence on the TV picture.
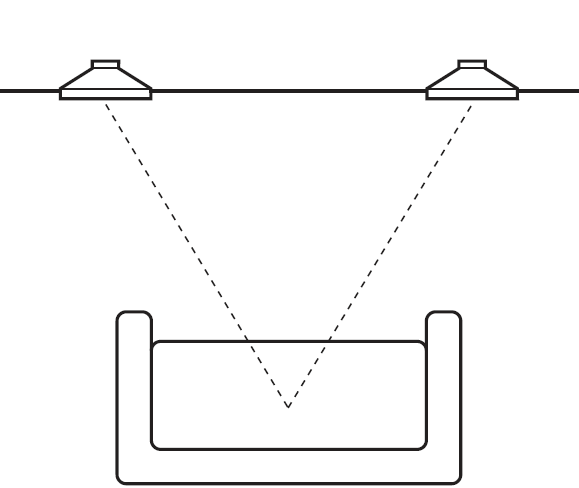
- StereoFor best stereo performance, install the left and right speakers at equal distance from the listening position. Each speaker should be separated by a distance of 6-10 ft. The center of the speaker should be placed at the listener’s ear level.

- Home TheaterInstall the left and right front speakers on either side of your TV, with the center of the speaker at the listener’s ear level. The center channel speaker can be installed horizontally above or below the TV. Surround speakers should ideally be placed behind the listening area, at least as far apart as the front speakers and up to 2 additional feet apart per side. The height of the speaker should be at a minimum of ear level or preferably somewhat higher.

INSTALLATION
Before installation, check to ensure that the area you are installing the speaker is free of any wall studs, either by tapping the wall or using a stud finder.If you wish to paint the speaker frame and grille, please refer to page 7 “PAINTING THE SPEAKER FRAME AND GRILLE” before proceeding.
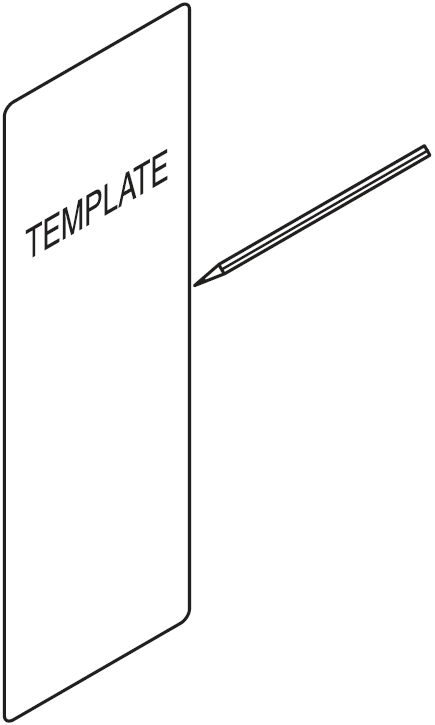
- Position the cutout template where you are installing the speaker. Make sure the template is level, then trace around the template with a pencil.
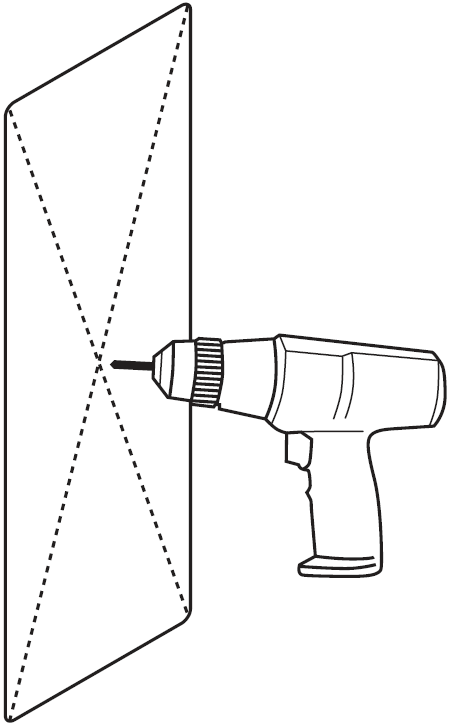
- Drill a pilot hole in the center outline you traced.
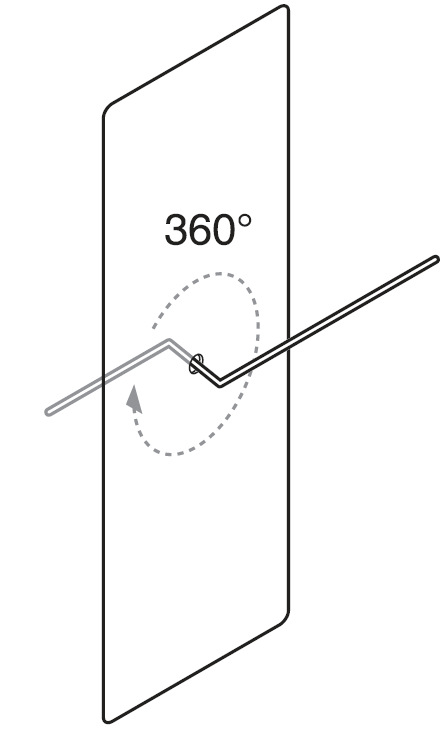
- Insert the bent coat hanger wire into the hole. Then slowly rotate to check for any obstruction. If there is any obstruction, patch the hole and select another location.
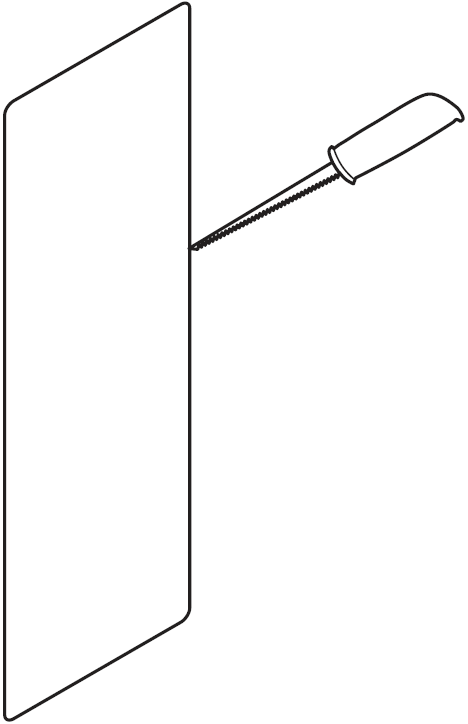
- Cut the wall along the outline you traced.
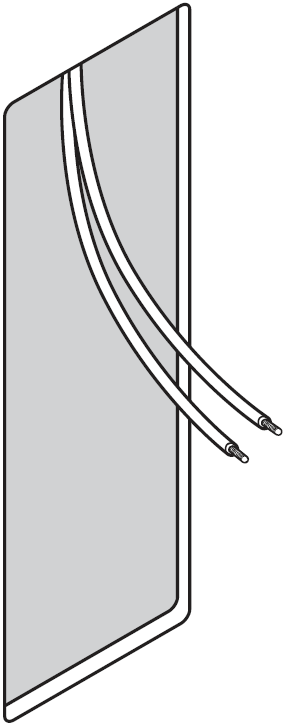
- Run high quality speaker cable from your receiver to the speaker. Leave a few extra feet of cable.
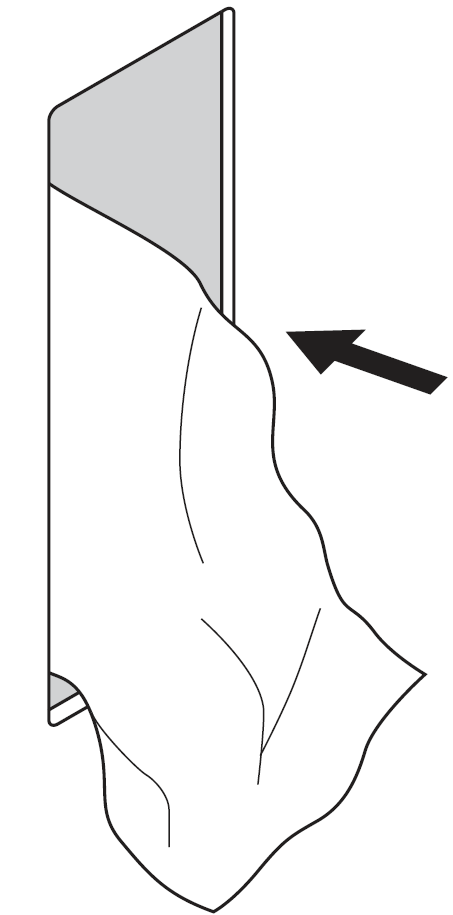
Note:You can insulate the cavity by placing a sheet of fiberglass insulation around the speaker components to improve speaker performance.
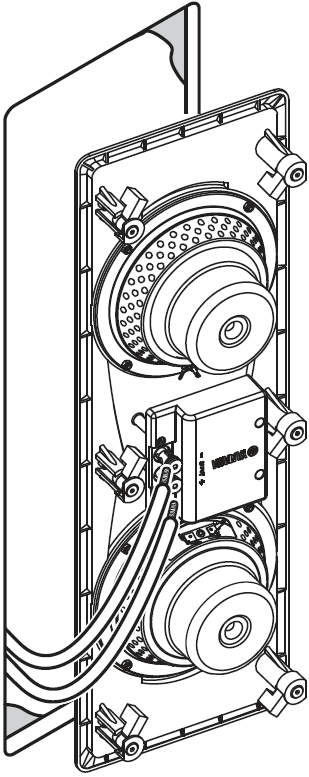
- Connect the speaker cable to the speaker and your receiver. Please refer to page 6, “CONNECTIONS” section for detailed instructions.
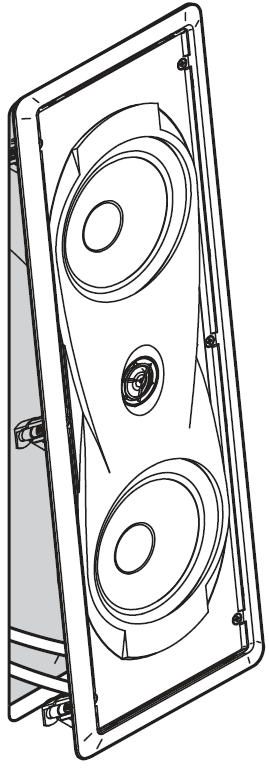
- Place the speaker into the wall. Loosen each mounting screw by turning it counterclockwise one complete turn. This will release the mounting clamp from its shipping position.
- Tighten each of the four mounting screws evenly until the mounting clamp grips the wall “finger tight.” Now tighten each screw one additional turn only. This will secure the speaker firmly to the wall.Note:We recommend using only hand tools as powered drivers may over-tighten the screws.Note:You can swivel the tweeter and the midrange speaker to direct high frequency sounds precisely toward the listening position by gently pressing the outer edge of the tweeter mount.
- Attach the grille to the frame.Note:For permanent grille attachment, application of the supplied glue strips is recommended.
 Note:We recommend using only hand tools as powered drivers may over-tighten the screws.Note:You can swivel the tweeter and the midrange speaker to direct high frequency sounds precisely toward the listening position by gently pressing the outer edge of the tweeter mount.
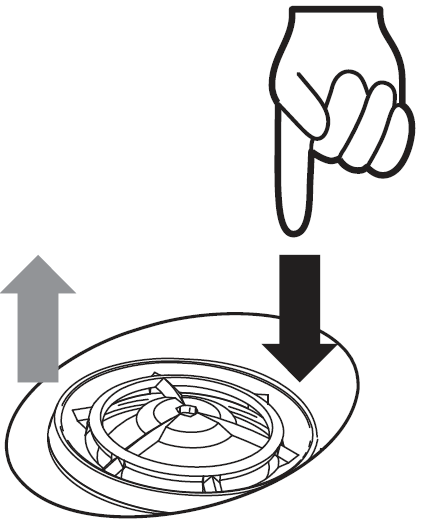
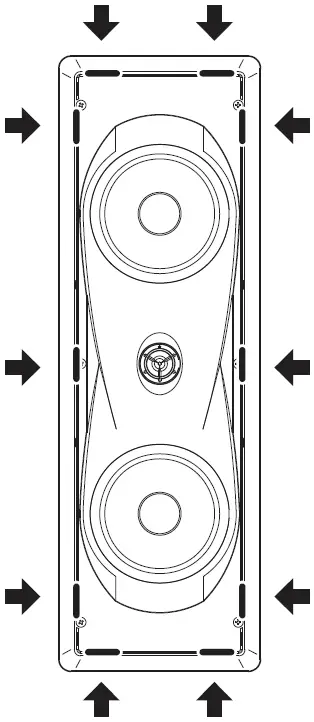
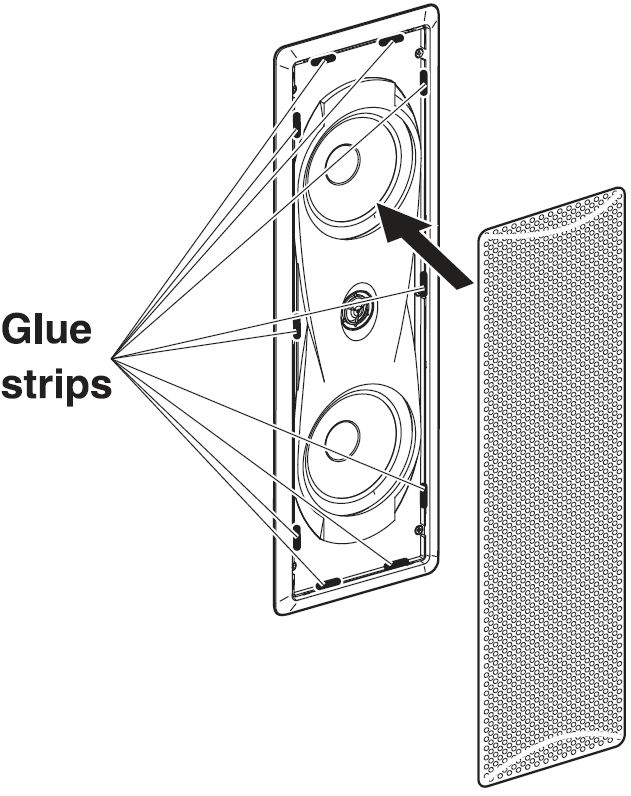 Note:For permanent grille attachment, application of the supplied glue strips is recommended.
Recommended Glue Strip Location
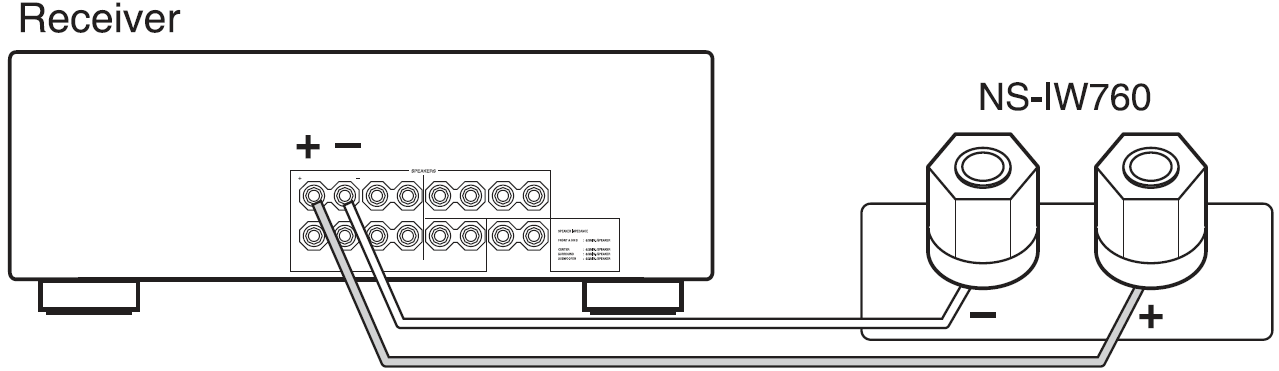
CONNECTION
- Connect the screw-type input terminals at the rear of the speakers to the speaker output terminals of the receiver.
- Connect the(+) terminals on the receiver and speakers using the corresponding side of the cable. Connect the ( -) terminals on both components using the other side of the cable.
Notes:
- Make sure that the bare wires are not touching each other as this could damage the speaker and receiver.
- Connect one speaker to the left terminals of your receiver, and another speaker to the right terminals, making sure not to reverse the polarity(+, -). If one speaker is connected with reversed polarity, the sound will be unnatural and lack bass.
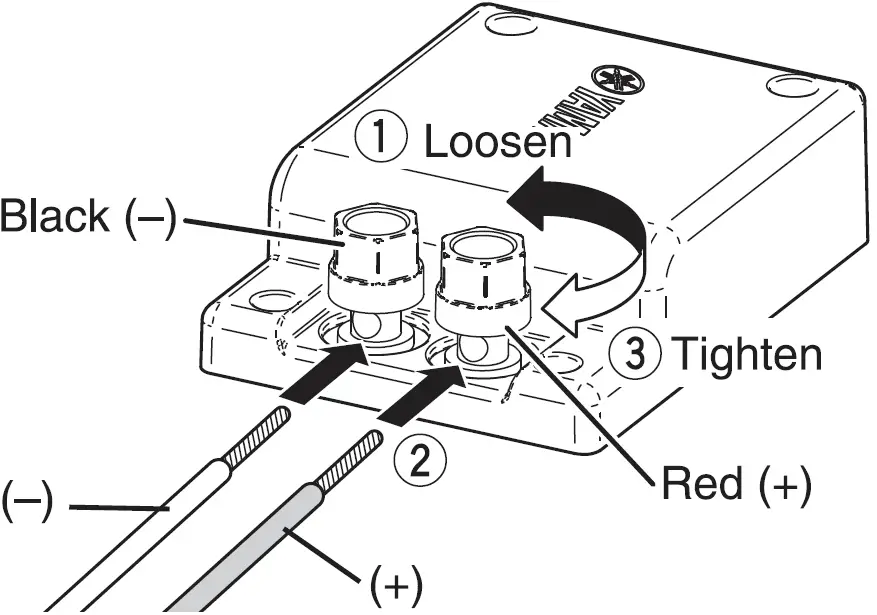
- How to connect
- Loosen the knob.
- Insert the bare wire. Remove the insulation coating at the extremity of each speaker cable by twisting the coating off.
- Tighten the knob and secure the cable. Test the connection by pulling lightly on the cable at the terminal.
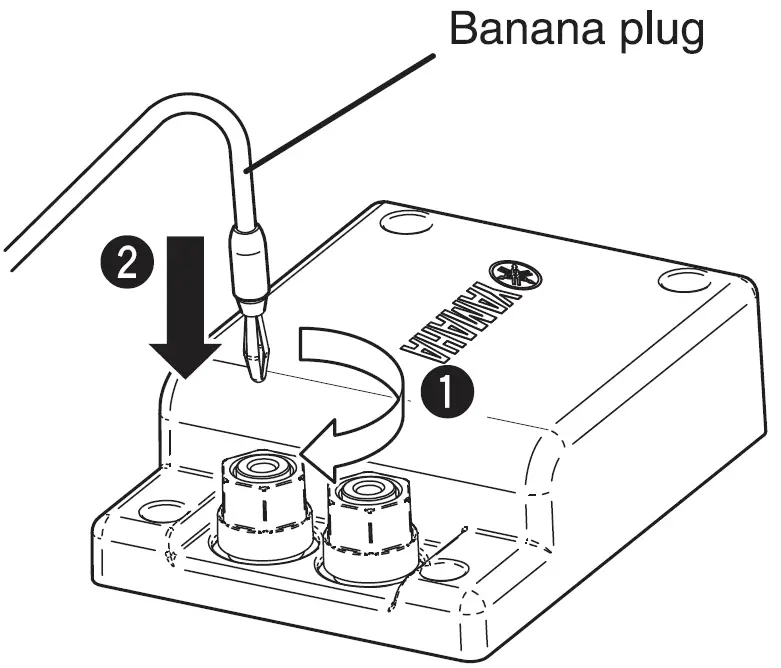
- When using a banana plug
- Tighten the terminal knob.
- Insert the banana plug into the terminal.
PAINTING THE SPEAKER FRAME AND GRILLE
The speaker frame an grille can be painted to match your room decor. Use high quality spray paint and select a well-ventilated area before proceeding.
- Painting the Frame
- Remove the speaker from the wall if it is already installed. Also, remove the grille from the baffle.
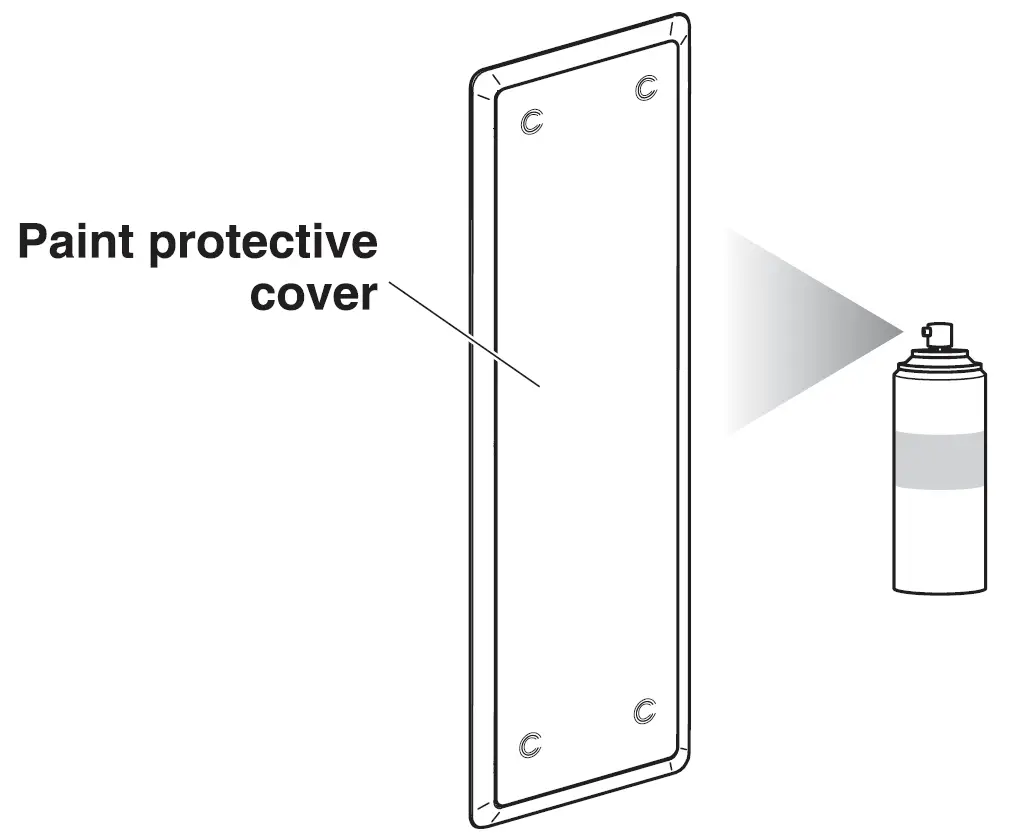
- Mask the speaker components and the baffle with the supplied paint protective cover.
- Apply paint to the frame.
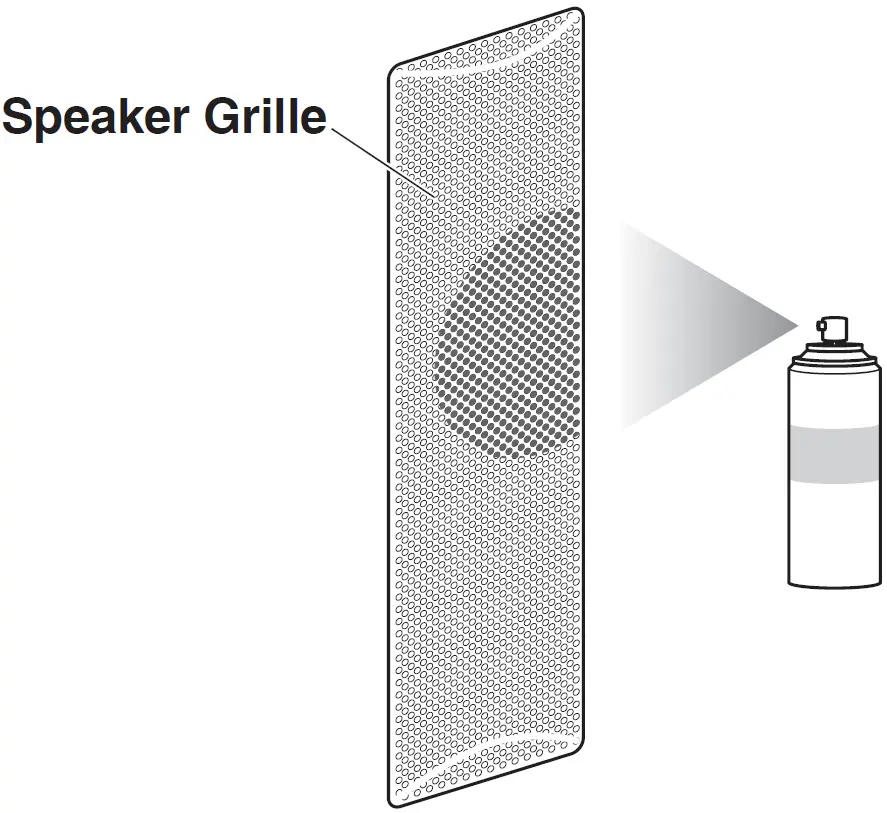
- Painting the Grille
- Carefully remove the grille from the speaker, if attached.
- Apply the paint to the grille. Make sure that the grille holes remain free of paint. Clogging the holes with paint may diminish the sound quality.
SPECIFICATION
- Speaker: 6.5″ woofer x 2, 1″ soft dome tweeter
- Frequency Range: 50Hz to 24KHz
- Impedance: 6 ohms
- Nominal Input: 40W
- Sensitivity (dB/2.83v, 1m): 130W
- Crossover Frequency: 6,500Hz
- Dimension (H x W x D): 23.4″ x 7.6″ x 3.6″ (595 x 195 x 93.6 mm)(Mounting Depth): 3.16″ (80.4mm)
- Weight: 5.1 lbs (2.1 kg)
- Magnetic Shielding: Yes
* Specifications subject to change without notice due to product improvements.
![]()
[xyz-ips snippet=”download-snippet”]