YAMAHA THR-II Wireless Modeling
Introduction
This manual explains the process for customers who have purchased the THR-II and want to record their guitar performances using Cubase AI.
Important: In order to use Cubase AI, you must acquire a license.
Follow Steps 1 to 4 below to acquire a license.
- User registration (creating a Steinberg ID)
- Getting an activation code
- Downloading Cubase AI
- Activating the Cubase AI license
This manual provides only an overview for acquiring the license. If the actual information displayed on your screen varies from the explanations in this manual, check for the latest information on Steinberg’s website, official FAQs, official videos, and the like.
License Acquisition Overview
- User registration (creating a Steinberg ID)In order to acquire a license for Cubase AI, you must first register as a user. Steinberg offers a user registration system called MySteinberg, allowing you to create a user ID (called Stein-berg ID). Access MySteinberg from the URL below and then create your Steinberg ID.MySteinberg https://www.steinberg.net/en/mysteinberg.html
- Getting an activation codeLog into your MySteinberg account, and then enter your Download Access Code, which is listed in the “Cubase AI Download Information” leaflet included with the THR-II, to the account to get your activation code.
- Downloading Cubase AIIn order to download Cubase AI, use the Steinberg Download Assistant. Steinberg Download Assistant is software for downloading installers, and is available in your MySteinberg* account. Multiple Steinberg products are displayed on the Steinberg Download Assistant. Select Cubase AI and then download the installer. Use the installer you downloaded to install Cubase AI.* As of June 2020, this is available from the same screen where the activation code is obtained.
- Activating the Cubase AI licenseTo activate your Cubase AI license, use the eLicenser Control Center, a special software app for managing licenses. When you install Cubase AI, the eLicenser Control Center is also automatically installed. Start the eLicenser Control Center, and then enter your activation code to activate your Cubase AI license.
Recording Your Guitar Performance with Cubase AI
- Connect the THR-II and your computer via a USB cable, and then turn the power on.
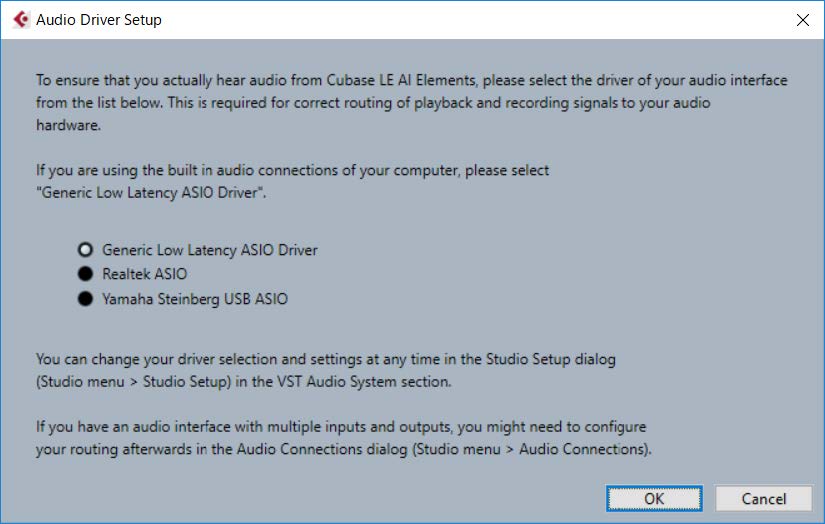
- Double-click* the Cubase AI shortcut icon.* If the [Audio Driver Setup] dialog is displayed during start-up, select [Generic Low Latency ASIO Driver] (or for Mac, the name of the connected THR-II series), and then click [OK].

- Select [Create Empty]. An empty project starts up.
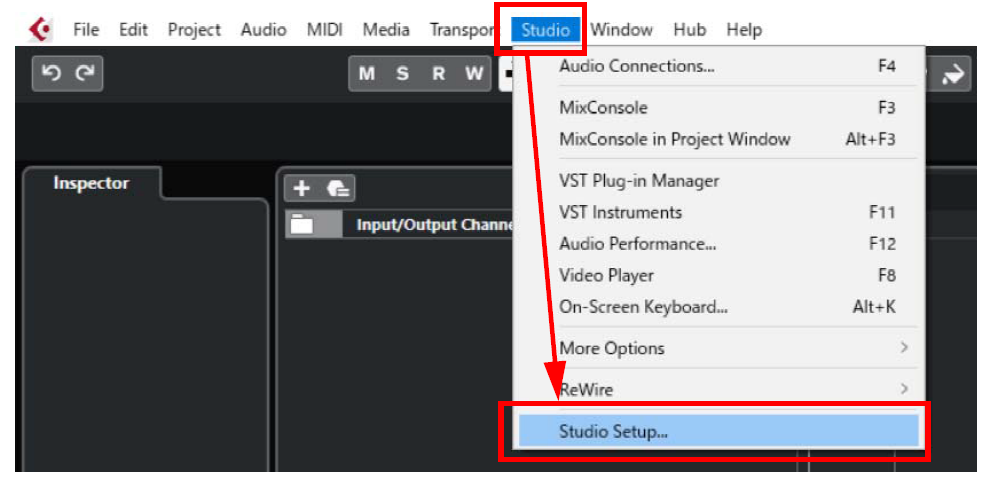
- In the Cubase AI menu bar, select [Studio], and then click [Studio Setup].The [Studio Setup] screen opens.
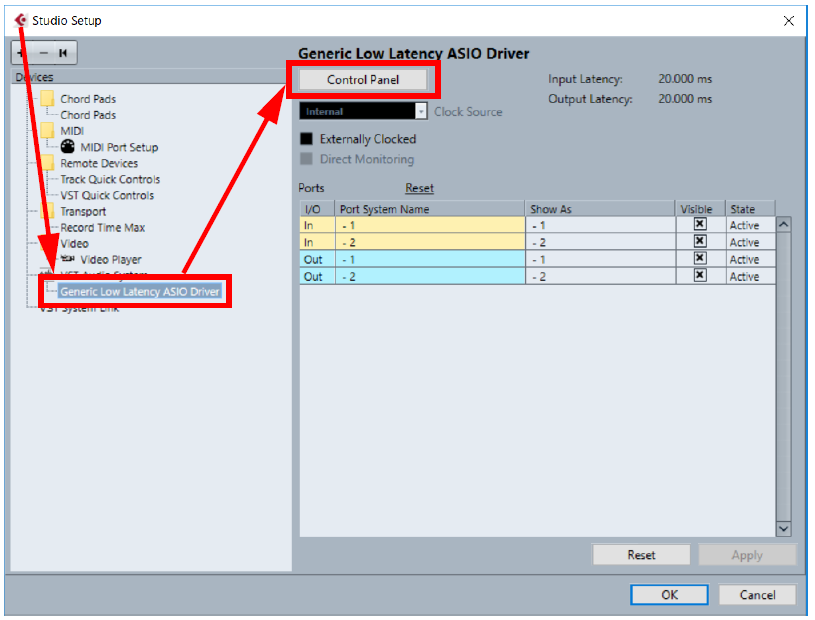
- On the left side of the screen, select [VST Audio System], and then check that the [ASIO Driver] field in the top-right of the screen is set to [Generic Low Latency ASIO Driver*].
- For Mac, allocate the name of the connected THR-II series and then close the screen. Then, proceed to Step [7].
- If the [ASIO Driver] field is not set to [Generic Low Latency ASIO Driver], click the downward arrow and then switch the driver.
- Select [Generic Low Latency ASIO Driver], and then click [Control Panel] in the top-right of the screen.The [Generic Low Latency ASIO Driver] screen opens.
- For both [Input Ports] and [Output Ports], place a check only in the name of the connected THR-II series*, and then click [OK].* If any other port names are displayed with a check next to them, remove the check.
- In the Cubase AI menu bar, select [Studio], and then click [Audio Connections].The [Audio Connections] screen opens.
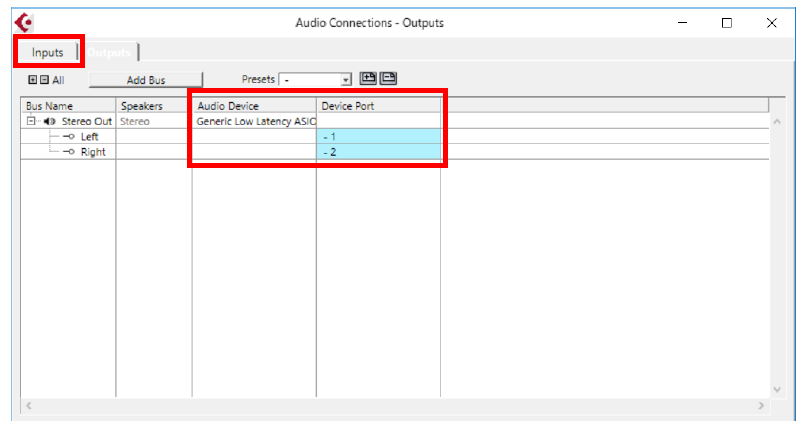
- Click the [Inputs] tab on the top of the screen, and check that [Generic Low Latency ASIO Driver] is set in the [Audio Device] field, and that [-1] / [-2] (or for Mac, [Front Left] / [Front Right]) is assigned in the [Device Port] field. If [Not Connected] is displayed, click [Not Connected] and then assign a device port.
- Click the [Outputs] tab, and then check that ports are assigned in the same way as for [Inputs]. If [Not Connected] is displayed, click [Not Connected] and then assign a device port.
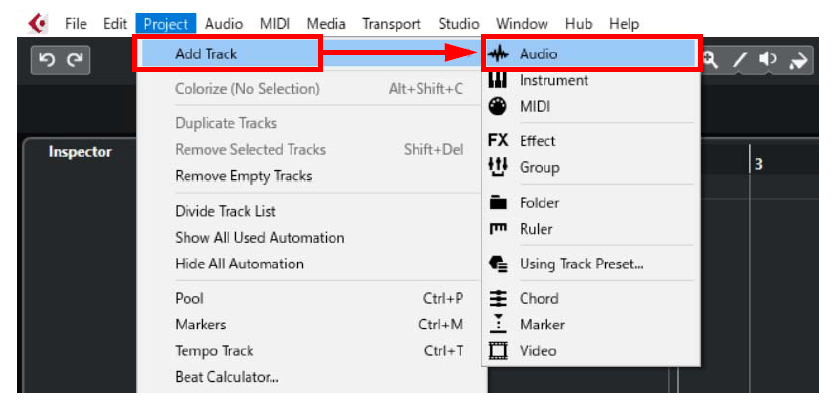
- In the Cubase AI menu bar, select [Project] and then [Add Track], and then click [Audio].The [Add Track] screen opens.
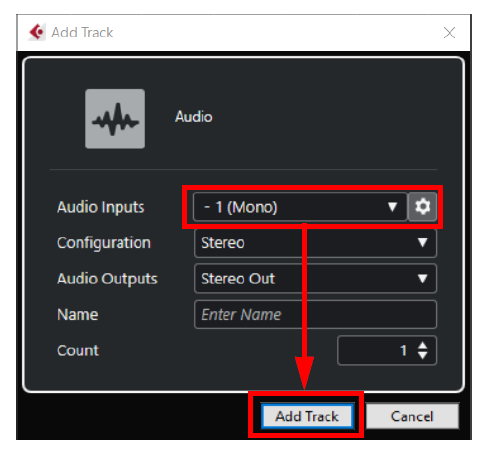
- Change the configuration to [Mono], and then click the [Add Track] button.An audio track is created.
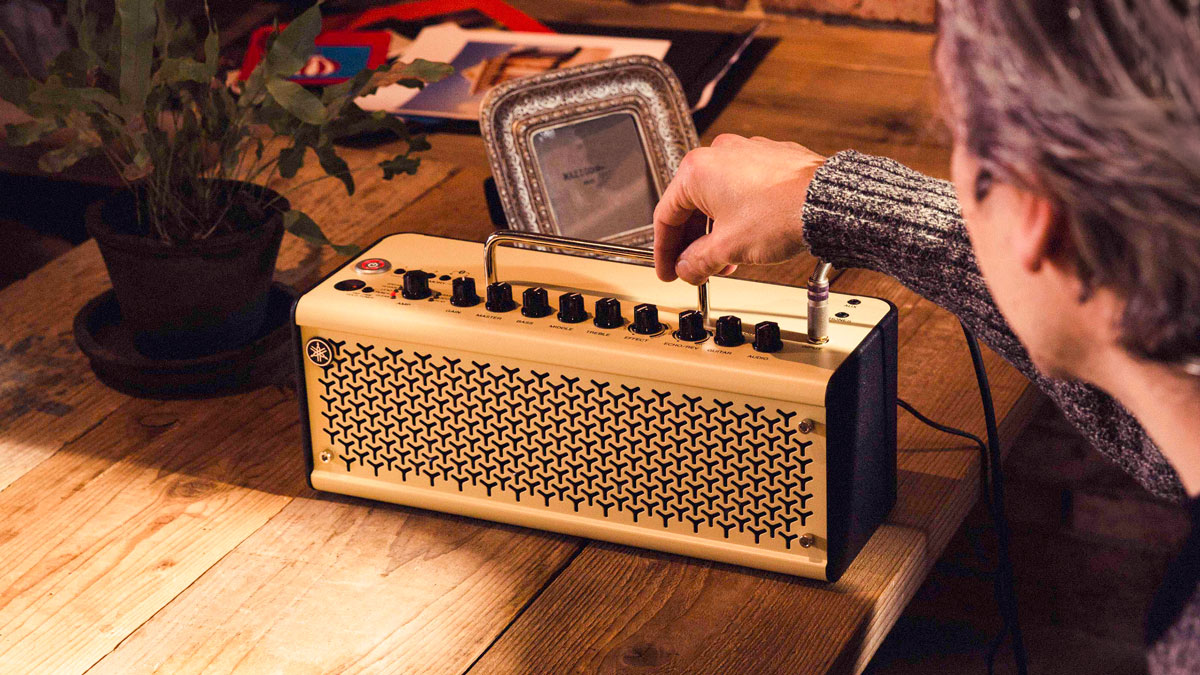
- Connect your guitar to the THR-II and use the [AMP], [GAIN], [MASTER], [GUITAR], [VOLUME], and other knobs to adjust the sound.
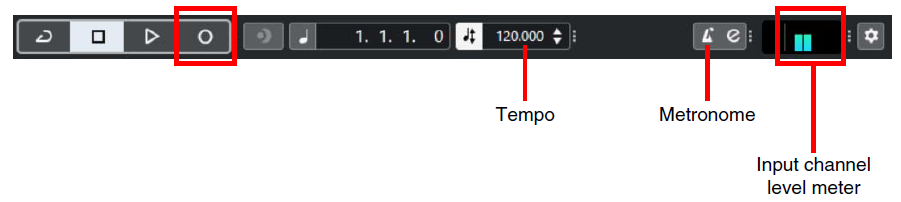
- Cubase AIPlay the guitar and check that the input channel level meter, on the Transport panel located on the bottom of the Cubase AI screen, reacts*.* Check that the top of the input channel level meter is not displayed in red. If it is displayed in red, return to Step 12 and lower the volume.
- Click the [Record] button*.Turn [Metronome] on or off and perform tempo settings (double-click and then directly enter values) as necessary.When recording is finished, click the [Stop] button. A waveform is displayed. Once you see the waveform, click the [Play] button and check that you can hear the recorded sound from the THR-II.

 The [Generic Low Latency ASIO Driver] screen opens.
 * If any other port names are displayed with a check next to them, remove the check.
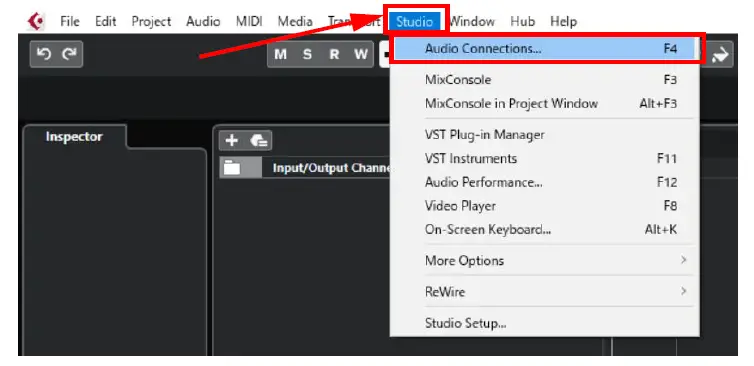
 * Check that the top of the input channel level meter is not displayed in red. If it is displayed in red, return to Step 12 and lower the volume.
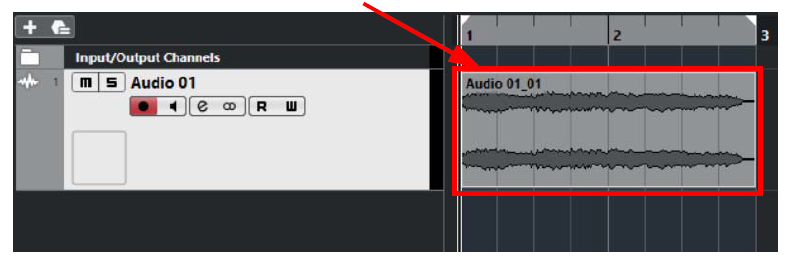
[xyz-ips snippet=”download-snippet”]