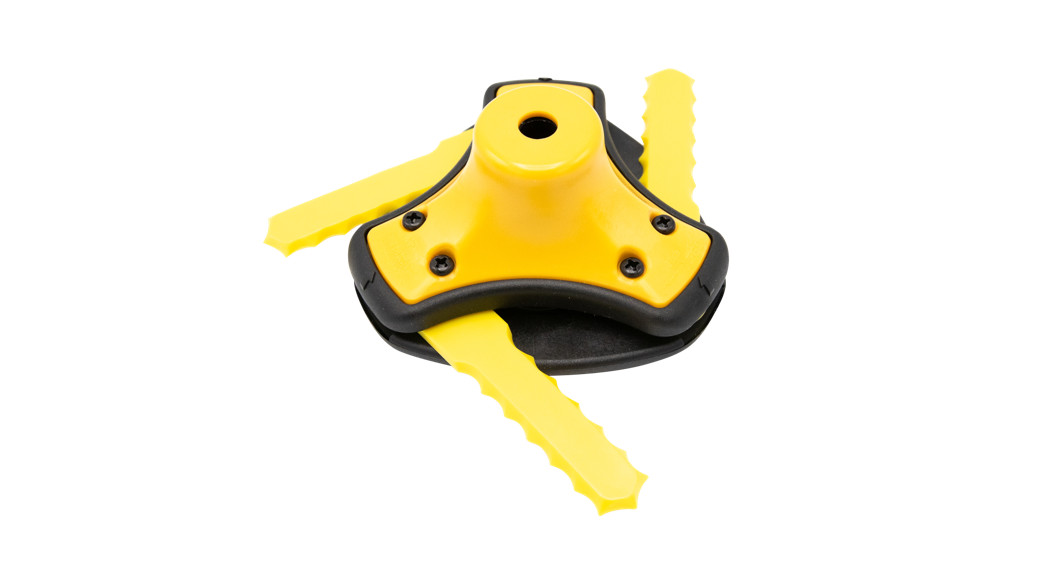
![]() Push-N-Load®3 Blade
Push-N-Load®3 Blade
Installation Instructions:
First, read safety instructions! Then determine which method your trimmer requires for install.

Scan with a smartphone to view installation

Fits select models
Warning! Only use the nuts and bolts supplied with this product. Do not substitute nuts & bolts from other sources.
Hardware package:
Note: You will only need 1 hex nut or 1 hex bolt to install the trimmer head not both!A. Trimmer head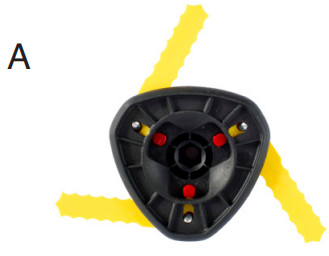 B. 5 hex bolts
 C. 8 hex nuts
 D. Plastic hex adapter
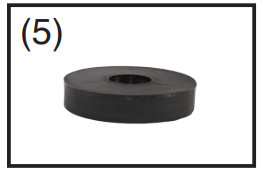
 E. Plastic Adapter cup
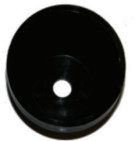
F. Metal washer (always use above trimmer head) G. ¼” Plastic washer
SAFETY INFORMATION
Warning! To reduce the risk of injury, the user must read and follow all warnings, safety, and installation instructions in the operator’s manual.Warning! Do not use metal blades with this head.Warning! Wear Eye, Ear, Foot and Body Protection When in Use.Warning! Do Not Exceed 8,000 RPM.Warning! Do Not Use VerticalWarning! Change Blades When Broken. Do not use if vibrating excessively. Excessive Vibration can damage your trimmer and can result in excessive temperatures which may melt the head, resulting in the head coming off the trimmer.Warning! If any excessive vibration occurs during use, stop the trimmer immediately to check for damage.Warning! Check metal pins for wear – Discard head if significantWarning! Keep bystanders and pets at least 50 feet awaywhile operating the trimmer.Warning! Operators and any bystanders must wear eye protection or face shields to reduce the risk of eye injury. Failure to wear eye protection can result in blindness. Eye protection that meets ANSI Z87.1 is recommended.Warning! To reduce the risk of hearing loss, always wear hearing protection.Warning! Objects may be thrown or ricochet in all directions. To reduce the risk of injury to the operator, never operate a trimmer without a properly mounted guard. And, wear proper clothing to protect feet, legs, and any other exposed body parts.Warning! Never wear open-toed shoes or shorts while trimming. Heavy boots should be worn.Warning! To reduce the risk of injury from broken parts, check the condition of your trimmer head before each use and at regular short intervals. Do not continue to use if broken or damaged.Warning! Keep feet and hands away from the trimmer head while operating the string trimmer.Warning! Never change blades or head while the trimmer engine is running – make sure the trimmer is in the OFF position.Warning! Only use the nuts and bolts supplied with this product. Do not substitute nuts & bolts from other sources.Warning! After tightening, if the head can move up and down on the shaft, then a spacer is needed.
WARNING!Risk of injury!
Do not attempt to make any adjustments or modifications not listed in your trimmer operator’s manual or this instruction sheet. Follow the manufacturer’s safety and operating instructions. Unauthorized modifications to your trimmer may result in the failure of your trimmer or trimmer head and cause serious personal injury.
Helpful tips
Thank you for your purchase! We are sure you will be happy with its performance and welcome your feedback. The following tips may help you maximize operating performance and protect you and your trimmer:Read all instructions and safety information prior to use!
- During installation remember that some trimmers are reverse threaded and tighten counter-clockwise.
- Ensure no foreign objects such as string or long vegetation have wrapped around the shaft.
Trouble Shooting
In order to serve you with superior customer service, we have provided three helpful ways for you to troubleshoot the installation process of your trimmer head.
- Reference the instructions provided in this packet, go back through, and make sure you did not miss a step.
- Visit us at www.yardgear.com to watch the installation instruction video and to find out about our other useful products.
- Call us at 866-212-7466 and talk to our helpful support staff as they walk you through any installation issues or questions you might have.
Do not return to the retailer! Simply call our support staff at (866)212-7466 (USA) or find more information at www.yardgear.com.
Easy Installation
Select the right method and then it is as Easy as 1-2-3
- Detach – old trimmer head
- Identify – which nut or bolt you need
- Install – your new head
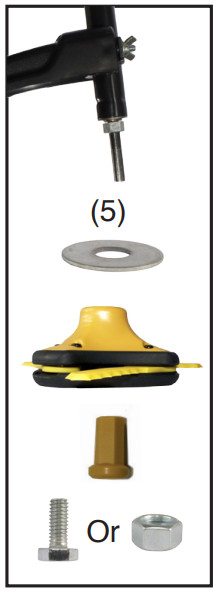
Most straight shafts and some curved shafts with a male bolt end (Weedeater, Poulan, and Echo, ect.)Use when removing whole housing and there is no removable shaft extension.
- Consult owner’s manual to determine a method to lock shaft rotation (Could have a keyhole or hex nut on trimmer that requires an Allen-wrench or pliers to assist in locking the shaft rotation). Unscrew the entire trimmer head assembly by hand to expose the threaded shaft (maybe left-hand threads).

- Identify which hex nut from the package threads easily onto the shaft.
- Place the identified hex nut into the recessed hex cavity of the trimmer head.
- Place the metal washer onto the threaded shaft. Then while holding the nut in the recessed hex cavity with one finger, turn the entire trimmer head to thread the nut onto the trimmer shaft with the shaft rotation locked.
- WARNING! After tightening, if the trimmer head can move up and down the shaft (if there is a GAP), a spacer is needed! Use the ¼” plastic washer.
- One the trimmer head is fully assembled see Trimmer Blade Loading section of this manual for loading replacement blades.
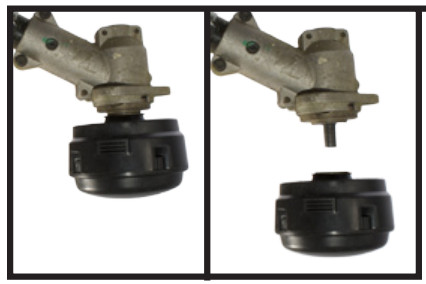

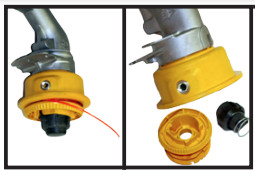
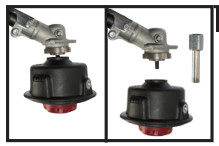
Most curved shaft trimmers and some straight shafts.Trimmers whose spool housing cannot be unscrewed (usually a yellow trimmer head)
- Unscrew the knob and only remove the upper trimmer head assembly (knob, spool, and string).
- Identify which nut or bolt from the package threads easily onto the trimmer shaft. Then place the identified nut or bolt into the recessed hex cavity of the trimmer head. Insert the plastic Adapter Cup in the original spool housing and cover it with the metal washer.
- While holding the nut in the recessed hex cavity with one finger, turn the entire trimmer head to thread the nut or bolt onto the trimmer shaft. Tighten by hand.
- WARNING! After tightening, if the trimmer head can move up and down the shaft (if there is a GAP), a spacer is needed! Use the ¼” plastic washer.
- Once the trimmer head is fully assembled see the Trimmer Blade Loading section of this manual for loading replacement blades.
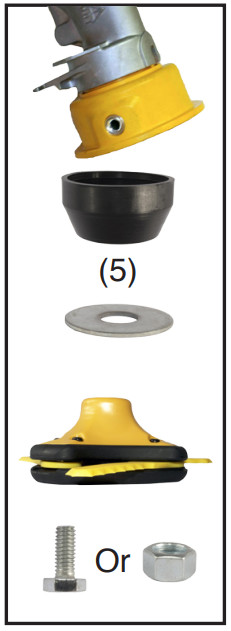
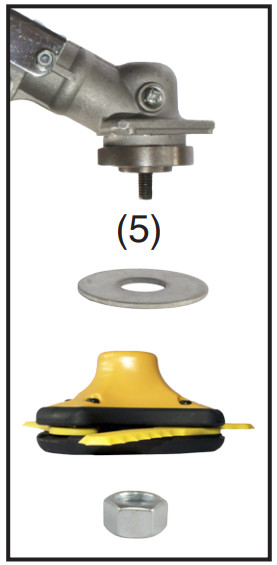
Most curved shaft trimmers and some straight shaftsWhen the spool housing is removable.
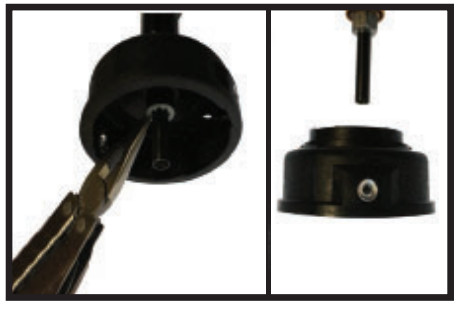
- Unscrew knob and remove the entire trimmer head assembly. A pair of pliers may be needed to remove the lock washer from the spool housing.
- Identify which nut or bolt from the package threads easily onto the trimmer shaft.
- Place the identified nut or bolt into the hex adapter and then place the hex adapter into the recessed hex cavity of the trimmer head.
- Place the metal washer onto the trimmer shaft. Then while holding the nut or bolt in the recessed hex cavity with one finger, turn the entire trimmer head to thread the nut or bolt onto the trimmer shaft with the shaft rotation locked (pliers or a wrench may be needed to lock the shaft).
- WARNING! After tightening, if the trimmer head can move up and down the shaft (if there is a GAP), a spacer is needed! Use the ¼” plastic washer.
- Once the trimmer head is fully assembled see the Trimmer Blade Loading section of this manual for loading replacement blades.

Some straight shaft trimmersWith shaft extensions
- Unscrew the knob and remove the entire trimmer head assembly. Unscrew the shaft extension to expose the primary shaft.
- Identify which nut from the package threads easily onto the shaft.
- Place the identified nut into the recessed hex cavity of the trimmer head
- Place the metal washer onto the threaded shaft. Then while holding the nut in the recessed hex cavity with one finger, turn the entire trimmer head to thread the nut onto the trimmer shaft with the shaft rotation locked.
- WARNING! After tightening, if the trimmer head can move up and down the shaft (if there is a GAP), a spacer is needed! Use the ¼” plastic washer. If the head can still be moved up and down the shaft the hex adapter may be needed.
- Once trimmer head is fully assembled see Trimmer Blade Loading section of this manual for loading replacement blades.
Notes——————————————————————–![]() Push-N-Load®3 Blade
Push-N-Load®3 Blade
References
[xyz-ips snippet=”download-snippet”]