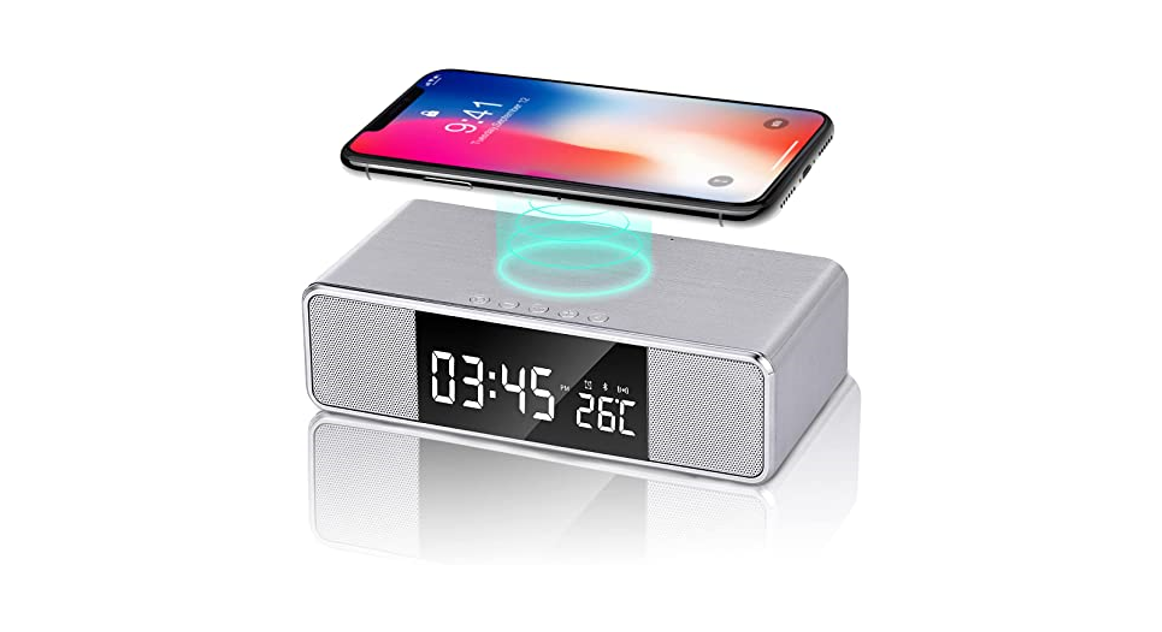
Dual Speakers Wireless Charging Desk ClockInstruction ManualMSL- 6019Q
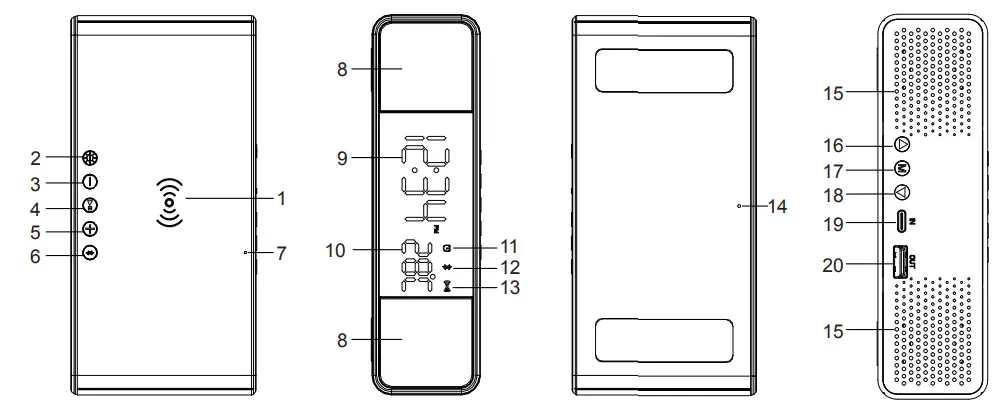
| 1. Wireless Charging Surface2. Screen Display Brightness Adjustment3. Previous Music Switch4. Music Pause/Play5. Next Music Switch6. BT ON/OFF7. Microphone Hole8. Speakers9. Time/Date10. Temperature | 11. Alarm ON12. BT Connection ON13. Wireless Charging ON14. Reset Hole15. Speaker Diaphragms16. Setting-Up17. Menu18. Setting-Down19. Type C Input20. USB Output |
What’s included:
1 x Dual Speakers Wireless Charging Desk Clock1 x USB to Type C charging cable1 x Instruction ManualTech Specifications:Type C Input: 5V/3AUSB Output: 5V/1AWireless Output: 5V/1A (5W)
Instruction:
- ConnectionConnect power with the Type C charging cable onto it, time & temperature and the other related symbols will display, with wireless charging stand by.Time and date display alternately, time displays for 10 seconds, and date stays for 3 seconds. Temperature displays all the time.
- Speakera. Long press “
 ”, blue tooth stands by with “ ” flashing on display, then on your phone find “BT Speaker” and connect it, now “ ” stops flashing and stays bright, meaning the speakers are ready to play music or make calls on your phone.b. Press “ ”and “ ” for the previous song and next song, press “ ” to pause or play.c. With no operation after the blue tooth stands by, it will automatically be off in 5 mins.
 - Time/date/alarmTime display: 12hours or 24hours models optional,00-59 min; when in the 12hours models, “AM” or “PM” will display automatically.Date display: the year 2000-2099, month 1-12, day 1-31.Alarm display: “ ” will display once any of the alarms are on; the alarm rings with the “ ” flashing.Setting steps:a. Long Press “ ” to enter time setting state, at this point, the adjustable digit is flashing, now rapidly adjust the digit by short press “ ” or “ ”, once you find your target digit, short press “ ”, the next digit is flashing while the first digit is settled down, then repeat the above up and down thing to finish the whole time setting.b. Short press “ ” to switch to other items(date/A1/A2/A3) setting, repeat the above steps to finish them one by one. The order as follows.c. On the bottom of the product, there is a reset hole to back to the factory settings.Note: When at the flashing status and no operation for 15 seconds, it will unset to the current digits.When power off, no settings memory, we need to reset all the digits after the power connection recovers.
- Temperaturea. Power on, automatically detect the current temperature, Normal measurement range is from 0 ℃ to 50 ℃ (32 ℉ – 122 ℉).b. Detect temperature every 60 seconds, press the DOWN button for 2 seconds to switch between Fahrenheit/Celsius.c. Temperature display lights up all the time (except Power-saving ON) 5. Power-savingPress “ ” to adjust the brightness of the display for power saving.
 c. On the bottom of the product, there is a reset hole to back to the factory settings.Note: When at the flashing status and no operation for 15 seconds, it will unset to the current digits.When power off, no settings memory, we need to reset all the digits after the power connection recovers.
SAFETY PRECAUTIONS:
 report this ad
WARNING: When using this product, basic precautions should always be followed, including the following:
- Do not use it on an aircraft or in a hospital.
- To reduce the risk of injury, close supervision is necessary when the product is used near children.
- Do not expose the device to any moisture.
- Do not use the device in excess of its output rating. Overloaded outputs above rating may result in a risk of fire or injury.
- Do not use the device if damaged or modified. The damaged or modified device may exhibit unpredictable behavior resulting in fire, explosion or risk of injury.
- Do not disassemble the device. Take it to a qualified service person when service or repair is required. Incorrect reassembly may result in a risk of fire or injury.
- Do not expose the device to fire or excessive temperature. Exposure to extreme heat may cause an explosion.
- Have servicing performed by a qualified repair person using only identical replacement parts. This will ensure that the safety of the product is maintained.
- This device is not a toy.
- Do not overcharge your Phone. The unit may get hot with excessive use.Remove the Phone when it is fully charged. Never charge for more than 7 hours at a time.
FCC STATEMENT
This device complies with part 15 of the FCC Rules. Operation is subject to the following two conditions:
- this device may not cause harmful interference, and
- this device must accept any interference received, including interference that may cause undesired operation. Any changes or modifications not expressly approved by the party responsible for compliance could void the user’s authority to operate the equipment. This equipment has been tested and found to comply with the limits for a Class B digital device, pursuant to Part 15 of the FCC Rules. These limits are designed to provide reasonable protection against harmful interference in a residential installation. This equipment generates uses and can radiate radio frequency energy and, if not installed and used in accordance with the instructions, may cause harmful interference to radio communications. However, there is no guarantee that interference will not occur in a particular installation. If this equipment does cause harmful interference to radio or television reception, which can be determined by turning the equipment off and on, the user is encouraged to try to correct the interference by one or more of the following measures:
‐Reorient or relocate the receiving antenna.‐Increase the separation between the equipment and receiver.‐Connect the equipment into an outlet on a circuit different from that to which the receiver is connected.‐Consult the dealer or an experienced radio/ TV technician for help.WARNINGChanges or modifications not expressly approved by the party responsible for compliance could void the user’s authority to operate the equipment.
 MADE IN CHINA
[xyz-ips snippet=”download-snippet”]