ZBOX ZOTAC Mini Desktop Computer

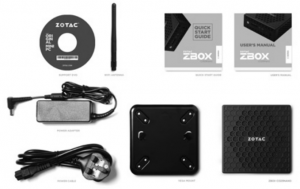
PACKAGE CONTENTS
- 1 x ZOTAC ZBOX nano
- 1 x ZOTAC VESA mount
- 1 x AC adapter
- 1 x Power cord
- 1 x WiFi antenna
- 1 x User Manual & Quick Start Guide
- 1 x Support DVD

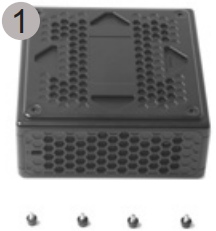
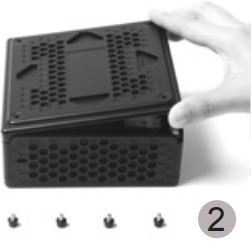
CUSTOMIZING YOUR ZOTAC ZBOX NANO
- Loosen and remove the 4 thumb screws securing the bottom cover.
- Gently remove the cover.
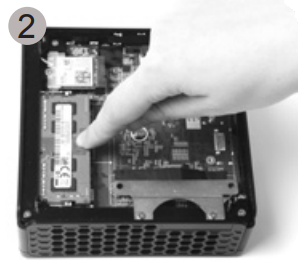
INSTALLING MEMORY MODULES
- Locate the SO-DIMM memory slots and insert a SO-DIMM memory module into the slot at a 45 degree angle.
- Gently press down on the memory module until it locks into place by the arms of the memory slot.

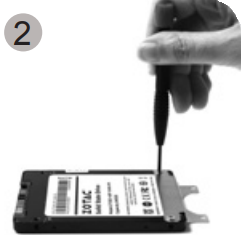
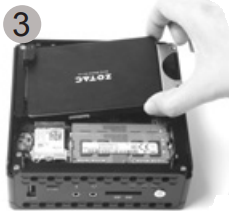
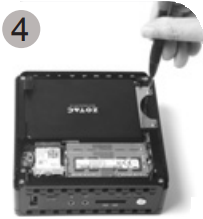
INSTALLING A HARD DISK
- Locate the hard disk bracket, remove the screw, and remove the hard disk bracket.
- Install the hard disk bracket to a 2.5-inch SATA hard disk /SSD with 2 screws.
- Insert the hard disk /SSD into the socket and gently slide into the connector.
- Reinstall the screws of the hard disk bracket.

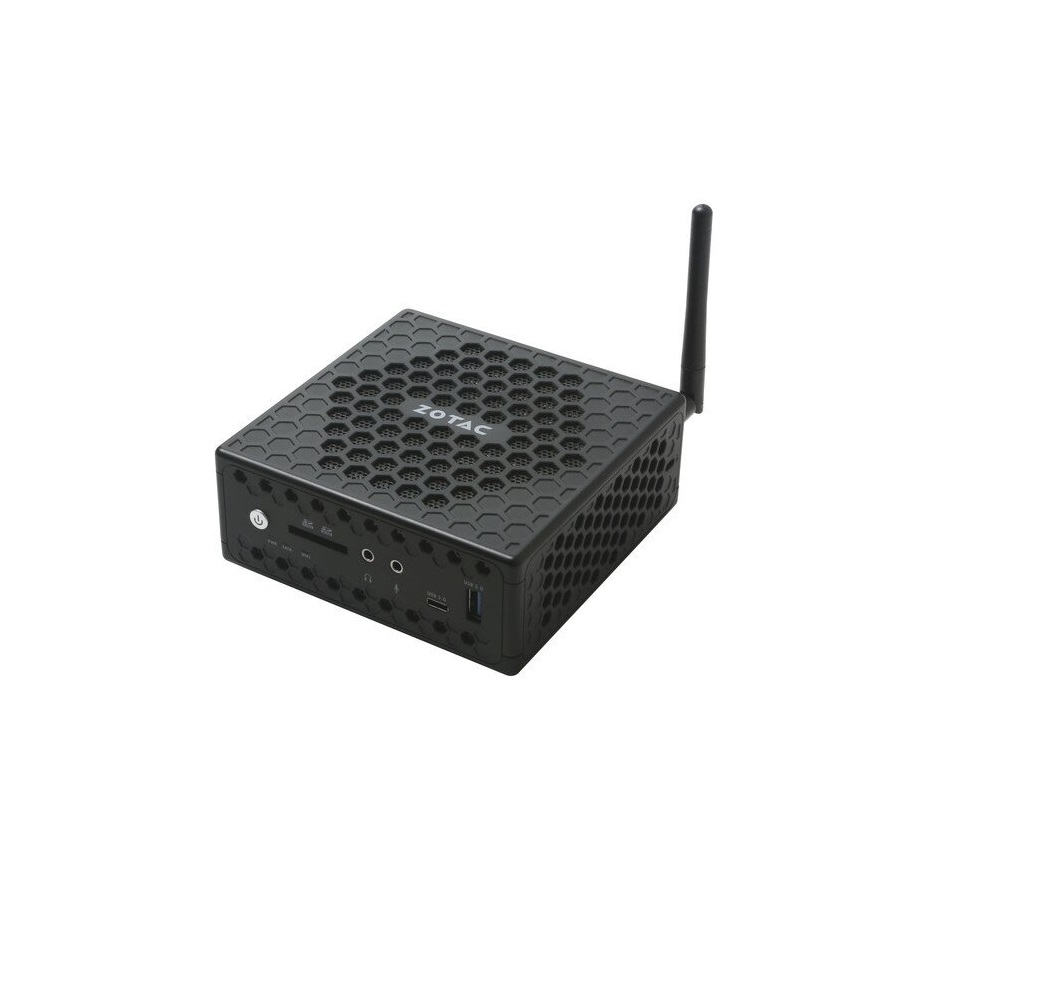
FRONT PANEL
- Power button
- Power LED
- SATA LED
- WiFi LED
- Memory card reader (SD/SDHC/SDXC)
- Headphone/Audio Out jack
- Microphone jack
- USB 3.0 Type-C
- USB 3.0 port

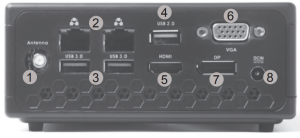
REAR PANEL
- WiFi antenna connector
- LAN (RJ45) ports
- USB 3.0 ports
- USB 2.0 port
- HDMI port
- VGA port
- DisplayPort
- Power input (DC19V)
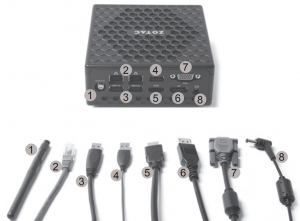
SETTING UP YOUR ZOTAC ZBOX NANO
- Connecting antenna for Wi-Fi
- Connecting to a wired home network
- Connecting USB 3.0 devices
- Connecting USB 2.0 devices
- Connecting an HDMI display
- Connecting a DisplayPort display
- Connecting a VGA display
- Connecting the power adapter and turning on the system

[xyz-ips snippet=”download-snippet”]