Smart IP Camera with BatteryQuick User Guide

100% Wire-Free IP Camera with rechargeable batteryPlace it Anywhere, Watch on Phone Anytime
1
1. Packing list
A4 Camera:
What is in the Box?
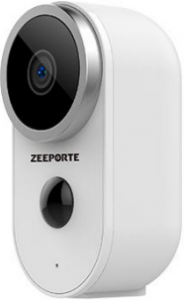
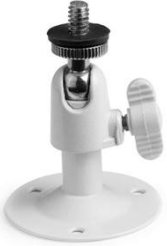

Battery Camera Bracket Screw Set

USB Cable Quick User Guide
1x camera, 1x bracket, 1x screws1x USB cable, 1x Quick User Guide
3
2. Product Details
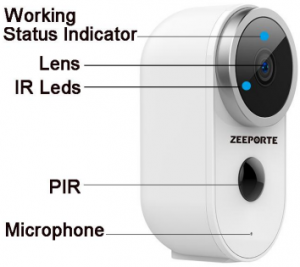
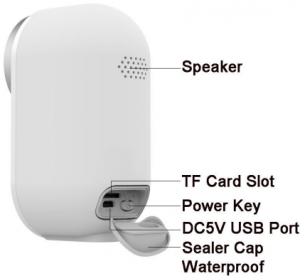
4
3. Install Adorcam APP
3.1 Search “Adorcam” in App store or google play store, or scan below QR Code to download and install on smart phone.
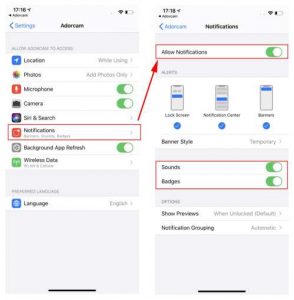
NOTE: Please allow below 2 permissions when first running App.
1.Allow Adorcam use mobile cellular data and wireless LAN (Function: If not allowed, it will be failed to add IP camera).2.Allow Adorcam to get system push message permissions (Function: When the camera triggers motion detection or audible alarm, the phone can receive alarm push).
5
3.2 Register Account:New users need to register by e-mail, click “Register” , follow the steps to complete the registration of the account, and log in.
4. Add Camera to APP
4.1 Insert TF cardPlease insert a TF card to record videos when motion detected and playback. (card not included, supports 128GB Max.)
6
4.2 Power on the cameraPress and hold on the Power Button for 5 seconds to Turn on Camera (if it can not power on, please plug in DC5V 1A/2A phone adapter to charge 15min first). Power adapter is not included in packing list.

NOTE: Ensure the indicator light slowly flashing in RED before setup WiFi.
4.3 Setup Wi-Fi4.3.1 Bring the camera and phone to the router within 1 to 3 feet (30 to 100 cm) and connect wifi.
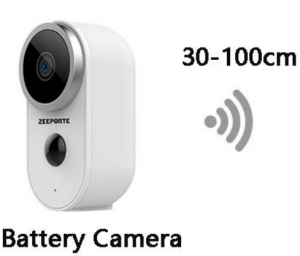
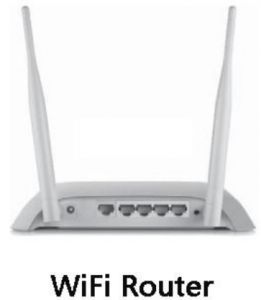
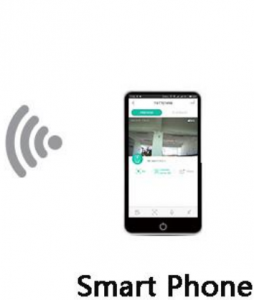
NOTE: Please note camera only works under 2.4G Wi-Fi, not supports 5G Wi-Fi.
7
4.3.2 Run Adorcam App, Click “Add Device” and select “Battery Camera”.
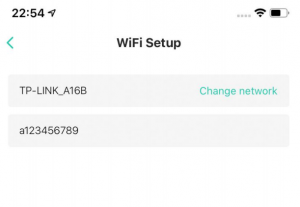
4.3.3 Select 2.4Ghz WiFi SSID and input password, tap “Connection”
4.3.4 Follow the “Operation Guide” on App, aim the lens of the camera directly to the QR code at a distance of 5-8 inches. A tone will be heard when successfully scanned.
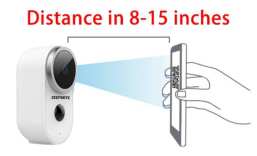
4.3.5 After the device recognizes the QR code, it will sound a tone, if heard it, then tap “Hear a tone” and waiting for “Connect Network”.
4.3.6 After successfully connected the network, you can name the camera, and find a good mounting spot according to the wifi signal strength, then click “Finish” and it will jump to device list. Select one camera and play it, then you can watch the real-time video.
8

Tips:
1. Please select 2.4G HZ WiFi2. Does not support 5G HZ WiFi3. Move the camera closer to the wireless router to ensure a good wireless signal


Please remove the protective film on the camera lens and keep the lens clean.
Tape Next to generate a QR code.
Aim the lens of the camera directly at the QR codeat at a distance of 5-8 inches.
A tone will be heard when successfully scanned.

9

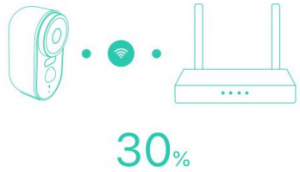
The network is connecting, please be patient.
Tips:If the network connection is unsuccessful:1. Please check if the WiFi username and password are correct, and then generate new QR code to scan again2. Move the camera closer to the wireless network router3. If it is still unsuccessful, please press the power button twice to reset the camera and try again
![]()

Take the camera and your smart phone to the location you want to mount the camera to check the strength of the WiFi Signal.
WiFi Signal Strength:

The current location is good to mount the camera


10
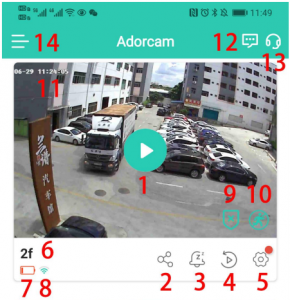
1. Play2. Share3. Snoone Alerts4. Playback5. Settings6. Camera Name7.Battery Volume8.WiFi Signal
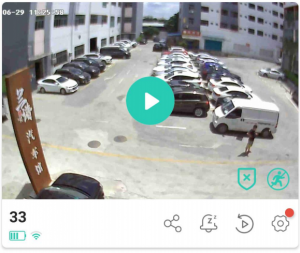 9. Disarm Mode10. Motion Detection Off11. Camera Time12. Messages13. Help14. About app15. Devices

16. Events17. Security18. Explore
11

19. Bit rate20. Record21. Snaphot22. Hold & Speak23. Audio24. Menu25. Events26. Night Vision27. Sound Alarm28. Settings29. Close
12
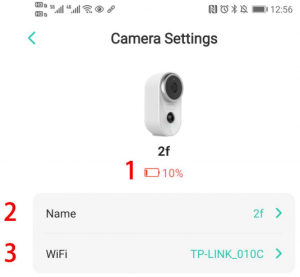
1 Battery Volume2 Camera Name3 WiFi
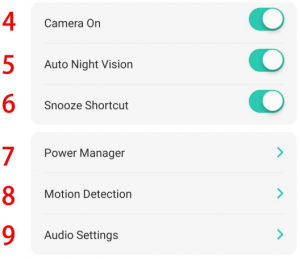 4 Camera On5 Auto Night Vision6 Snooze Shortcut7 Power Manager8 Motion Detection9 Audio Settings
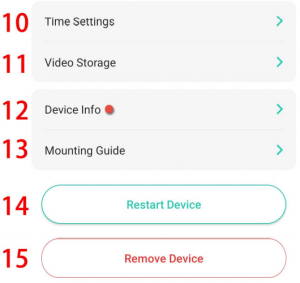 10 Time Settings11 Video Storage12 Device Info13 Mounting Guide14 Restart Device15 Remove Device
13
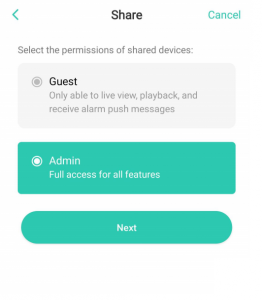
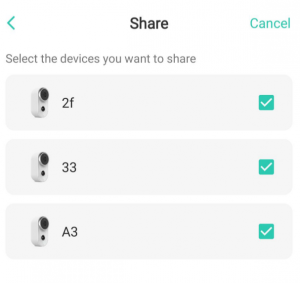
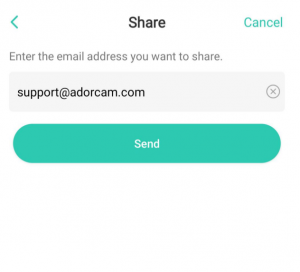
Click share icon or option and select permission and select connected cameras and input the friend’s account to share.
NOTE: Firstly ensure Friend’s account has already registered in Adorcam app

14
![]()
15
Appendix:
LED Status Description
| No. | Indicator description | Camera status |
| 1 | No light | Sleep / shutdown |
| 2 | Red light solid on | In charging |
| 3 | Red light flashes slowly (once every second) | Awaiting for WiFi connection |
| 4 | Fast red light (multiple times a second) | WiFi connecting |
| 5 | Blue light solid on | Alarm recording |
| 6 | Blue light flashes slowly (once every two seconds) | Camera in live view status |
| 7 | Blue light flashes quickly (multiple times a second) | Upgrading status |
16
Trouble Shooting Sheet
| No. | Description | Solution and operation |
| 1 | Unable to connect | 1) Check your WiFi name and password
2) Ensure your WiFi is 2.4G HZ, not the 5G HZ WiFi. 3) Ensure your camera and phone close to router |
| 2 | Reset | 1) Press and power button twice Hear one tone.
2) Red light turns to flash slowly |
| 3 | Change to a new Network | 1) If camera is online, you can select one new WiFi, input password to change;
2) If camera is not online, reset the camera and connect it to new wifi. |
| 4 | Failed to add Device | Please enable Adorcam app cellular data on in mobile settings |
| 5 | No Alarm Push | Please enable Adorcam app notification in mobile settings |
| 6 | No Alarm Video Record | Please insert TF Card |
17
FAQ:
- Battery Camera doesn’t support 7/24 constantly recording, only supports events recording when sensor human body motion detection.
- Battery camera doesn’t support any PC S/W or browser.
- Battery Camera doesn’t support 5G Wi-Fi
- Battery Camera charging supports DC5V 1A/2A plug. fully charged time: 5-6 hours
- IP battery camera support offline recording.IP battery camera cannot work without Wi-Fi. It supports events recording when Wi-Fi disconnected, but firstly the camera should be ever connected with Wi-Fi network.
- It is unlimited to add IP camera to app, and also unlimited to share video to other person. But system just allowed 2 persons online in max simultaneously.
- Regarding with TF card:7.1 please kindly ensure TF card, good brand such as Kingston, Sandisk, Class 10 level, 4-128 GB7.2 Please first format TF card on PC or plug in it again when adorcam cannot read the TF card.7.3 If no TF card in camera, there is no alarm recording, system will snap photos and be saved in “Events” list. If inserted TF card, there will be no snapshot photos.
18
[xyz-ips snippet=”download-snippet”]


