
![]()
INTRODUCTION TO HARDWARE OF UHD3000
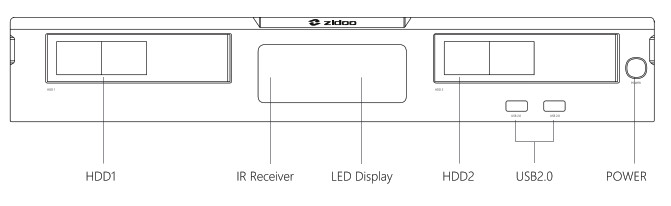
Device interfaceZidoo UHD3000 is equipped with multiple audio input/output ports and data transmission ports. Please refer to the descriptions in this manual.
- Front

- Back
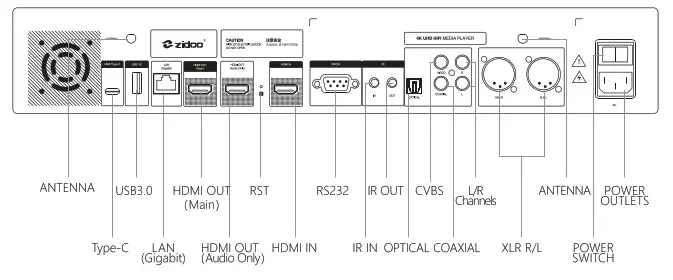
Instruction to the installation of the antenna: Please insert the two antennas in the parcel into the antenna ports in the above diagram.Notices: Please load/change the hard disk after turning off the power. If it is a brand-new hard disk, please load it after formatting it. Please prevent the orifice of the cooling fan from being blocked. ‘Do not touch any liquid in case the liquid runs into the inner part of the device and damages it. Any maintenance personnel who are not appointed are not allowed to open the case.
PERFORMANCE PARAMETER
| Material | Space aluminum |
| CPU | Realtek R101296 ARM Cortex-A53 Quad-core |
| OS | Android+OpenWRT(NAS) dual system |
| GPU | ARM T820 MP3 |
| Memory | 4GB DDR4 |
| Internal Storage | 32GB eMMC |
| Ethernet | IEEE 802.11 a/b/g/n/ac 2×2 MIMO 867Mpbs |
| WiFi | 1*RJ-45(10/100/1000Mbps) |
| Bluetooth | BT4.1 |
| HDMI Output | HDMI 2.0a ( 10BitHDR10 output)+ HDMI 1.4 (Audio Only pass-through) audioand video output separately |
| HDMI Input | HDMI 2.0 support |
| Video Decode | Support HDR10,up to 4K HEVC/H.26510Bbit decoding maximum |
| Video | Support 4K UHD media Ples, auto frame rate switching,MVC3D playing, subtitle download, ASS/SSA/SUP specialeffect subtitle and exclusive media player |
| Audio Decode | Support HD audio decode and pass-through, built-inXMOS+ESS 9038 chipset, DSD native direct |
| Audio Interface | 1* Optical, 1* Coaxial, 1*RCA left/right channels, XLR left/right channels balance |
| Analog AudioCharacteristics | SNR: >120dBrA; THD+N: < 0.0003%;Output Level:(XLR)4.5±0.4Vrms. (RCA)2.2±0.2Vrms;DNR: 122dB; Crosstalk: >128dBrA |
| Power Supply | AC 110-120/220-240V 50/60Hz(built-in linear power supply) |
| USB | 1*USB3.0, 2*USB2.0, 1*Type-C |
| HDD Bay | Separate 2*SATA3.0 3.5’HDD bays(hard drive are not included) |
| Other Ports | 1*IR input, 1*IR output, 1*RCA composite audio, 1*RS232 |
| Dimension | 312mm*430mm*72mm |
| Accessories | 1* media player, 1*remote control, 1*power cable,1*HDMI cable, 2*antennas, 1*user manual |
LOADING HARD DISK REMOTE CONTROL
UHD 2000 has two 3.5 inches HDD bays with built-in high-speed SATA jacks, Please slowly push 3.5 inches hard disk with SATA interface toward HDD bay without any tools (Hard Disk support 10TB Maximum)
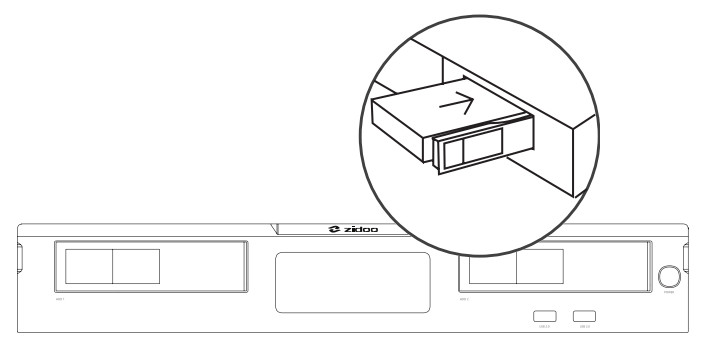 Notice: Please do not load or change the hard disk when powering on and in order to avoid damage the disk and data. This device support hard disk formats
REMOTE CONTROL
1. Description of functions buttons
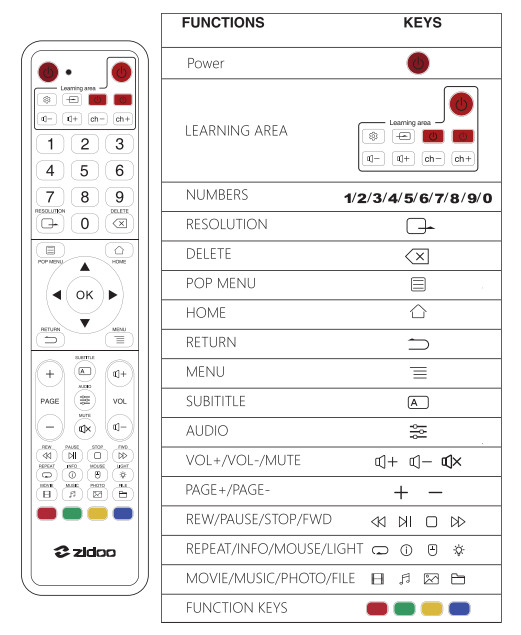
2. Introduction to Learning buttonLearning function: This remote control can copy functions of buttons of other remote control so that it can control two devices.Operation descriptions of the Learning button:
- PressKEY for 3 sec until the indicator light is always on;
- Press Learning KEY when indicator light will blink;
- Let two remote controller infrared emission windows with approximate 3cm distance, then press other remote controller Learning KEY. If learning progress works, the indicator light stops blinking,by the analogy, apply to other Learning KEY, Press KEY to exit the learning model.
- Press Light KEY to turning on/off the backlight.
3. Bluetooth PairingThe control remote is aimed at the machine within 30cm. Meantime press Down Key and Menu Key for at least 5s until the indicator light blinking which pairing succeeds.
Connection with Device
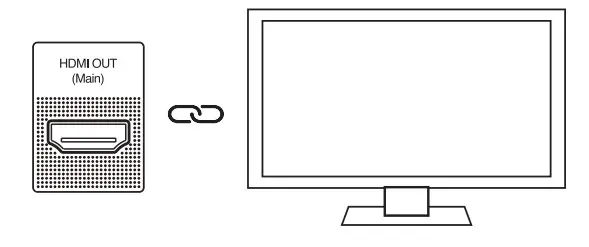
HDMI connects to the TV.UHD 2000 has two ways to connect HDMI. One is stand-up output mode and another one is Double output mode.
- Cut off the power of the device. Please make sure the power of both the TV and Media Player are off.
- Stand-up Output mode: While the power of N and Media Player is off, insert one end of HDMI cable into HDMI OUT and insert the other end into the HDMI IN port.
- Double Output mode (The video is separated from the audio): While the power of N and Media Player is off, make the connection between one side of the HDMI cable with HDMI OUT AUDIO ONLY interface. Another side with amplifier. Then use another HDMI cable connect with the HDMI OUT MAIN interface. Another side with N HDMI IN interface.
-
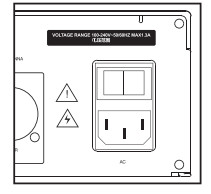
Connect with the power. This device is equipped with a suitable AC power adapter. Please connect the head of AC power adapter to the AC power input port of this device, then insert the plug of AC power line into the alternating current socket of 110-120/220-240V.
- Turn on the device by pressing the power button on the right side of the front panel or pressing the power button on the remote control.
- The corresponding video source is selected by TV.


2. Connect AV cable with the TVThe connection method is same as that of the HDMI cable. Please connect the AV cable before energizing.
HDMI & DAC analog audio
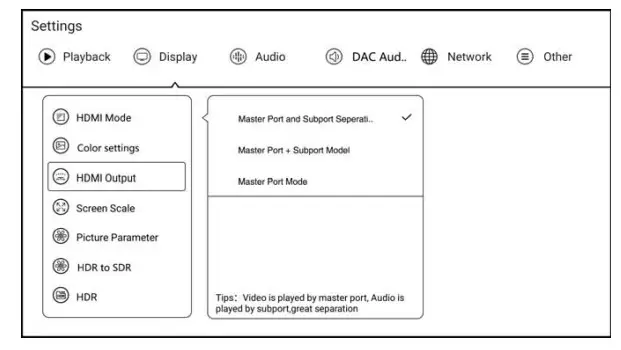
1. HDMI Output SettingIf apply double HDMI output mode that the main port access to TV or Projection, deputy port with the power amplifier. There is Three mode to choose.
- Master Port and Subport Separation Model: Video is outputting from the main port, audio is outputting from deputy port and achieve Great Separation.
- Master Port + Subport Model: Main port is outputting audio and video, deputy port is outputting audio.
- Master Port Mode: Main port output audio and video, deputy port without audio.
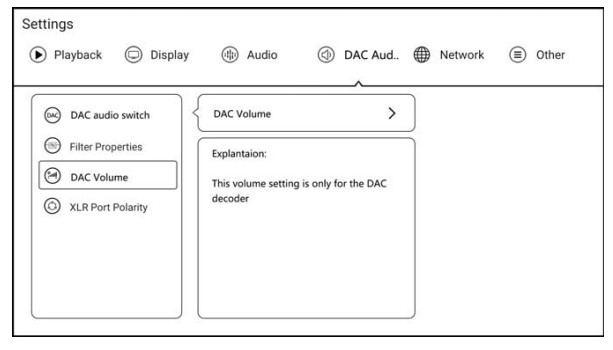
2. DAC analog audio
- DAC audio switchIt is needed to turn on the DAC audio switch to connect speakers via analog XLR balanced or RCA port. Turning this switch on will be decoded by the XMOS output (DSD pass-through) to the DAC for the highest native DSD 512 and PCM 768 high-sampling. There is no sound from HDMI and SPDIF when the DAC Audio switch turns on.
- Filtering Features
- Analog Audio VolumeThis setting is only for DAC decoder, audio value is DAC Decoder volume value.
- XLR Port polarity
 Filtering Features

INITIALIZATION
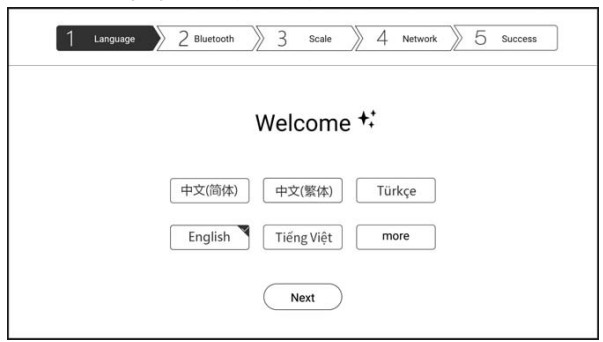
Before actually using this device, this software will provide you for the first initialization. Please set your device according to the initialization process to obtain the optimum watching experience.
- Language of the systemSelect the language of the system as you need.
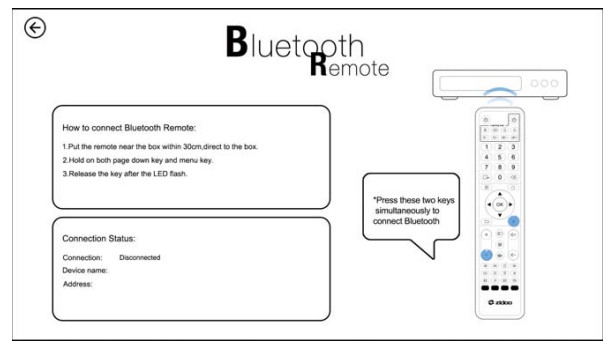
- Bluetooth Match-UpLet remote controller be aligned with media player and press Page-Down KEY and Menu KEY at the same time for least 5 seconds until indicator light blinking. The light will be off after matching successfully.
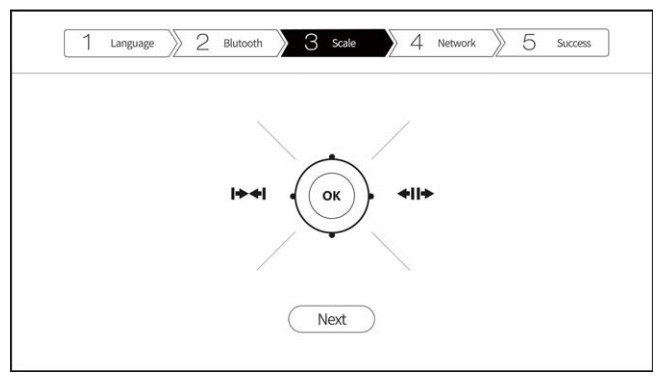
- Screen scalingAdjust the screen display range using the LEFT or RIGHT button of the remote control or the mouse wheel so that the image can be displayed on the screen of TV.
- Network settingsChoose a WiFi network or Ethernet network to let the media player connect to the network successfully.

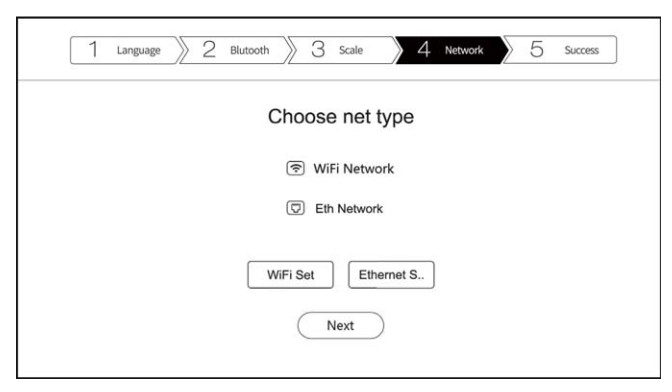
WIFI: Select SSID and enter a password, connect to WIFI and finish setting;
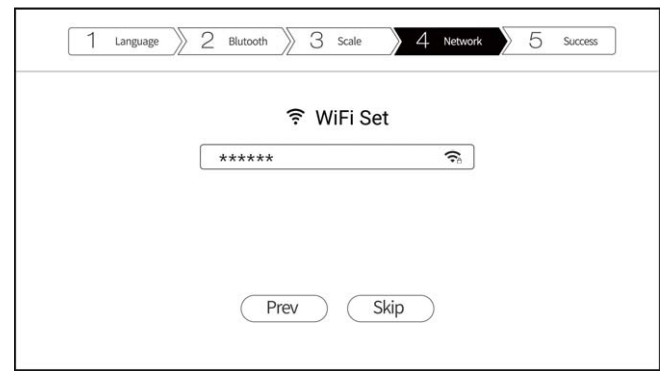
Ethernet: It will work after connecting with LAN cable. Click “Next step” to Pnish initialization setting.
SYSTEM UPDATE BY OTA
- Zidoo will update the firmware irregularly.Find the system update icon in the APP center and open it; support online network update and local update; after ticking “automatically detect the latest version”, you will receive the prompt for the latest firmware update automatically.

- Online Update
- Local updateUsers can download the update file on the forum or official website and update firmware by local update.Copy the downloaded update file to a USB disk. Click “local update to select the update file.


Download the update file by online update or local update. Click “update to update.The system will automatically check the update file whether is complete or not.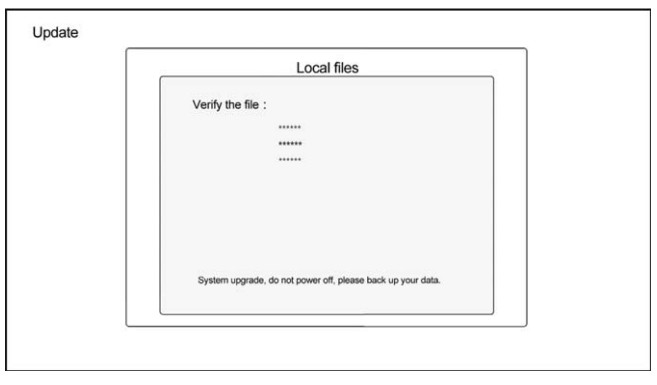 Note: System will upgrade automatically, please do not power off.
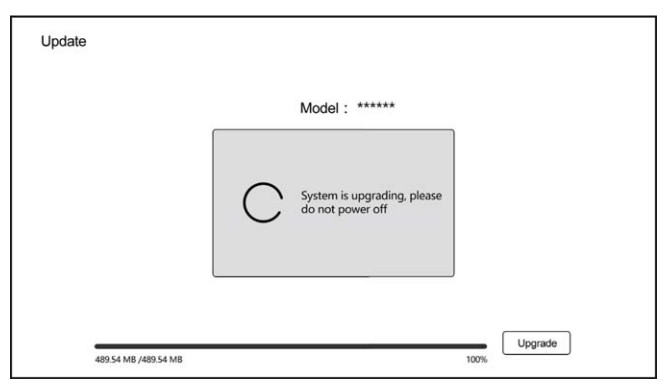 Once the update is completed, the system will automatically be restarted.
 Special note: To guarantee user experience, Zidoo will update the firmware irregularly. Therefore, this manual may not be totally in line with the product.Warning notice:
- The equipment shall not be subjected to water splashing or water drop, and shall not be placed on the device such as a vase, which is full of liquid.
- The disconnecting device of this product is the power plug. The socket provided to this product should be installed near the product and should be easy to operate and cannot be blocked by other objects.
- This product is classified as I equipment, and it must have grounding measures inside the time box.
FCC Statement
This device complies with Part 15 of the FCC rules. Operation is subject to the following two conditions: 1) this device may not cause harmful interference, and 2) this device must accept any interference received, including interference that may cause undesired operation.Note: This equipment has been tested and found to comply with the limits for a Class B digital device, pursuant to part 15 of the FCC Rules. These limits are designed to provide reasonable protection against harmful interference in a residential installation. This equipment generates uses and can radiate radio frequency energy and, if not installed and used in accordance with the instructions, may cause harmful interference to radio communications. However, there is no guarantee that interference will not occur in a particular installation. If this equipment does cause harmful interference to radio or television reception, which can be determined by turning the equipment off and on, the user is encouraged to try to correct the interference by one or more of the following measures:–Reorient or relocate the receiving antenna.–Increase the separation between the equipment and receiver.–Connect the equipment into an outlet on a circuit different from that to which the receiver is connected.–Consult the dealer or an experienced radio/TV technician for help.Changes or modifications not expressly approved by the party responsible for compliance could void the user’s authority to operate the equipment.FCC Radiation Exposure StatementThis device complies with RF radiation exposure limits set forth for an uncontrolled environment. This transmitter must not be co-located or operating in conjunction with any other antenna or transmitter.This device must operate with a minimum distance of 20 cm between the radiator and user body
[xyz-ips snippet=”download-snippet”]