
![]()
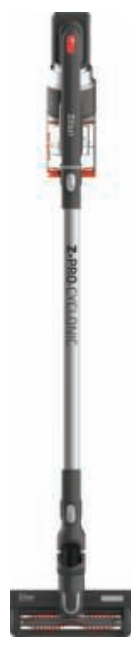
Vacuum CleanerZLN2099INSTRUCTION MANUAL140 watt220-240 Volt50/60 Hz
 |
 |
 |
||
 |
 |
 |
DESCRIPTION
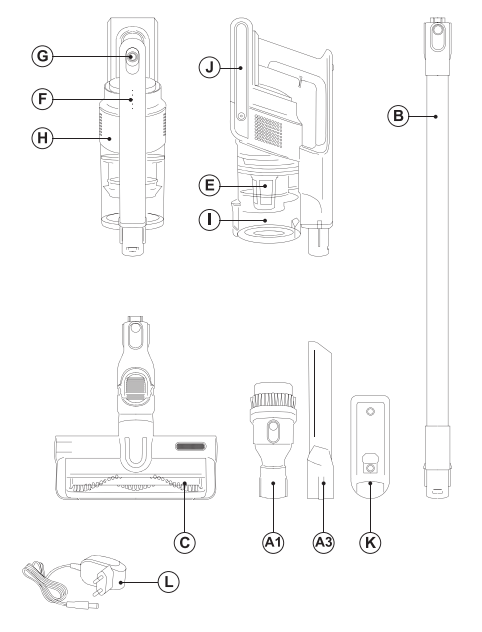
A Accesories:A-1 Lance and multiuse brushA-3 Extralong lanceB Extension tubeC Motorized turbo brushE FilterF Battery indicatorG ON/OFF buttonH BodyI Dust tankJ Lithium batteriesK Wall bracketL Power supply
If the model of your appliance does not have the accessories described above, they can also be bought separately from the Technical Assistance Service.
USE AND CARE:
- Do not use the appliance without its filter(s) correctly in place.
- Do not use the appliance if its accessories are not properly fitted.
- Do not use the appliance to gather up water or any other liquid.
- Do not use the appliance if the on/off switch does not work.
- Store this appliance out of reach of children and/or persons with physical, sensory or reduced mental or lack of experience and
- Do not work on areas where there are metal objects, such as nails and/or screws.
- Never vacuum hot or sharp objects (cigarette butts, ashes, nails, etc.).
- Do not open the battery/ies under any circumstances whatsoever.
- The battery/ies should be stored at a temperature of below 40°C.
- Only use the appliance for carrying out dry
- Do not use the appliance on any part of the body of a person or animal.
- Recharge the battery/is only with the charger supplied by the manufacturer. A charger that is suitable for one type of battery may cause an explosion or fire hazard when used with other batteries/ies.
- Use the device only with the battery/ies for which has been specifically designed. The use of any other battery/ies s can cause an explosion or fire hazard.
INSTALLATION
- Be sure to remove all packaging material from inside the appliance.
ASSEMBLING THE WALL BRACKET:
- The appliance has a wall bracket (K) which must be fixed to the wall.
- Fix the wall bracket as you think appropriate, using plugs, screws, and adhesive…
- Make sure that the bracket is firmly fixed; it should be able to support twice the weight of the appliance.
- Fit the appliance into the wall support.
CHARGING THE BATTERY
- Caution: A new battery is not fully charged and must therefore be charged before the appliance is used for the first time.
- Charge the battery at an atmospheric temperature of between 4 and 40°C.
- Plug the charger (L) into the mains.
- A pilot light will come on to indicate that the charger is ready to begin charging the battery.
- Approximately 4 to 5 hours are needed for a complete charge of the battery. Never attempt to over-charge the battery (although it is recommended that the first charge of the battery is of 6 hours in duration).
- Insert the battery into the charger.
- Connect the charger (L) to the jack using the socket on the appliance. The socket is located at the lower/back part of the appliance.
- The pilot light will come on to indicate that the charger is charging the battery.
- At the end of the time period specified above, remove the battery from the charger.
- When the battery is charged disconnect the charger from the mains supply.
- NB: Do not use the appliance while it is connected to the charger.
HOW TO CHECK THE BATTERY’S CHARGE LEVEL:
- Press the ON/OFF button in order to see the battery indicator lights.
- If no pilot light lights up, this means that the battery is completely flat.
- NB: For long battery life, it is advisable to charge the battery, only, when it has run out completely.
INSTRUCTIONS FOR USE BEFORE USE:
- Make sure that the product’s packaging has been removed.
- Before using this product for the first time, it is important to make a full charge of batteries.
- Prepare the appliance according to the function you wish to use:
VACUUMING FUNCTION: USE:
- Turn the appliance on, by using the on/off button.
- Select the desired speed.
VACUUM:
- The hand vacuum is designed in such a way that it allows the following accessories to be fitted: (use the combination that best meets your requirements). (Fig.1).
- Furniture brush: Equipped with a brush at the end, which brushes the surface as it is used.—Crevice nozzle: Specially designed for getting into cracks and difficult corners.
ONCE YOU HAVE FINISHED USING THE APPLIANCE:
- Turn the appliance off using the on/off button.
- Clean the appliance.
CLEANING
- Disconnect the battery charger from the mains and allow it to cool before undertaking any cleaning task.
- Clean the equipment with a damp cloth with a few drops of washing-up liquid and then dry.
- Do not use solvents, or products with an acid or base pH such as bleach, or abrasive products, for cleaning the appliance.
- Never submerge the appliance in water or any other liquid or place it under running water.
EMPTYING THE DUST BOX
- Empty the dust box when it is full (observation facilitated by transparent windows), or when vacuuming power is notably reduced.
- Disconnect the accessories from the vacuum cleaner’s air intake. (Fig.2).
- Open the lid of the dust box and empty the contents into the appropriate waste disposal
- Close the lid of the dust box.
CHANGING THE FILTERS:
- Motor filter, it is advisable to be changed at least once a year or every 100 hours of the appliance’s use.
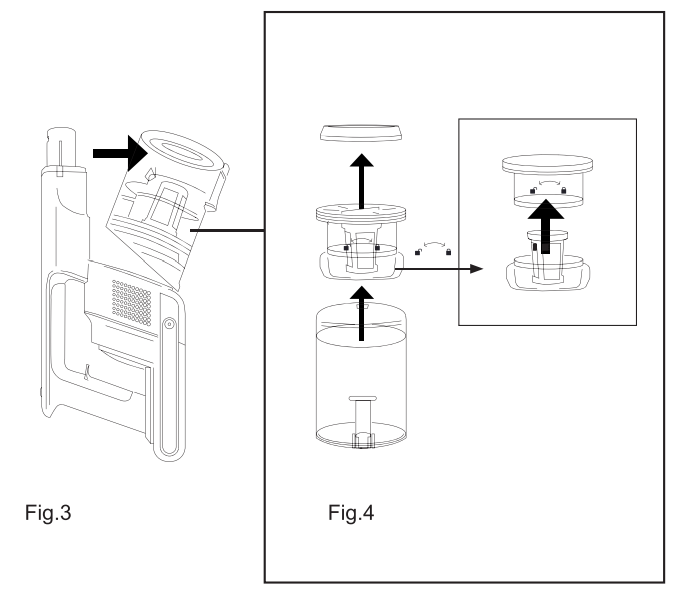
TO REMOVE THE FILTERS:
- Remove the dust tank pulling out without pressing any button. (Fig.3)
- Remove the filter from its housing (Fig.4).
- To reassemble the filter, proceed with the above instructions, in reverse order.
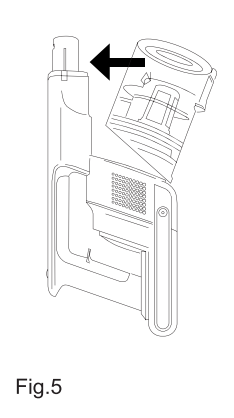
- Engage the dust tank in the vacuum cleaner. (Fig.5)
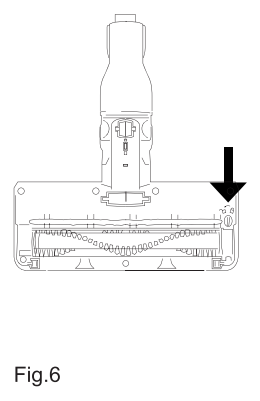
CLEANING THE ROTARY BRUSH:
- To remove the brush:
- Turn the rotating button on the bottom of the fitting to the left in order to release the brush. (Fig.6).
- Remove the brush and clean.
- To reassemble, follow the above instructions but in reverse.
SUPPLIES
- Supplies can be acquired from distributors and authorized establishments (such as filters, ..) for your appliance model.
- Always use original supplies, designed specifically for your appliance model.
- These supplies are available in specialist
HOW TO REMOVE THE BATTERIES FROM THE INTERIOR OF THE DEVICE:
- CAUTION: It is important that the batteries are fully discharged prior to its withdrawal from the
- CAUTION: The appliance must be disconnected from the supply mains when removing the
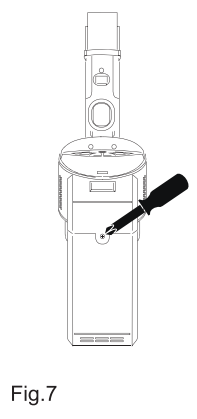
TO REMOVE THE BATTERIES, ONCE THE LIFE OF THE APPLIANCE, PROCEED AS FOLLOWS:
- Open the top shell of the apparatus, removing previously with the help of a screwdriver fixing screws (Fig.7).
- Safely remove the battery from its housing.
[xyz-ips snippet=”download-snippet”]