Alorair VentirPro-S2 Crawl Space Fan User Manual
DIRECTION: AIR-OUT
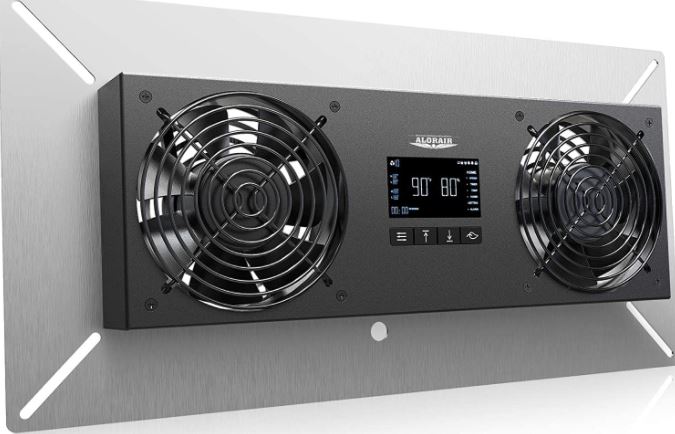
Dear users,Hello! Welcome and thank you for choosing VentirPro-S2 Crawl Space Fan.VentirPro-S2 Crawl Space Fan, using lattice screen and DC technology to drive and control. The double ball DC motor gives you more than 65000 hours of running time. It will bring you comfortable, safe, energy-saving and intelligent life.
Read the product instructions carefully before installation. These instructions must be consistent with the equipment, do not destroy.
Product Description
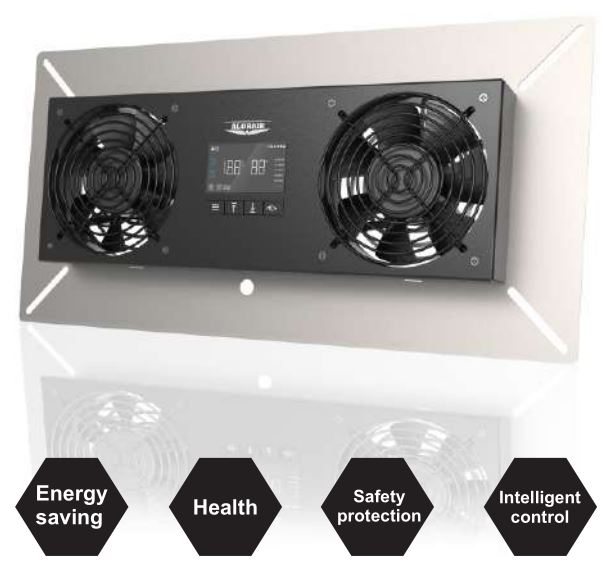
The Crawl Space Fan is designed to allow fresh outdoor air to circulate under the house and porch. The high humidity in the crawling space is the main reason for the premature decay of the support column. Joist, floor and crossbeam support. Humidity can promote the growth of fungi and increase the activity of termites. Humidity can also cause pipeline failure due to rust and corrosion. The continuous operation of the fan helps to vent radon, gases from treated wood and other odors that may spread to the living area. Controlled by a circuit board, the dehumidifier control fan starts when the relative humidity is higher than the selected set value.
Accessories List
FAN SYSTEM: x1POWER ADAPTER: x1THERMAL PROBE: x1WALL ANCHORS: x4
Product Technical Parameters
Standard size: 18 X 9 X 1.7 inRated power: 8.5 WMachine net weight: 4.7 lbsRated voltage: 11 0V-230V, 50/60Hz
Attention
- It is forbidden to use this product in places that may lead to water intake from Crawl Space Fan such as outdoors, sprinklers, bathtubs, swimming pools, etc.
- Use in the correct electricity environment.
- It is forbidden to disassemble this product by yourself. If you have any questions, please contact the company’s after-sales department.
- Do not run the Crawl Space Fan for a long time. Please unplug the power supply.
- Clean the surface of the machine, please wipe with a soft wet cloth, do not use friction, volatile cleaning agents or solvents, so as not to damage the surface coating.
- When the equipment is in use, the LCD screen is atomized due to excessive humidity in the house. please turn off the equipment in time to prevent the equipment from being closed by short circuit due to condensed water. If you notice that the equipment is not short-circuited in time, please do not worry, after the water in the machine evaporates, the equipment can resume operation.
Pre-Installation Instruction
Crawl Space Fan must be installed by qualified installers in accordance with these instructions and all local codes and, in the absence of these codes, in accordance with the latest version of the International Residential Code and the International Electrical Code. Improper installation can cause dangerous situations such as fire, electric shock or personal injury. Using this equipment as directed by the manufacturer will significantly reduce these risks. If you have any questions, please contact the ALORAIR manufacturer. Be sure to disconnect the crawling space ventilator from its power supply before installation and maintenance. The temperature and humidity probe should be installed in the same space as the equipment; ensure that the temperature and humidity probe will not get wet or damaged.
The Tools Needed
- 5/16 “nut roller or Phillips screwdriver.
- If installed on bricks or foundation blocks, use a 5-stroke 16-inch masonry bit.
Installation
PositionA Crawl Space Fan is installed in the crawling space behind the existing foundation ventilation opening. The vents should be within three feet of every corner of the building.
Note: The Crawl Space Fan must be installed in the climbing space, and the electrical control box and motor face the inside of the climbing space.
- Remove existing doors or coverings on ventilation holes around the building.
- Put the fan in the low building above the vent.
- If installed on a base block or brick, mark the position on the four corners of the metal panel and drill 5/16 “holes.” Install the wall anchor on the opening and secure the climbing fan to the wall with four screws. If installed on a wooden frame, install rims or meshes on the existing climbing space vents and secure the climbing space ventilator screws, washers and nuts to the four corners of the fan metal panel.

- If the mounting board needs to be modified to accommodate important openings, the following trimming advice should be followed: be careful when trimming the mounting board to avoid damage to the power cord.

Instructions
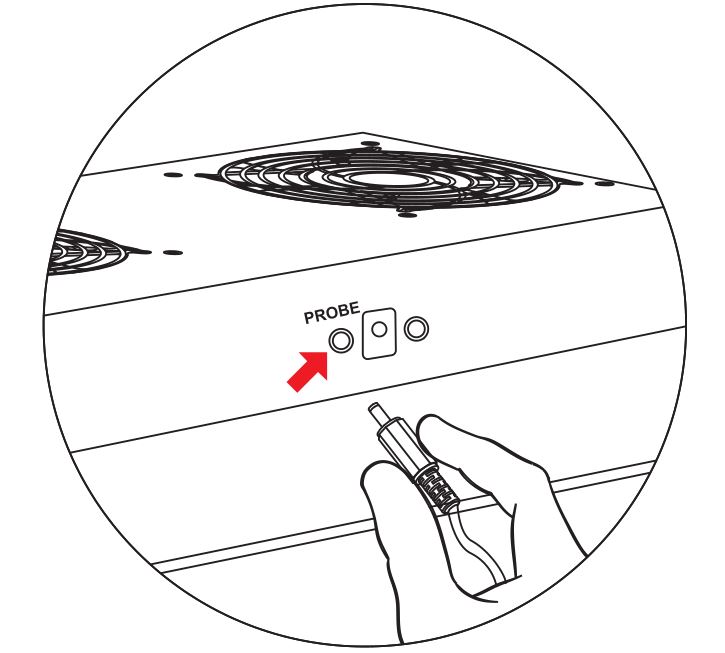
- Insert the connector of the temperature and humidity probe into the designated port located at the bottom of the fan unit.
- Plug the Plug of the active Power adapter into the jack located at the bottom of the controller.
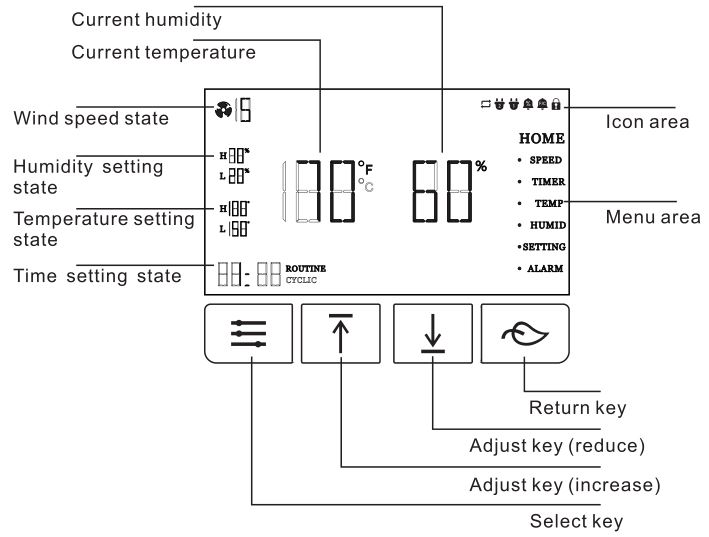
1. Select key: Select each menu you want to set in turn
General operation: This button loops through each setting menu; OFF, HOME, SPEED, TIMER, TEMP, HUMID, SETTING, ALARM.
In HOME: The fan will run according to the settings in other menus;
In OFF HOME: Regardless of timer, temperature, humidity, the fan will stop running.
In SPEED: Press the adjustment key to set the speed of the fan;
In TIMER:
- First enter the WORKING option, press the adjustment key to set the fan running time, and turn off the timer function when it is set to “OFF”.
- Press the menu key once to jump to the STANDBY option, and press the adjustment key to set the fan standby state. The timer function is turned off when you set it to “OFF”.
- The fan enters loop mode when the options in “WORKING, STANDBY” are set.
Press the menu key again to jump out of the menu. If there is no action within 10 seconds, the “HOME” page will be returned automatically, and the fan will run according to the specified setting parameters.
In TEMP:
- First enter the high temperature option and press the adjustment key to set the high temperature trigger. If the probe measures that the temperature exceeds the set high temperature, the fan will start. The activated fan will slowly increase its speed until it reaches the set speed. When the measured temperature is lower than the set high temperature, the speed of the fan will slowly drop until the fan stops.
- Press the menu key once to jump to the low temperature option, and adjust the key to set the low temperature trigger. If the temperature measured by the probe is lower than the set low temperature, the fan will start. The activated fan slowly increases its speed until it reaches the set speed. When the measured temperature is higher than the set low temperature, the speed of the fan will slowly drop until the fan stops.
- Press the menu key again to jump out of the menu. If there is no action within 10 seconds, the “NO HOME” page will be returned automatically, and the fan will run according to the specified setting parameters.
- When you press the adjustment key to “- -%”, turn off the current function.
In HUMID:
- First enter the high humidity option and press the adjustment key to set the high humidity trigger. If the probe measures that the humidity exceeds the set high humidity, the fan will start. The activated fan will slowly increase its speed until it reaches the set speed. When the measured humidity is lower than the set high humidity, the speed of the fan will slowly drop until the fan stops.
- Press the menu key once to jump to the low humidity option, and press the adjustment key to set the low humidity trigger. If the humidity measured by the probe is lower than the set low humidity, the fan will start. The activated fan slowly increases its speed until ii reaches the set speed. When the measured humidity is higher than the set low humidity, the speed of the fan will slowly drop until the fan stops.
- Press the menu key again to jump out of the menu. If there is no action within 10 seconds, the “HOME” page will be returned automatically, and the fan will run according to the specified setting parameters.
In SETTING:
Press the adjust key to set the brightness of the screen. At the same time, press the decrease I increase adjustment key to change the temperature unit (°F / °C)for2 seconds.
ln ALARM:
- First enter the high humidity option and press the adjustment key to set the high humidity trigger.Press the menu key once to jump to the low humidity option and press the adjustment key to set the low humidity trigger.Press the second menu key to jump to the high temperature option, press the adjustment key to set the high temperature trigger.Press the third menu key to jump to the low temperature option, press the adjustment key to set the low temperature trigger.
- Once the temperature and humidity value set in the alarm is triggered,the fan will ignore the setting of wind speed, timer, temperature andhumidity. Gradually switch to a maximum speed of 10 gears.
- Press the menu key again to jump out of the menu. If there is no action within 10 seconds, the “HOME” page will be returned automatically, and the fan will run according to the specified setting parameters.
- This setting does not have to be set without special needs
2. “increase” and “decrease” adjustment keys: used to adjust the set wind speed, temperature, humidity, screen brightness.
3. Return key: press to exit the current interface to return to the main interface “HOME”, and then press the device to close “OFF”
4. Current temperature: displays the temperature of the current air detected by the detector, and if no probe is inserted, ii displays “–°F” or”– °C”.
5. Current humidity: displays the humidity of the current air detected by the detector, and displays”–%” if no probe is inserted.
6. Menu area: this area displays the current mode of the controller. Press the Select key button to cycle through these modules.
7. Icon area: this area displays the alarm of the controller, the status of the device connection, screen lock, and loop mode.
![]()
This icon function is displayed when the STANDBY in “TEMP” is set, and is hidden on the home page when it is not turned on.
![]()
No. 2 and No. 1 mainframe icons correspond to two fan interfaces. The corresponding icon is lit when it is inserted and hidden when it is not inserted.
![]()
Humidity, temperature alarm icon-this icon flashes with a beep when the high or low humidity alarm you set is triggered. Press any key to turn off the sound when the beep goes off.
![]()
Show lock alert-this icon is displayed when the screen is locked. The screen flashes when you mistakenly press the icon once while in locked mode. The icon is hidden when you exit locked mode.
- Wind speed status: displays the current speed of the fan.
- Humidity setting state: displays the set high and low temperature. If the display is not set”–%.
- Temperature setting state: displays the set high and low temperature. If the display “– 0 is not set.
- Time setting status: displays the running time of the fan and the standby time of the fan.
Keystroke Function
Controller lock: When “NO HOME”, press the menu key for 5 seconds to enter the lock mode, and then press the menu key for 5 seconds to unlock the mode, hiding the lock icon. Pressing other keys at this time cannot change the parameters. Enter standby when locked for more than 3 minutes. The screen closes and the background continues to operate according to the specified settings.
Warranty Clause
Upon receipt of the goods, the customer must log in to www.alorair.com to fill in the warranty registration form and submit it to ALORAIR.We will receive your purchase and installation information and save it.If the warranty registration is not sent to us, the warranty period will begin from the date the goods leave the warehouse.Be sure to record the serial number and installation date.You will need this information to receive the RA number.The product has a shelf life of two years.
If warranty service is required, the customer must contact ALORAIRTechnical support at [email protected] or local technical service phone number 1-888-990-7469, Monday through Friday (8:00-17:00 PST).To obtain a return authorization (RA number).
When ALORAIR receives the equipment (whether in the maintenance center or in the warehouse), ALORAIR, it will carry out the initial inspection.
The warranty claim is determined to be invalid, the customer must pay all related maintenance costs and transportation costs for unit maintenance. Warranty plan does not cover abuse or misuse.
This includes physical damage, product immersion, incorrect installation (such as incorrect voltage input), and misuse for any reason other than the intended purpose.
ALORAIR shall not be responsible for any indirect loss or incidental damage of any nature caused by the product.
From the date of replacement, new equipment will be provided to the customer during the warranty period of the same year.
After parts are repaired or replaced by ALORAIR, the original warranty will continue to apply until the due date.
AlorAir Solutions INC.2048 E. Francis St Ontario CA 91761Tel: 1-888-990-7469E-mail: [email protected]
[xyz-ips snippet=”download-snippet”]