Banggood Battery Powered Security Camera

Features
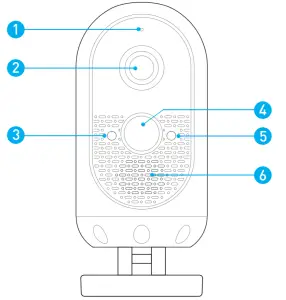
- Microphone
- Wide-angle Lens
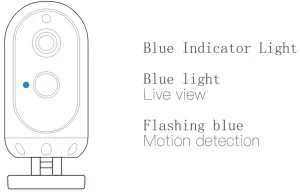
- Indicator Lights
- Motion Sensor
- Light Sensor
- Speaker

In the box
|
|
|
|
|
|
|
|
|
 Rechargeable 6000mAh Battery Pack
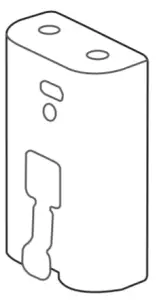
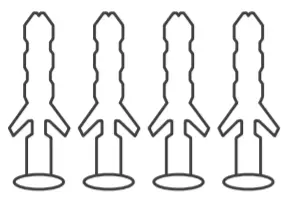 Anchor Packs
 User Manual
Charge the battery
Charge the included battery.
Fully charge the battery by plugging it into a USB port using a Micro USB cable.
It takes about 6-8 hours for the battery to fully charge. When only one blue LED is lit, that indicates the battery is fully charged.
![]()
Set up your camera
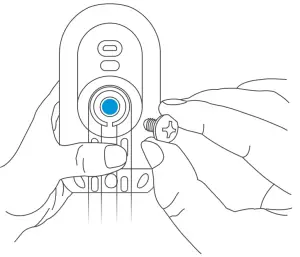
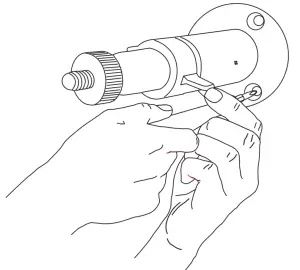
- Attach the stand to the camera.

- Secure tightly with the stand screw.
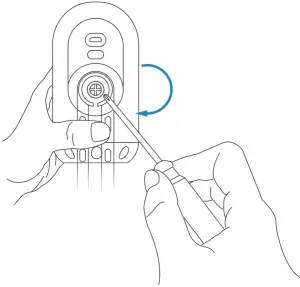
- Remove the battery cover.Twist the battery cover counterclockwise to unlock, and then remove it from your .
- Cloud storage services.The camera only supports cloud storage, one year cloud storage service is free. It doesn’t need to set up the camera, it will automatically start the cloud storage function when the camera is turned on.When the device has an event alarm (PIR trigger event and equipment anti-theft event under dormant state) it will automatically upload the recorded event video to the cloud to save. This product uses triple security authentication, anti-fake identity, end-to-end data encryption, anti-eavesdropping. The network side can not read the device and user data, the device side uses the most stringent firewall and security audit policy, and the anti-intrusion network side uses a third-party cloud shield, which can prevent up to 300G DDOS attacks. So feel free to use
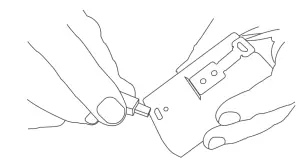
- Insert the battery.Insert the fully charged battery into the bottom of your Camera until it clicks into place.
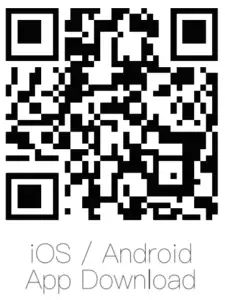
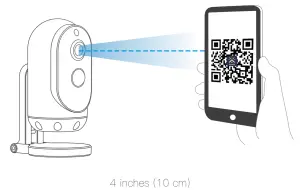
- Set up your device in the Aiwit app.Before You Start1. Download and install Aiwit App.Scan the QR code below or search for Aiwit on the Apple App Store or Google Play. Download and install the app.2. Create an Aiwit account. Set up your Astro in the Aiwit app.To pair your Camera, follow the steps below and in-app instructions.1. Open Aiwit App and log in to your account.2. To add your camera, select the + icon.3. Select Battery Camera 2.4. Press and hold the Setup Button until the red light is flashing.5. Enter your 2.4GHz Wi-Fi network and the Wi-Fi password, then tap Next (5GHz is not supported).6. Use your Camera camera to scan the QR Code shown on the app, then select Confirm once the Wi-Fi setup has finished.
- Attach the battery cover.Find the Open lock symbol located behind your . Align the symbol with the line on the battery cover. Push the cover on and turn clockwise until it locks.
- Give it a try!After setup, tap the Live View in the Aiwit app to see live video from your Camera.


Install your Camera
Choose any location.Place the Camera anywhere, inside or outside your home. It can be mounted on a wall, ceiling, or placed on a tabletop. Put it in an area where you wish to view.
Install the Camera on a ceiling:
Using the axis to rotate the stand, position the base above the camera. Ensure the base is directly positioned above your Camera.
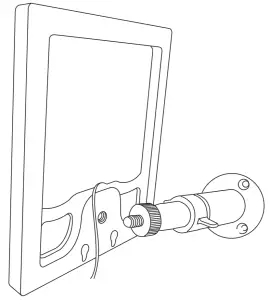
Install the Camera on wall:The base is hinged, so rotate the base behind the Camera prior to wall installation.
Once you have chosen a wall or a ceiling for your Camera, Mark drill holes and use a bit to drill holes in your wall or ceiling. Insert anchors and secure your Astro with mounting screws.
Place the Camera on a flat surface:
Flip the base under the Camera, so it can stand upright. Use the flipped base as a stand for table or shelf placement. Installation is complete. Your Camera is now ready to use!
Need help setting up?
If you experience some issues during the app setup, try these steps:
Check your WiFi password.The most common issue during setup is incorrect Wi-Fi passwords. Passwords are case sensitive. Please double-check your password.
Reboot the router/modem.If you have entered the correct password, but still experiencing issues, try unplugging the power to your router/modem. Wait for 30 seconds, then plug the power back and turn it back on. Proceed to setup again in the Aiwit app.
Frequently asked questions
How to RESET network settingsPress and hold the Setup Button until red light is flashing. Follow the in-app instructions to finish your Wi-Fi setup.
How to share the device with my familyOpen the Aiwit app. From the home page, tap the Share icon. Tap Share via Email or Share via QR Code. You can share the device with up to 8 users.
Share via Email:The new user has to download the Aiwit app and create an account with the same email address which the device owner has shared with. Log in to the account and you’ll see the shared device.
Share via QR Code:
- Open the Aiwit App on a new user’s smartphone.
- From the home page, tap +.
- Tap QR Code Sharing, then scan the QR code the device owner generated before.
- You will see Share successful, then tap Confirm.
How many users can view the video at the same time?Up to 3 users may view the video feed, but only 1 user can use the direct intercom. Both iOS and Android are compatible.
Is 5GHz Wi-Fi supported?No. Only 2.4GHz Wi-Fi is supported.
Why is my Wi-Fi signal poor on my device?Your device may be too far away from your wireless router or you may have some obstructions in between that reduce signal strength. You might try repositioning your router or getting a signal extender/repeater for your wireless router.
How to adjust Motion Detection SensitivityFrom the home page, tap Motion Detection icon.
Motion Detection Sensitivity
- Fast: Records and notifies you about every motion. Shortest battery life.
- Medium: Records and notifies you about motion less often. Standard battery life.
- Slow: Records and notifies you about motion even less often. Maximum battery life.
How to enable Notifications on my phoneTo do this, you need to give permission for the Aiwit app to access to your microphone and enable notifications. Follow these steps to enable notifications.
- Open Settings. Go to Aiwit app permissions and select Notifications.
- Make sure all switches are on.
Install your Solar Panel (Optional)
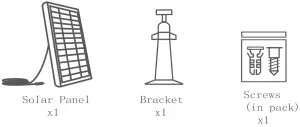
Please complete the battery camera setup in the App prior to installing the solar panel.
- Choose the installation locationPick an unshaded spot for best sun exposure. The solar panel should be installed where it will receive several hours of direct sun daily.
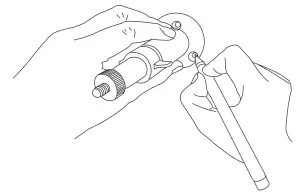
- Mark your spotPlace the solar panel mounting arm mark where you plan to install, and mark the screw hole positions lightly with a pencil.
- Drill the holesOptional: You may opt to use a drill bit to drill the holes where you have previously marked.● For mounting surfaces that are brick, concrete, or stucco, please use the plastic anchors. You may need to use a hammer to install the anchors.● For mounting surfaces that are wood or vinyl, you can omit the anchors, and use the screws directly.
- Install the mounting armUse a screwdriver to secure the mounting arm to the wall, tighten securely.
- Attach the solar panelAttach the solar panel onto the mounting arm, ensure that it is installed correctly.Note: You may adjust the angle of the solar panel for better sun coverage. Simply loosen the adjustment screw on the mounting arm, adjust to desired angle, and re-tighten the screw.
- Plug the cableLastly, plug the solar panel charging cable into the Camera. Let’s start charging!
[xyz-ips snippet=”download-snippet”]