
![]()

INSTALLATION INSTRUCTION

(1)IN THE BOX

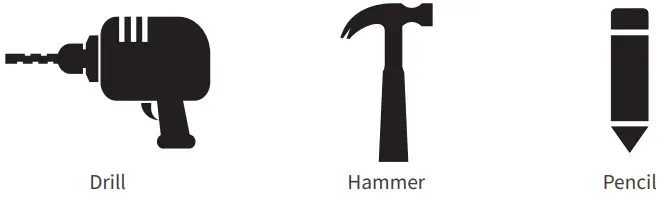
TOOLS YOU MAY NEED
Installation – Sentry
Installation Requirements:
To install your Bosma Sentry video doorbell, please make sure that:
- You have an existing doorbell wiring powered by a doorbell transformer or a DC 5V2A micro USB power source.
- The doorbell transformer’s output is AC 8-24V (or 16-24V if a chime is installed), and at least 30VA of power. Insufficient power may result in frequent disconnection.
- Your Sentry doorbell’s location has strong 2.4Ghz Wi-Fi coverage (5Ghz Wi-Fi is not supported) with a minimum of 2Mbps upload speed. Also, make sure that the Wi-Fi’s encryption method is either WPA or WPA2.
- The camera’s lens is not exposed to direct sunlight.
Helpful Resources:
- For a video installation guide, and other resources, please visit Sentry’s support page: https://www.bosmasmarthome.com/support/sentry/
- For more troubleshooting steps and general questions, please visit Sentry’s FAQ page: https://www.bosmasmarthome.com/faqs/sentry/
Safety Reminder:
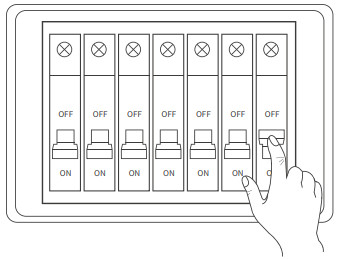
- It is highly recommended to switch off power to your doorbell prior to installation. You can switch off the power by turning off the circuit breaker for your doorbell.
- If you have an existing doorbell chime installed, you would need to go to Sentry settings -> Doorbell Chime and enable the option in the Bosma app after setting up Sentry, so that the chime still rings when Sentry’s doorbell button is pressed.
Warning: If Sentry is not connected to a chime (e.g. you’re connecting Sentry directly to a Low Voltage Transformer), please do NOT enable the “Doorbell Chime” option in-app. Enabling the “Doorbell Chime” option without an installed chime may pose a serious fire risk when Sentry’s doorbell button is pressed.
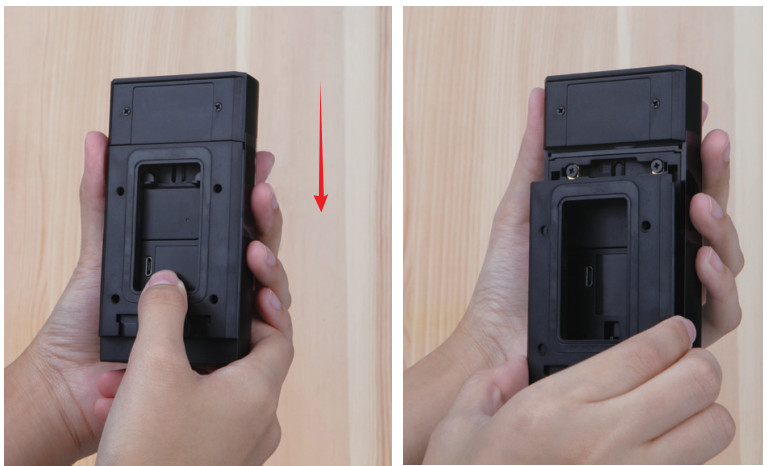
- Remove the base plateSlide down to remove the base plate from the doorbell.
- Install a micro SO cardIf you want to install a micro SD card, please push back to remove the PIR module, insert a micro SD card into the SD card slot, and then replace the PIR module. Sentry supports a micro SD card up to 12868. Please make sure that the SD card is formatted to FAT32.Sentry requires either a micro SD card (local storage) or a Bosma Assist subscription (cloud storage) to store video recordings. If you intend to use local storage, it is recommended to install a micro SD card prior to installing Sentry, as installing the micro SD card requires uninstalling Sentry from the base plate.
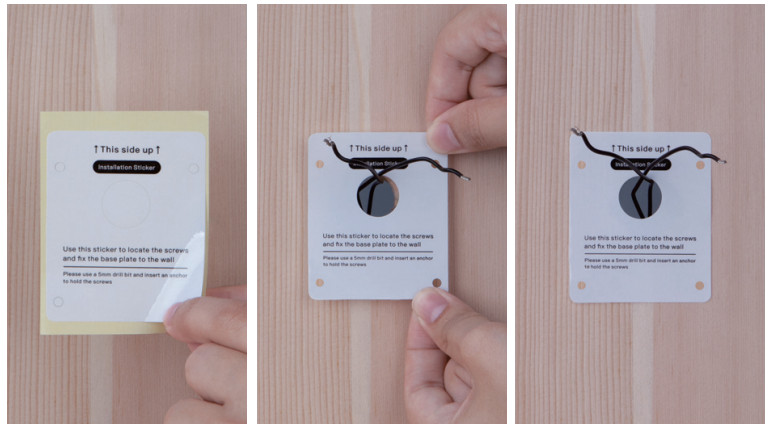
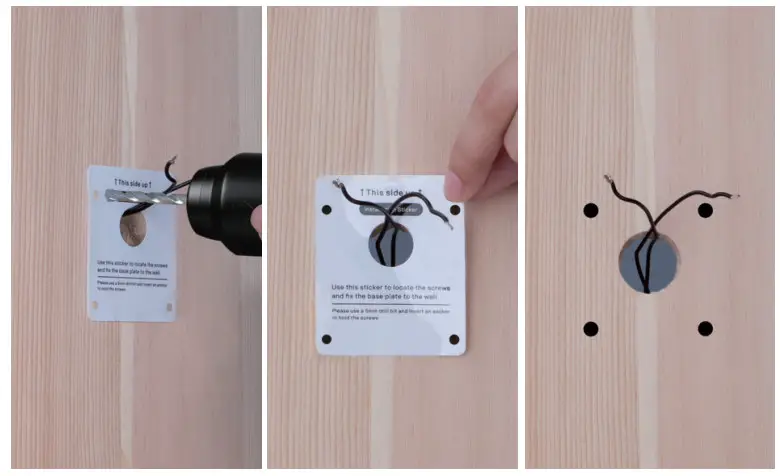
- Stick the installation sticker on the wallRemove the existing doorbell (if you have one) and leave the wires on the wall. It is recommended to switch off the power to the doorbell wires.Stick the installation sticker on the wall so that the wires go through the center hole on the sticker.*use a pen to mark the 4 spots on the wallIf your wall has an uneven surface and the sticker won’t hold, you can also use a pen to mark the 4 spots on the wall.
- Drill holesUse the provided drill bit to drill 4 holes at the marked spots on the sticker. Remove the sticker after finishing.
- Insert the plastic anchorsPut the plastic anchors into the 4 holes. If necessary, use a hammer to gently tap them in until they are flush with the wall.
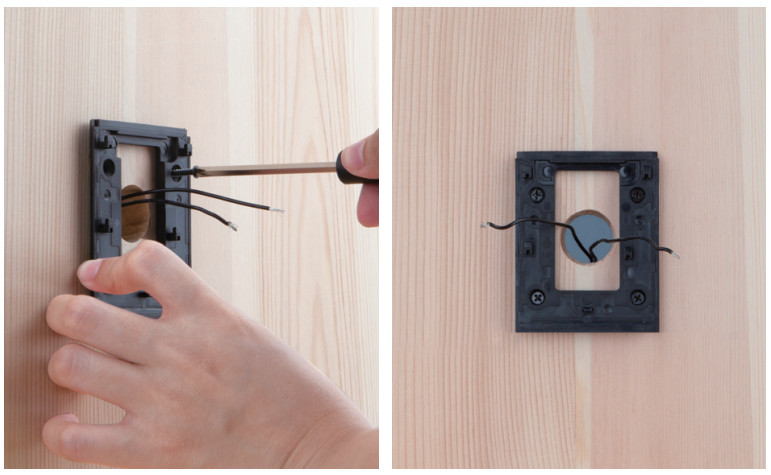
- Install the base plate Placethe base plate over the holes, and use the provided screws to secure the base plate.
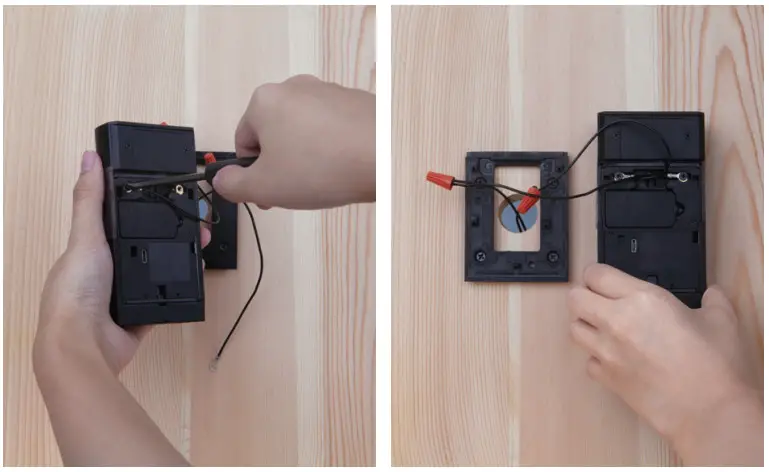
- Attach the adapter cordsRemove the plastic caps from the adapter cords. Attach each adapter cord to a wire.
- Connect the wiresUse the provided twist-on wire connectors to secure the adapter cords and the wires.
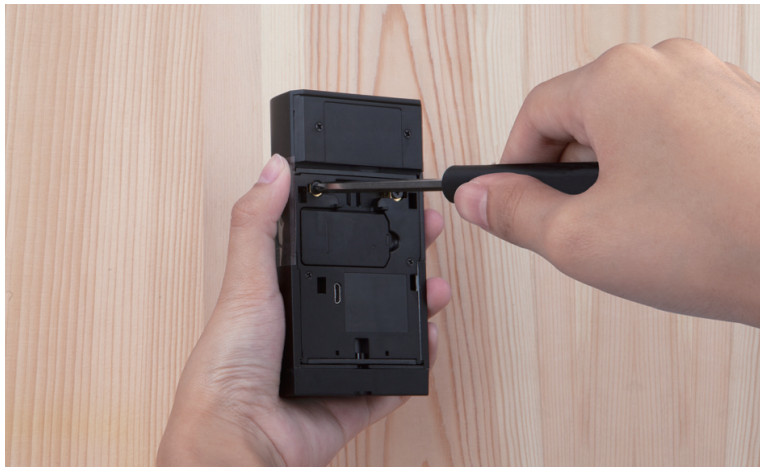
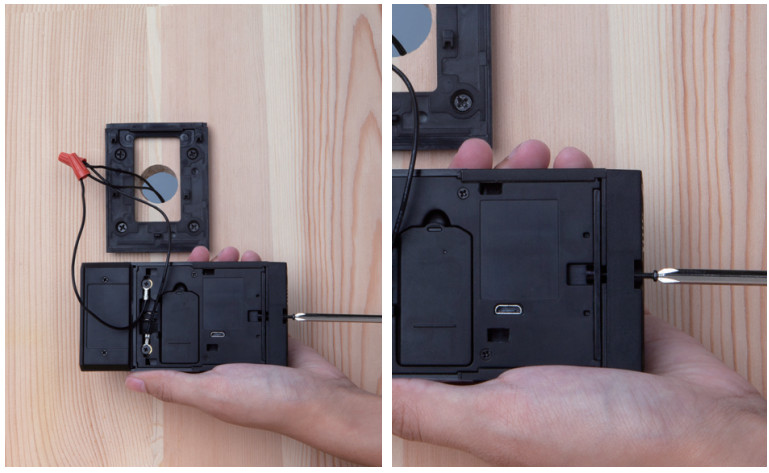
- Remove the screwsUse the provided screwdriver to remove the two screws from the back of the Sentry.
- Secure the adapter cordsAttach each adapter cord to a screw, and tighten the screws to secure the cords. It doesn’t matter which cord is attached to which screw.
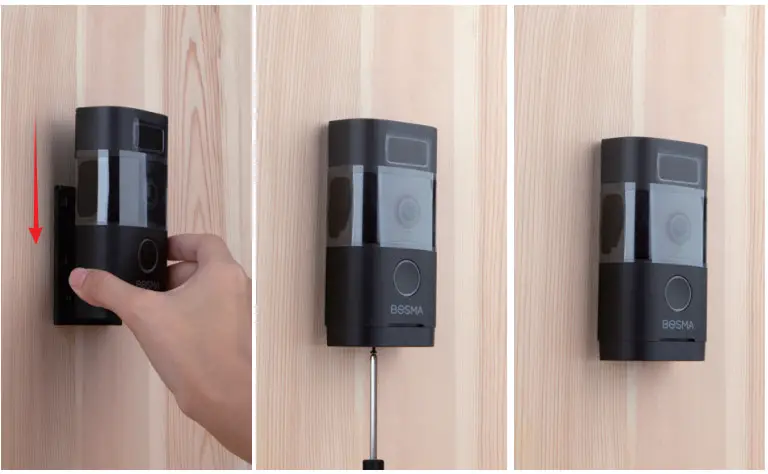
- Prepare the tamperproof screwDrive the provided tamperproof screw slightly into the bottom screw hole on the Sentry doorbell. Please make sure the tip of the screw stays beneath the end of the screw hole.
- Mount Sentry on the base plateSlide the doorbell down on the base plate until it’s in place. Tighten the tamperproof screws. Installation is now complete.

 *use a pen to mark the 4 spots on the wallIf your wall has an uneven surface and the sticker won’t hold, you can also use a pen to mark the 4 spots on the wall.
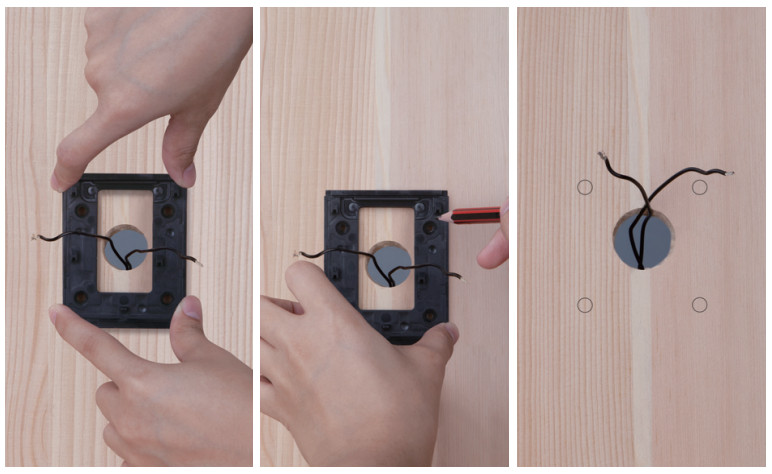


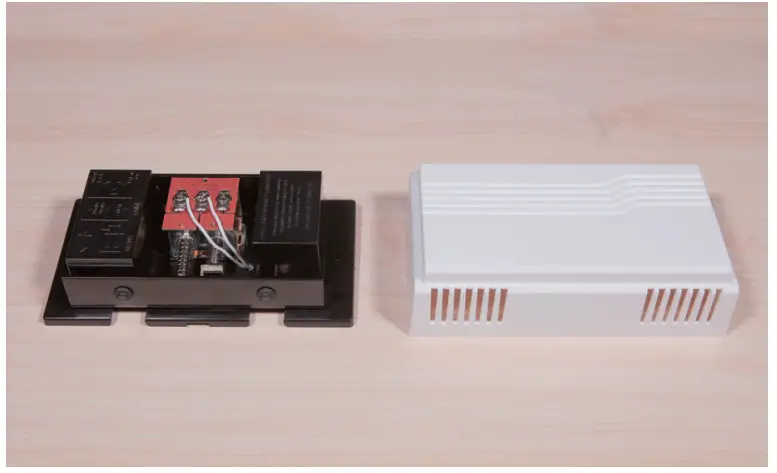
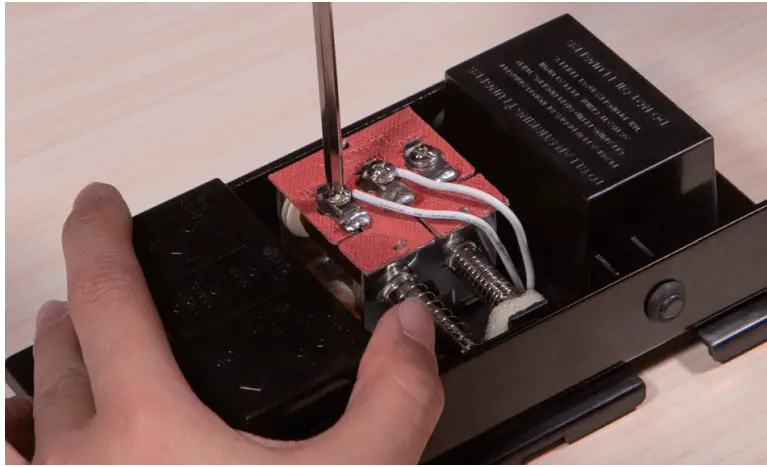
If you hear your doorbell chime buzzing/humming after installing Sentry, you would need to install the included resistor across the terminal screws on your chime. Follow the steps below to install the resistor:
- Please switch off the power to the chime, in order to avoid the risk of a short-circuit.
- Remove the chime’s cover.
- Loosen the two terminal screws on the chime that are connected to the power cords.
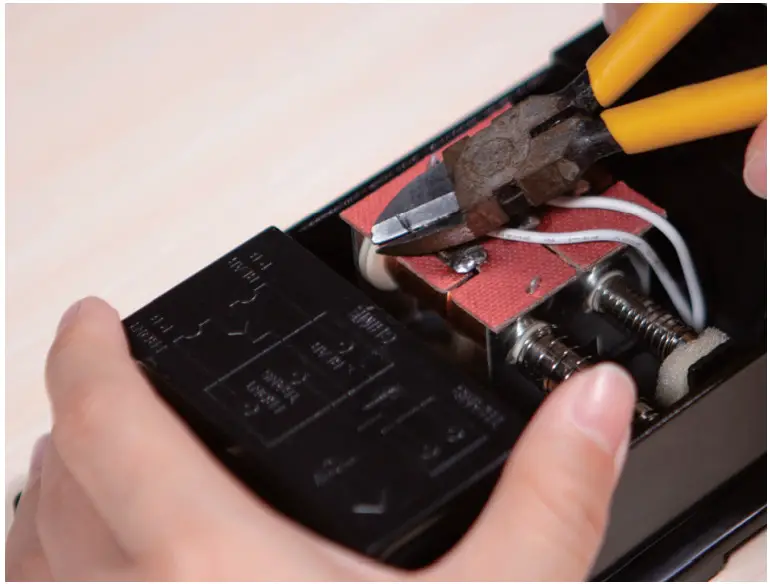
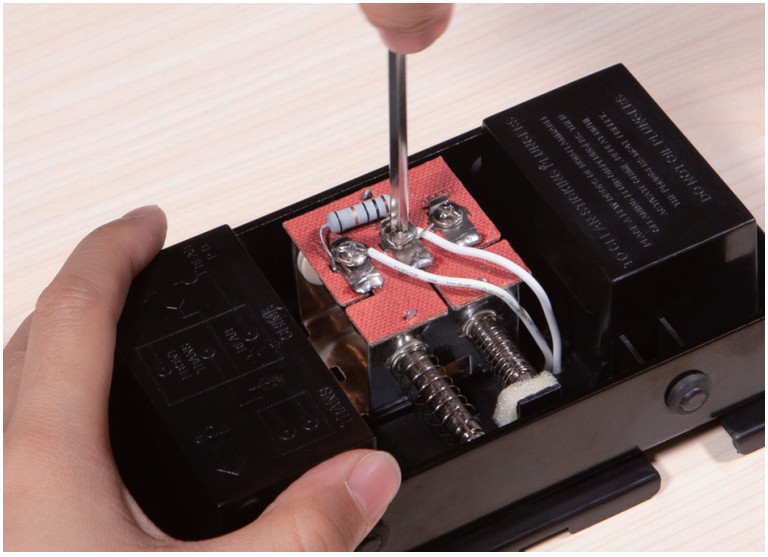
- Wire the resistor’s two leads around the screws, and tighten the screws to secure the resistor. Make sure that there is no short circuit.
- Replace the chime’s cover, and turn the power back on. Note: this method only applies to mechanical chimes. It does not work on electronic chimes.

Quick Start Guide
- Download “BOSMA” from Google Play or App Store.
- Connect your Sentry to power, and wait until it says “waiting for connection”.
- Log in to BOSMA or create a new account.
- Tap the “+” button at the top right corner of the screen.
- Select “Sentry” and follow the instructions on the screen to complete the setup.

Customer Service![]() [email protected]
[email protected]![]() 1(800)-976-0881
1(800)-976-0881![]() www.bosmasmarthome.com* The quick start guide is subject to change without notice, please find the latest version onwww.bosmasmarthome.com
www.bosmasmarthome.com* The quick start guide is subject to change without notice, please find the latest version onwww.bosmasmarthome.com

[xyz-ips snippet=”download-snippet”]