BOSMA X1 Lite Security CameraUser Manual
PRODUCT OVERVIEW
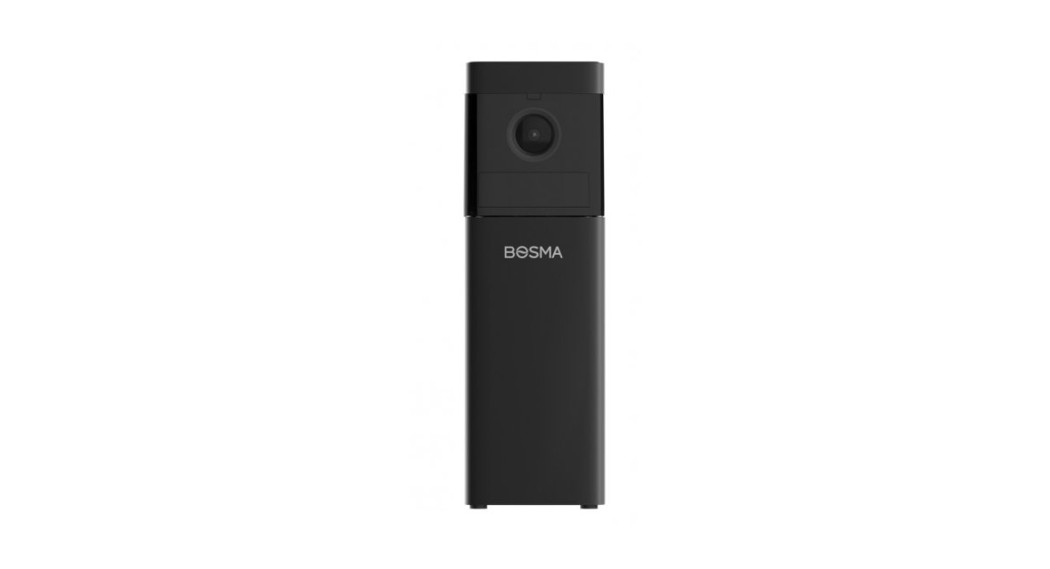
The BOSMA X1 Lite security camera helps you always keep an eye on your home, even while you’re away. With its integrated hub (available on X1 Lite Connect), the X1 Lite can also work with peripheral sensors such as the door/window sensor to provide additional security and convenience.
FEATURES
- 1080p Video with 138° Wide Super Wide AngleLeave no blind spot in your home with X1 Lite’s wide-angle lens and 360° panning.
- Infrared Night VisionHigh-quality night vision allows you to see everything clearly even at zero lighting conditions.
- Two-way Audio CommunicationCommunicate with your loved ones at home, anytime, anywhere.
- Built-in Smart Hub (available on X1 Lite Connect)Work with other BOSMA peripheral devices, such as the door sensor, motion sensor, night light, etc.
- Motion & Sound DetectionsKeen motion and sound detections in any environment provided by the motion and sound detectors.
- Built-in SirenA loud 110dB siren can be manually or automatically triggered to scare off intruders.
- Local StorageLocal Storage with a micro SD card up to 128GB. Micro SD cards are sold separately.
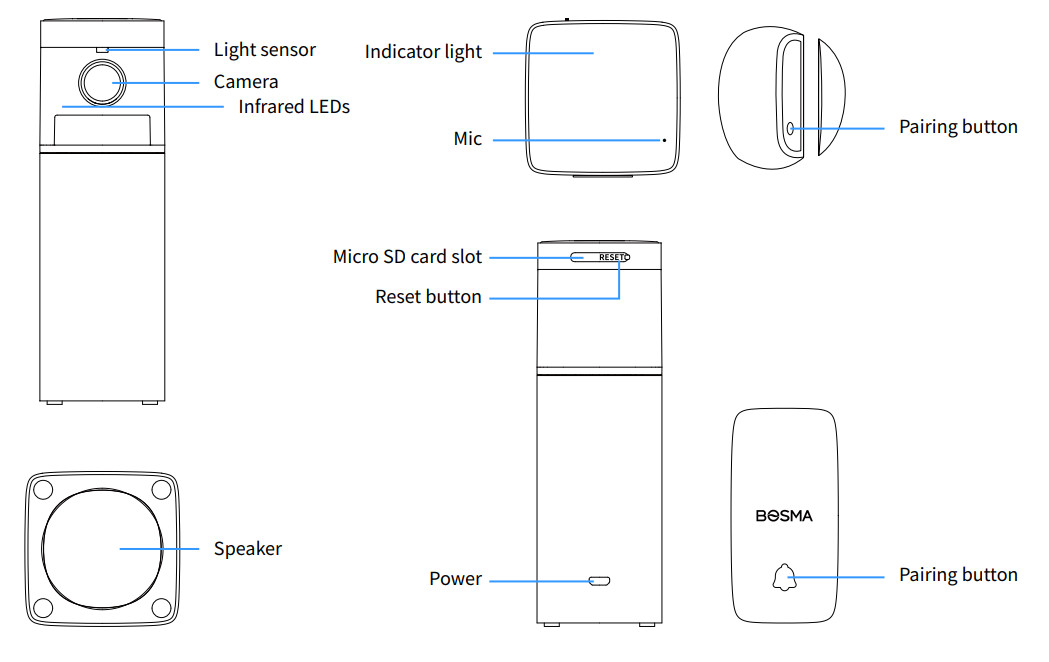
PRODUCT DESCRIPTION
GETTING STARTED
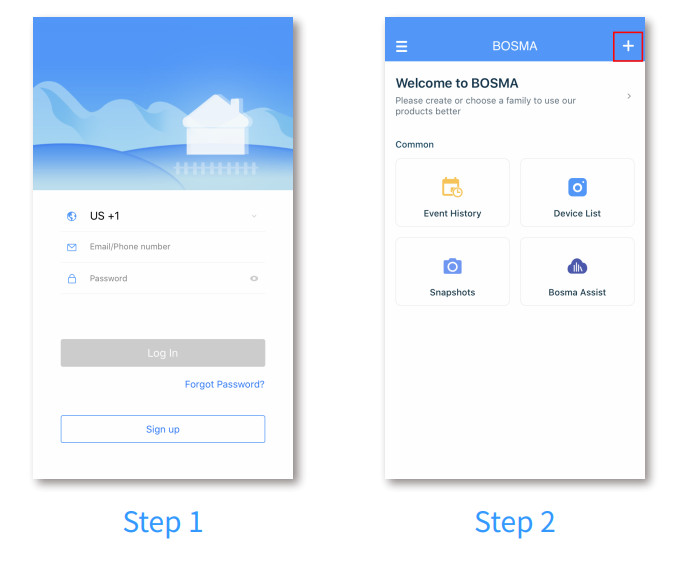
- Step 1: Download the “BOSMA” app from App Store or Google Play. Create a new account or log in with an existing account.
- Step 2: Tap the “+” button at the top right corner.

- Step 3: Tap “X1 Lite Series” in the list.
- Step 4: Connect the X1 Lite to power and wait for it to power up. After you hear “system startup” and “waiting for connection”, tap “Next”. If you did not hear either message, long press the reset button until you hear “system reset” to reset the camera.
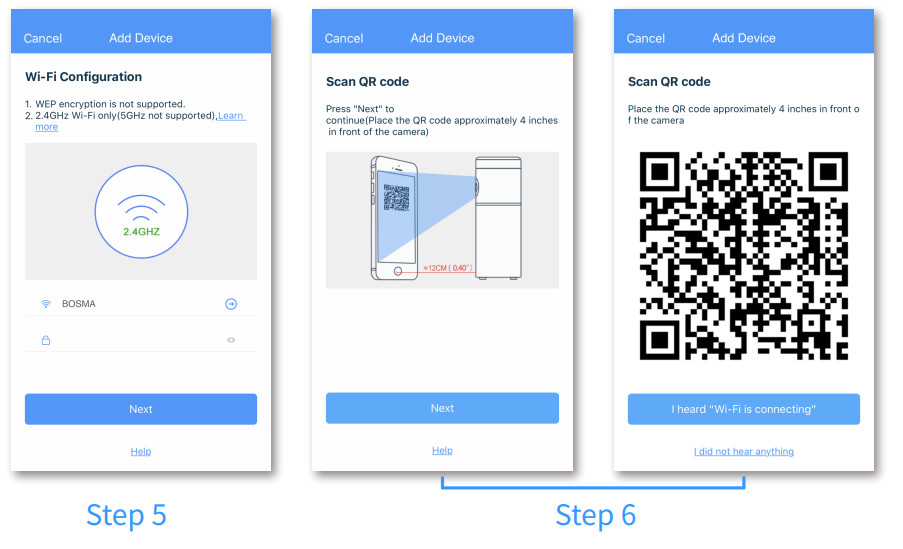
- Step 5: Select the WiFi you want the X1 Lite to connect to and enter its password. Note that only 2.4Ghz WiFi is supported.
- Step 6: A QR code will be generated. Place the QR code roughly 3-4 inches in front of the camera till you hear “Wi-Fi is connecting”. Then tap “I heard-Fi is onnecting\’” to continue.
- Step 7: Wait for the X1 Lite camera to connect.
- Step 8: Once the device has been added successfully, you can edit the device name.


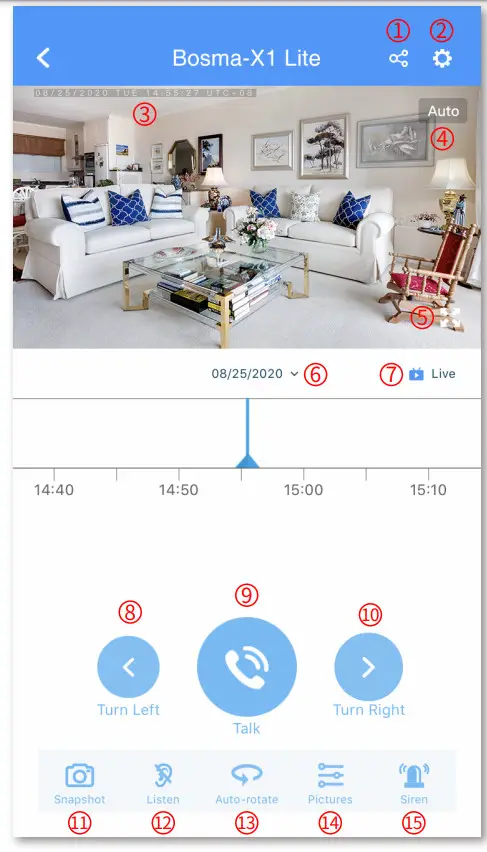
- Share the device with another person. This method is being deprecated. Please instead use Family Management for sharing.
- Device settings
- Date and time display
- Change video quality
- Full-screen switch
- Change timeline date
- Live or playback indicator
- Turn left button
- Talk button
- Turn right button
- Screen snapshot
- Listen button (tap to listen to the camera)
- Auto-rotate switch
- Adjust image parameters
- Trigger alarm siren manually
DEVICE SETTINGS

- Change the device’s name
- Motion/Sound detection and notification settings
- Manage recording schedule
- Camera on/off switch
- Image orientation settings
- Manage device sharing. This method is being deprecated. Please instead use Family Management for sharing
- Manage paired peripheral sensors/accessory devices
- Adjust speaker volume
- SD card settings
- Manage Wi-Fi network of the device Check firmware update and turn on /off auto-update
- Home page display switch
- Remove device
ADDING ACCESSORY DEVICES (for X1 Lite Connect)
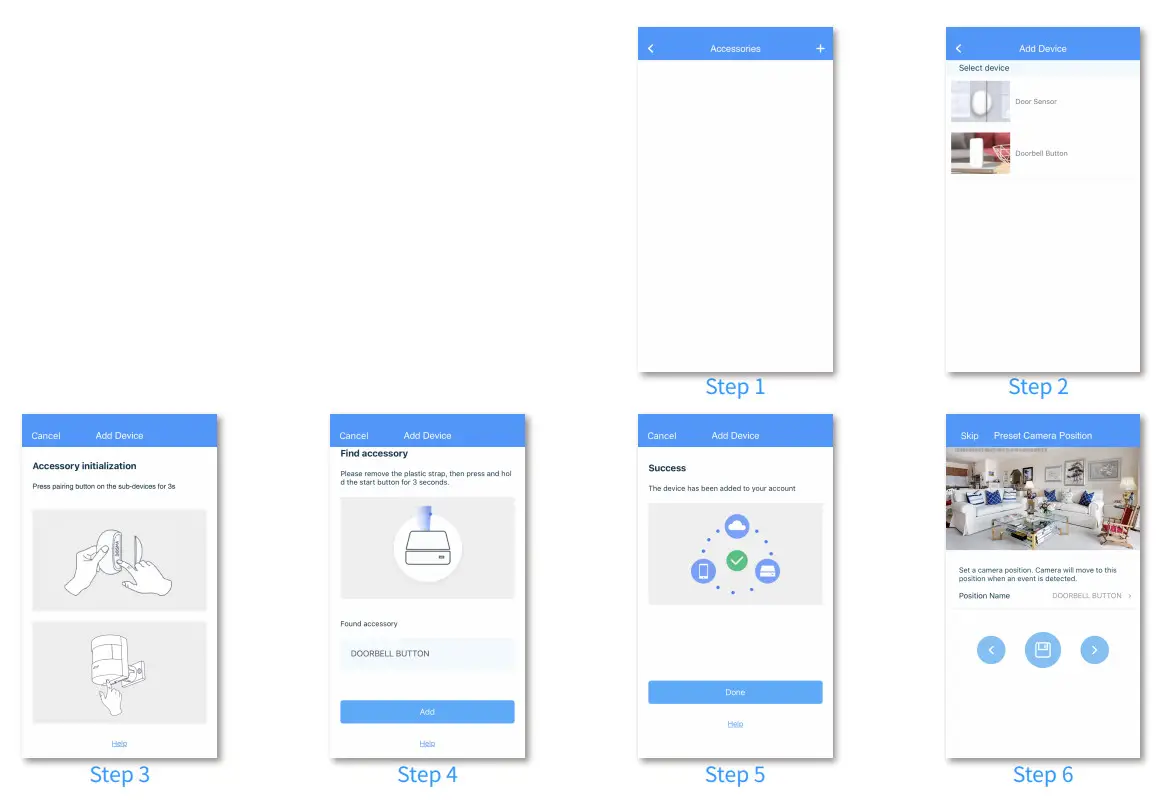
Step 1: Enter device settings -> Accessories. Tap the “+” button at the top right corner.Step 2: Select the device you want to addStep 3: Long-press the pairing button of the accessory device for about 3 seconds.Step 4: After the accessory device is found, rename the device if needed and tap “Add” to proceed.Step 5: Tap “Done” after the accessory device is successfully added.Step 6: Set a Preset Camera Position for this accessory device. The X1 Lite will rotate to this position when an event is triggered by this accessory device.
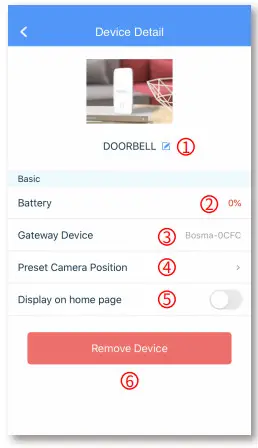
1. Rename the device2. Battery level3. Paired gateway device information4. Manage the Preset Camera Position for this device5. Home page display switch6. Remove device
DOOR/WINDOW SENSOR

 report this ad
1. Rename the device2. Current status display3. Battery level4. Paired gateway device information5. Notifications settings6. Manage the Preset Camera Position for this device7. Home page display switch8. Remove device
SPECIFICATIONS
| Resolution | 1920 * 1080 | Weight | 12 oz 340g |
| Field of View | 138° Diagonal | Dimensions | 2″(L) x 2″(W) x 6″(H)50mm(L) x 50mm(W) x 154mm(H) |
| Night Vision | Infrared Night Vision w/ 4 IR-LEDs | Operating Temperature | 14°F ~ 122°F -10℃ ~ 50℃ |
| Audio | 2-way audio communication | Color | Black |
| Siren: | 110 dB alarm siren | Material | Aluminum Alloy |
| Power | DC 5V, 2A, 10W | Warranty | 1-year limited warranty |
| Hub | 915MHz, up to 650ft range | Certifications | CE, FCC, RoHS |
| Storage | Local: micro SD up to 128GB (micro SD card sold separately) | App | Free “BOSMA” app available on Google Playand App Store |
| Wireless | 802.11 b/g/n 2.4GHz (does not support 5GHz) WPA, WPA2 encryptionMinimum 2Mbps upload speed required |
SAFETY INSTRUCTIONS
- Do not disassemble or repair the device yourself. In the event of a malfunction, contact the service center.
- Keep the device away from open flame in order to avoid an explosion or fire.
- Do not expose the device to extremely high or low temperatures.
- Avoid contact with water.
- Avoid dropping the device or hitting it with hard objects. Do not expose the device to strong mechanical stress.
- The manufacturer is not responsible for any damage caused by the user.
- Keep the device away from the sources of electromagnetic radiation, such as microwave, refrigerator, etc.
- Do not use chemicals or detergents to clean the device, always turn off the device before cleaning.
[xyz-ips snippet=”download-snippet”]