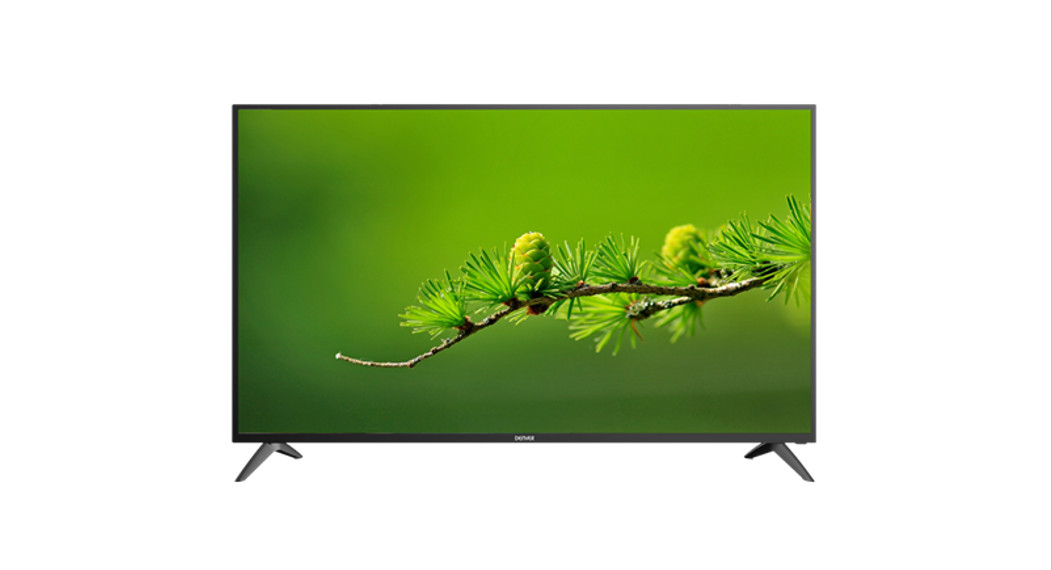
SMART TV with DVB-T2/S2/DVB-C and H.265/HEVC SupportModel: LDS-5071
 Quick start guideThe full user manual can be found by searching for this model number at www.denver-electronics.com.
Safety Information
IMPORTANT SAFETY INSTRUCTIONS-READ CAREFULLY BEFORE USE. Take note of the following safety information which appears on the back of the TV.![]() CAUTION: TO PREVENT ELECTRICAL SHOCK, DO NOT REMOVE ANY SCREWS AND COVERING, NO USER-SERVICEABLE PARTS INSIDE, REFER SERVICING TO QUALIFIED SERVICE PERSONNEL.
CAUTION: TO PREVENT ELECTRICAL SHOCK, DO NOT REMOVE ANY SCREWS AND COVERING, NO USER-SERVICEABLE PARTS INSIDE, REFER SERVICING TO QUALIFIED SERVICE PERSONNEL.![]() This symbol indicates the important information in the accompanied operating instructions. Always read this information carefully.
This symbol indicates the important information in the accompanied operating instructions. Always read this information carefully.![]() This symbol indicates that dangerous voltage constituting a risk of electric shock is present within this unit.
This symbol indicates that dangerous voltage constituting a risk of electric shock is present within this unit.
Read and keep these instructions.
- Do not use this product near water.
- Clean the product only with a slightly damp cloth.
- Do not block any ventilation openings on the product.
- Install this product in accordance with the supplied Quick Start Guide and the User Guide. Protect the power cable from being walked on or pinched, particularly at plugs and the point where it exits from the TV.
- Do not allow the power cable to overhang the edge of a table.
- Unplug the product during lightning storms or when unused for a long period of time.
![]() WARNING! TO REDUCE THE RISK OF FIRE OR ELECTRICAL SHOCK, DO NOT EXPOSE THIS TV TO RAIN OR MOISTURE. THE TV MUST NOT BE EXPOSED TO DRIPPING AND SPLASHING AND NO OBJECTS FILLED WITH LIQUIDS SHOULD BE PLACED NEAR THE TV.NOTE: No naked flames such as candles should be placed near the TV.Smell/odor from TVNew televisions may emit an unusual smell or odor when first turned on.Due to the manufacturing process of components, televisions and other electronic products can have parts that may emit a smell after the product is first turned on and warms up.The smell will usually dissipate within a few days of use and does not return.This is normal and occurs with many electronic products. Please ensure there is sufficient ventilation around the TV and in the room and the odor will dissipate.
WARNING! TO REDUCE THE RISK OF FIRE OR ELECTRICAL SHOCK, DO NOT EXPOSE THIS TV TO RAIN OR MOISTURE. THE TV MUST NOT BE EXPOSED TO DRIPPING AND SPLASHING AND NO OBJECTS FILLED WITH LIQUIDS SHOULD BE PLACED NEAR THE TV.NOTE: No naked flames such as candles should be placed near the TV.Smell/odor from TVNew televisions may emit an unusual smell or odor when first turned on.Due to the manufacturing process of components, televisions and other electronic products can have parts that may emit a smell after the product is first turned on and warms up.The smell will usually dissipate within a few days of use and does not return.This is normal and occurs with many electronic products. Please ensure there is sufficient ventilation around the TV and in the room and the odor will dissipate.
Front View
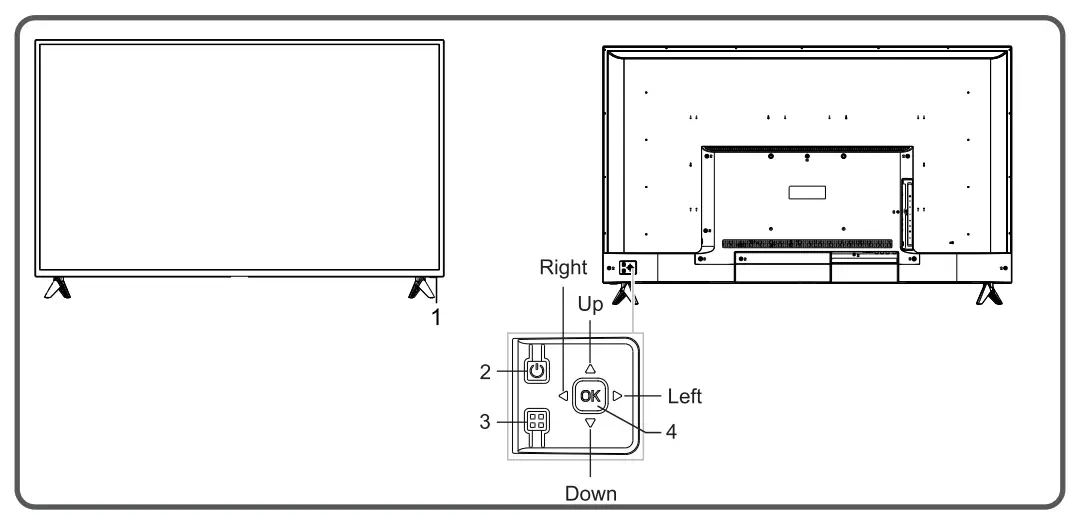
(standby): Switch the TV on or to standby.(menu): Press to display the OSD menu; Press it again to exit the menu.up/down: To move to the next channel or previous channel; To move down/up in the OSD menu screen.left/right: To adjust the volume; to move left/right in the OSD menu screenOK: To confirm your selection in the OSD menu.
Connections
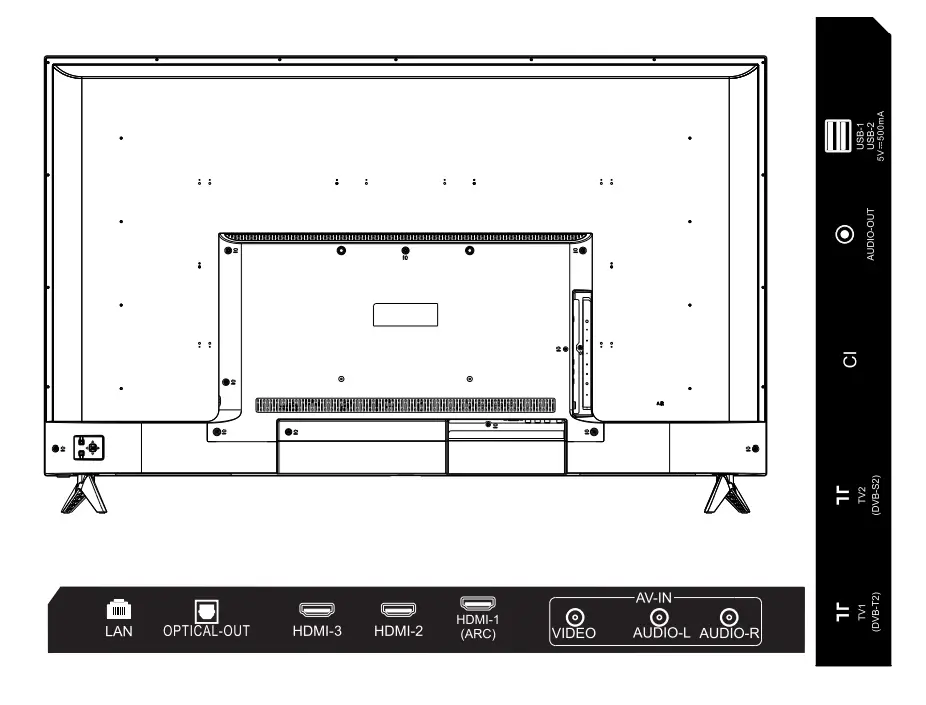
LAN(RJ45): RJ45 plug for connecting to external modem or network access equipment.HDMI: Connect DVD/Blu-ray player or other equipment.TV2(DVB.S2): Connect a Satellite signal.TV1 (DVB-T2): To connect to the aerial socket on the wall with the RF coaxial cable.Common Interface: CI slot.AV: Connect it to the audio & video output terminal of the DVD.USB: Connect to a USB device for multimedia.Audio out: connect it to other audio equipment.OPTICAL-OUT: Connect it to an external digital audio deviceInstallation of TV channelsThis TV comes with a triple digital tuner:
- used for digital terrestrial TV: DVB-T2 – H.265 HEVC;
- used for digital cable TV: DVB-C;
- used for digital satellite TV: DVB-S2.
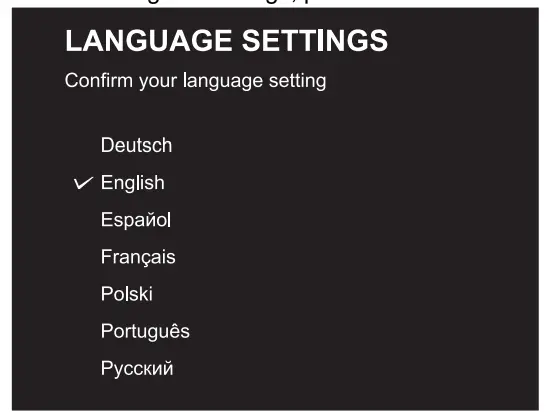
The TV also has an analog tuner.When you start the TV for the first time, the first time setup will appear. You can select a language and country by using the left/right arrow buttons.After making the settings, press the OK button. The auto-tuning menu screen appears.
Select a tuning mode: OW (digital TV), ATV (analog TV), or both.Then select a digital tuning mode: DVB-T for terrestrial (if you have your own antenna on the roof), DVB-C (if you have digital cable TV, and you need to know the DVB-C information from your cable provider), or DVB-S (if you have a satellite dish).If selecting DVB-T, you can just make an auto scan, and it will scan all available channels.If selecting DVB-C, you can use either full scan or network scan (some countries demand this), and input Network ID, Frequency, Symbol rate, and LCN on/ off.If selecting DVB-S, you have to know what satellite your dish is pointing towards and select this option in the setup menu.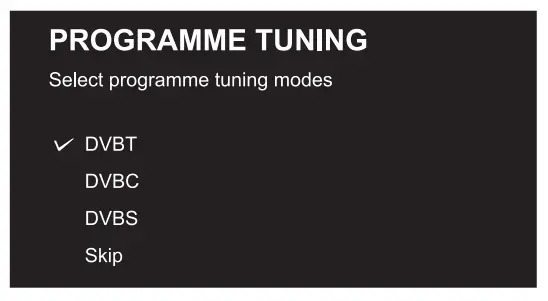 The TV has a common interface+ input. This allows you to insert a CA module from your TV/cable provider to watch pay-to-view channels and selectable channels outside of your package.Read the instructions shown on the back of the Non how to insert a CA module.
Streaming

Press ![]() the button on the remote control to display the home menu. Use the arrow buttons to select an item or app on the home menu then press OK. You may also press the hotkey on the remote control to access the desired app directly.Network Settings
the button on the remote control to display the home menu. Use the arrow buttons to select an item or app on the home menu then press OK. You may also press the hotkey on the remote control to access the desired app directly.Network Settings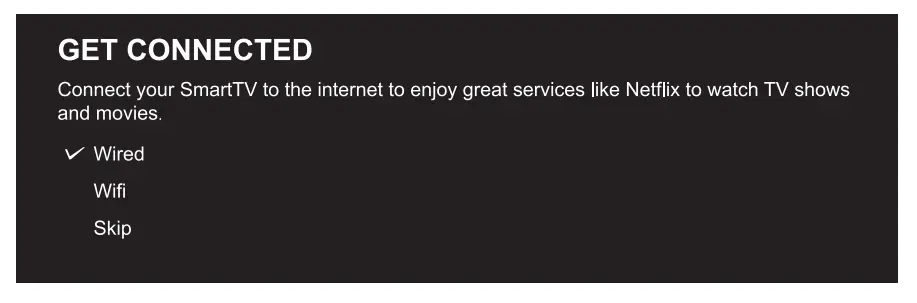 Select wired, wifi, or skip this step.Attaching the standThe pictures below are only for reference.
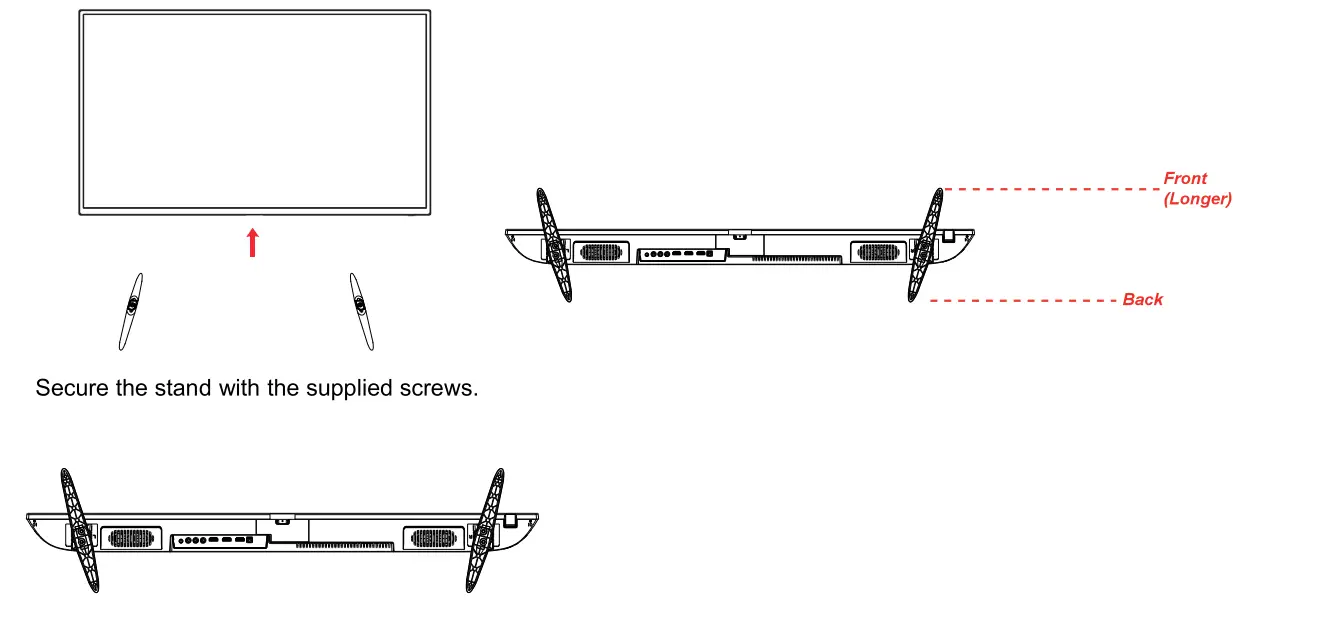
- The supplied accessories for attaching the stand to the TV
 Before installing the stand, please check that you have all of the parts and that there is no visible damage. If a part is missing or appears damaged, please contact customer service.
 - How to install the stand?Place the TV face down on a soft and flat surface (e.g. blanket, foam, cloth, etc.) to prevent any damage to the N.Attach the stand to the bottom of the TV as shown below.Before you put it on the stand, please make sure the direction Is correct as shown below.When you are putting it on the stand. please make sure the neck of the IV set is in the correct position and attached tightly. If you do not attach the stand correctly if will make the TV unstable and may tip over.When attaching the stand. make sure the screws are attached tightly.if the screws do not attach tightly, it will lead the TV to be unstable or may oven tip over.
- Warnings.a. Do not tilt the stand forward or backward as shown below. Doing so may damage the stand.b. Do not tilt the stand leftward or rightward as shown below. Doing so may damage the stand.

 b. Do not tilt the stand leftward or rightward as shown below. Doing so may damage the stand.
Please notice – All products are subject to change without any notice. We take reservations for errors and omissions in the manual.
ALL RIGHTS RESERVED, COP YRJGHT DENVER ELECTRONICS A/Swww.denver-electronics.com
 report this ad
Electric and electronic equipment and included batteries contain materials, components, and substances that can be hazardous to your health and the environment if the waste material (discarded electric and electronic equipment and batteries) is not handled correctly.Electric and electronic equipment and batteries are marked with the crossed-out trash can symbol, seen below. This symbol signifies that electric and electronic equipment and batteries should not be disposed of with other household waste, but should be disposed of separately.As the end-user, it is important that you submit your used batteries to the appropriate and designated facility. In this manner, you make sure that the batteries are recycled in accordance with the legislature and will not harm the environment.All cities have established collection points, where electric and electronic equipment and batteries can either be submitted free of charge at recycling stations and other collection sites or be collected from households. Additional information is available at the technical department of your city.Hereby, Inter Sales NS, declares that this model DENVER LDS- 5071 is in compliance with the essential requirements and other relevant provisions of Directive 2014/53/EU. A copy of the Declaration of Conformity may be obtained at: www.denver-electronics.com and then click the search ICON on the top line of the website. Write model number: LDS- 5071. Now enter product page, and red directive is found under downloads/other downloadsOperating Frequency Range: (VHF)174-230MHz ; (UHF)474-862MHz Max Output Power: 130WWI-Fl Frequency: 2.4GHZ – 2.4835 GHz
DENVER ELECTRONICS NSOmega 5A, SoeflenDK-8382 HinnerupDenmarkwww.facebook.com/denverelectronics
[xyz-ips snippet=”download-snippet”]