HIKVISION Configure Automation Device in AX PRO Wireless Control Panel Instructions
Preparation
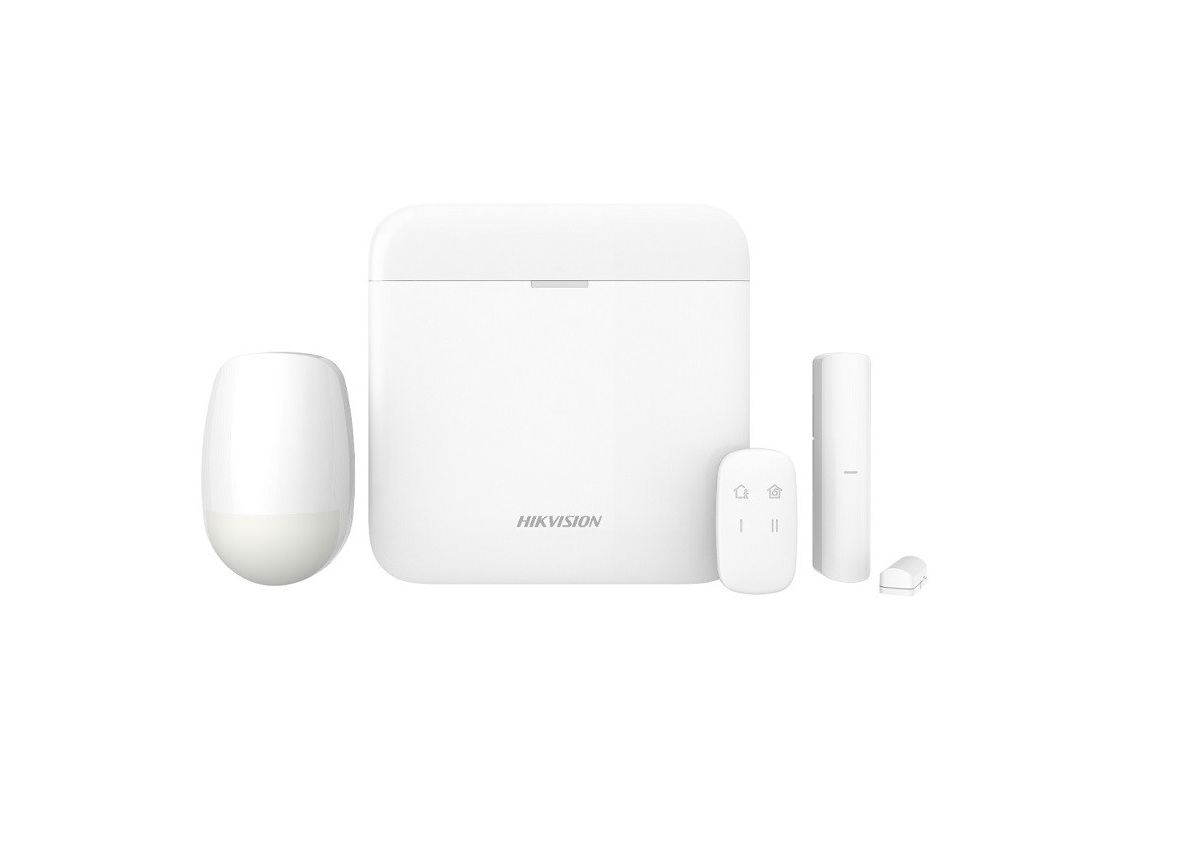
- DS-PWA Series AX PRO Wireless Security Control Panel
- Automation Device(Relay Module) DS-PM1-O1L-WE and Wireless Keyfob
- IE Browser and Hik-Connect App
How to Configure Automation Device in AX PRO Wireless Control Panel
Use Event Type to Control Automation Device
- Add the Automation Device to AX PRO at first
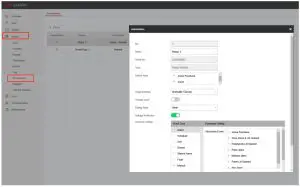
- Login AX PRO, select Device—Automation—Configuration

- Configure Original Status—Normal Open or Normal Close
- Configure Tamper Input: If third part device Tamper signal is connected, you can enable this function. Need select Tamper input Status(NO or NC)
- Configure Event linkage
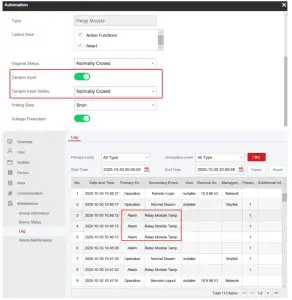
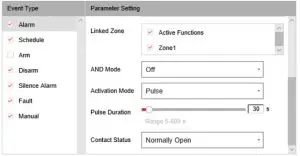
Note: AND Mode means only all zone triggered, then relay will output
Schedule: Configured time period, the Automation Device will be normal open or normal close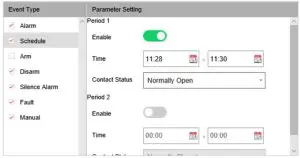
Disarm: Disarm Event will link the Automation Device open or close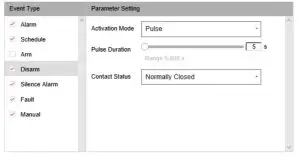
Silence Alarm: Silence Alarm Event will link the Automation Device open or close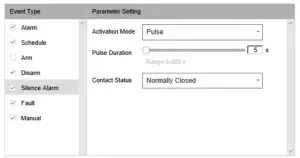
Fault: System Fault Event will link the Automation Device open or close
Manual: You can manually control the Automation Device open or close in Hik connect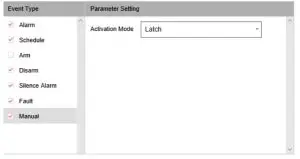
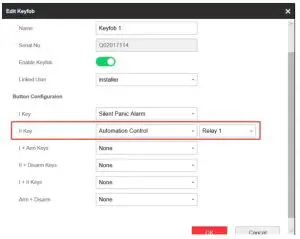
Use Keyfob to control Automation Device
- Add the Automation Device and wireless keyfob to AX PRO at first
- Configure Keyfob Button linkage to Automation Control, and select the relay number.
- Configure Automation Control Device Event Type—Manual, select Activation Mode and Pulse Duration.
Activation ModePulse: Relay output for a short time period and then stopLatch: Relay output continuously
[xyz-ips snippet=”download-snippet”]