![]()
HALOWI-Fl TOUCHSCREEN SMART LOCK67609-002Rev 02Kwikset1-800-327-5625www.kwikset.com
Installation and User Guide
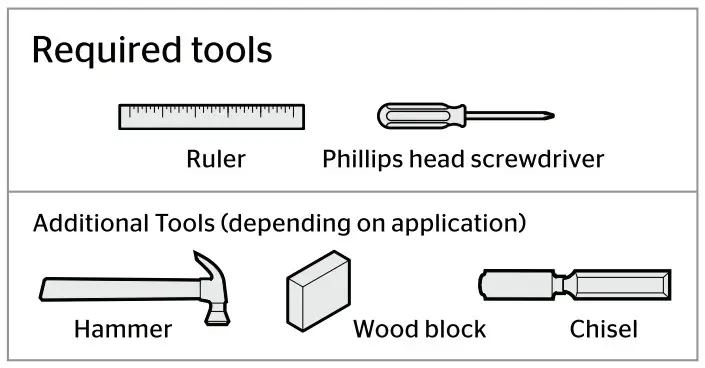
Prepare the door and check dimensions
If drilling a new door, use the supplied template and the complete door drilling instructions available at kwikset.com/doorprep
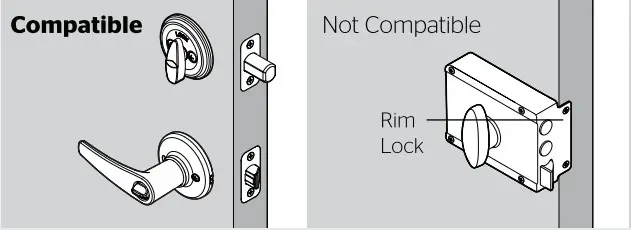
A. Make sure your door is compatible. If you have a standard deadbolt mounted separately from the handle below it, your door is compatible.
 |
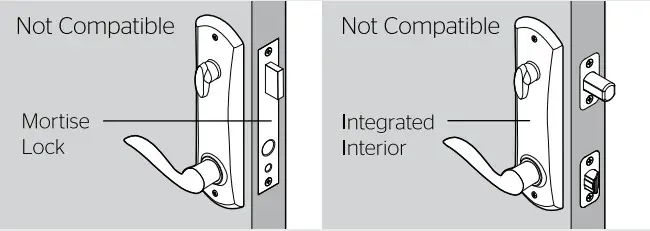 |
B. Remove your existing deadbolt from your door.
C Measure to confirm that the hole in the door is either 2-1/8″ (54 mm) or 1-1/2″ (38 mm).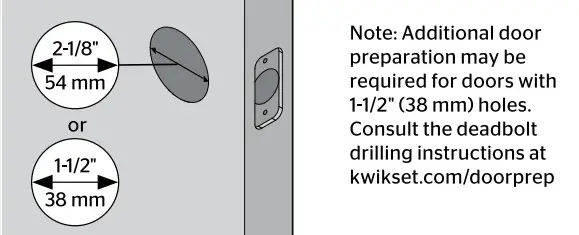 D Measure to confirm that the backset is either 2-3/8″ or 2-3/4″ (60 or 70 mm).
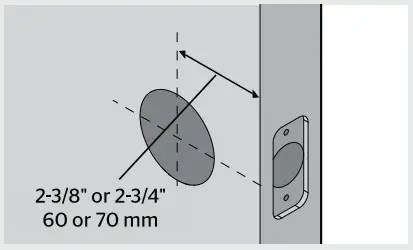 E Measure to confirm that the hole in the door edge is 1″ (25 mm).
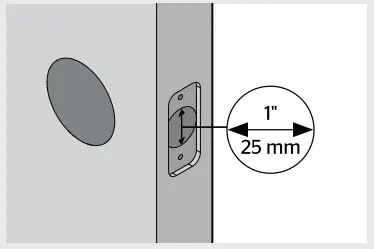 F Measure to confirm that the door is between 1-3/8″ and 2″ (35 mm and 51 mm) thick.
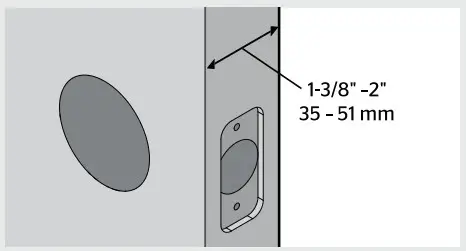
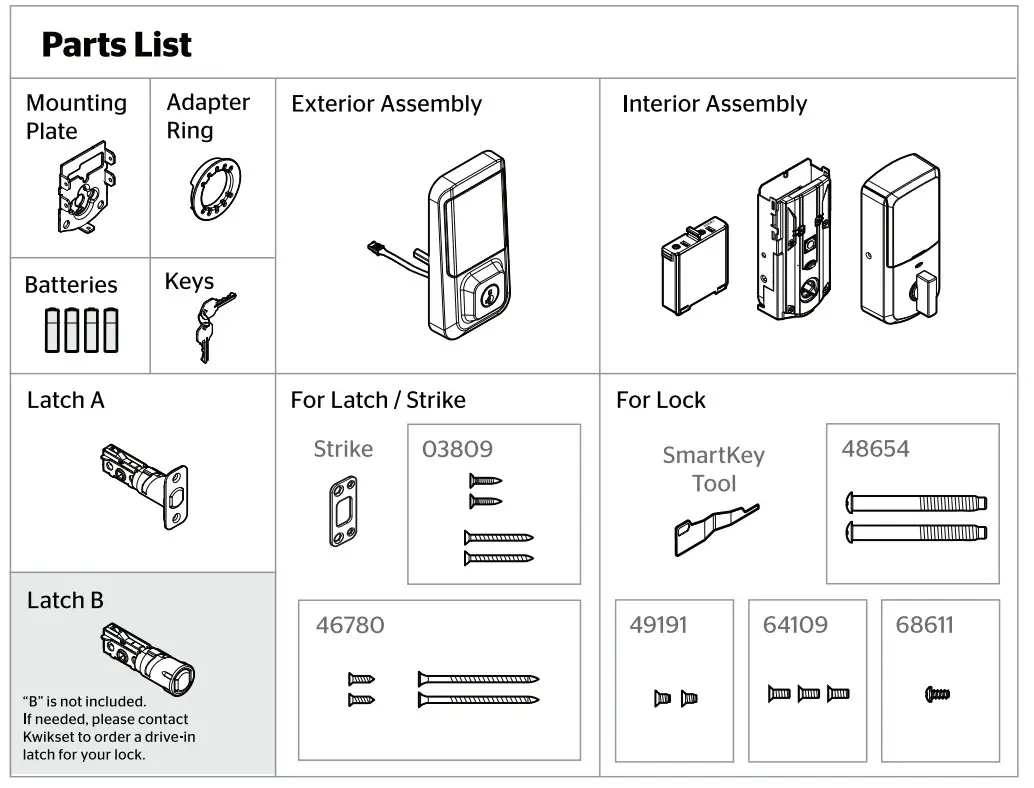
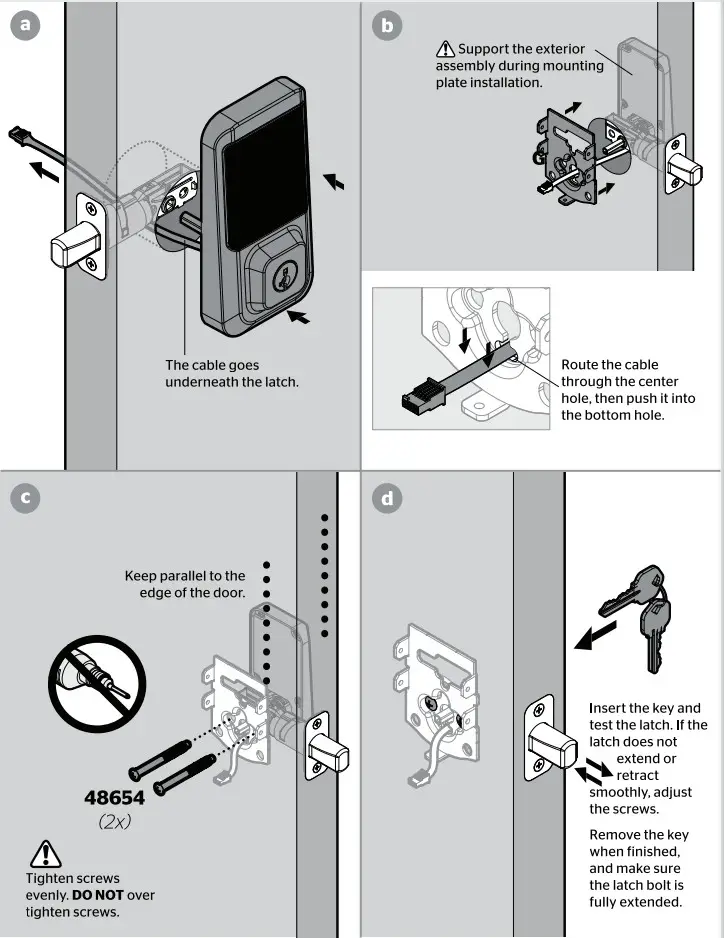
Install the latch and strike
For Latch / Strike Bag A Is the door edge chiseled?
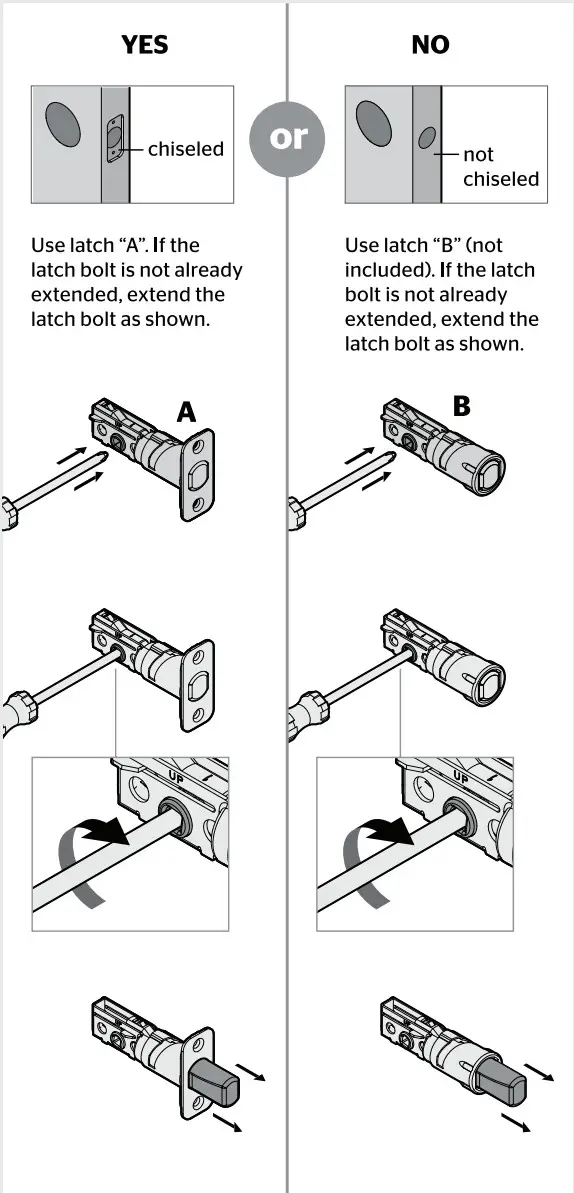 B Hold the latch in front of the door hole, with the latch face flush against the door edge.
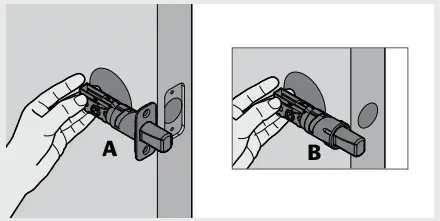 C Is the D-shaped hole centered in the door hole?
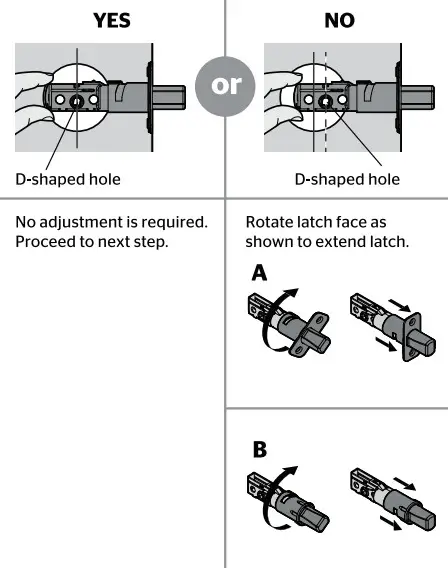 D Which latch are you installing?
E Install the strike on the door frame. Make sure the hole in the door frame has drilled a minimum of ‘I” (25 mm) deep.
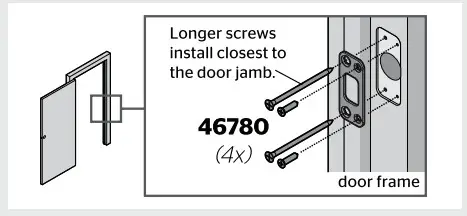
Install the exterior keypad
For LOCK Bag A What is the diameter of the hole in the door?
B Locate the screws for step 3D and keep them within reach. C Remove the mounting plate from the interior assembly.
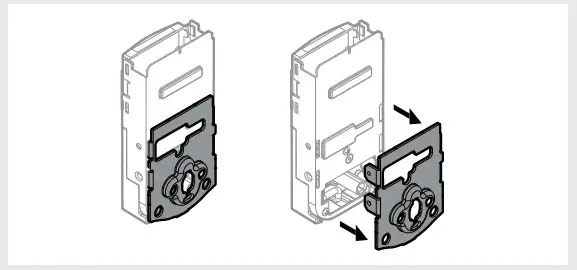
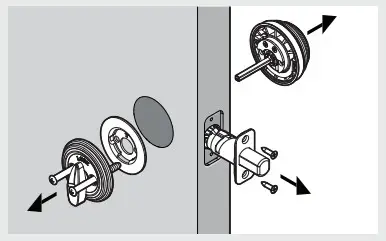
D Install the exterior keypad and mounting plate. Install the interior assembly
 Install the interior assembly
For Lock Bag A Ensure the turn piece shaft is pointing up, and remove the interior cover and battery pack from the interior assembly.
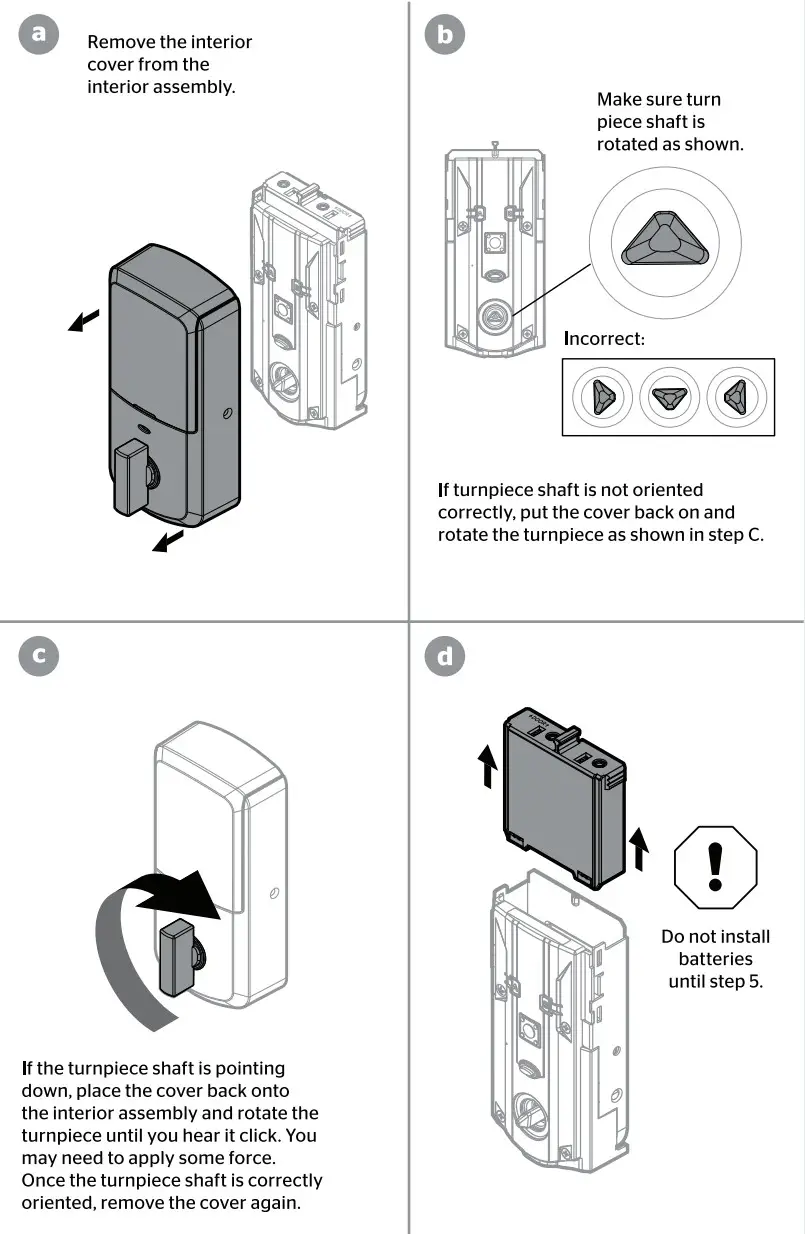
B Install the interior assembly onto the mounting plate.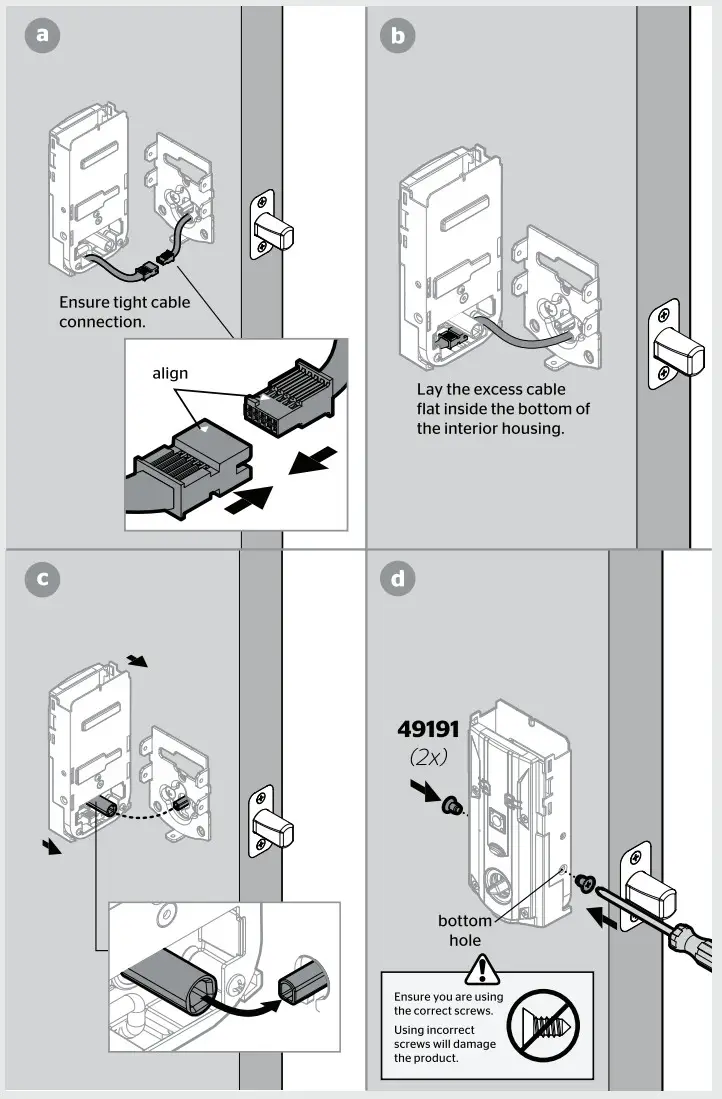
Install the batteries and perform the door handing process
This step will teach your lock the orientation of your door and is crucial to lock operation.
A Install 4 AA batteries in the battery pack.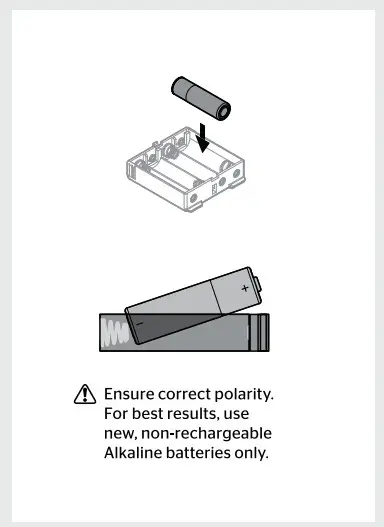 B With the door open, install the battery pack to initiate auto-handing.
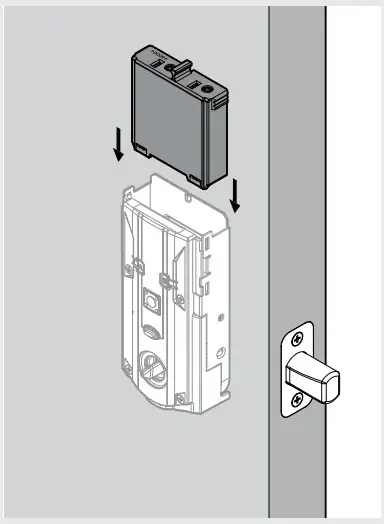
C After a few seconds, the latch bolt will retract and extend on its own to learn the orientation of the door. This is called the door handing process, and it is crucial to lock operation.

Test the lock and check door alignment
A With the door open, insert the key to extend the latch. Ensure that the latch extends smoothly. B Turn the key 180° to retract the latch. Ensure that the latch retracts smoothly.
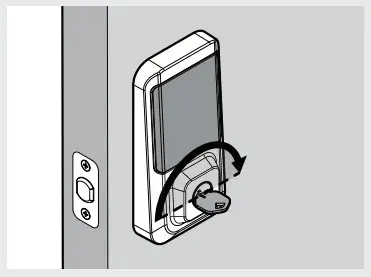 C Close the door. Insert and rotate the key to lock the door. Ensure that the door locks smoothly.
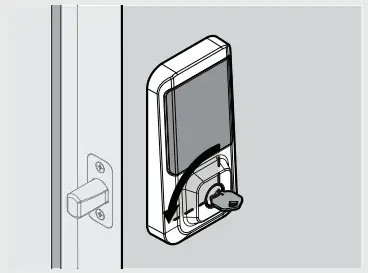 D Turn the key 180° to retract the latch. Ensure that the door unlocks smoothly.
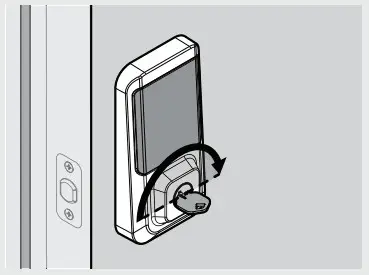
If your door does not lock and unlock smoothly, make sure you replaced your previous latch and strike with those supplied in the box. If you still experience locking errors, call Kwikset Support to order a Warped Door Service Kit.
Kwikset Support: 1-800-327-5625
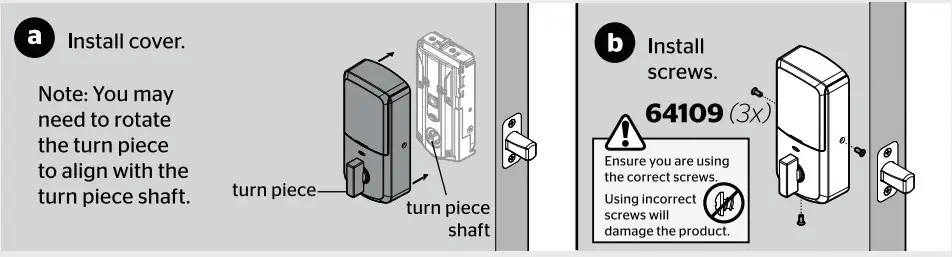
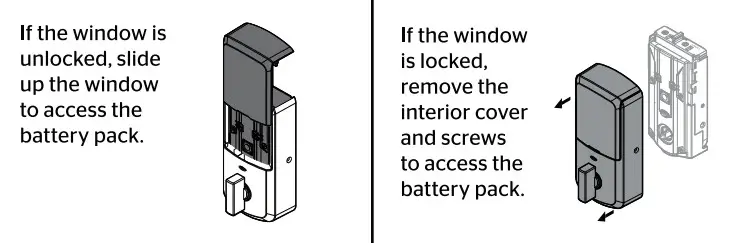
Install the interior cover
Important Information about the interior cover
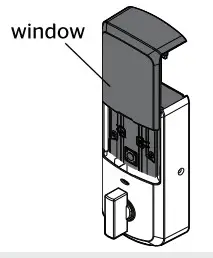 |
The window on the interior cover is unlocked by default for easier access to the battery pack and buttons. |
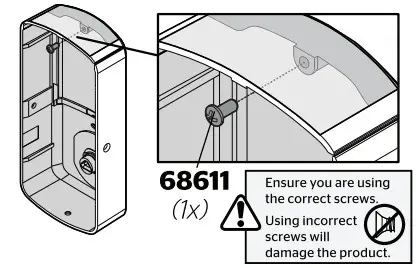 |
For additional security, you may choose to lock the window by installing the security screw. |
 |
When the window is locked, you will need to remove the entire interior cover and screws to access the battery pack and buttons. |
Cover Installation
Battery Pack Access
Download the app and create an account
 Download the app and create an account
 The Kwikset app is needed to use this lock. If this lock was professionally installed (or installed by someone other than the homeowner), make sure this step is performed by the homeowner.
a Download the Kwikset app by scanning the QR code or visiting www.kwikset.com/app on your smartphone. b Create your account and follow the setup instructions in the Kwikset app.
Reference Guide
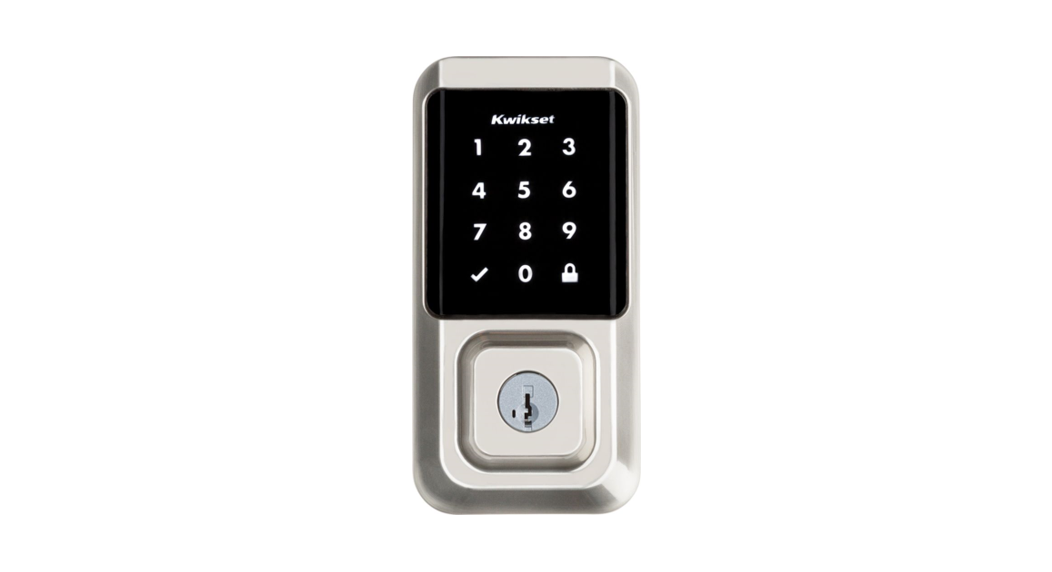
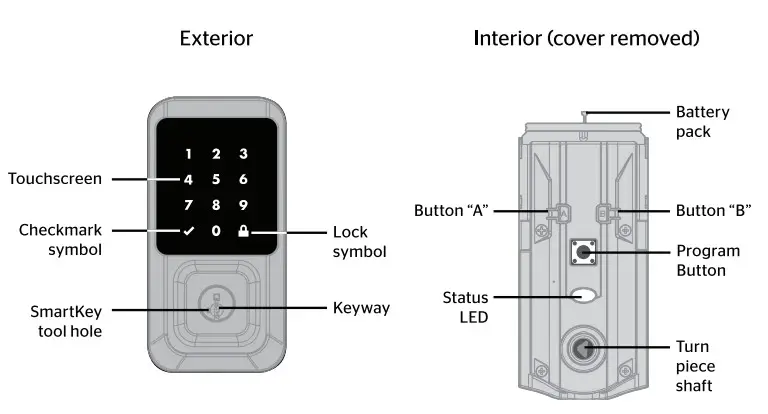
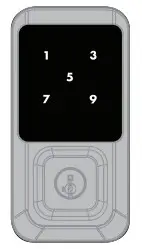
Halo Touchscreen at a Glance
System Alerts
| Display | Alert | Reason | Solution |
 |
“X” pattern flashes once with one beep*. | One incorrect code was entered. | Re-enter code. |
| “X” pattern flashes
three times with three beeps*. |
No user code programmed. | Program at least one user code. | |
| “X” pattern flashes red 15 times with 15 beeps* | Three incorrect codes were entered. | Re-enter code after 60-second keypad lockout. | |
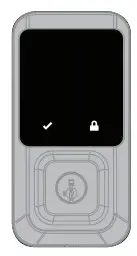 |
Checkmark and lock symbols flash simultaneously five times with five beeps*. | Low battery. | Replace batteries. |
| Checkmark and lock symbols alternate flashing five times with five beeps*. | The door jammed while attempting to lock. | Manually re-lock door. If needed, reposition strike. | |
| N/A | Lock beeps continuously. | Interior assembly is disconnected from the exterior. | Remove the battery pack, reconnect the interior to the exterior, then reinstall the battery pack. |
*Beeping sounds will only be heard if Lock Sounds have not been disabled in the app.
Status LED colors
These features can be adjusted in some smart home apps.
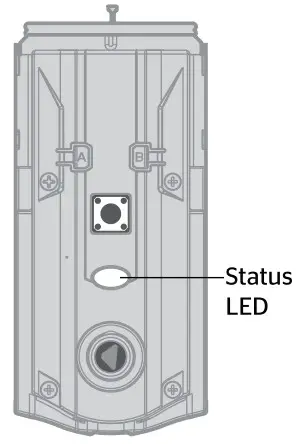
| Color | Lock Status |
| Green (solid) | Action successful |
| Green (blinking) | Unlocked |
| Red (solid) | The door handing process unsuccessful |
| Red (blinking) | Action unsuccessful or incomplete |
| Low battery | |
| Blue (solid) | Bluetooth Pairing successful |
| Blue (blinking) | Bluetooth Pairing Mode |
| Amber (solid) | Entering Network Reset mode |
| Amber (blinking) | Network or System Reset mode. Action required. |
| Locked |
Manual Door Handing
If needed, the door handing process can be initiated manually. This is useful if the lock is being moved to a different door.
1 Remove the battery pack.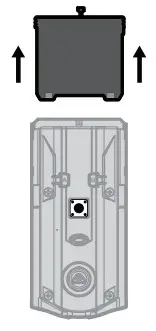 |
2 Press and HOLD the Program button while reinserting the battery pack. Release the Program button after 3 seconds. The status LED will flash red and green.
|
3 Press the Program button once more.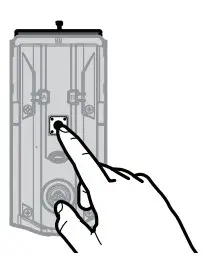 |
4 The latch bolt will extend and retract to learn the orientation of the door. The LED will flash green if handing is successful or red if handing is unsuccessful. |
Network Reset
Network Reset will delete all Wi-Fi settings, Bluetooth pairings, user associations, and remove the lock from the account.
1 Press and HOLD “A” for 10 seconds. You will hear 1 short beep and see an amber LED.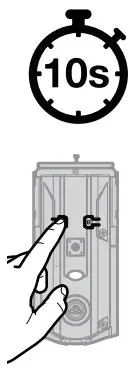 Note: After 3 seconds, you will hear 1 short beep and see a blue LED. You should continue to hold “A” to enter the network reset mode. Note: After 3 seconds, you will hear 1 short beep and see a blue LED. You should continue to hold “A” to enter the network reset mode. |
2 Release “A.” You will see a blinking amber LED to indicate it is in-network reset mode.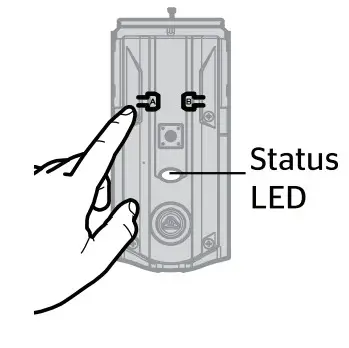 |
| 3 Press and release the Program button to confirm network reset.
|
4 If successful, you will hear 1 long beep and see a green LED. If unsuccessful, you will hear 5 rapid beeps and see a blinking red LED. If unsuccessful, repeat step 1.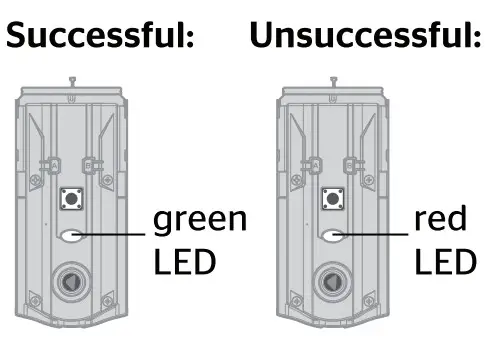 |
System Reset
System Reset will delete all access codes and lock settings including lock handing. The lock will run the handing process at the end of the System Reset.
1 Press “A” 10 times. You will hear 1 short beep and see a blinking amber LED to indicate it is in system reset mode. |
2 Press and release the Program button to confirm system reset.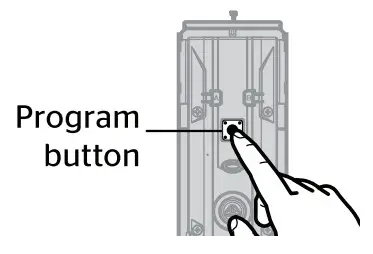 |
| 3 If successful, you will hear 1 long beep and see a green LED, and the reset process will begin. During the reset process, the LED will blink green/red a few times and will beep when complete.
If unsuccessful, you will hear 5 rapid beeps and see a blinking red LED. If unsuccessful, repeat step 1. |
|
Factory Reset
Factory Reset will delete all Wi-Fi settings, Bluetooth pairings, user associations, remove the lock from the account, and reset all lock settings including handing.
| 1 Remove the battery pack. |
2 Press and HOLD the Program button while reinserting the battery pack. Keep holding the button for 30 seconds until the lock beeps and the status LED flashes red.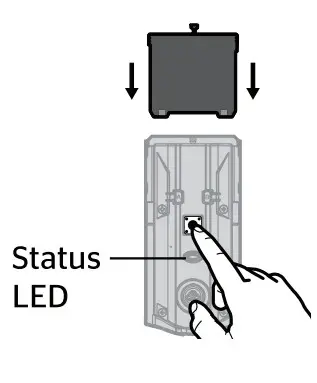 |
| 3 Press the Program button once more. The LED will flash green and red, and the auto-handing process will begin. |
4 The latch will retract and extend to learn the orientation of the door. The LED will flash green if auto-handing is successful or red if auto-handing is unsuccessful. |
Troubleshooting
A complete Halo Touchscreen Programming and Troubleshooting Guide is available at www.kwikset.com/halo/support
SmartKey Re-Keying
 report this ad
Re-key the lock to work with your existing key. See the supplied SmartKey Re-key instructions for more information.Note: If Auto-Lock is enabled, remove the battery pack before re-keying your lock.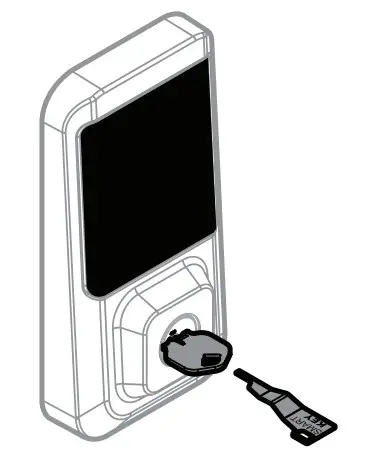
Important Safeguards
- Read all instructions in their entirety.
- Familiarize yourself with all warning and caution statements.
- Remind all family members of safety precautions.
- Protect your user codes.
- Dispose of used batteries according to local laws and regulations.
WARNING: This Manufacturer advises that no lock can provide complete security by itself. This lock may be defeated by forcible or technical means or evaded by entry elsewhere on the property. No lock can substitute for caution, awareness of your environment, and common sense. Builder’s hardware is available in multiple performance grades to suit the application. In order to enhance security and reduce risk, you should consult a qualified locksmith or other security professional.
© 2020 Spectrum Brands, Inc.
[xyz-ips snippet=”download-snippet”]