
![]()
![]()
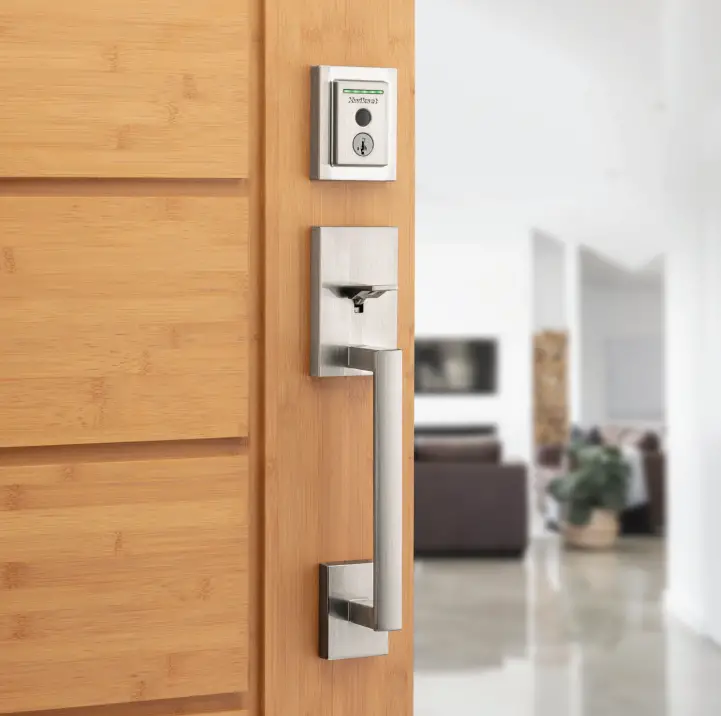
 Installation and Reference Guide
Welcome to the Kwikset family!This guide will get you up and running with your new Halo Touch Fingerprint Smart Lock.If you have any issues, please visit our support center: kwikset.com/halo-touch or call us at 1-800-327-5625.
Getting started
For an interactive version of this installation guide, please download the Kwikset app:

Parts in the box


Installation
Remove your existing deadbolt
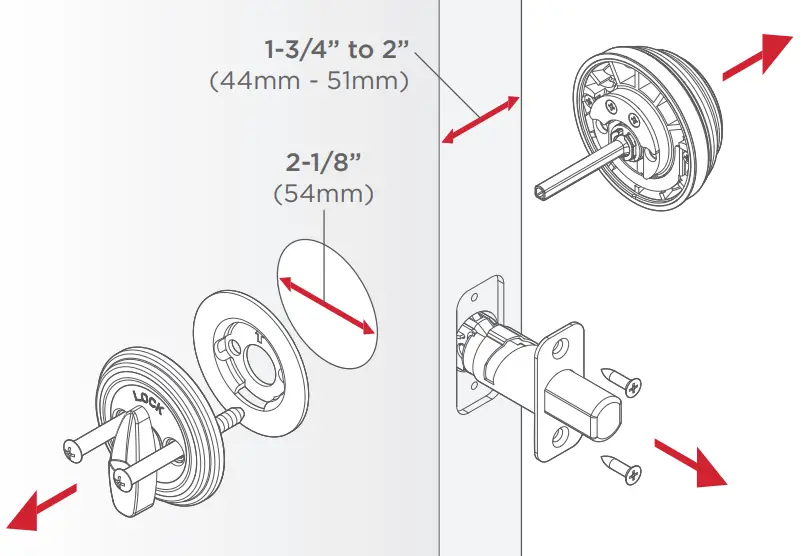
If drilling a new door, use the supplied template and instructions available at:

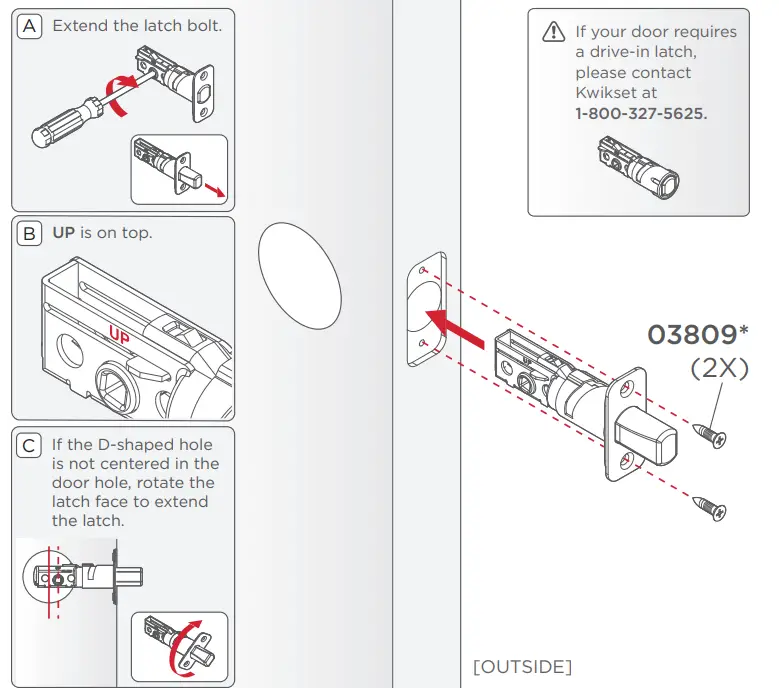
- Install the latch

- Install the strike
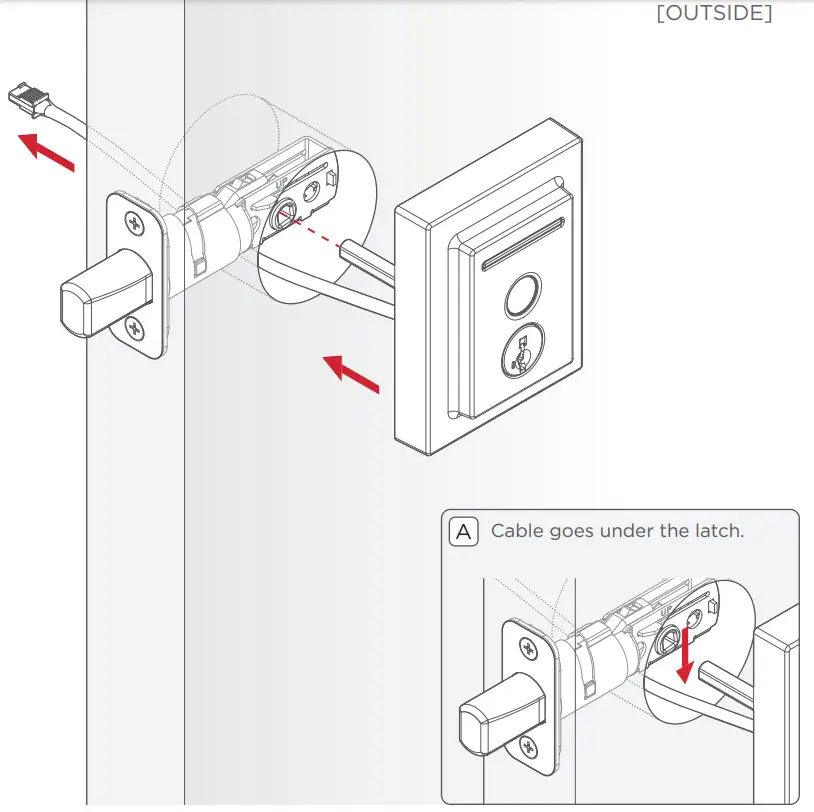
- Install the exterior assembly
- Install the interior assembly
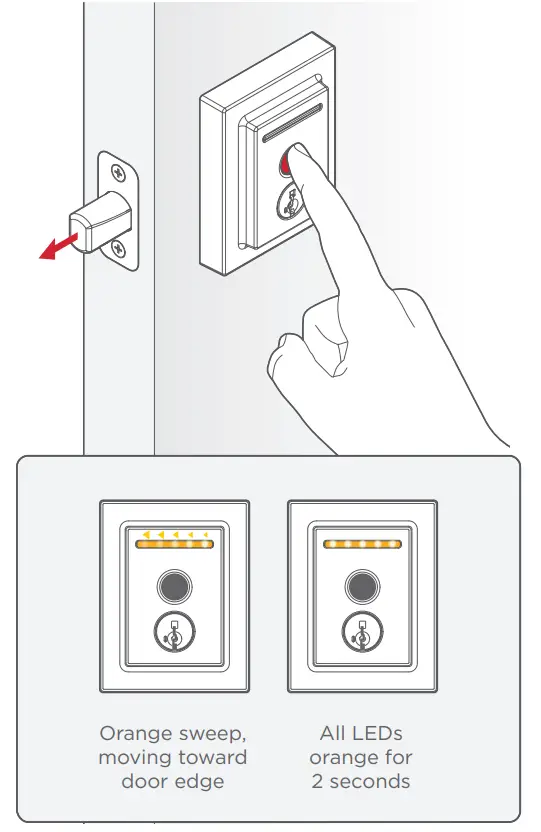
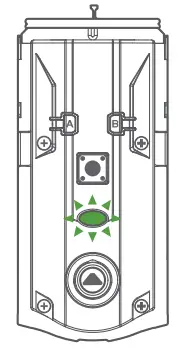
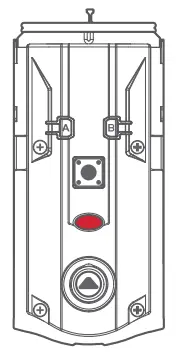
- Perform the door handing processGREEN: Successful. Proceed to the next step.RED: Unsuccessful. Make sure the lock interior and batteries are correctly installed. Perform step 5 again. If your second attempt is still unsuccessful, follow the Manual Door Handing instructions.

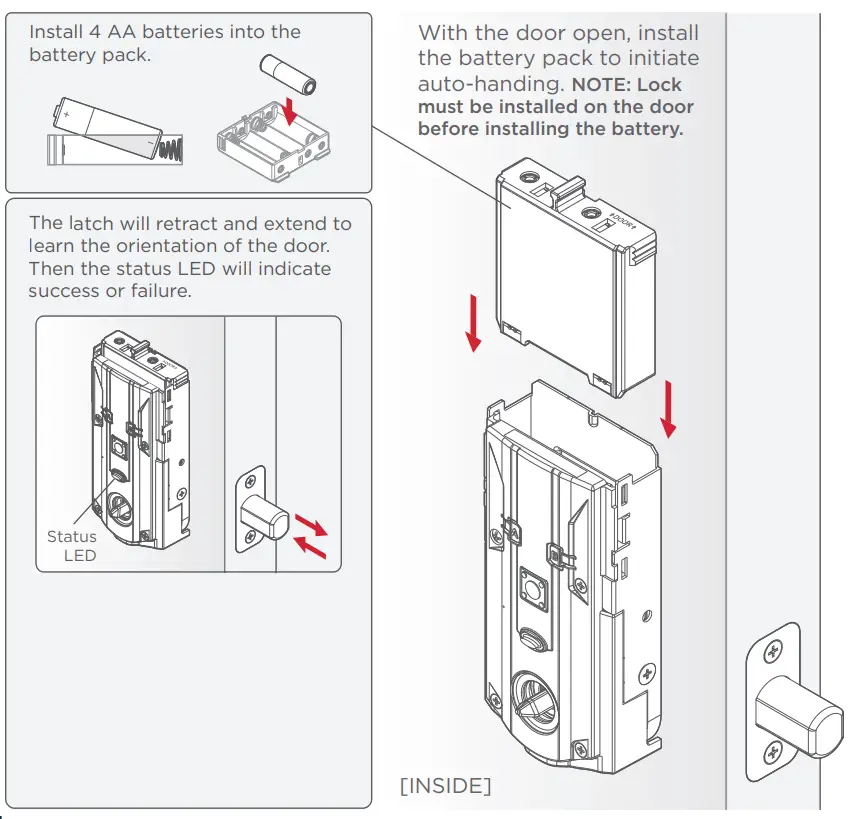
 Install the interior assembly
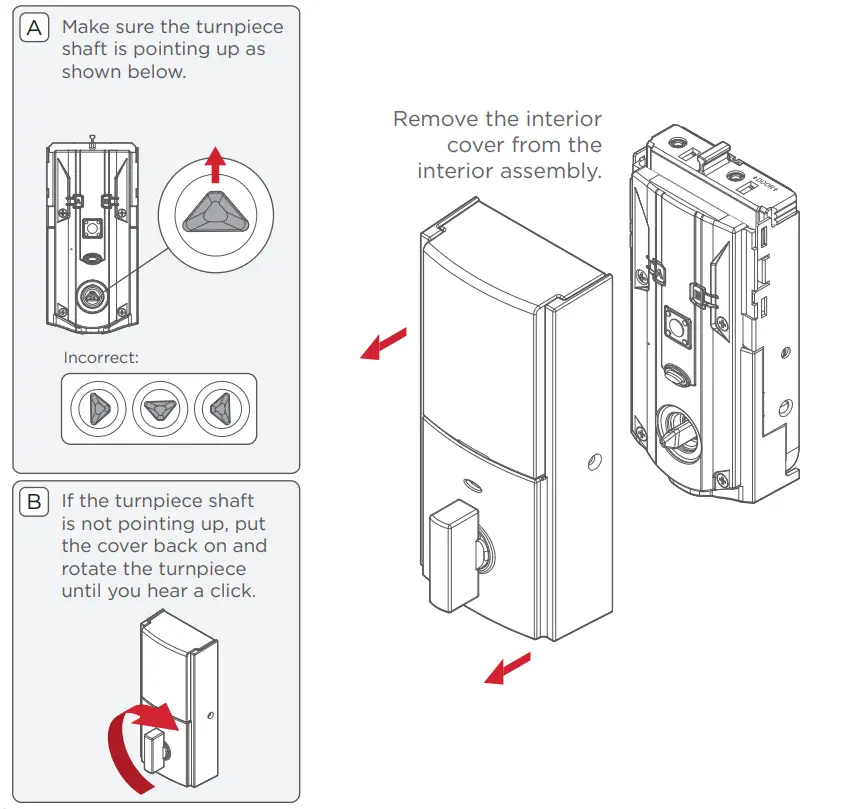

 GREEN: Successful. Proceed to the next step.RED: Unsuccessful. Make sure the lock interior and batteries are correctly installed. Perform step 5 again. If your second attempt is still unsuccessful, follow the Manual Door Handing instructions.
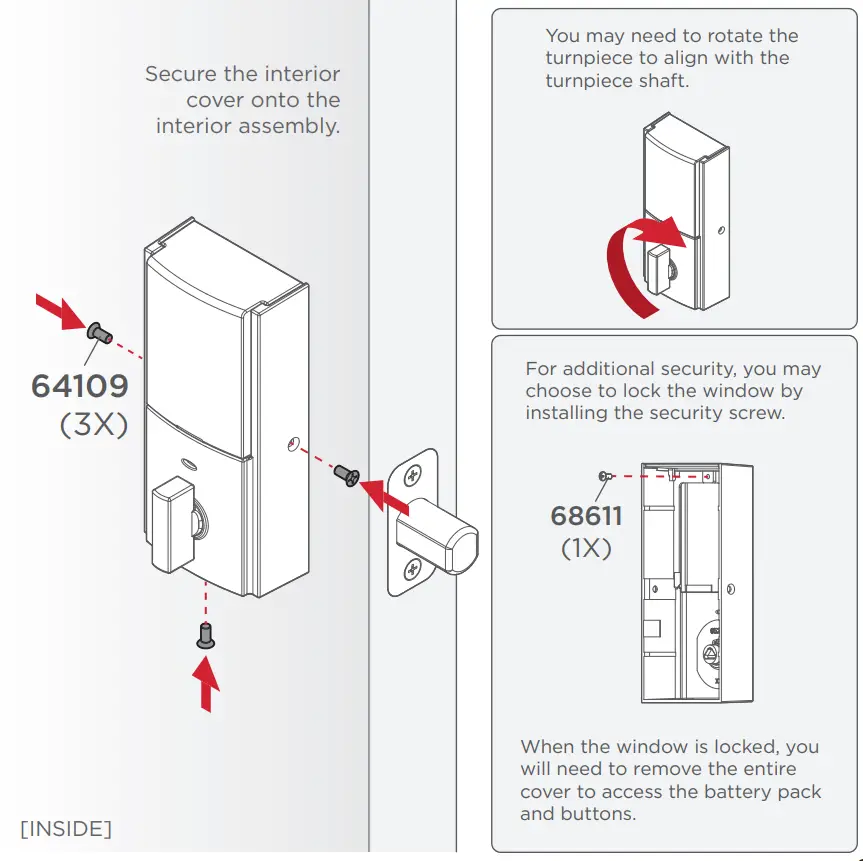
Download the app & create an account
Create your account
Follow the setup instructions in the Kwikset app to create your account:
![]() The Kwikset app is needed to use this lock. If this lock was professionally installed (or installed by someone other than the homeowner), make sure this step is performed by the homeowner.
The Kwikset app is needed to use this lock. If this lock was professionally installed (or installed by someone other than the homeowner), make sure this step is performed by the homeowner.
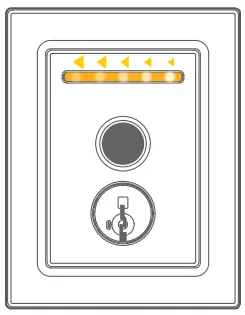
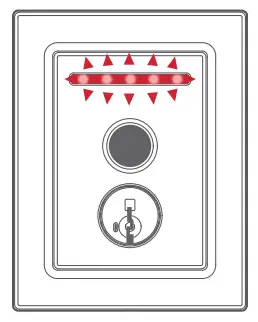
Reference GuideLockingTo lock your door, place any finger on the fingerprint sensor. The light bar will display the following animations, beep once, and the door will lock.
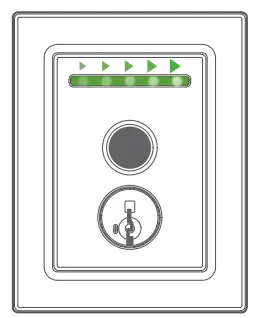
UnlockingTo unlock your door, place your enrolled finger on the fingerprint sensor. The light bar will display the following animations, beep once, and the door will unlock.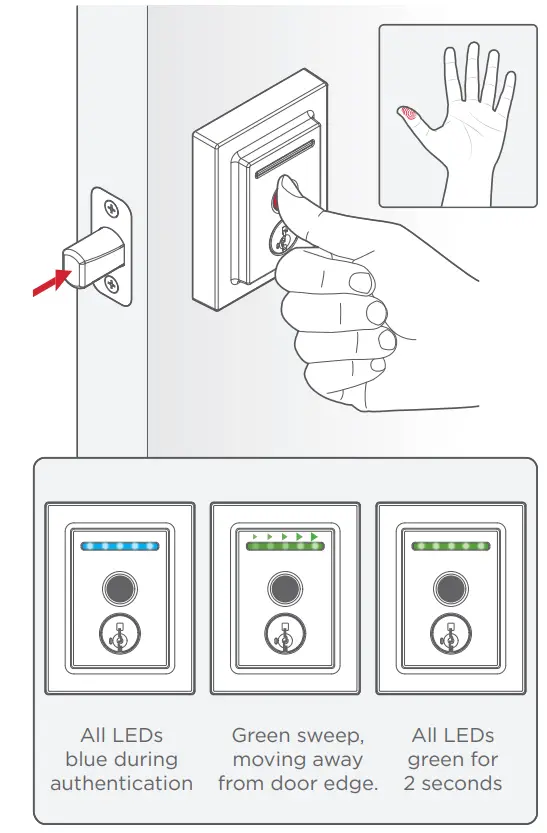 Enabling Amazon AlexaFollow the setup instructions to enable Amazon Alexa:

Enabling Google AssistantFollow the setup instructions to enable Google Assistant:

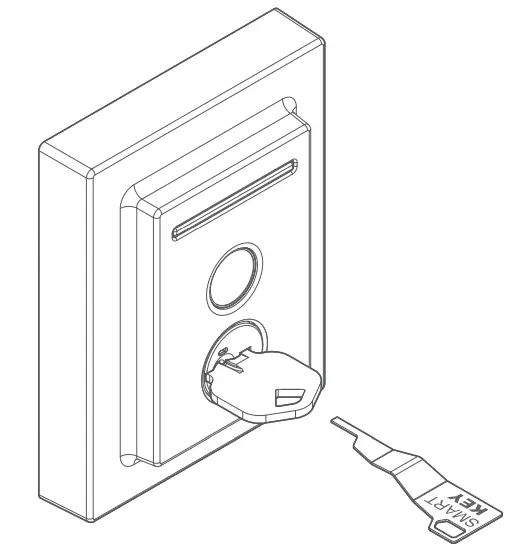
SmartKey Re-key
Re-key the lock to work with your existing key by following the SmartKey Re-key instructions.NOTE: If Auto-Lock is enabled, remove the battery pack before re-keying your lock.
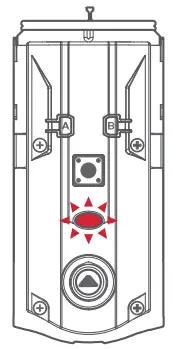
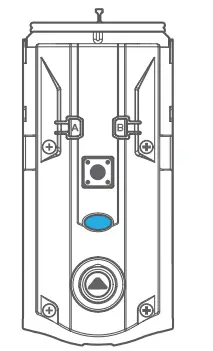
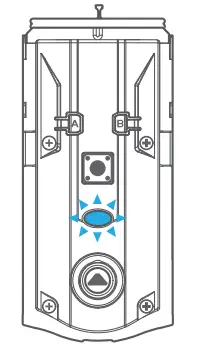
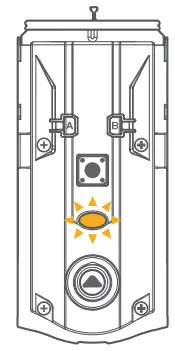
Exterior LED Indicators
| Orange:Locking | Green:Unlocking |
 |
 |
| Blue:Authenticating fingerprint | Red:Low battery or door jam |
 |
 |
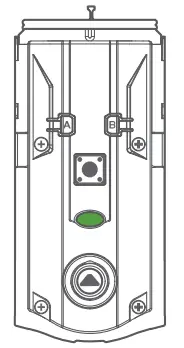
Interior LED Indicators
| Green | Red | ||
| Solid:Action successful | Blinking:Unlocked | Solid:Door handingunsuccessful | Blinking:Low battery oraction unsuccessful |
 |
 |
 |
 |
| Blue | Orange | ||
| Solid:Bluetooth pairingsuccessful | Blinking:Bluetooth pairingmode | Solid:Entering networkreset mode | Blinking:Locked or network/system mode |
 |
 |
 |
 |
Device CompatibilityPlease see the Device Compatibility list to see if your device is compatible.

Router CompatibilityPlease see the Router Compatibility list to see if your router is compatible.

NOTE: Halo Touch implements a standard-based Wi-Fi radio and should work with majority of the routers available in the market that are Wi-Fi certified.
Manual Door HandingIf needed, the door handing process can be initiated manually.This is useful if the lock is being moved to a different door.
1. Remove battery pack. |
2. Press and HOLD the Program button while reinserting the battery pack. Release the Program button after 3 seconds. The status LED will flash red and green.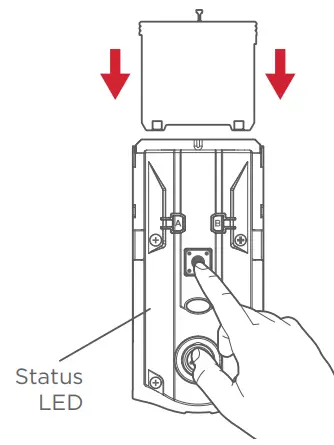 |
3. Press the Program button once more.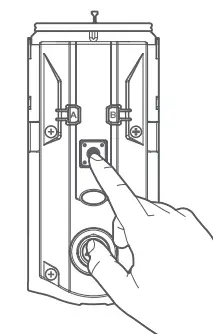 |
4. The latch bolt will extend and retract to learn the orientation of the door. The LED will flash green if handing is successful or red if handing is unsuccessful. |
Factory Reset
Factory Reset will:
- delete all Wi-Fi settings
- delete user associations
- reset all lock settings including handing
- delete access codes and event history from the lock. Note: They will still appear in the app and cloud until the lock is deleted from the app.
Factory reset should be used when:
- you want to change the lock owner
- you have lost your phone
- you are troubleshooting on a new installation
| 1. Delete the lock from the Kwikset app. | 2. Remove the lock from the Bluetooth list on your device by tapping “Forget Device” in the Bluetooth settings. |
3. Remove the battery pack.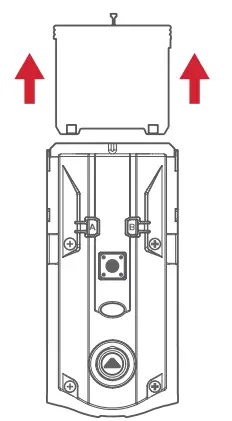 |
4. Press and HOLD the Program button while reinserting the battery pack. Keep holding the button for 30 seconds or until the lock beeps and the status LED flashes red. Then release the Program button. |
5. After the beeping stops, press and release the Program button once more. The LED will flash green and red, and the auto-handling process will begin. Note: It can take a few seconds for the handing to start.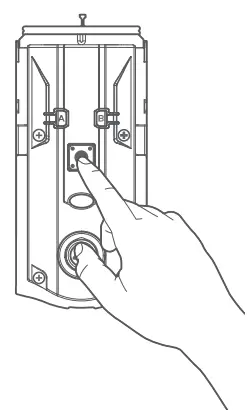 |
6. The latch will retract and extend to learn the orientation of the door. This confirms the Factory Reset has been completed. The LED will flash green if auto-handing is successful or red if auto-handing is unsuccessful. If the Factory Reset is not successful, perform the steps again until the LED flashes green and red. |
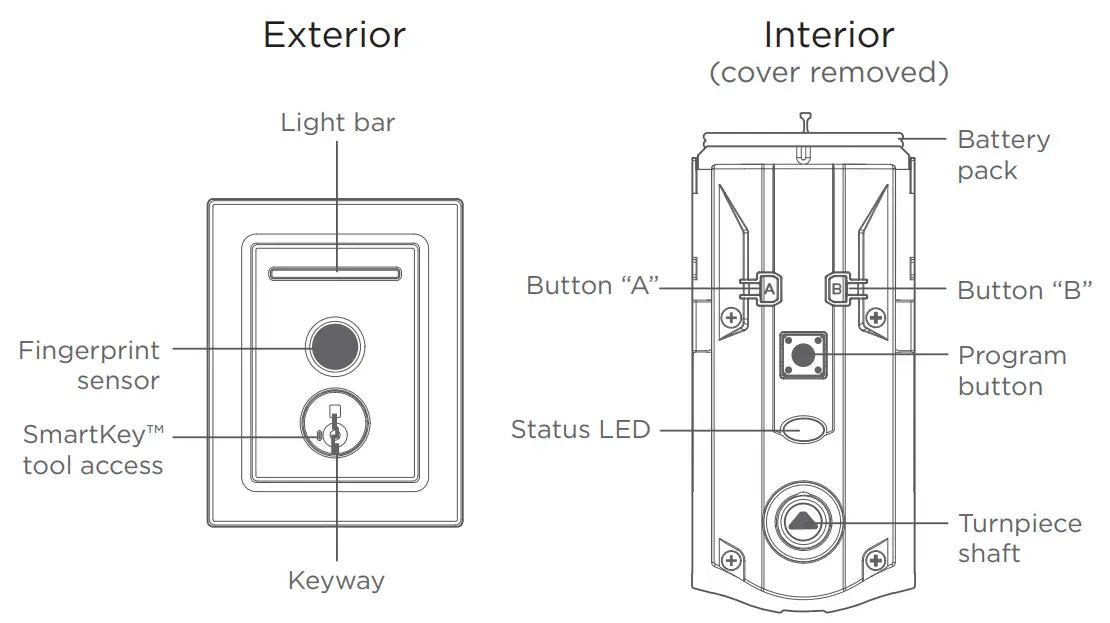
Halo Touch at a Glance
Troubleshooting
If you have any issues, please visit our support center: kwikset.com/halo-touch or call us at 1-800-327-5625.

Important Safeguards
- Read all instructions in their entirety.
- Familiarize yourself with all warning and caution statements.
- Remind all family members of safety precautions.
- Always have access to your lock’s standard key.
- If using the Auto-Lock features, make sure you have your smartphone or standard key with you to prevent locking yourself out.
- Familiarize yourself with all light bar error notifications.
- Replace low batteries immediately.
- Dispose of used batteries according to local laws and regulations.
![]() WARNING: This Manufacturer advises that no lock can provide complete security by itself. This lock may be defeated by forcible or technical means or evaded by entry elsewhere on the property. No lock can substitute for caution, awareness of your environment, and common sense. Builder’s hardware is available in multiple performance grades to suit the application. In order to enhance security and reduce risk, you should consult a qualified locksmith or other security professional.
WARNING: This Manufacturer advises that no lock can provide complete security by itself. This lock may be defeated by forcible or technical means or evaded by entry elsewhere on the property. No lock can substitute for caution, awareness of your environment, and common sense. Builder’s hardware is available in multiple performance grades to suit the application. In order to enhance security and reduce risk, you should consult a qualified locksmith or other security professional.
Regulatory Compliance
 report this ad
This product complies with standards established by the following regulatory bodies:
- Federal Communications Commission (FCC)
- Industry Canada
FCCThis device complies with Part 15 of the FCC Rules. Operation is subject to the following two conditions: ( 1 ) this device may not cause harmful interference, and ( 2 ) this device must accept any interference received, including interference that may cause undesired operation. This equipment has been tested and found to comply with the limits for Class B digital devices, pursuant to Part 15 of the FCC Rules. These limits are designed to provide reasonable protection against harmful interference in a residential installation.
This equipment generates, uses, and can radiate radio frequency energy and, if not installed and used in accordance with the instructions, may cause harmful interference to radio communications. However, there is no guarantee that interference will not occur in a particular installation. If this equipment does cause harmful interference to radio or television reception, which can be determined by turning the equipment off and on, the user is encouraged to try to correct the interference by one or more of the following measures:
- Reorient or relocate the receiving antenna.
- Increase the separation between the equipment and receiver.
- Connect the equipment into an outlet on a circuit different from that to which the receiver is connected.
- Consult the dealer or an experienced radio/TV technician for help.
IMPORTANT! Changes or modifications not expressly approved by the manufacturer could void the user’s authority to operate the equipment. Industry Canada This device contains license-exempt transmitter(s)/receiver(s) that comply with Innovation, Science, and Economic Development Canada’s license-exempt RSS(s).Operation is subject to the following two conditions: ( 1 ) This device may not cause interference, and ( 2 ) This device must accept any interference, including interference that may cause undesired operation of the device.
References
[xyz-ips snippet=”download-snippet”]